ValueSpot for Beginners: A Step-by-Step Tutorial
Here, you'll learn how to use ValueSpot—don't worry, it's very user-friendly. With ValueSpot, you can keep track of national policies, company updates, public sentiment, and more. You can also share and discuss these with friends. We hope ValueSpot adds significant value to your life and boosts your efficiency. There are many more interesting use cases waiting for you to explore. Enjoy!
Using ValueSpot is a simple three-step process:
- Create a Tracker, which represents a topic you wish to follow, such as "AIGC", "U.S. Department of Commerce Policies", or "Apple Company Updates".
- Add sources to your tracker. A source is a URL of a webpage where information is published, like the news release page of the U.S. Department of Commerce at https://www.commerce.gov/news/press-releases.
- Set up a Channel for your Tracker to receive updates. Channels can be through platforms like Slack, Dingtalk, WeCom, and Lark, etc.
Create a Tracker
In ValueSpot, you have the flexibility to create multiple Trackers, each functioning independently with its own sources and channels. To begin, simply log in with your Google account and navigate to the dashboard. Here, you'll find the "New Tracker" button to start the process.
Upon clicking, you'll be directed to the Tracker's editing interface. In the "Tracker Config" section, you have the option to enable or disable the tracker, as well as decide whether to activate AI features. These features include:
- AI Summary: When enabled, the messages you receive will include an AI-generated summary, providing you with quick, digestible insights.
- AI Recommendation: This feature requires you to provide an interest prompt that reflects your focus areas. Based on this prompt, the AI will determine the relevance of the information before sending it to you.
Here’s an example of an effective interest prompt:
My interest lies in the AI advancements of OpenAI, Google, Meta, Apple, AWS, NVIDIA, Microsoft, AMD, HuggingFace, Snowflake, Cohere, Anthropic, AI21 Labs, Perplexity, etc. My focus areas include AIGC, LLM(such as Gemini, Claude, Llama), GPU, chatbot, AI agents, robotics, image generation, speech synthesis, video generation, code assistants, etc. I am not interested in autonomous driving or news unrelated to AI.
IMPORTANT: Don't forget to hit the "Save" button after making any changes to your settings.
Add Sources
For adding new sources, head over to the "Source Management" section, click on "New Source," and enter the URL in the provided form. Finally, you will get a Source list akin to the example below.

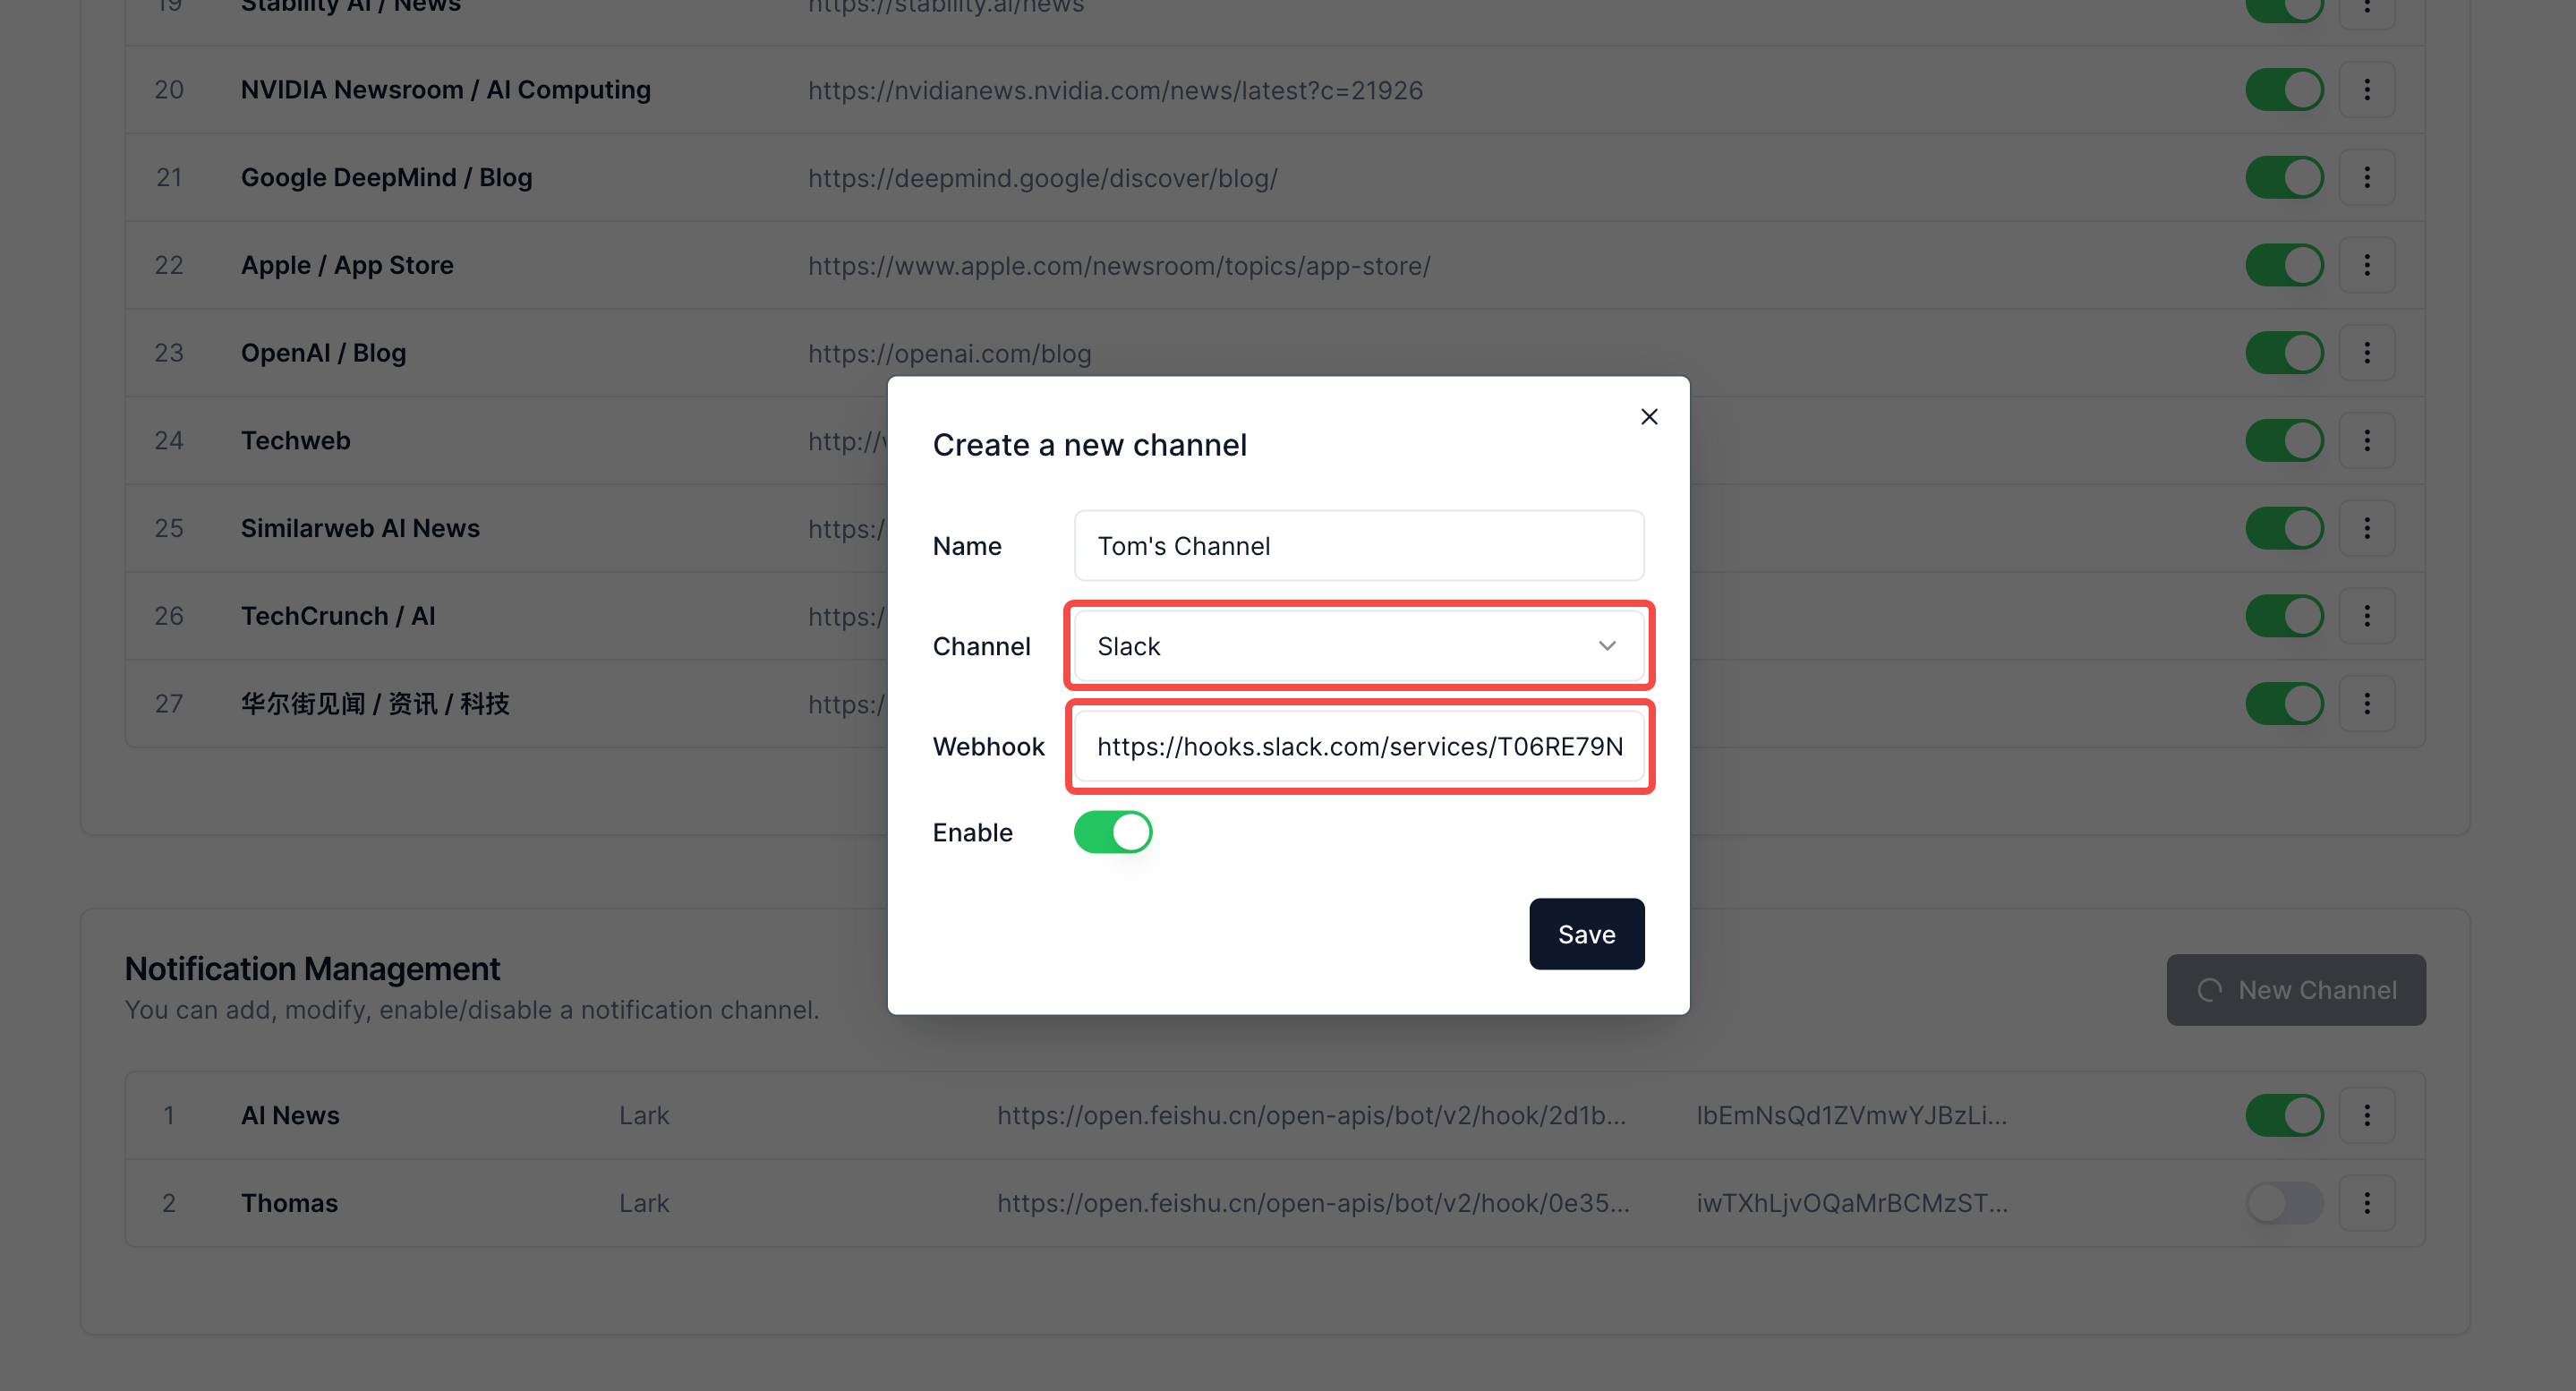
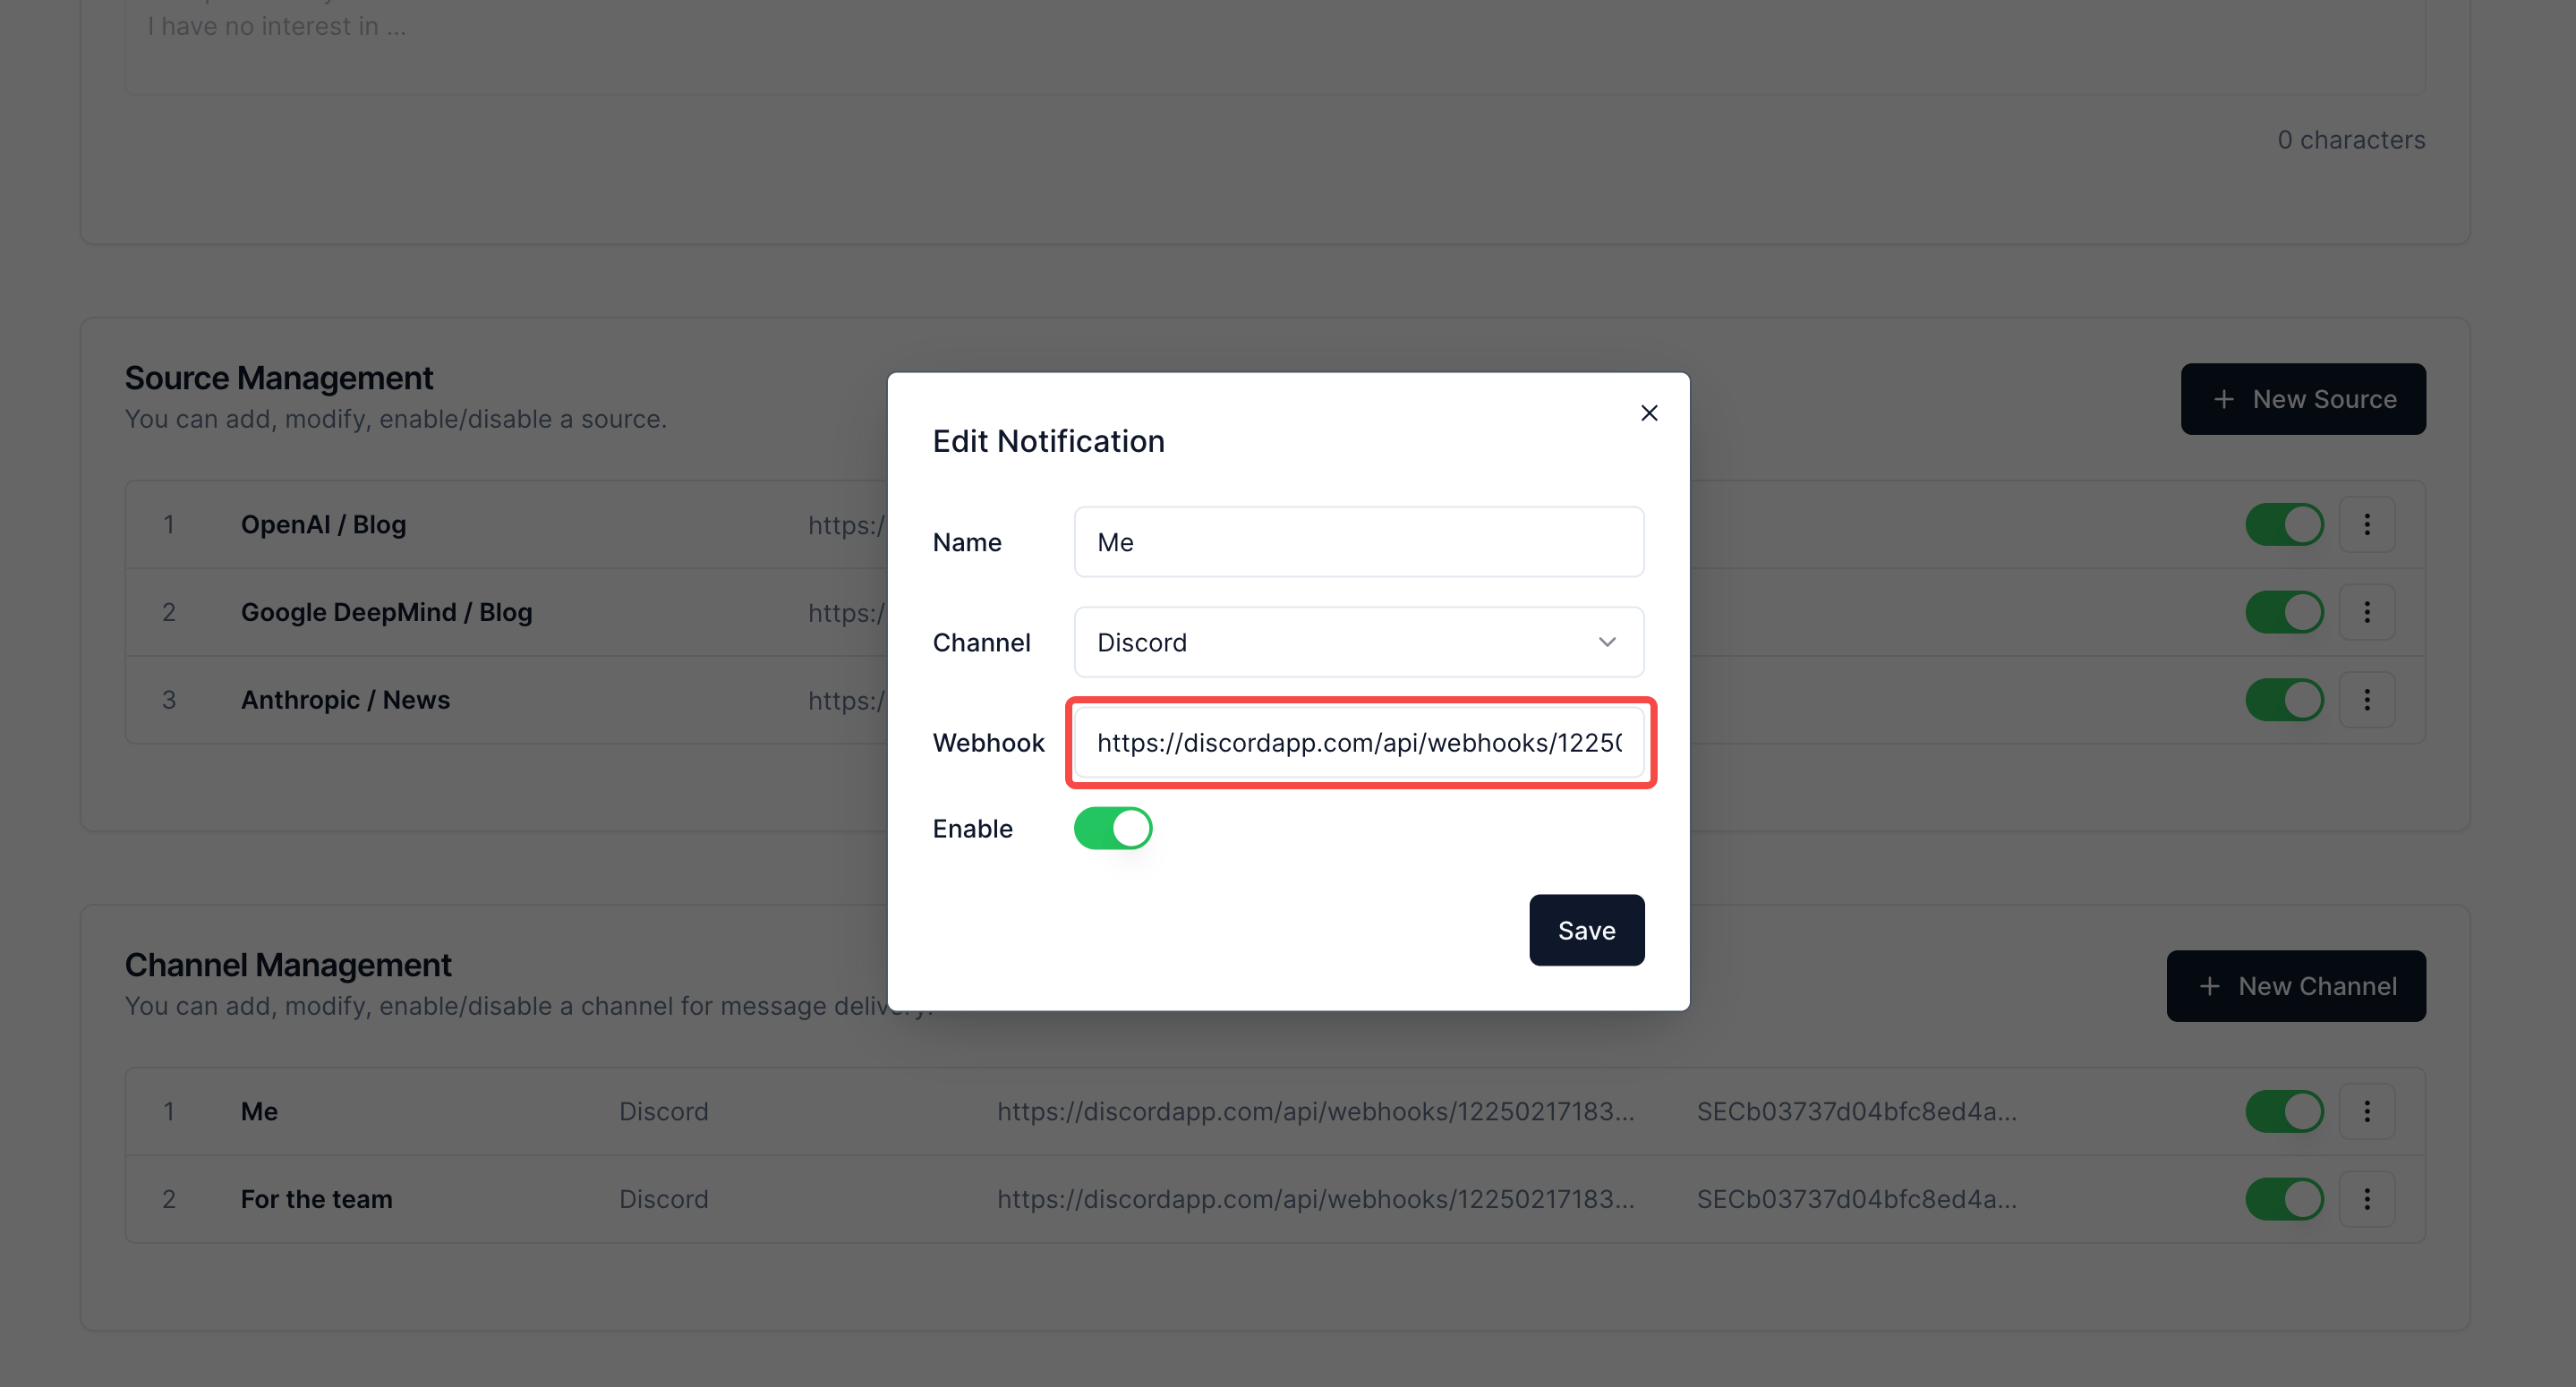
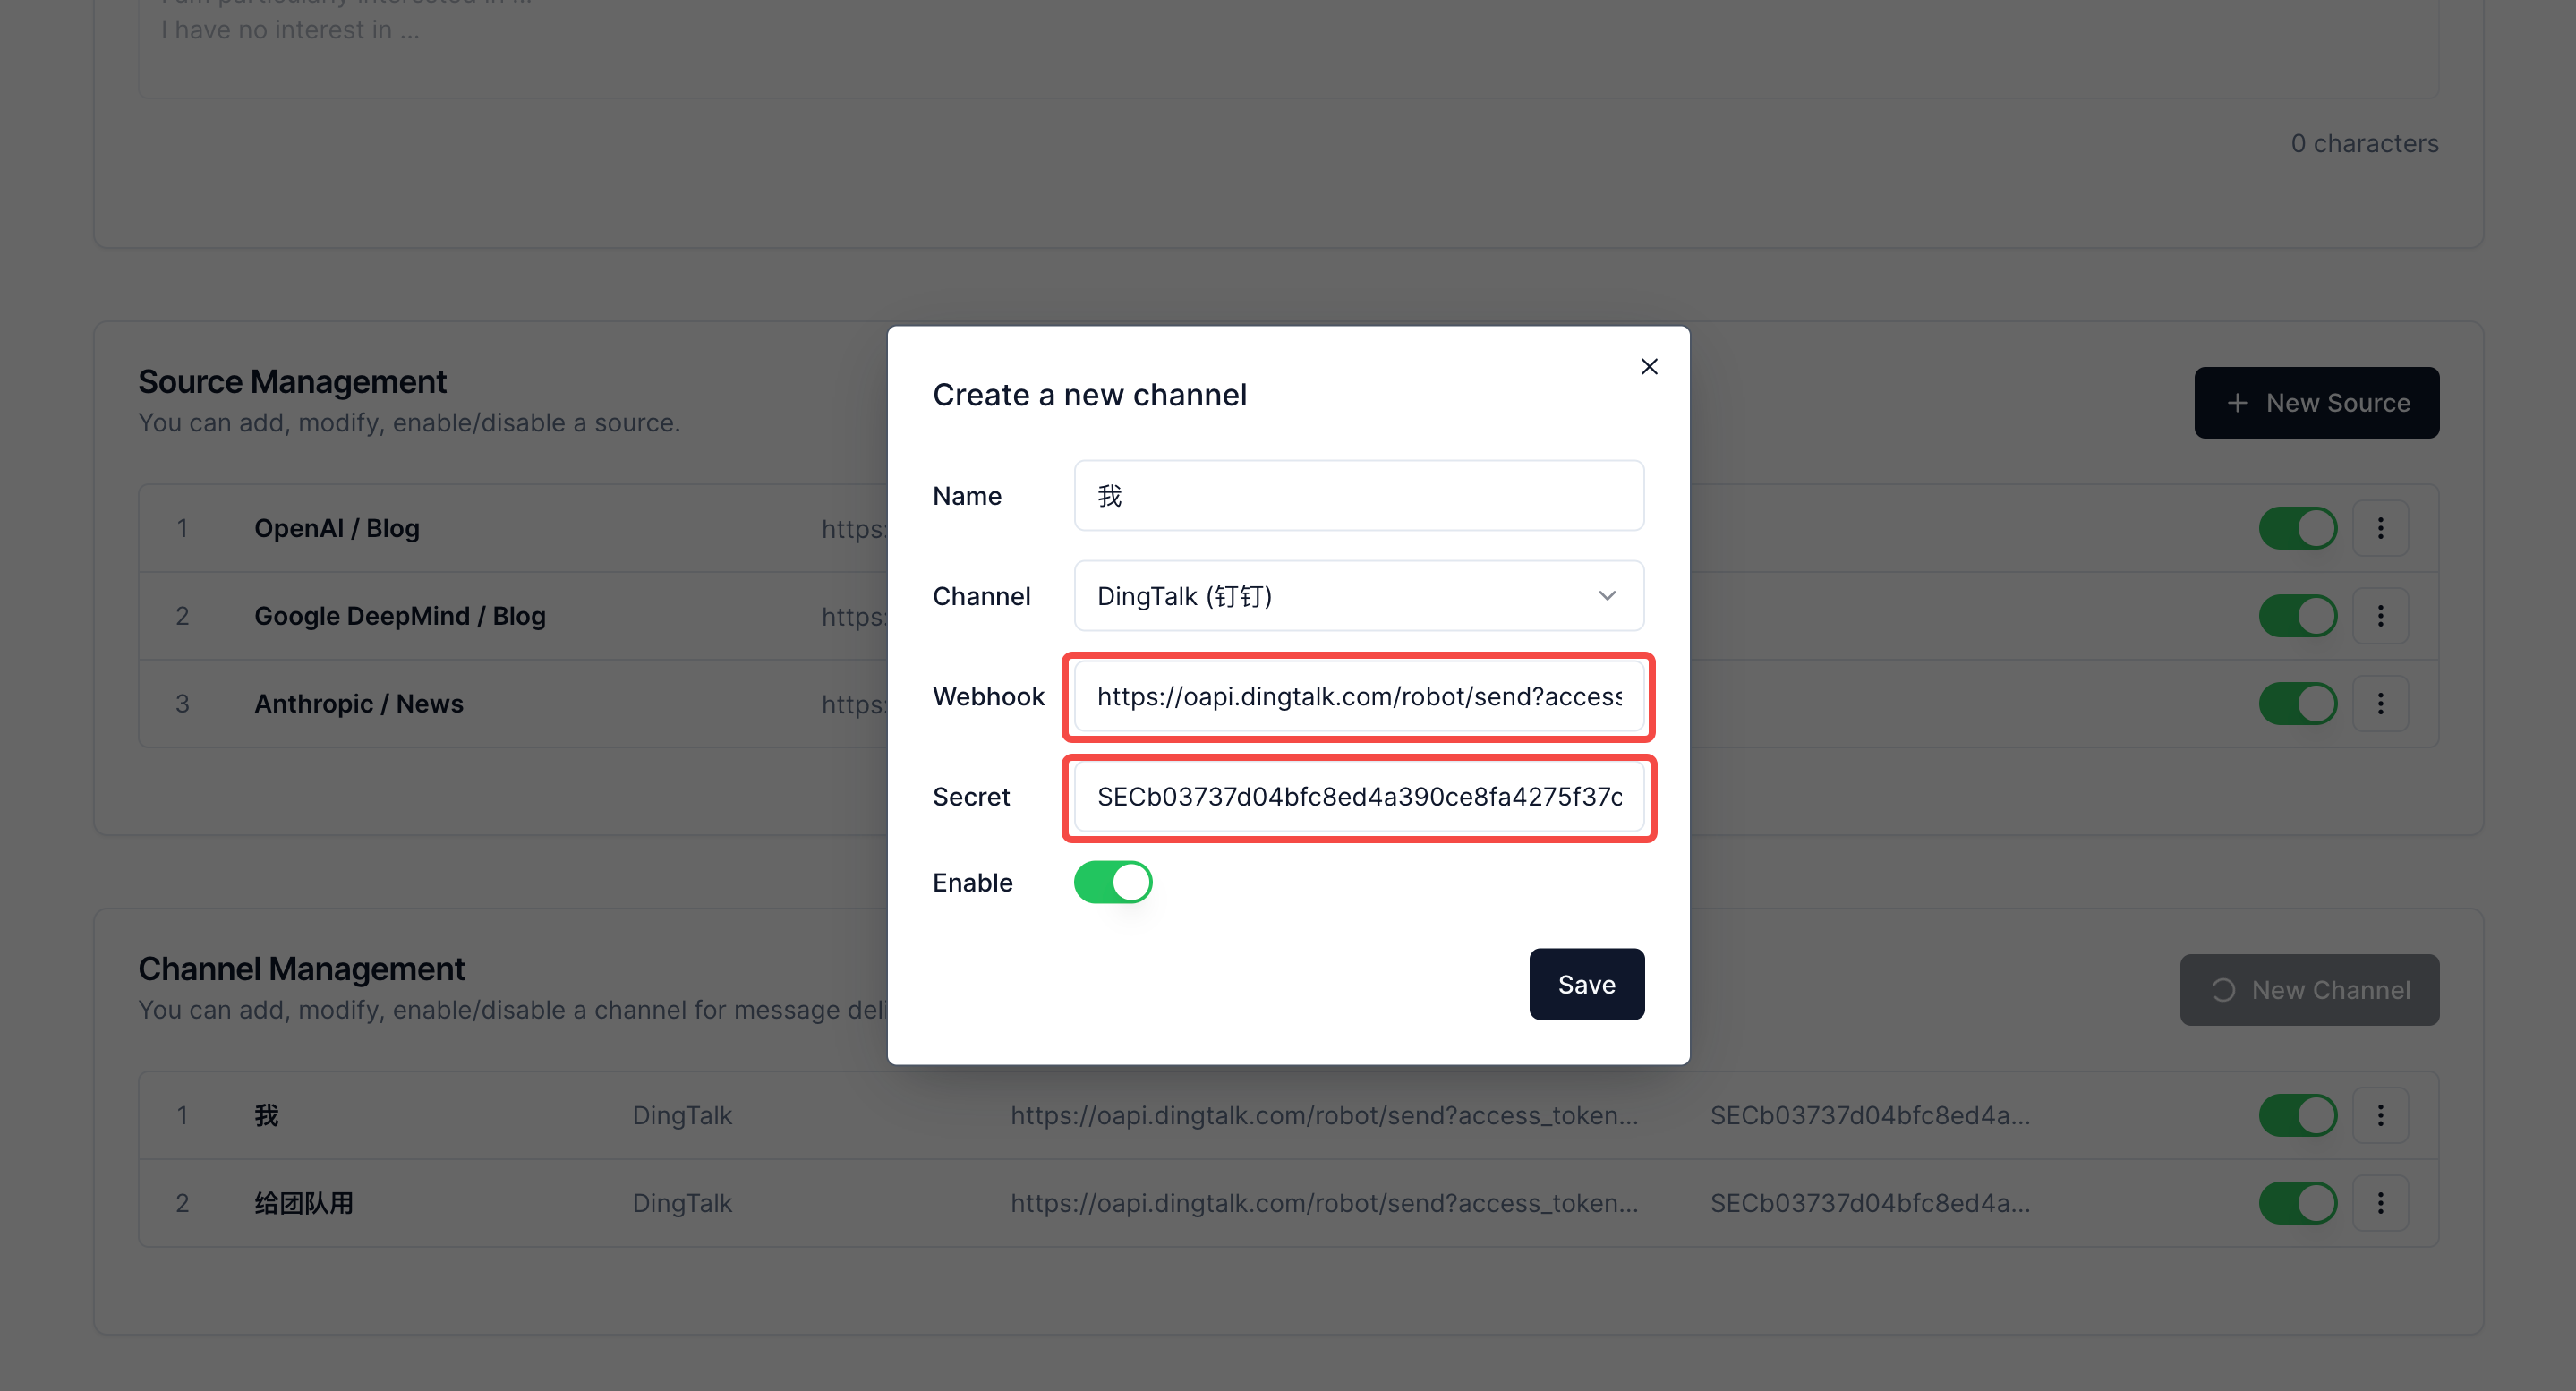
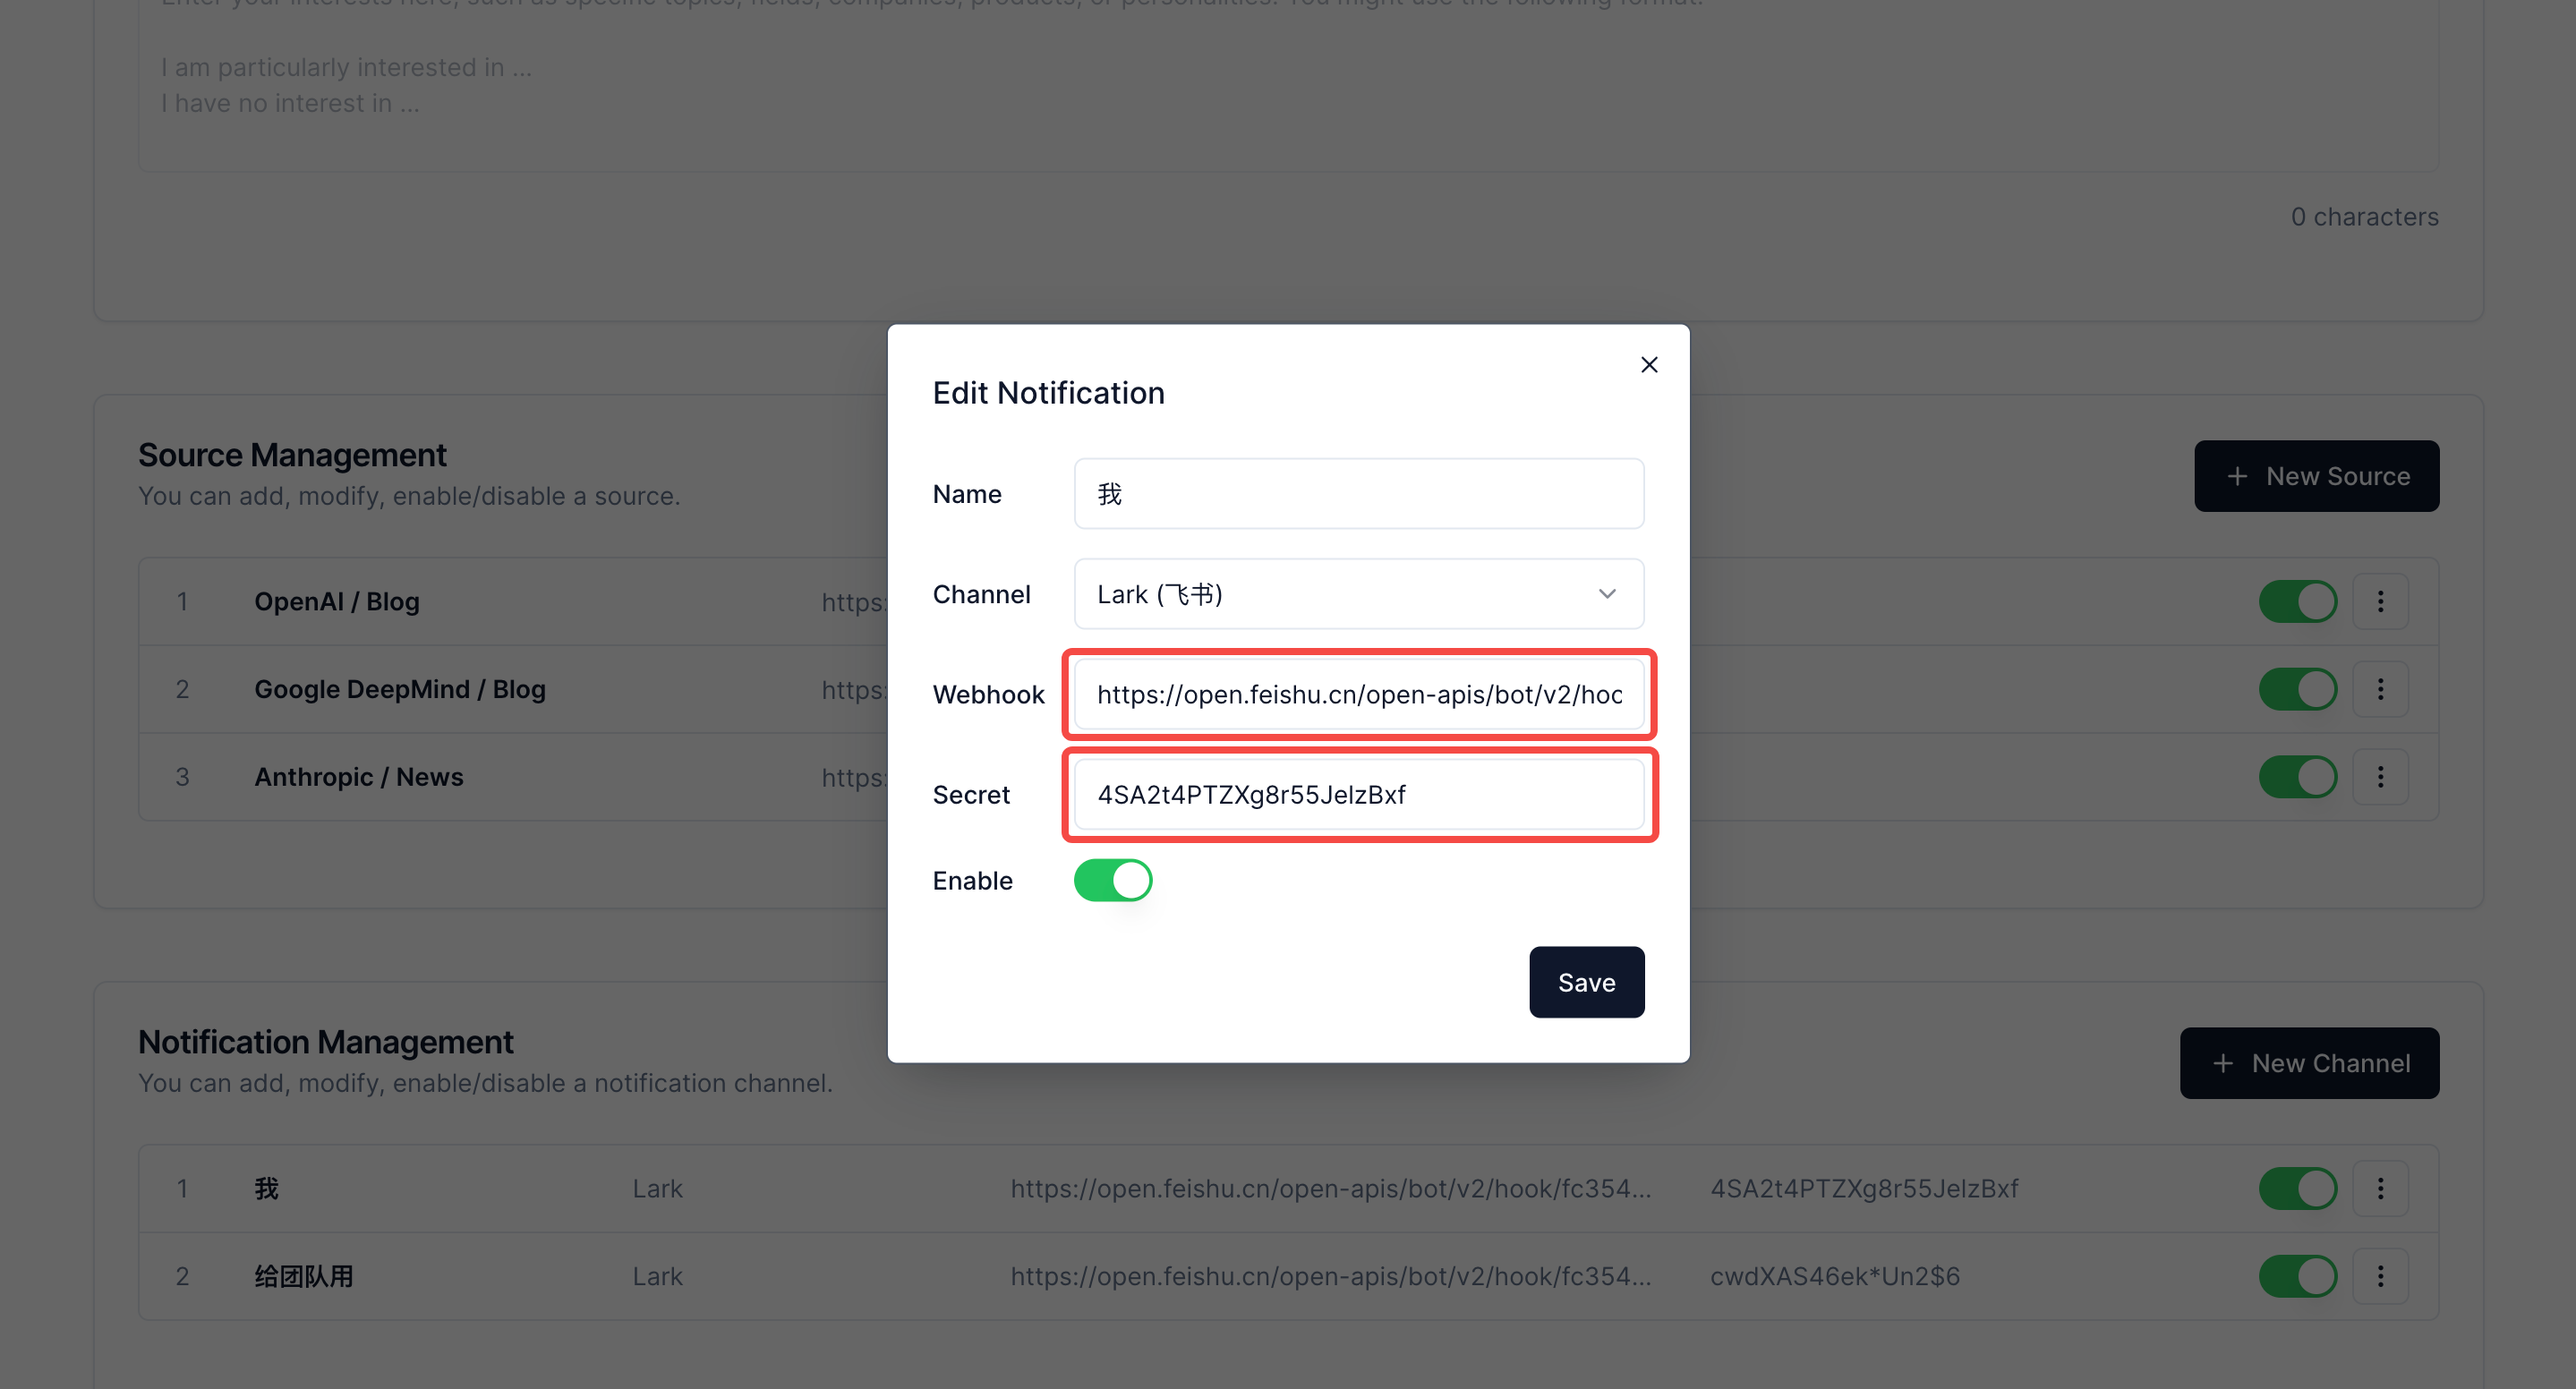
Set Up a Channel
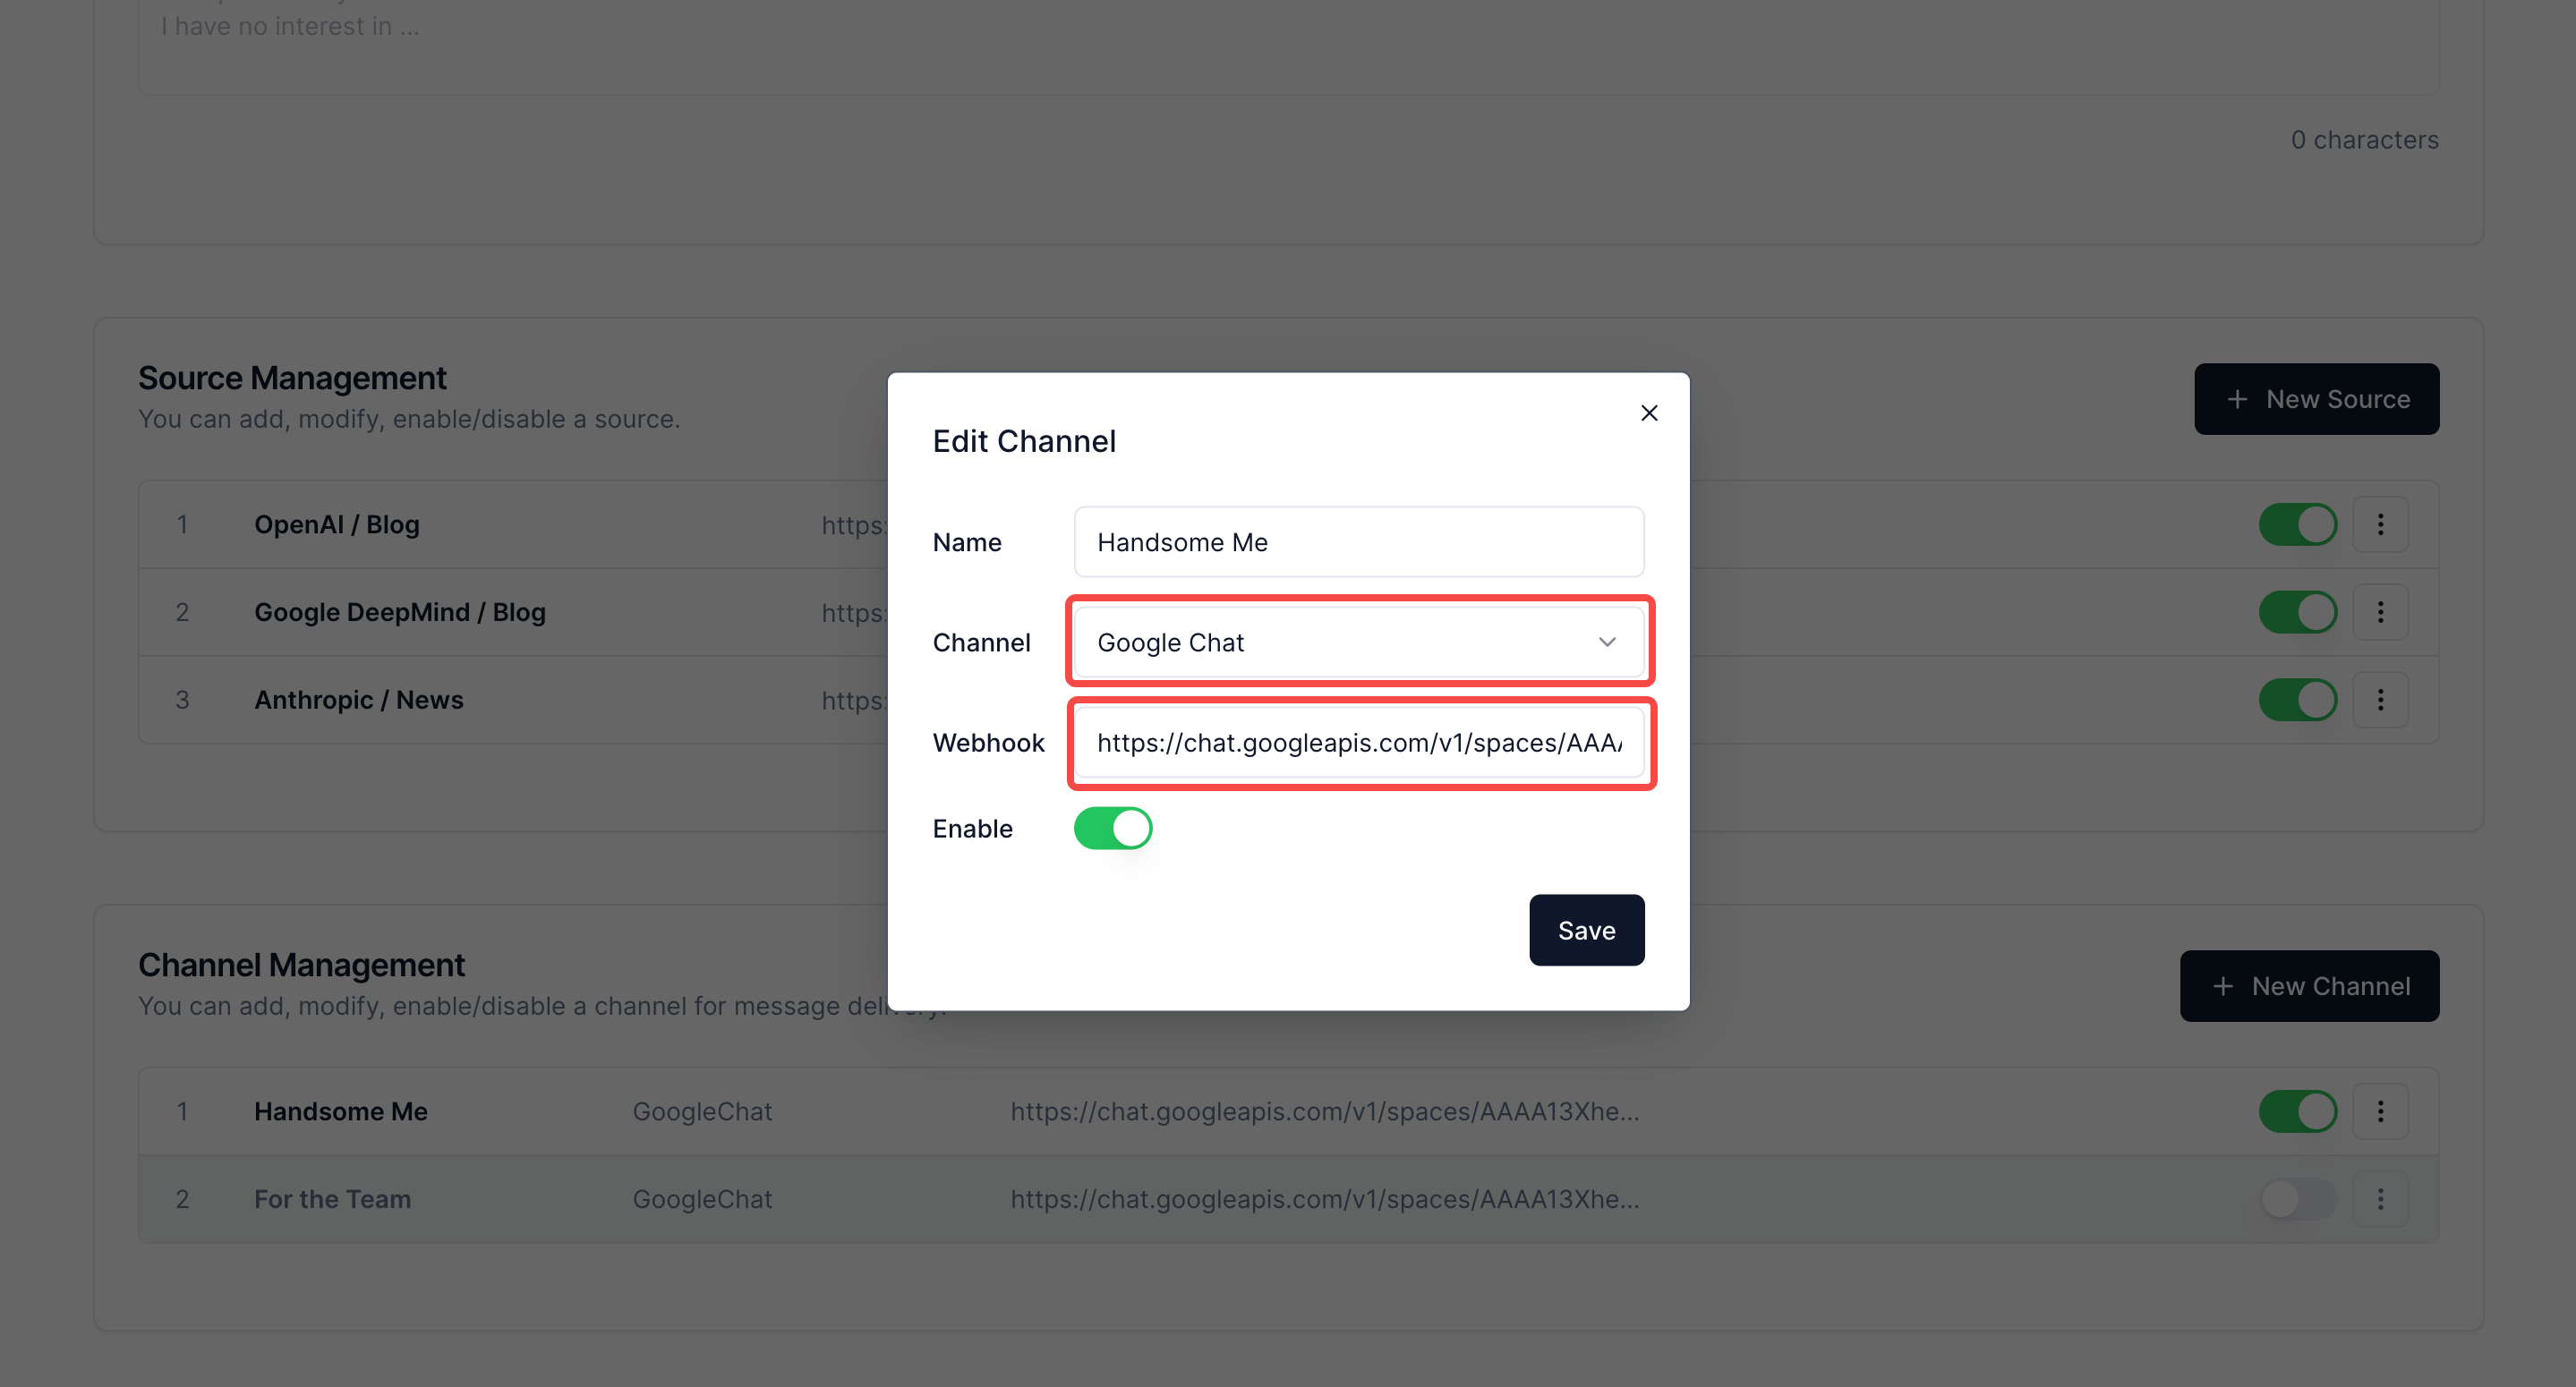
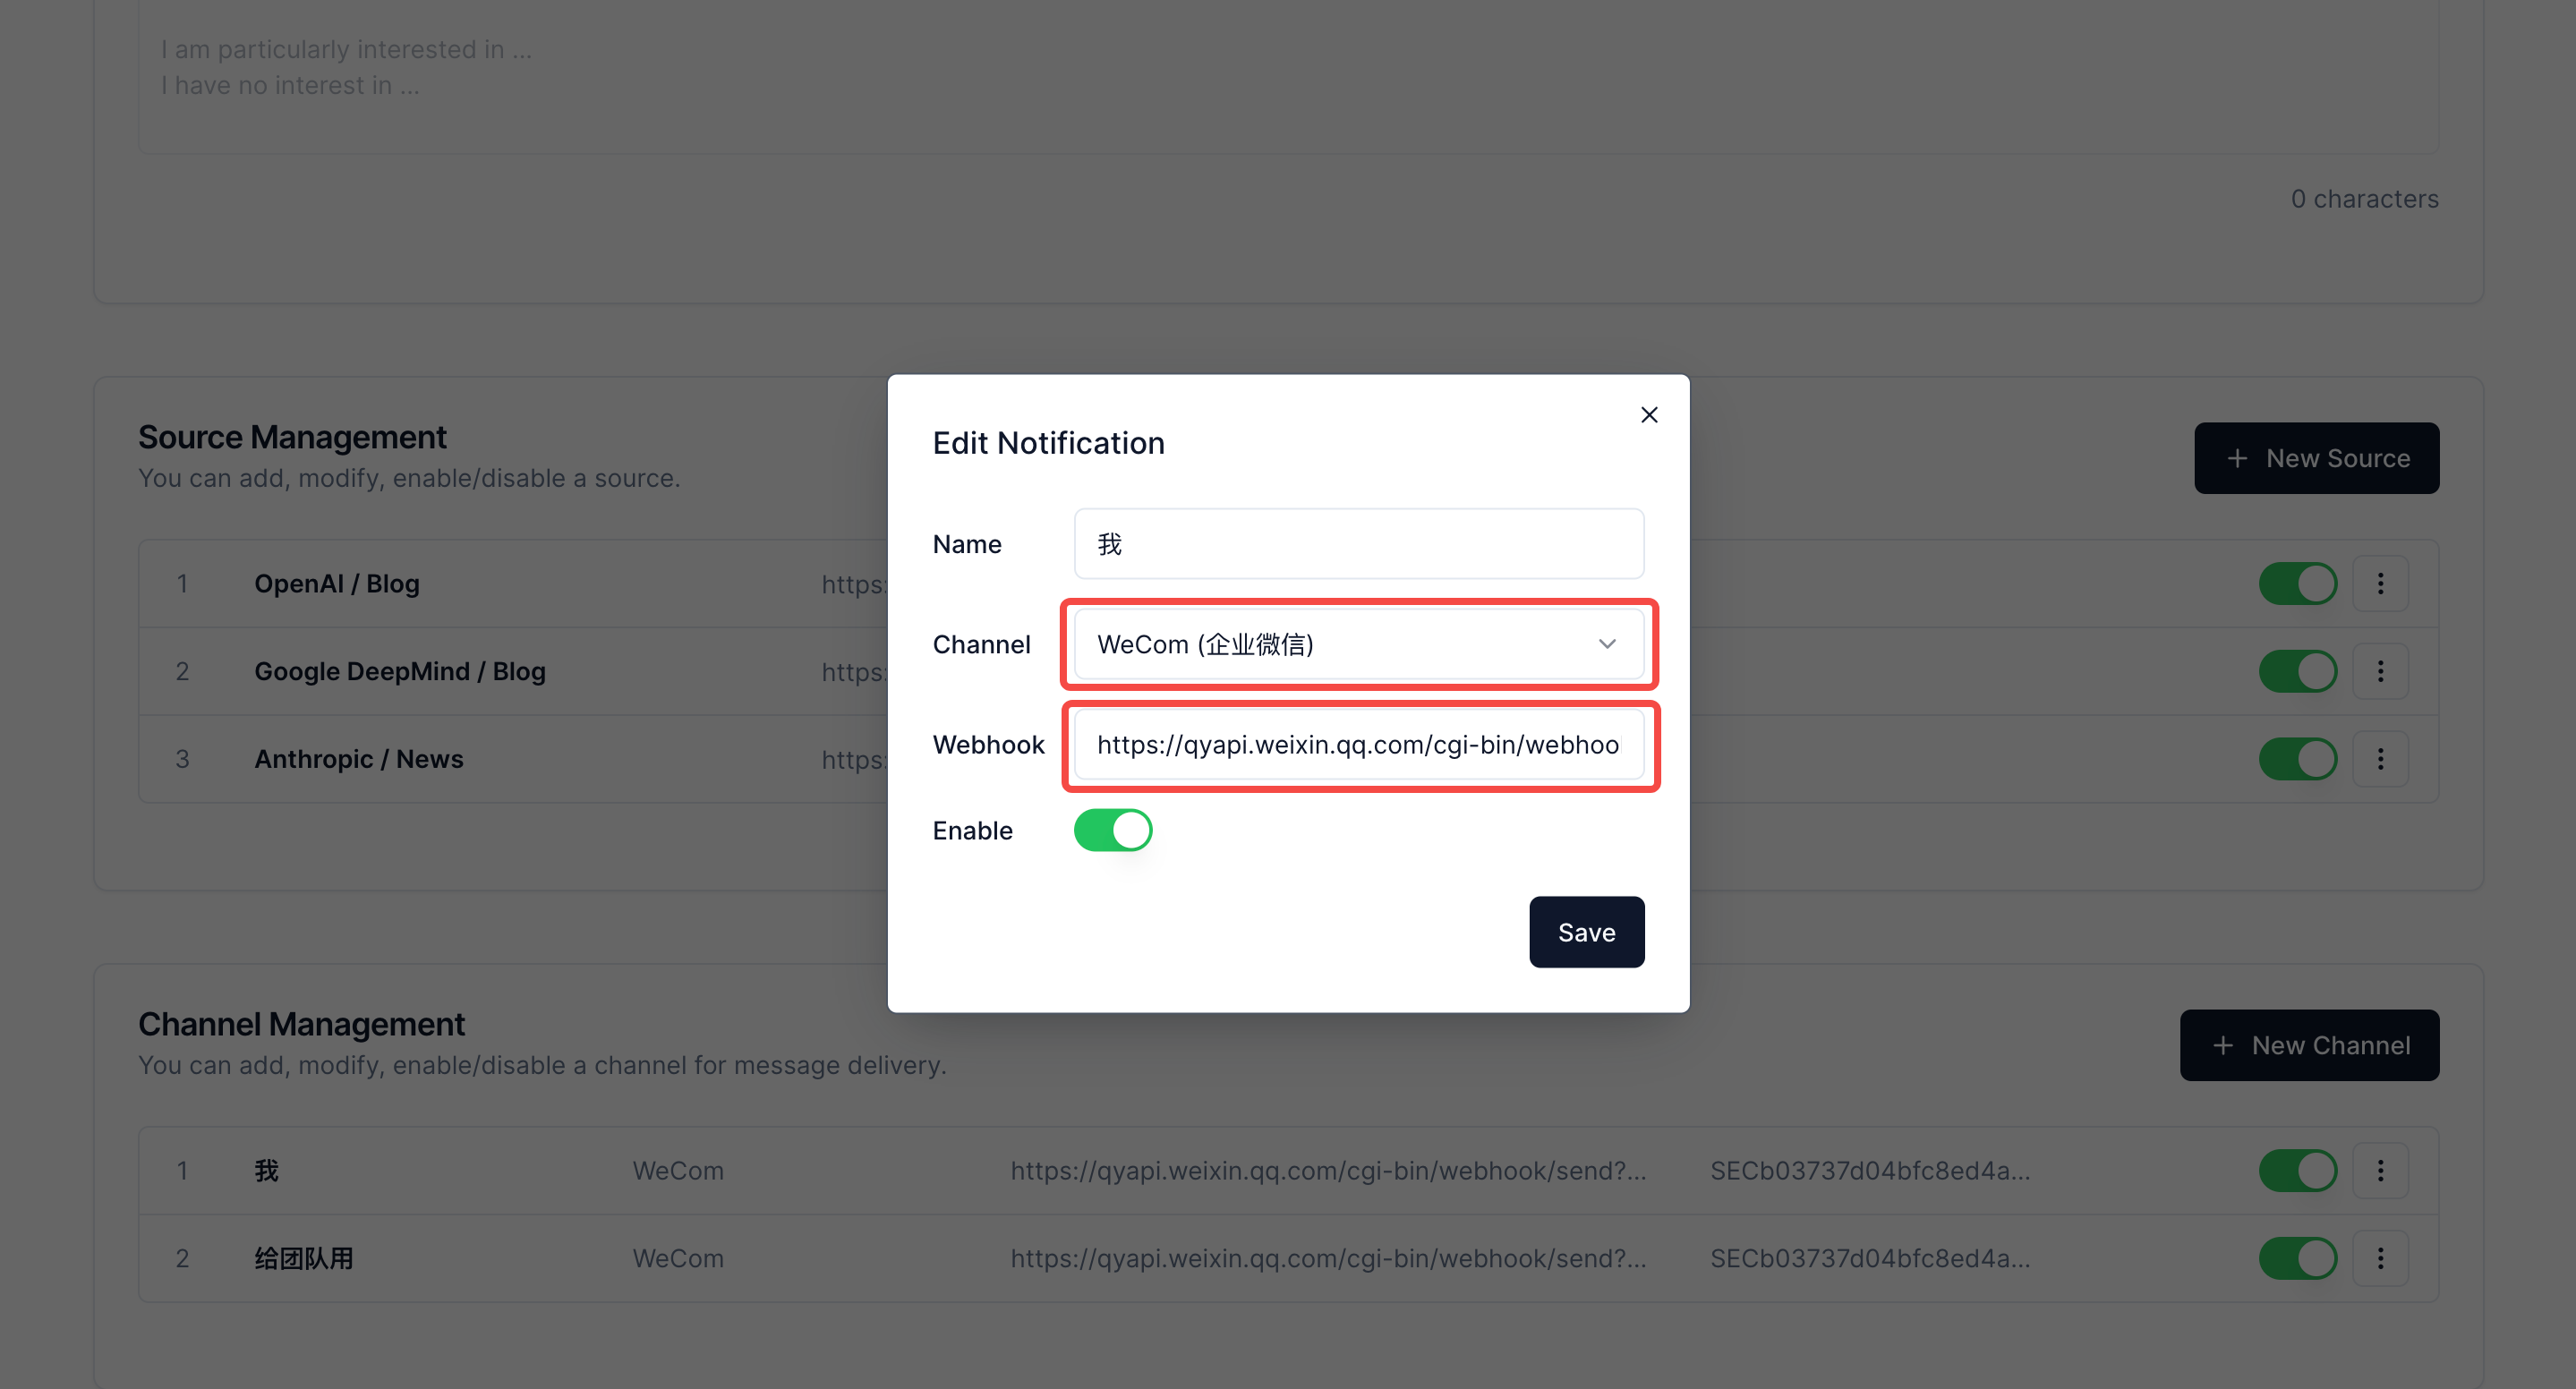
Using ValueSpot, there's no need to install extra apps. We rely on third-party messaging tools like Slack, Lark, Dingtalk, and WeCom for message delivery. Messages are sent through their respective webhooks. In the "Channel Management" section, creating a new channel is as easy as clicking "New Channel" and inputting the Webhook URL. You can set up multiple channels to share crucial information with your team. Finally, you will get a Channel list akin to the example below.

Lastly, we offer guidance on creating a webhook in various communication tools and adding it to ValueSpot. Of course, if you're already familiar with webhook creation, feel free to skip this section.
Teams
Step 1: Open the Teams main interface and create a new team. If you already have a team, you can move on to the next step.
| Step 1.1 | Step 1.2 | Step 1.3 |
|---|---|---|
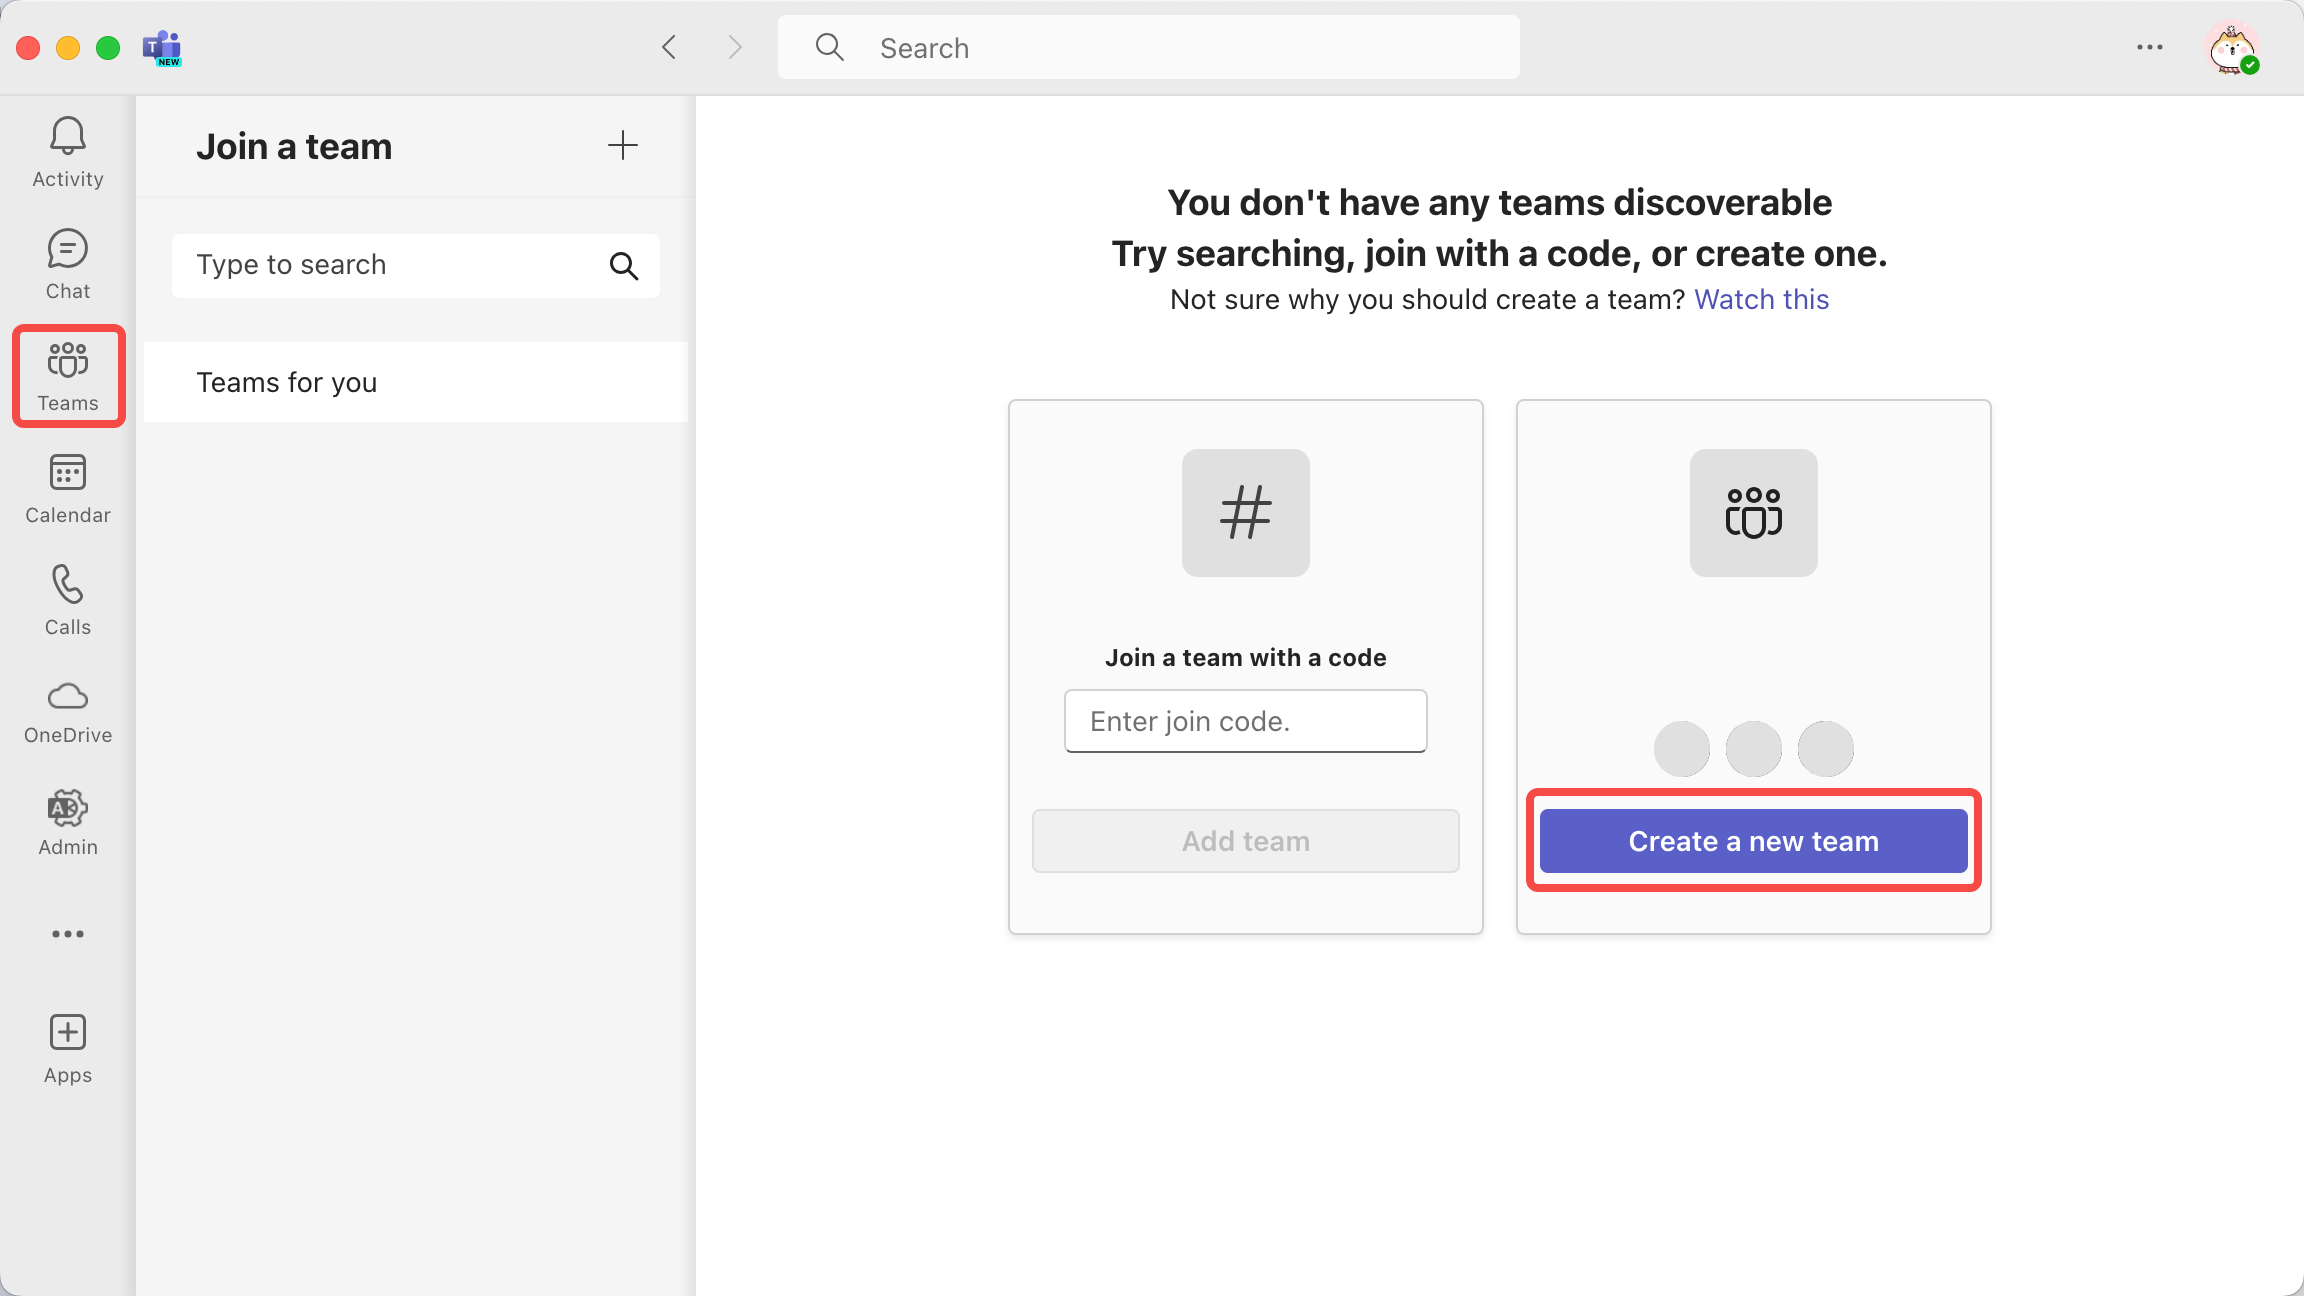 | 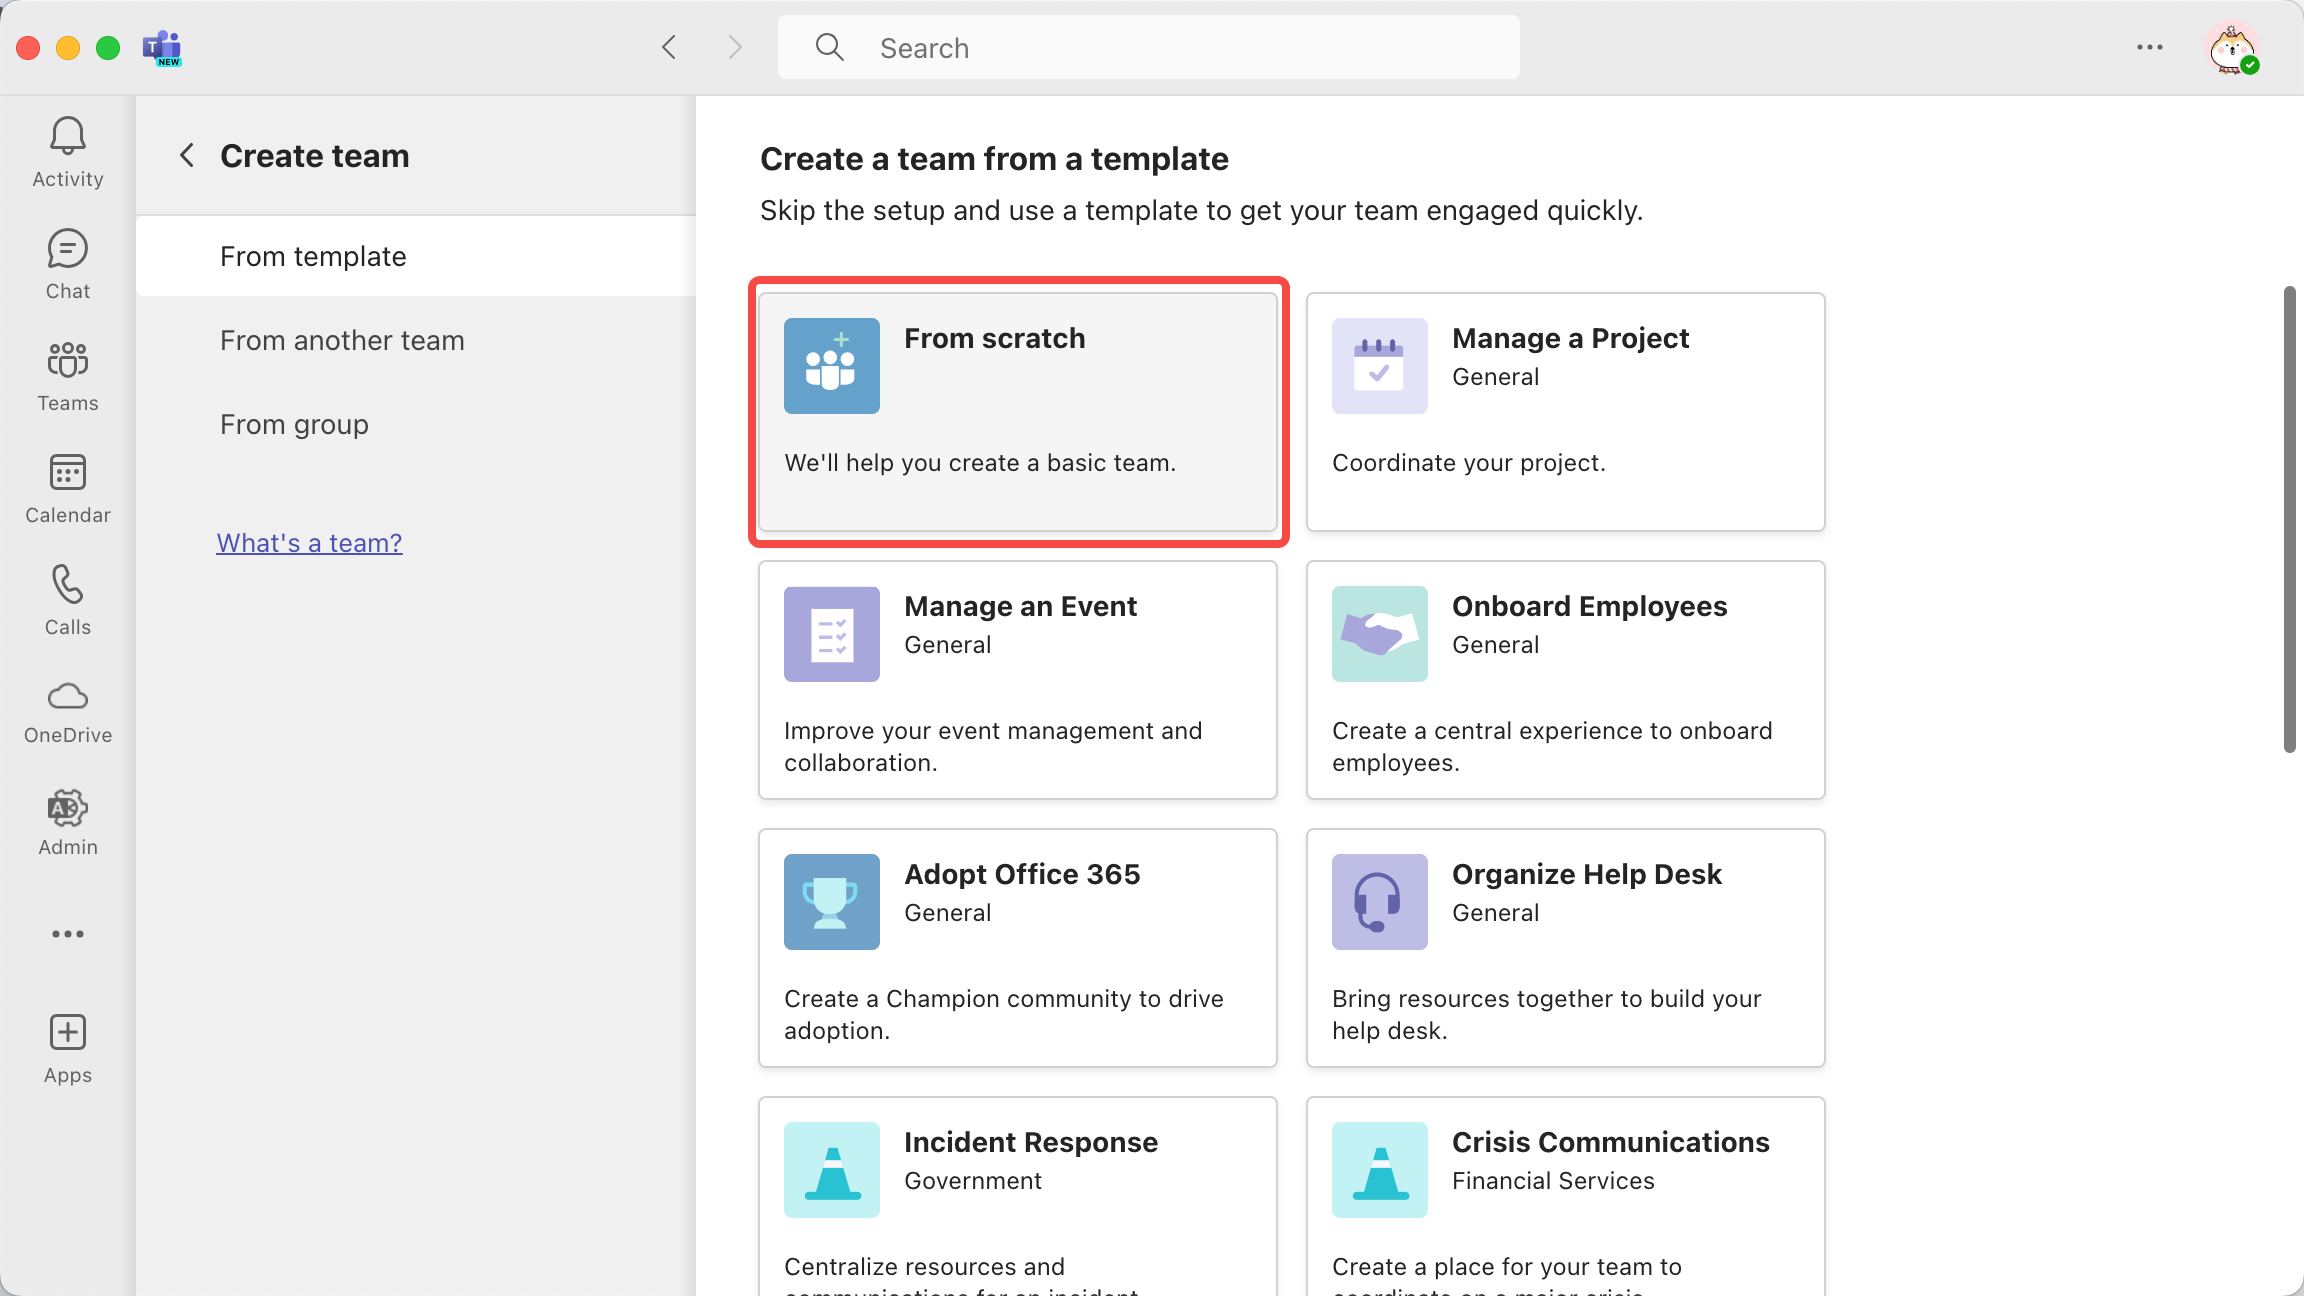 | 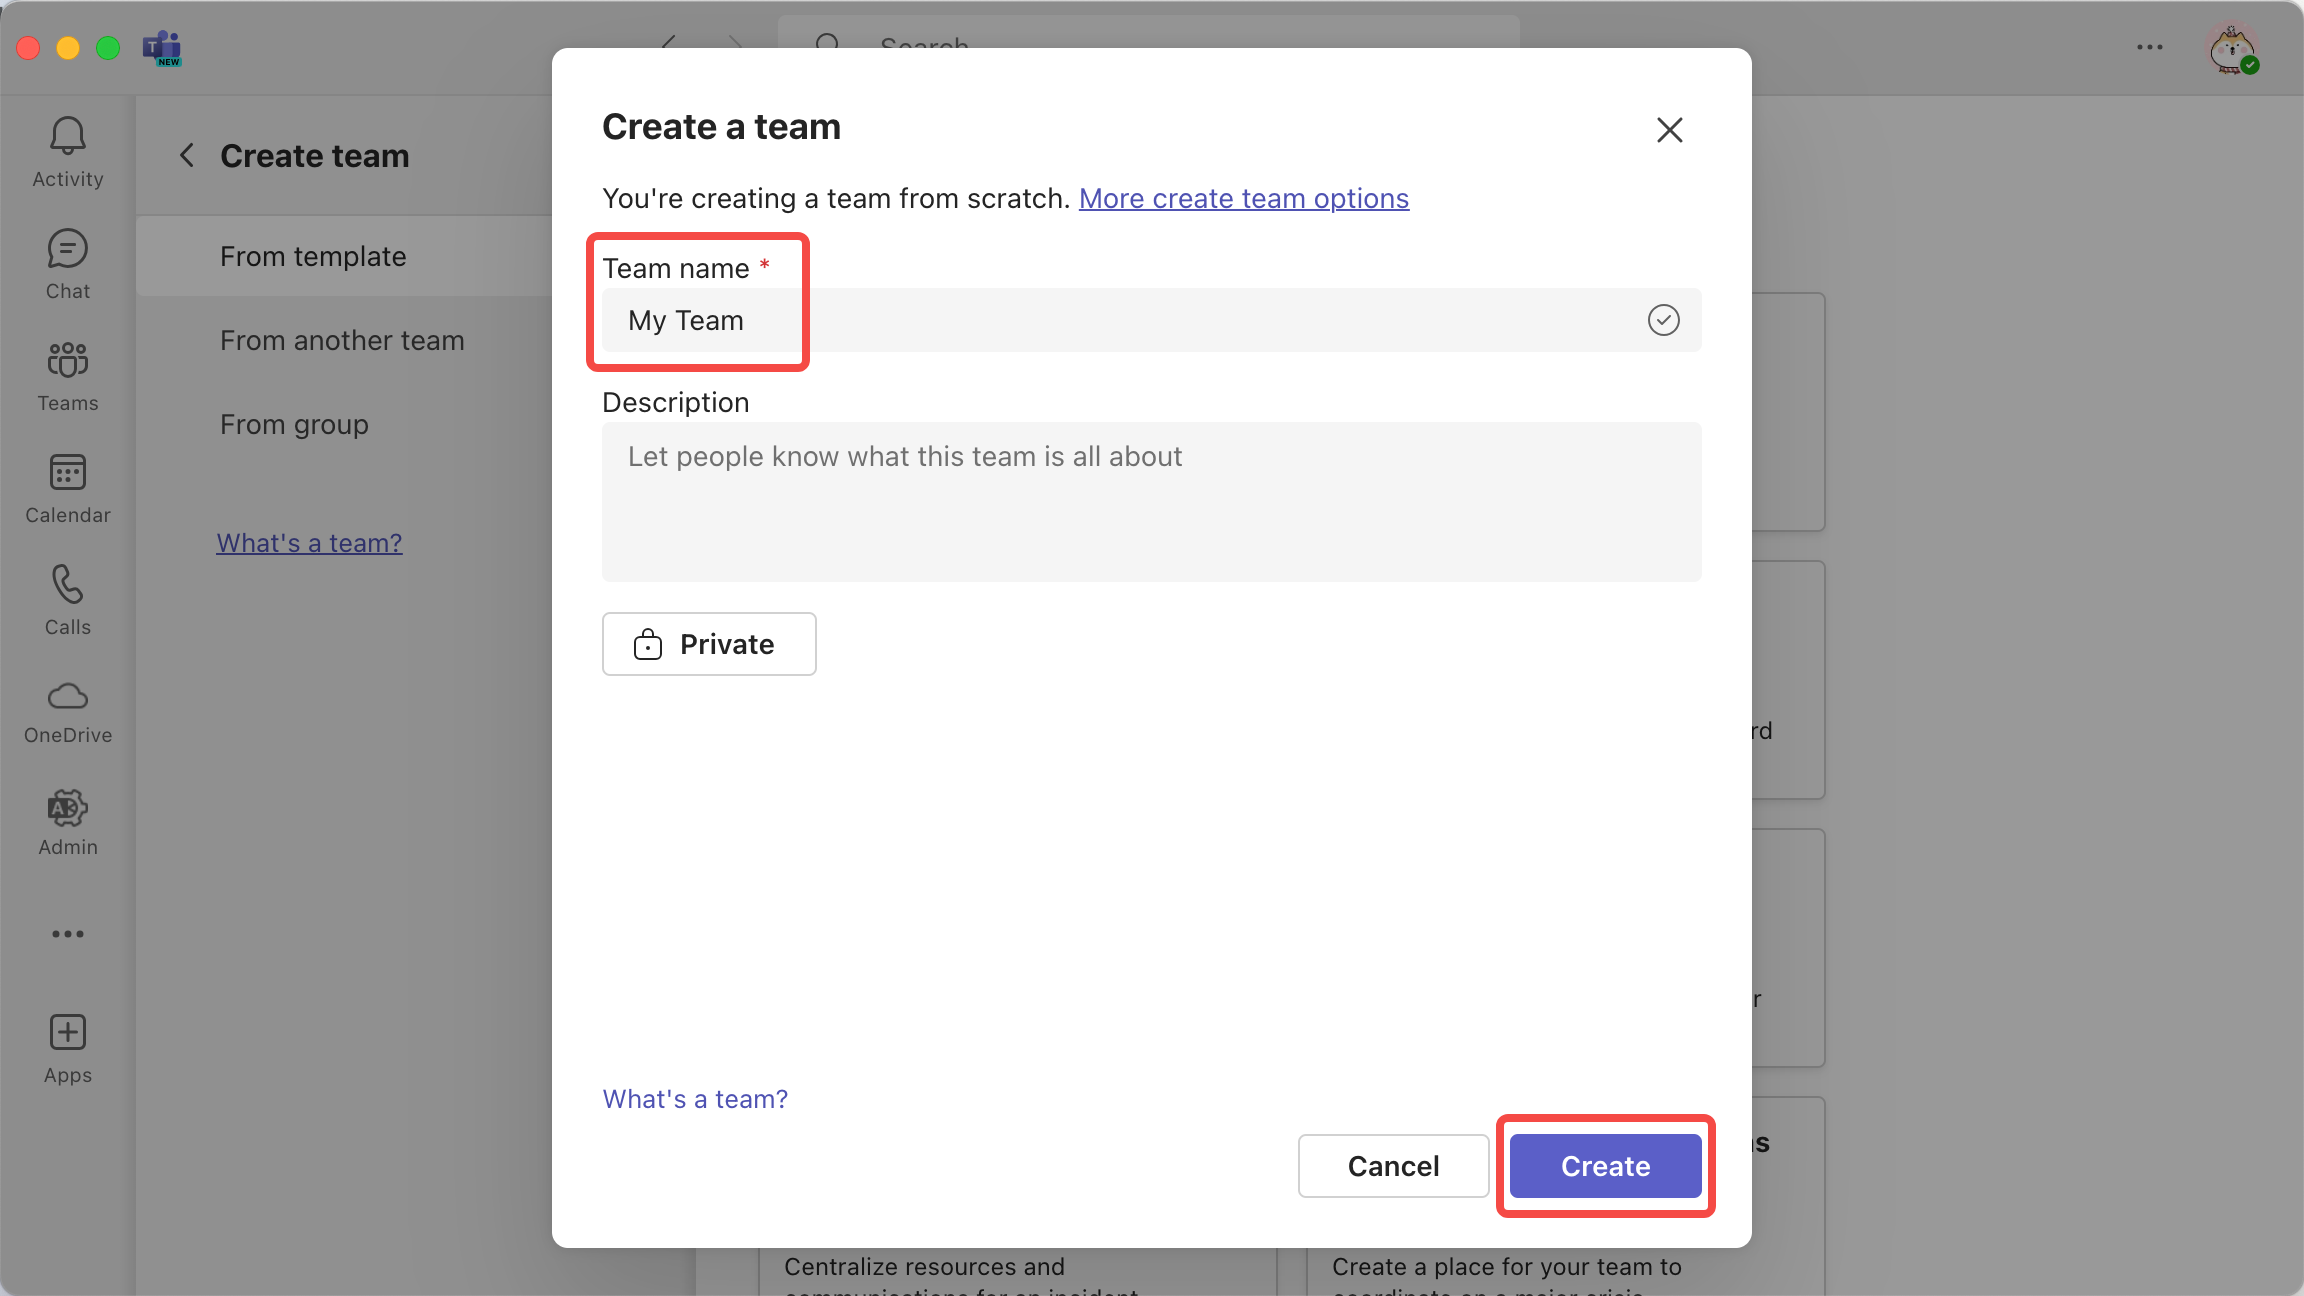 |
Step 2: Inside your newly created or existing team, create a channel for receiving messages. You can also invite friends to join the channel for discussions.
| Step 2.1 | Step 2.2 | Step 2.3 | Step 2.4 |
|---|---|---|---|
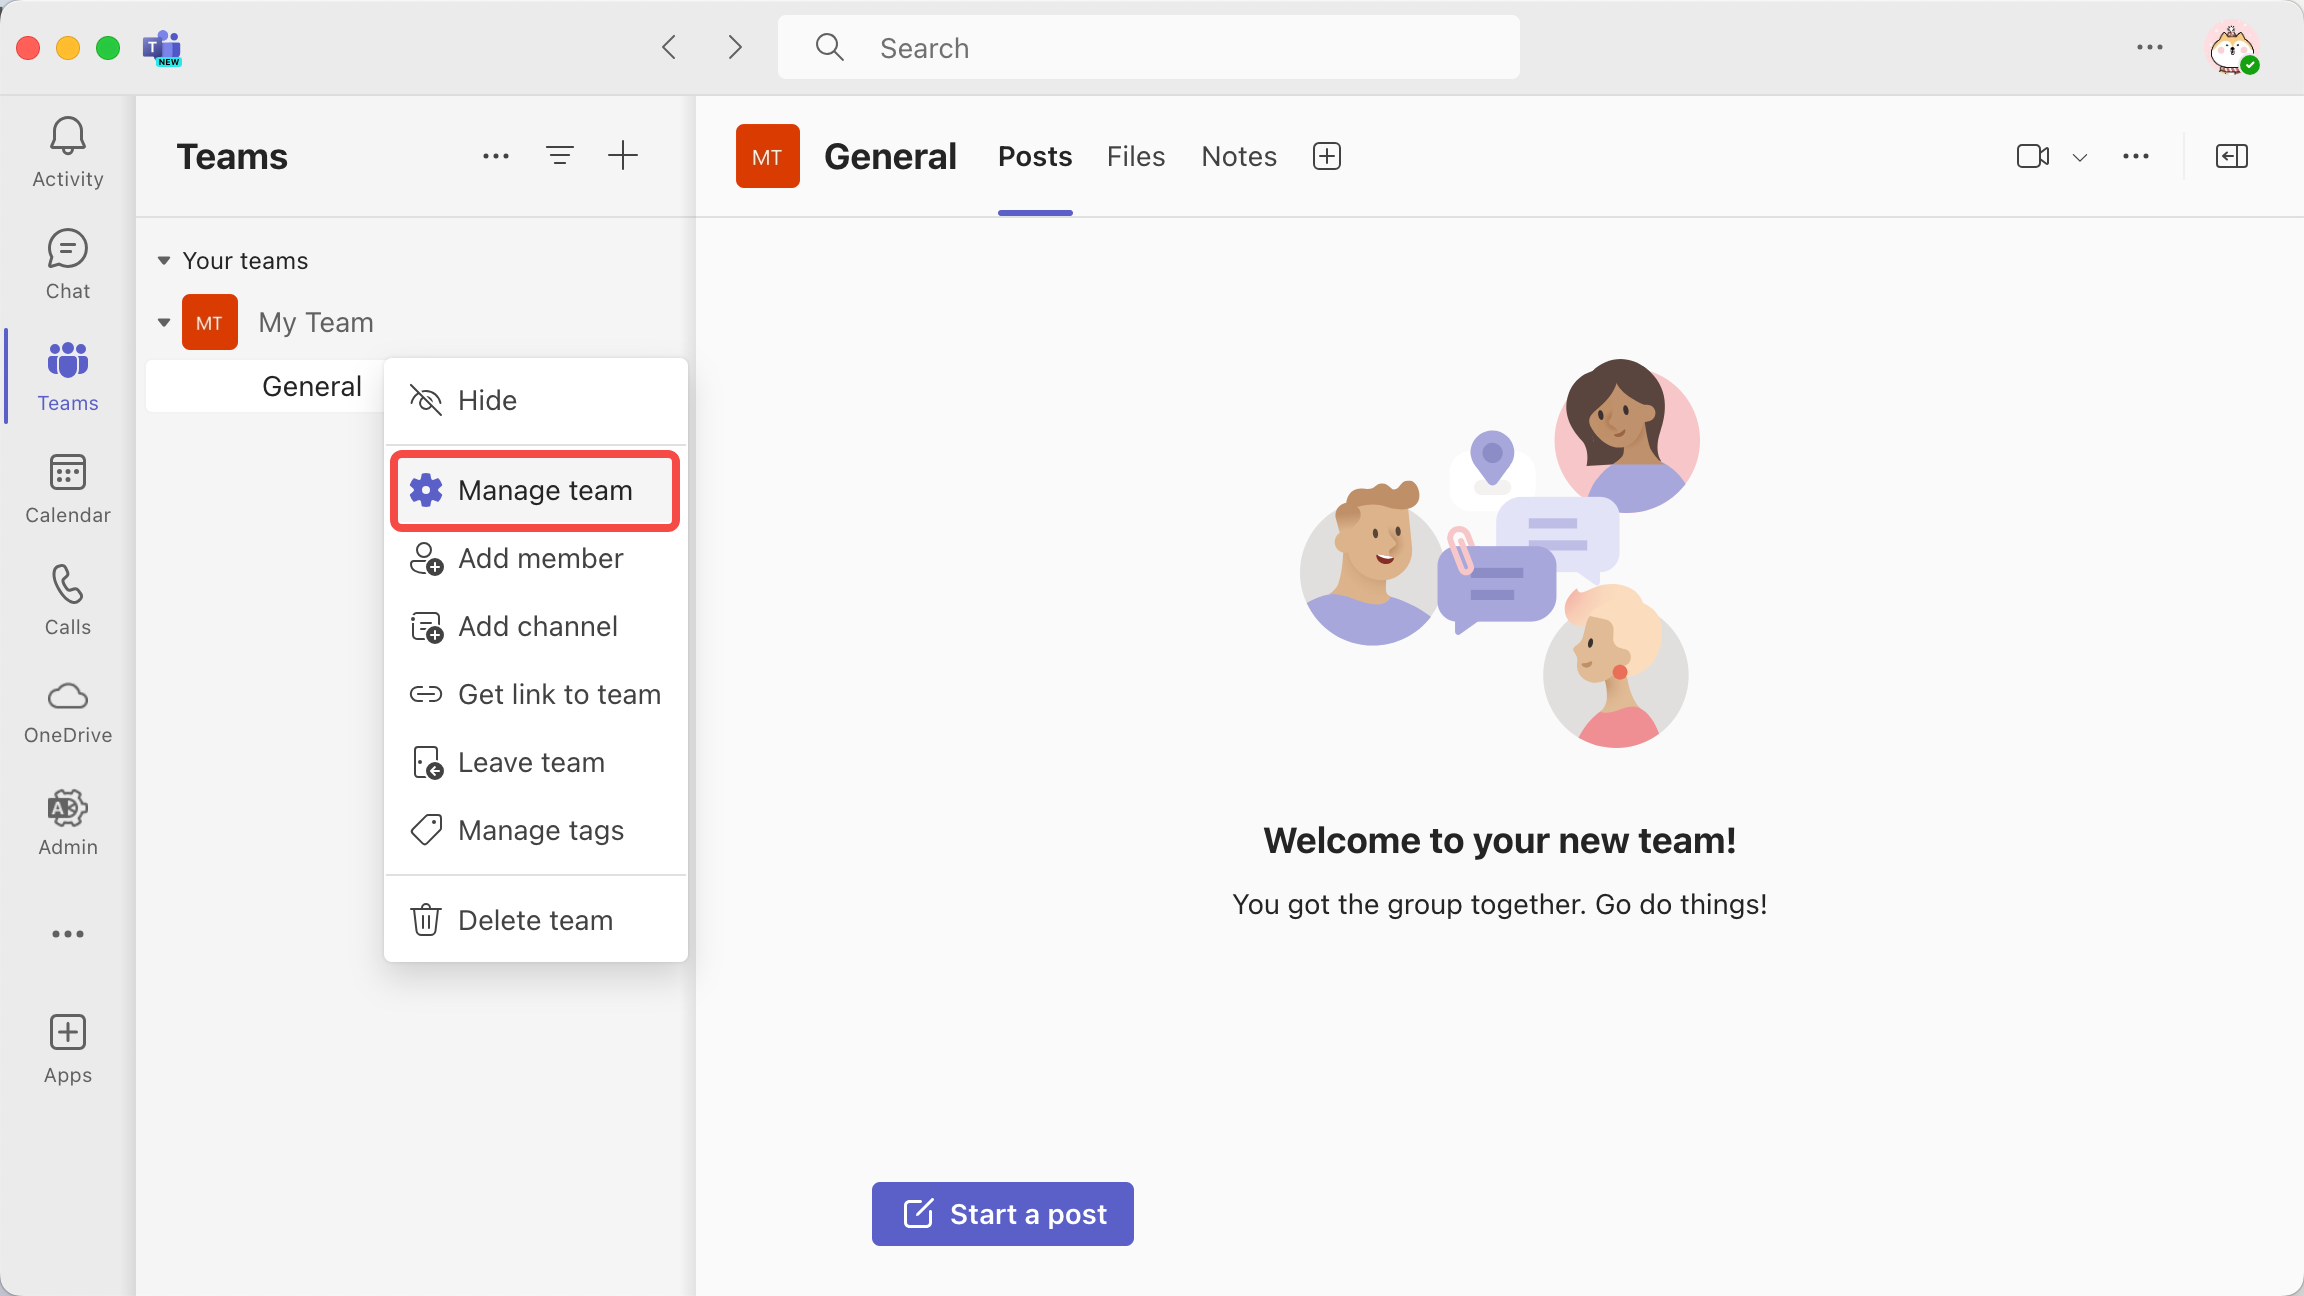 | 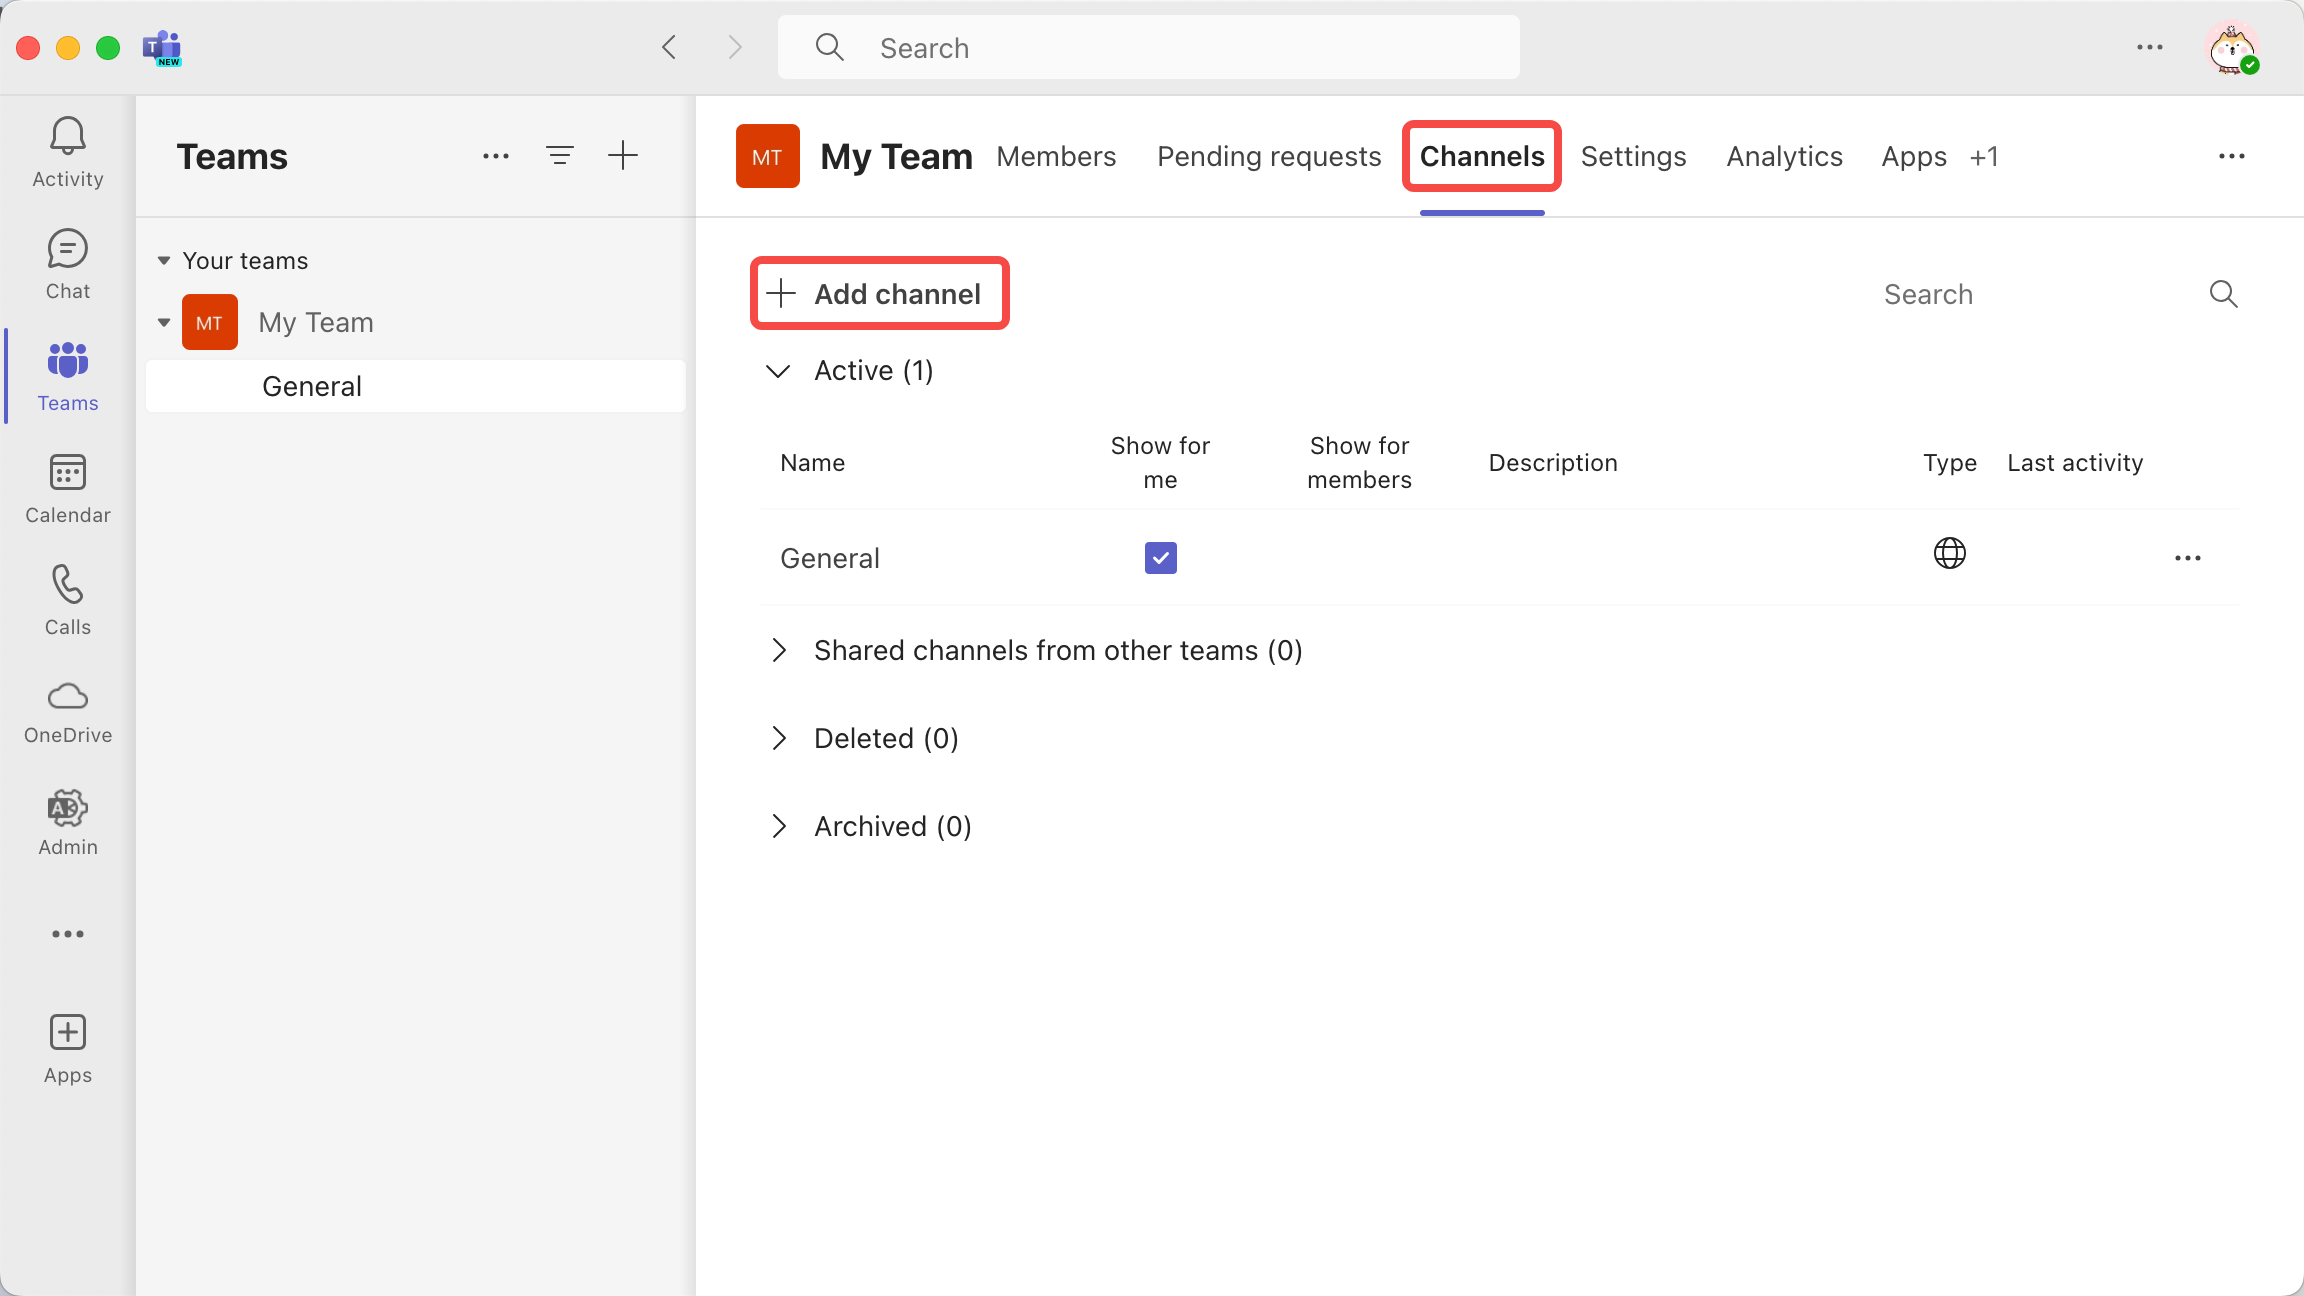 | 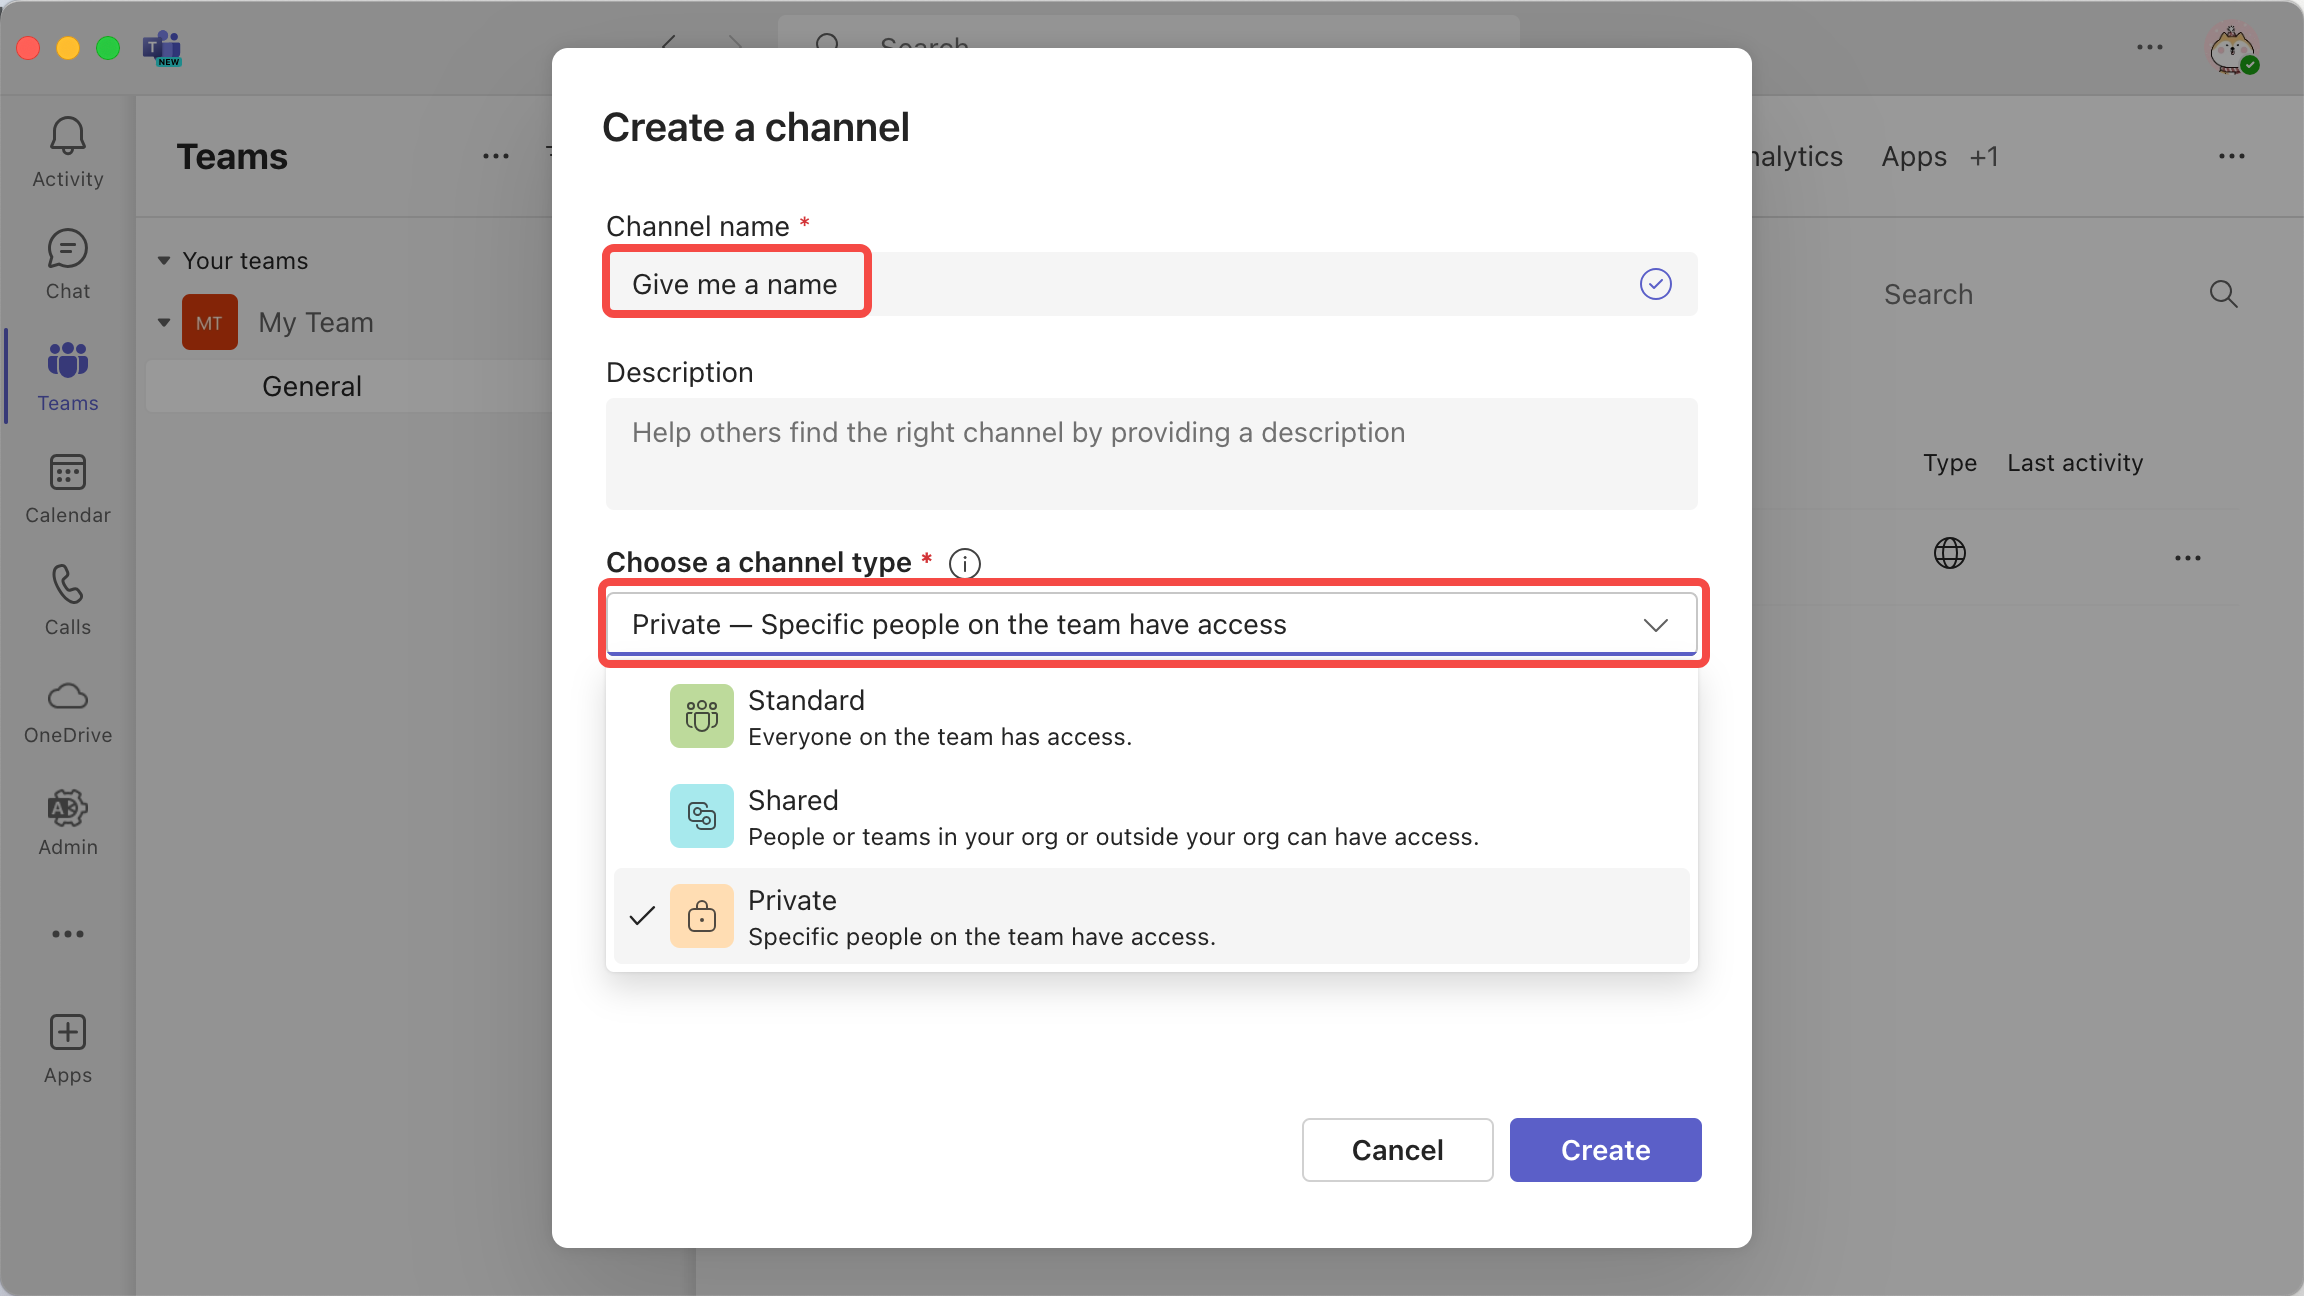 | 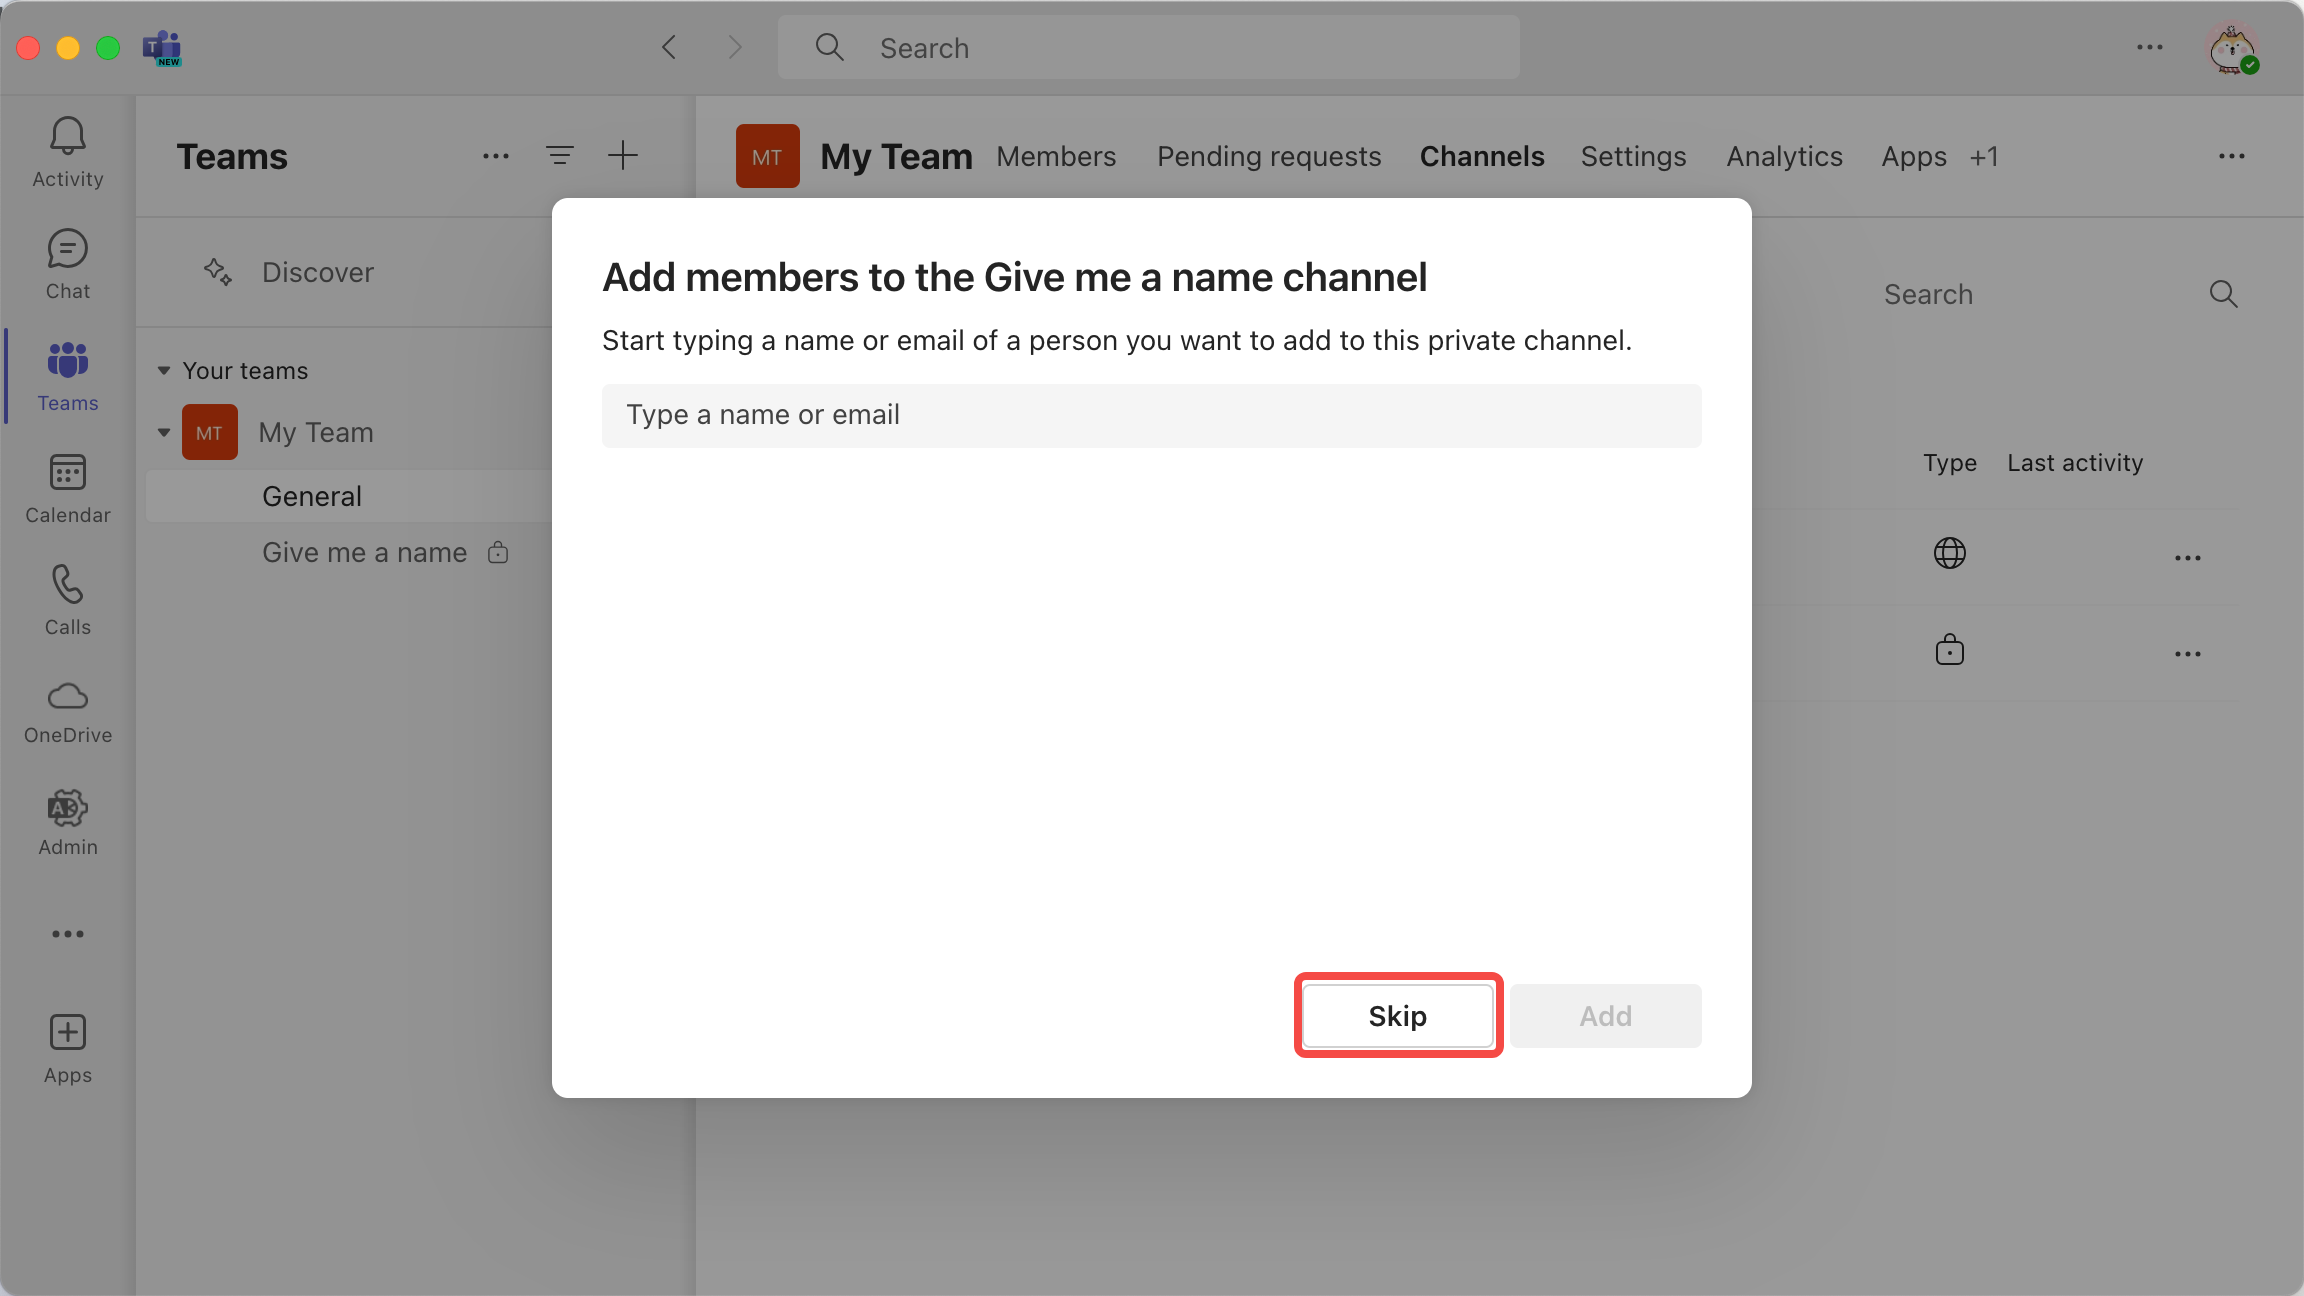 |
Step 3: Go to the channel settings to create a webhook specifically for it.
| Step 3.1 | Step 3.2 | Step 3.3 | Step 3.4 | Step 3.5 |
|---|---|---|---|---|
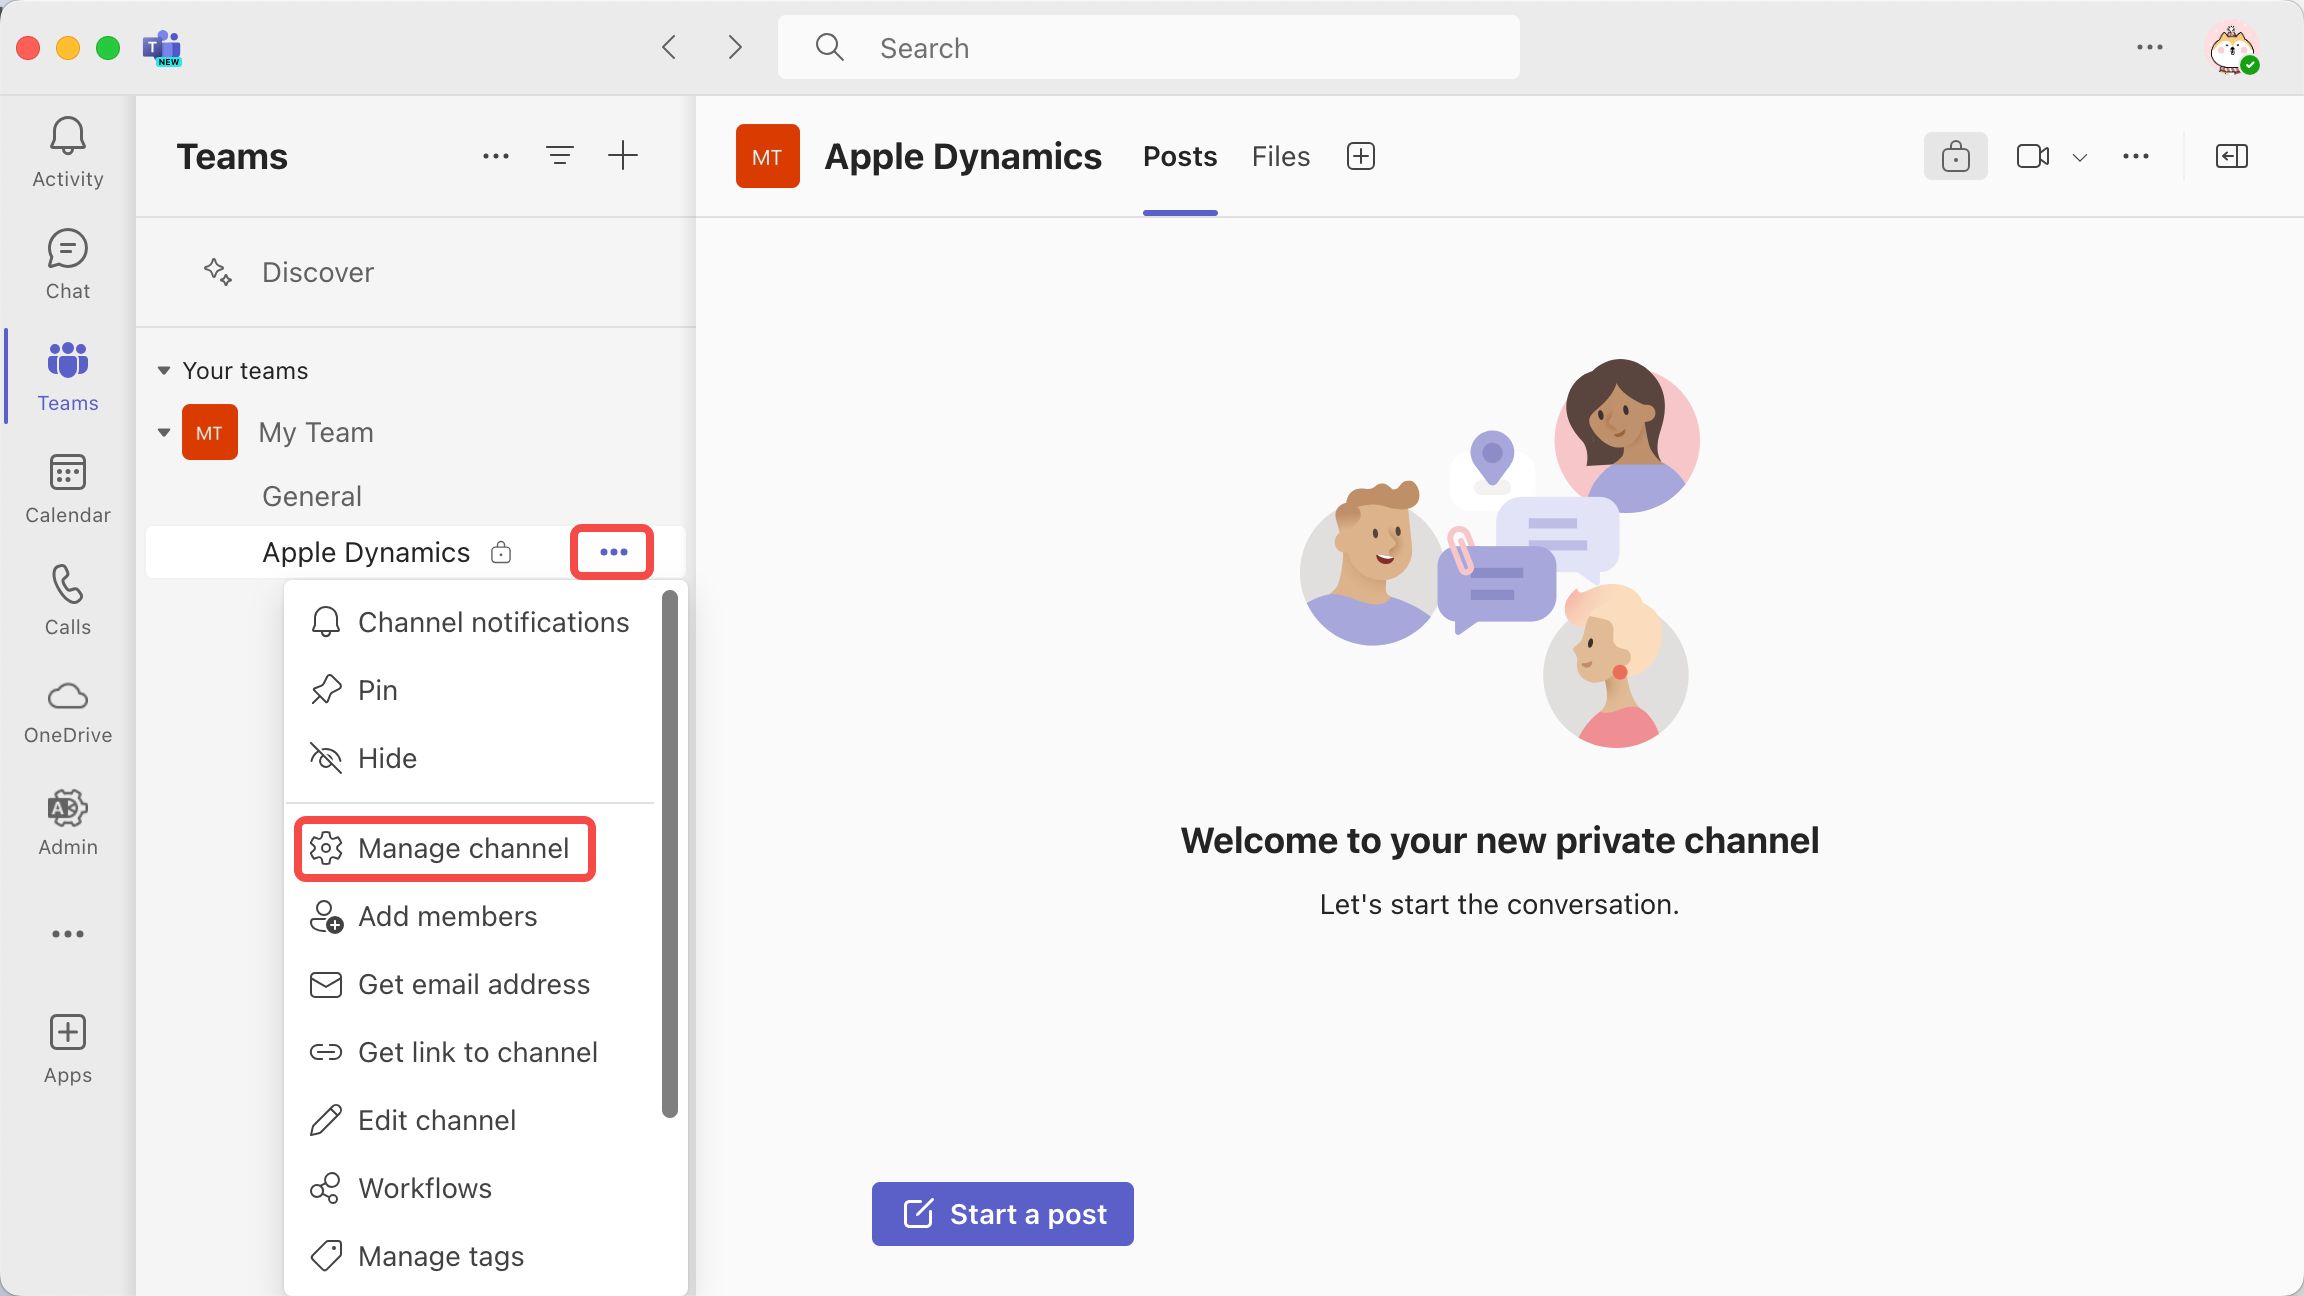 | 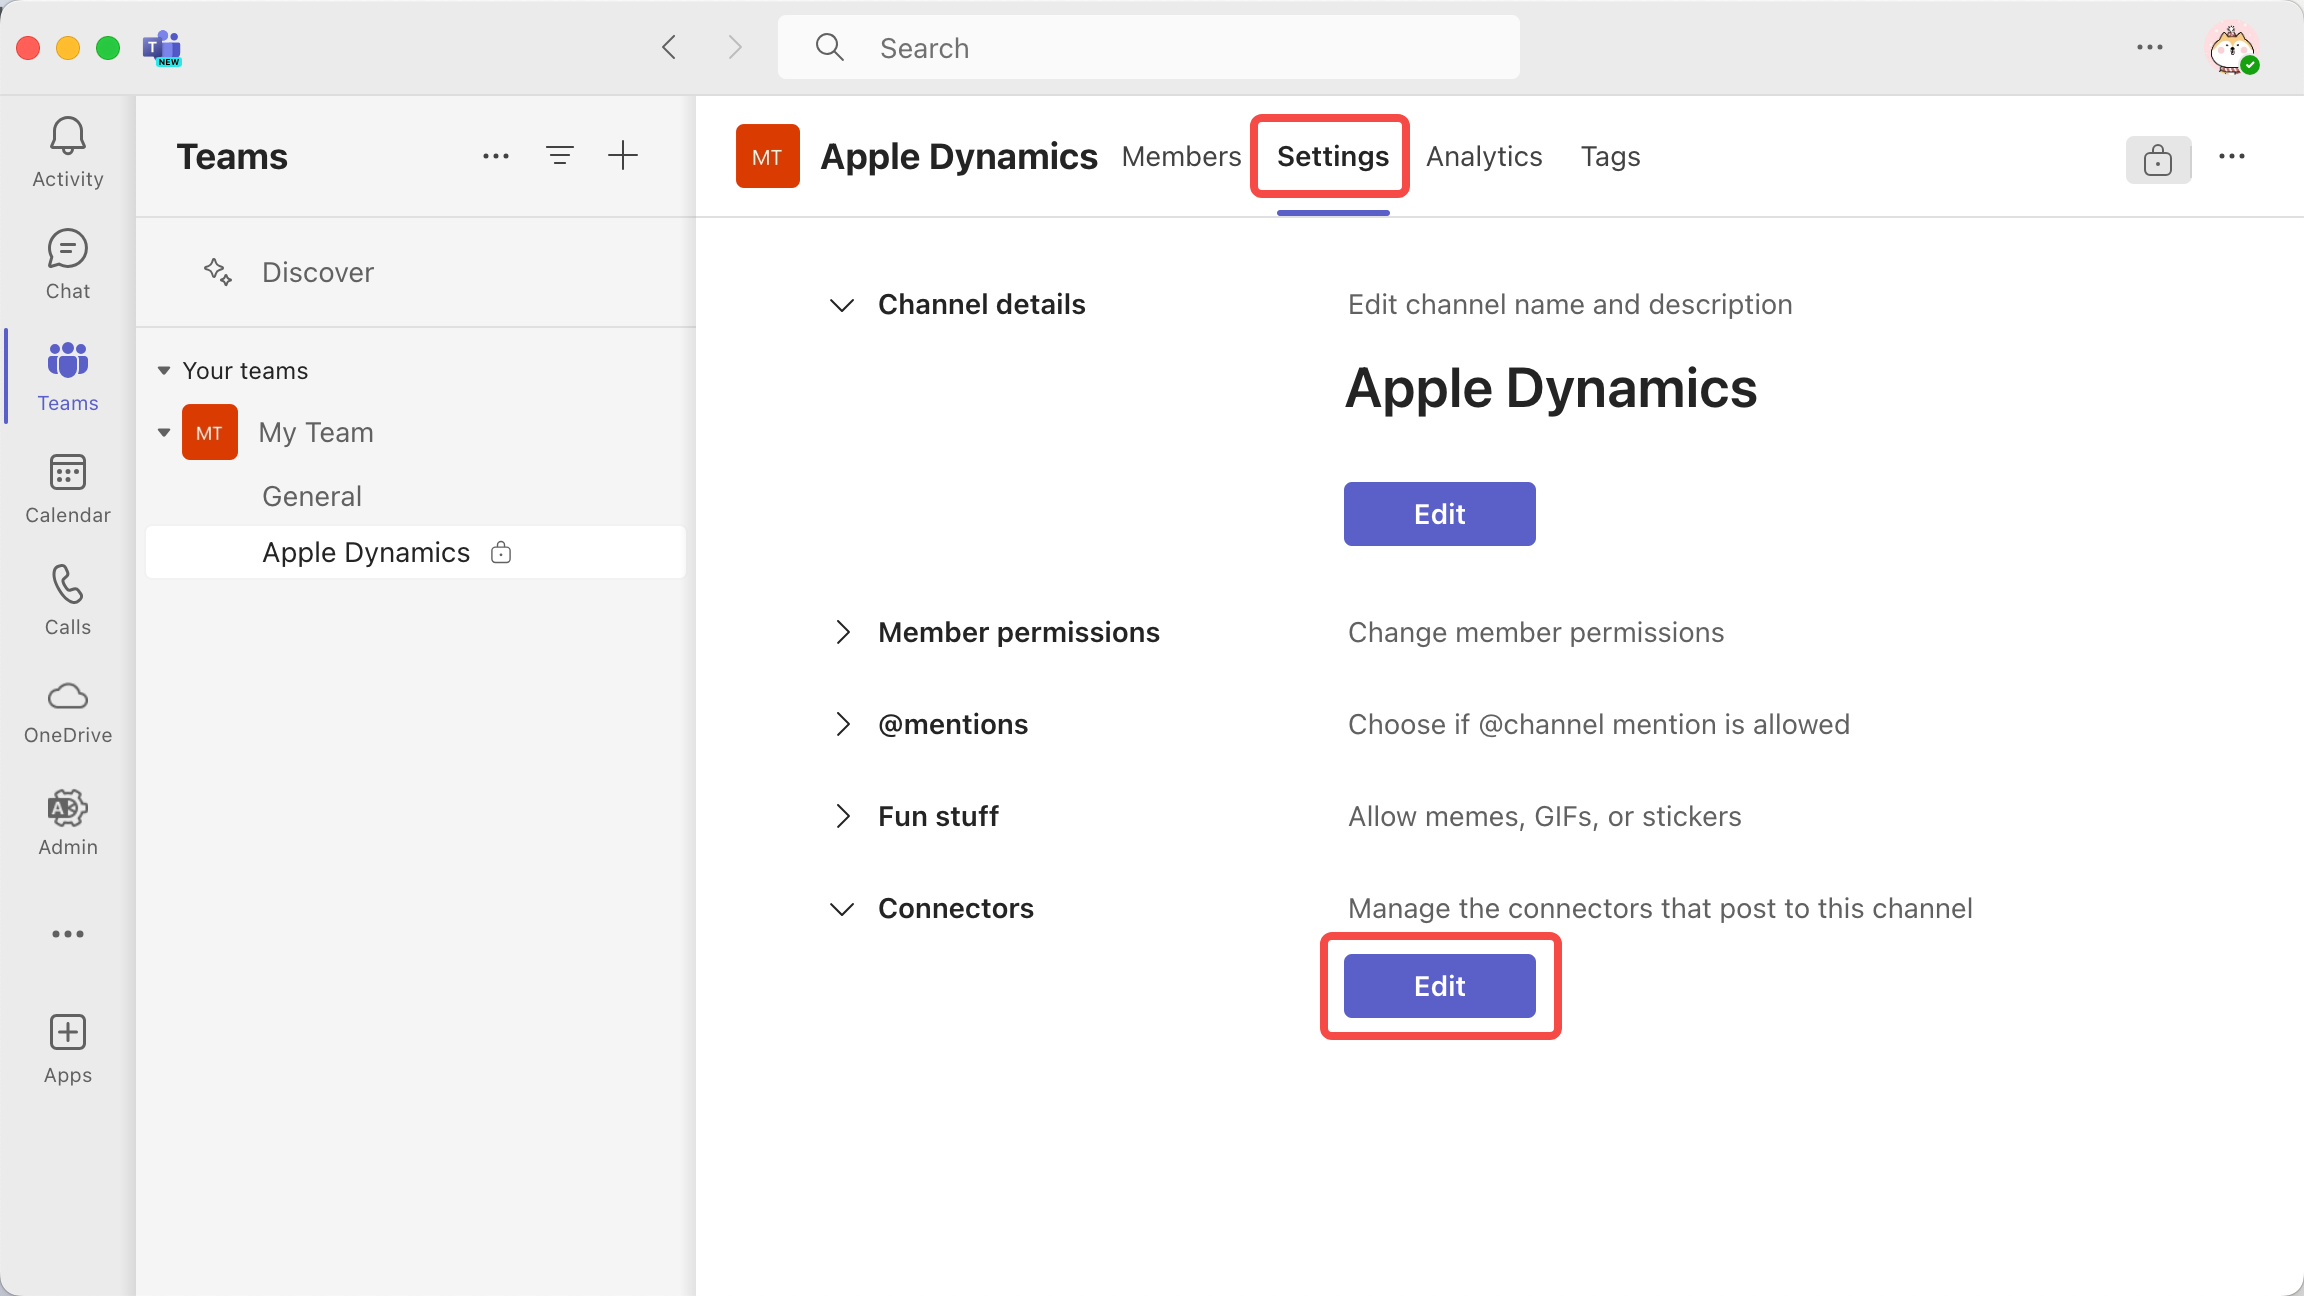 | 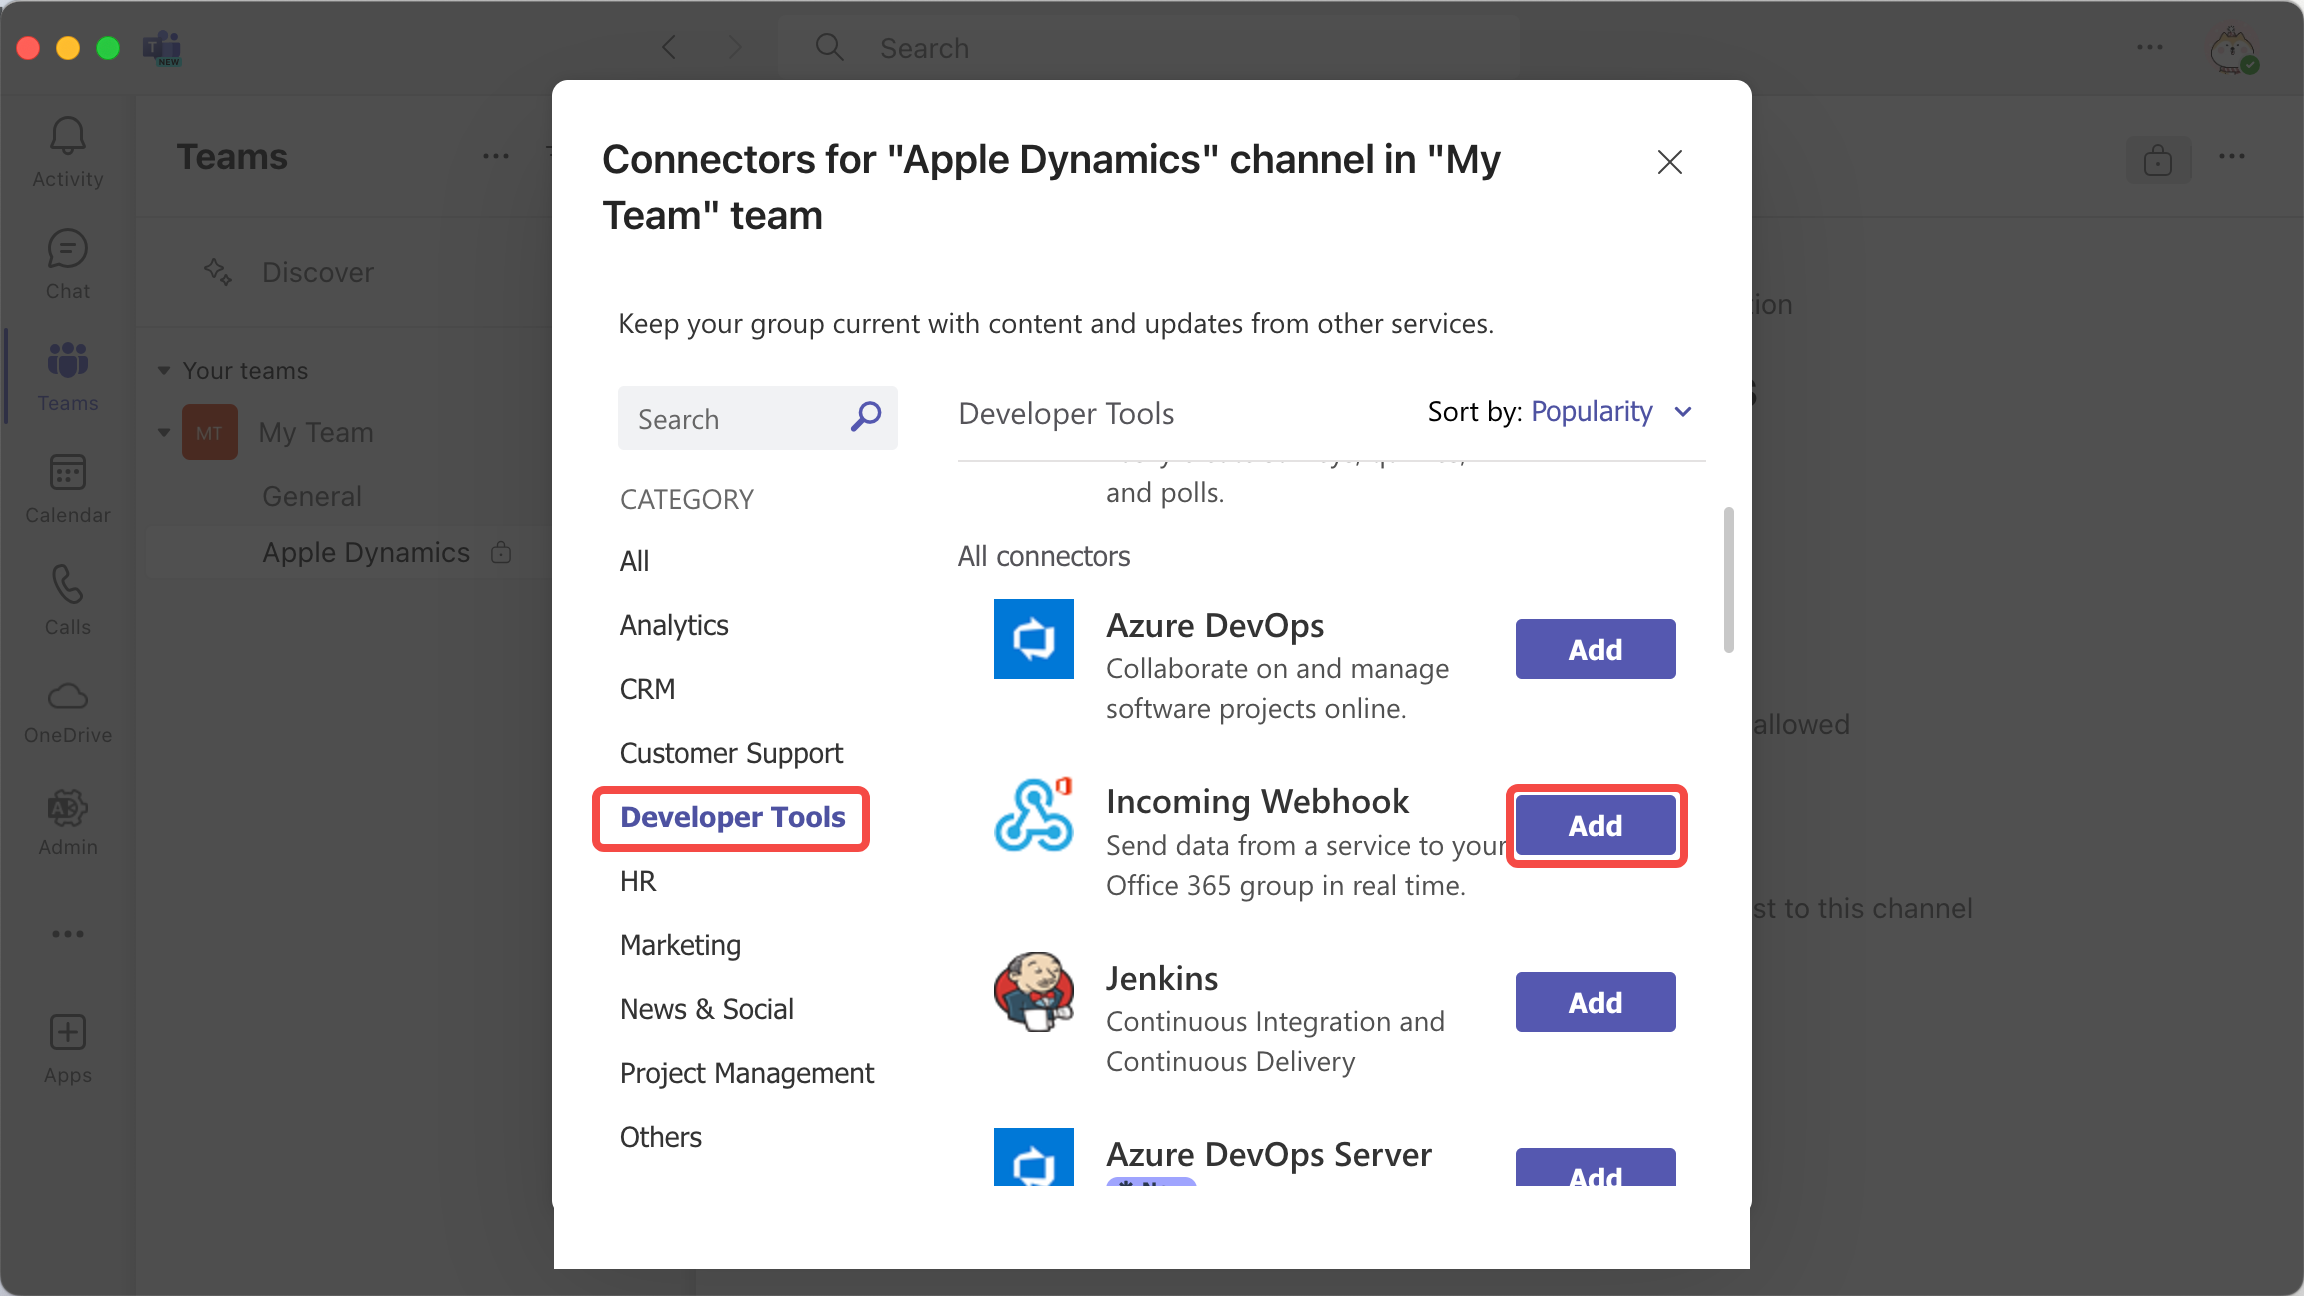 | 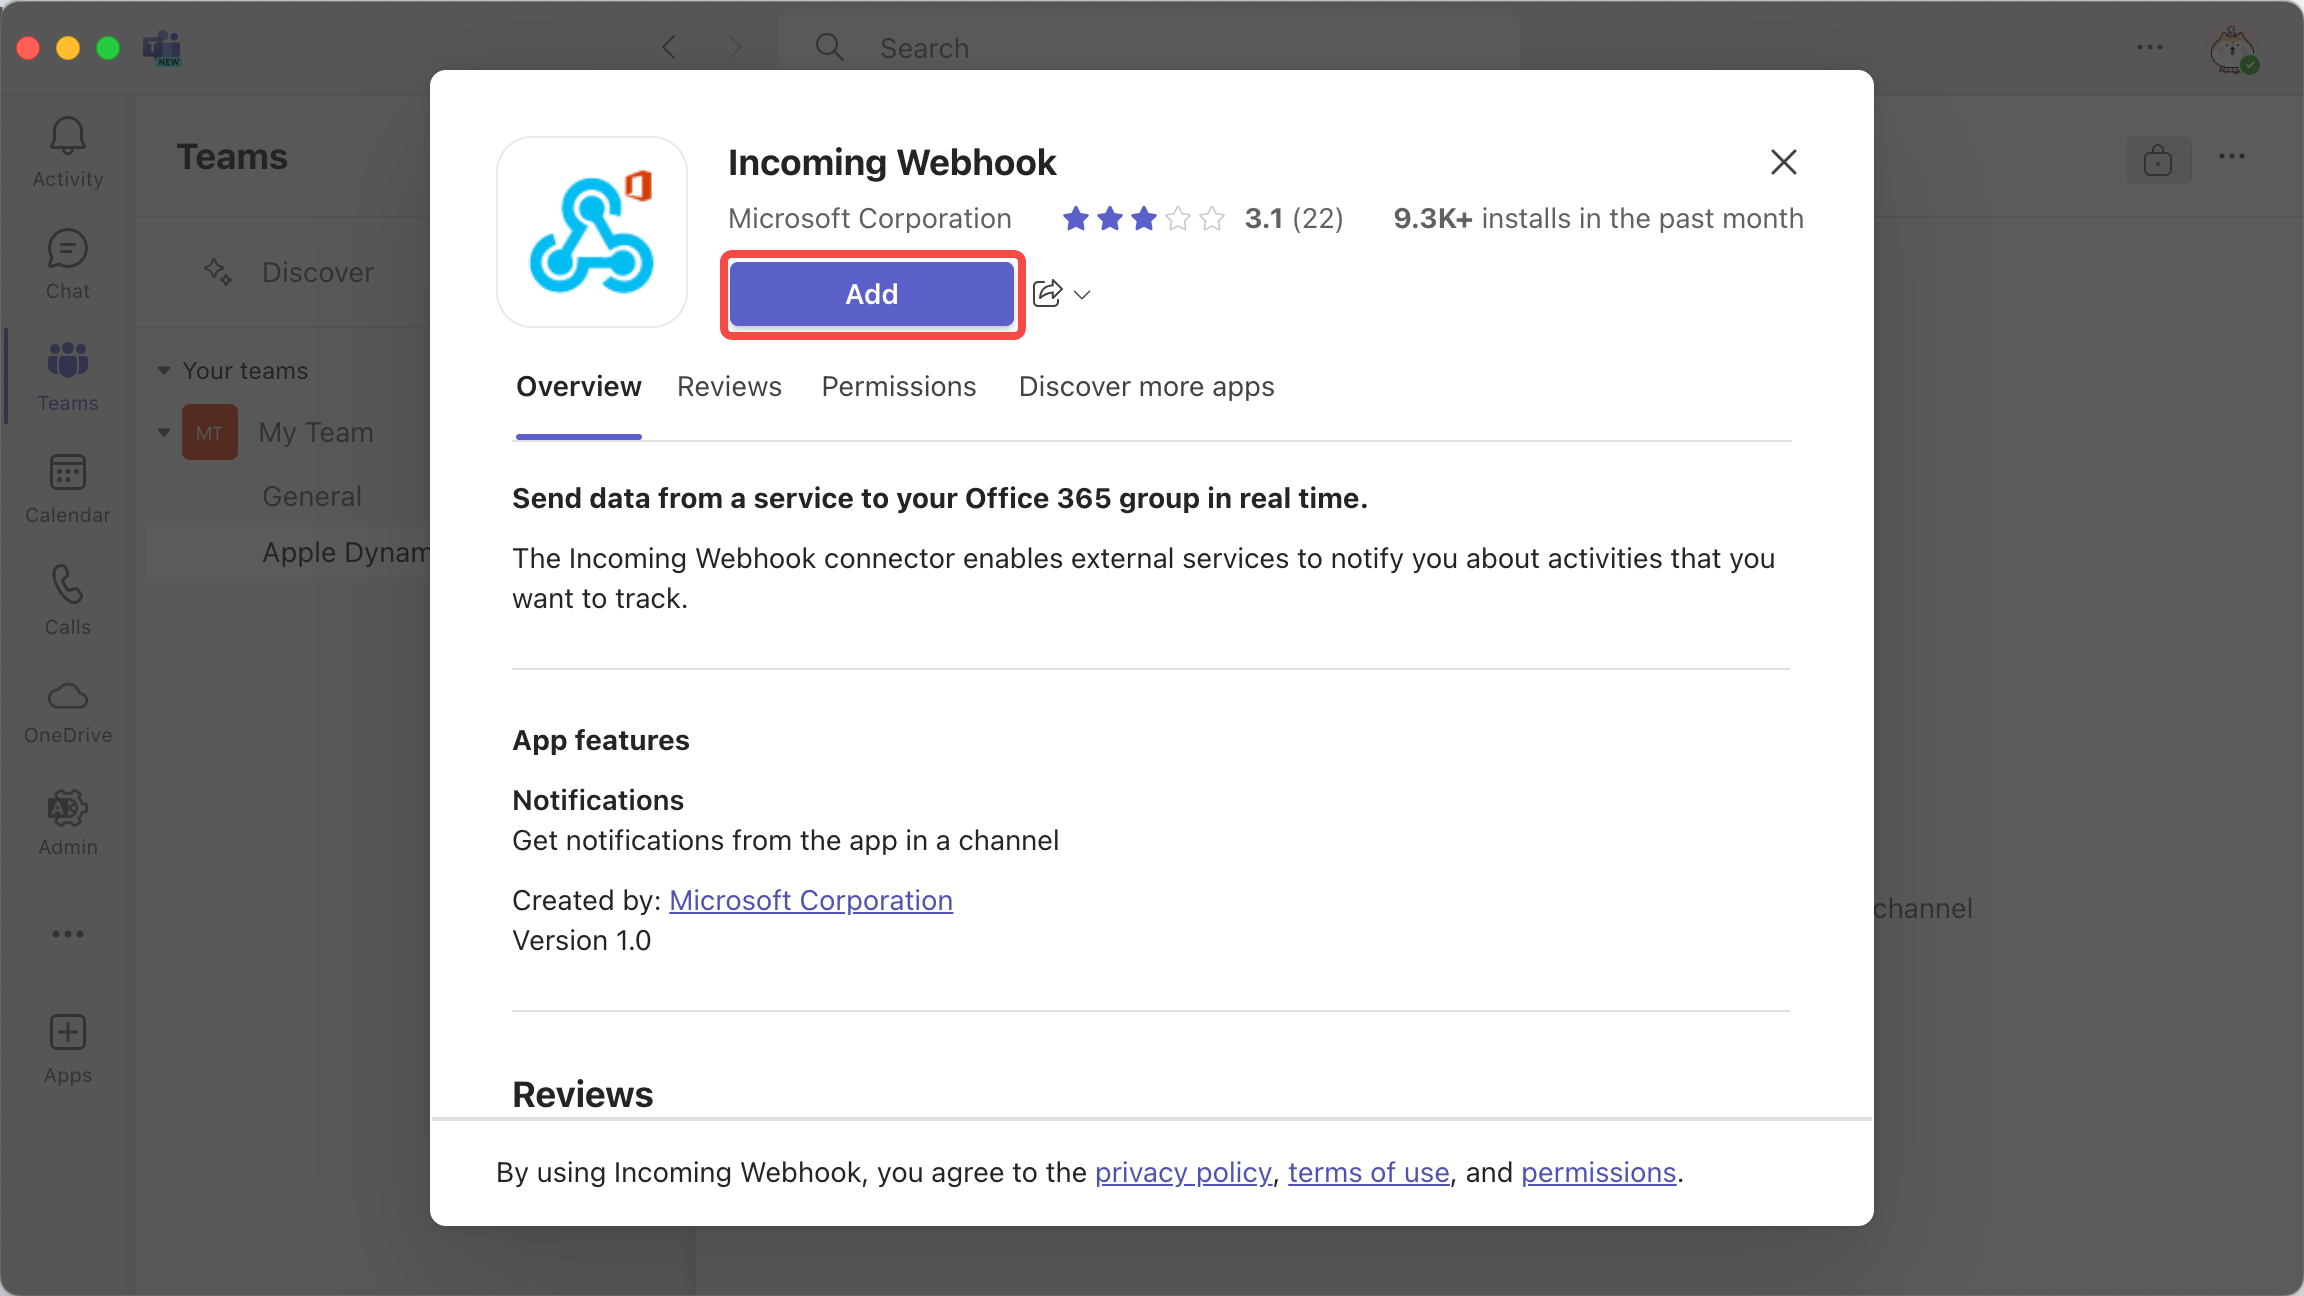 | 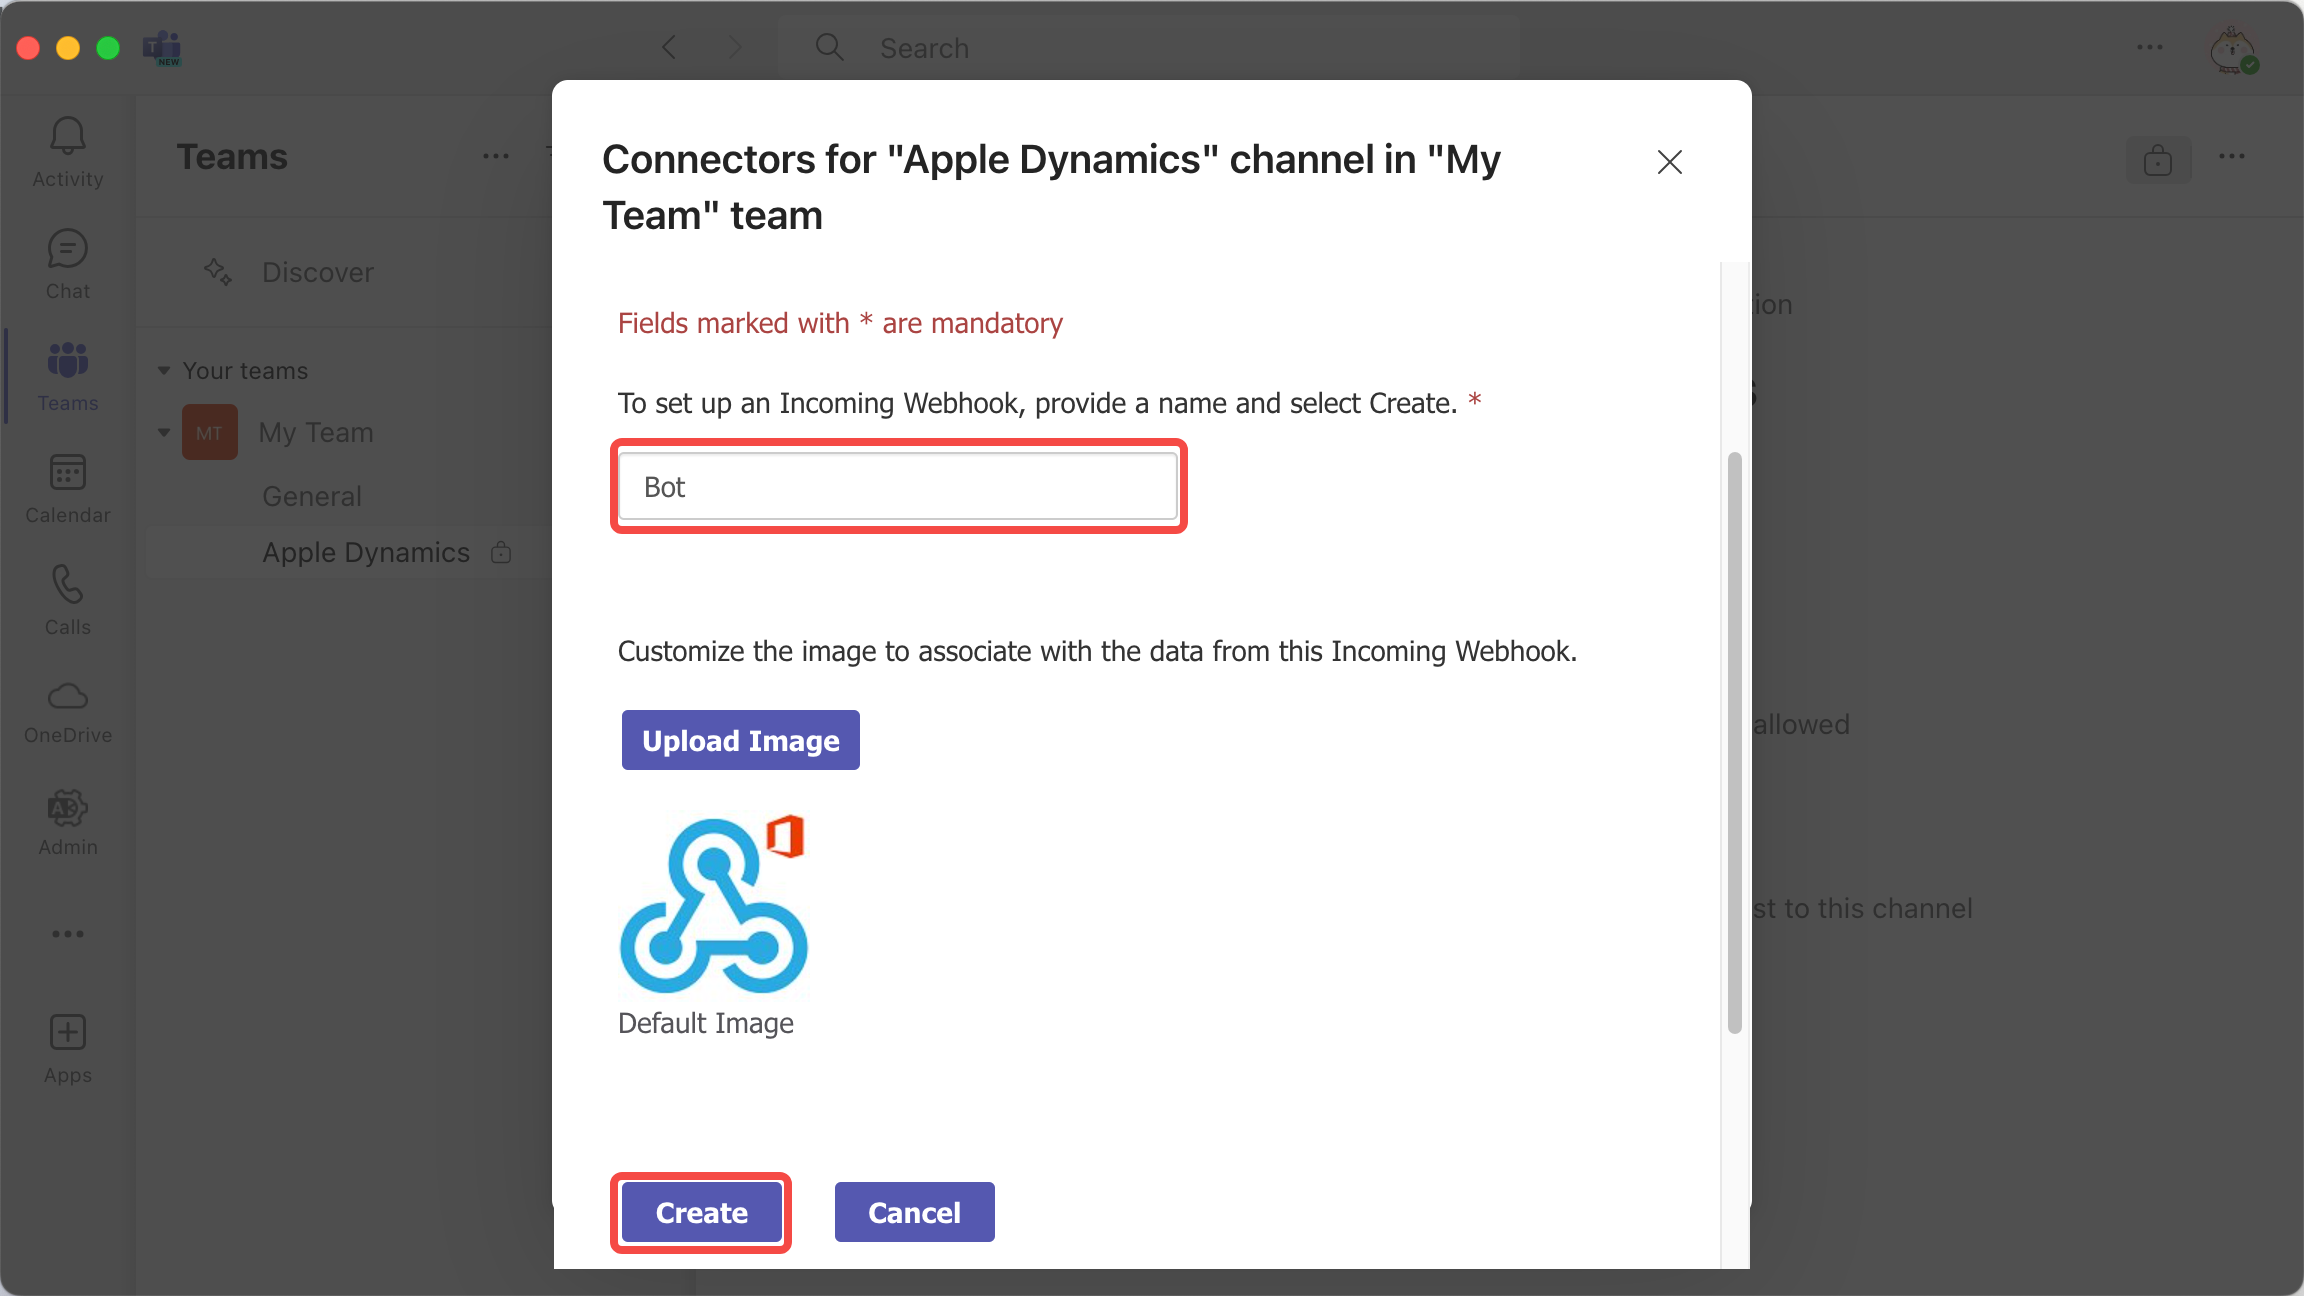 |
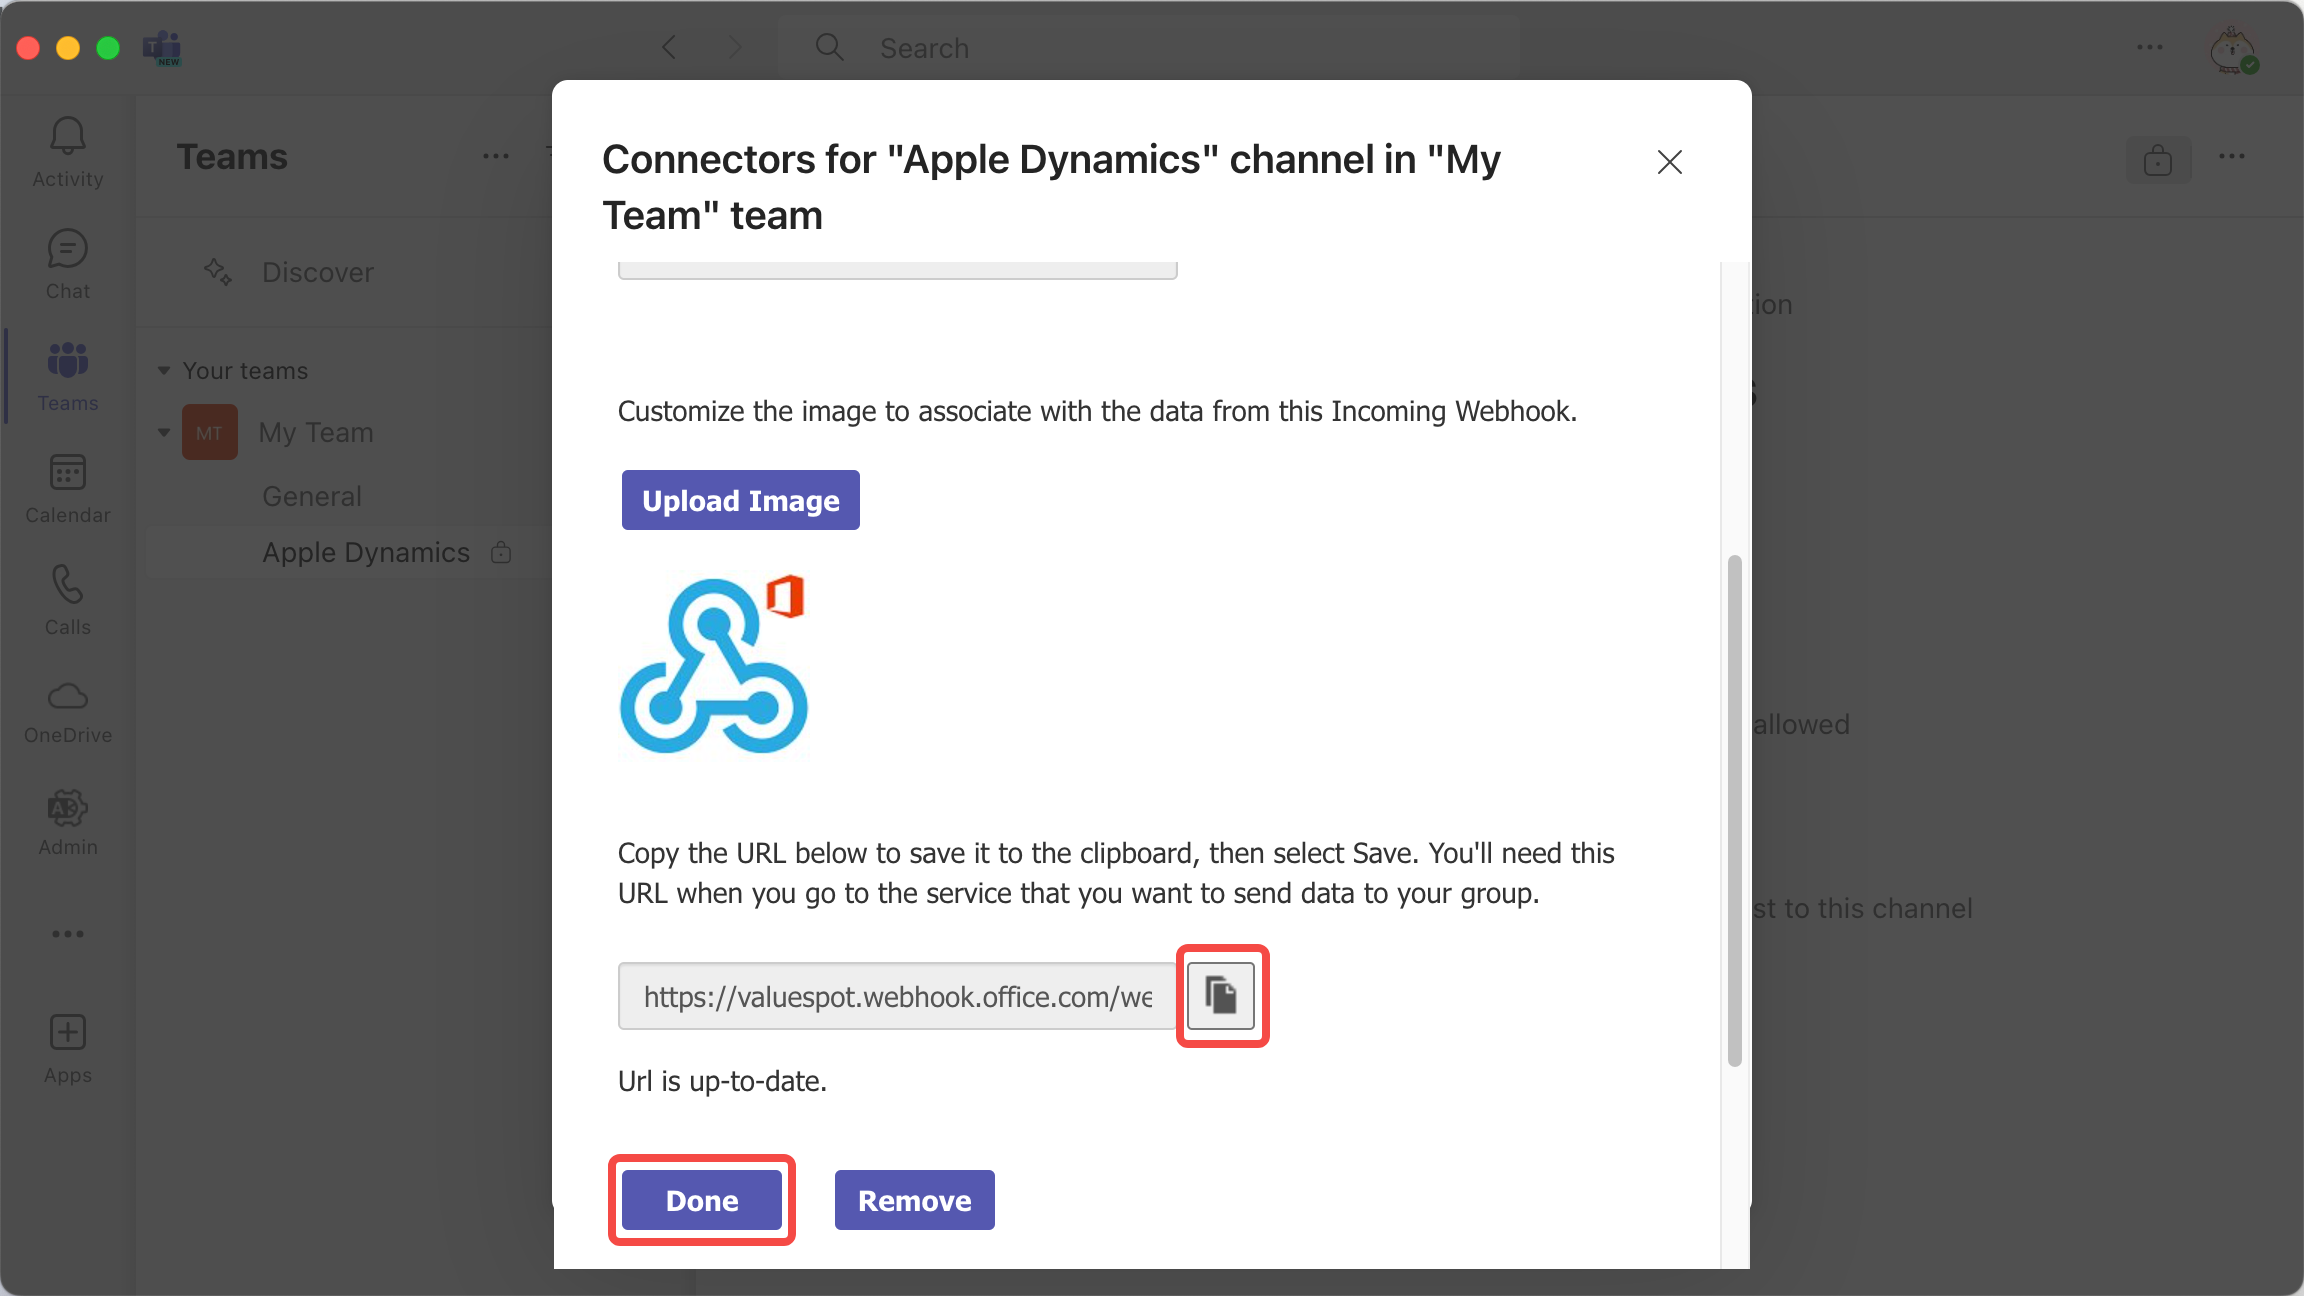
Step 4: Once your webhook is ready, click the copy button to copy the Webhook URL and paste it into ValueSpot.
| Step 4.1 | Step 4.2 |
|---|---|
 |  |
Slack
Step 1: Open the Slack main interface and create a channel for receiving messages. You can also invite friends to join the channel for discussions.
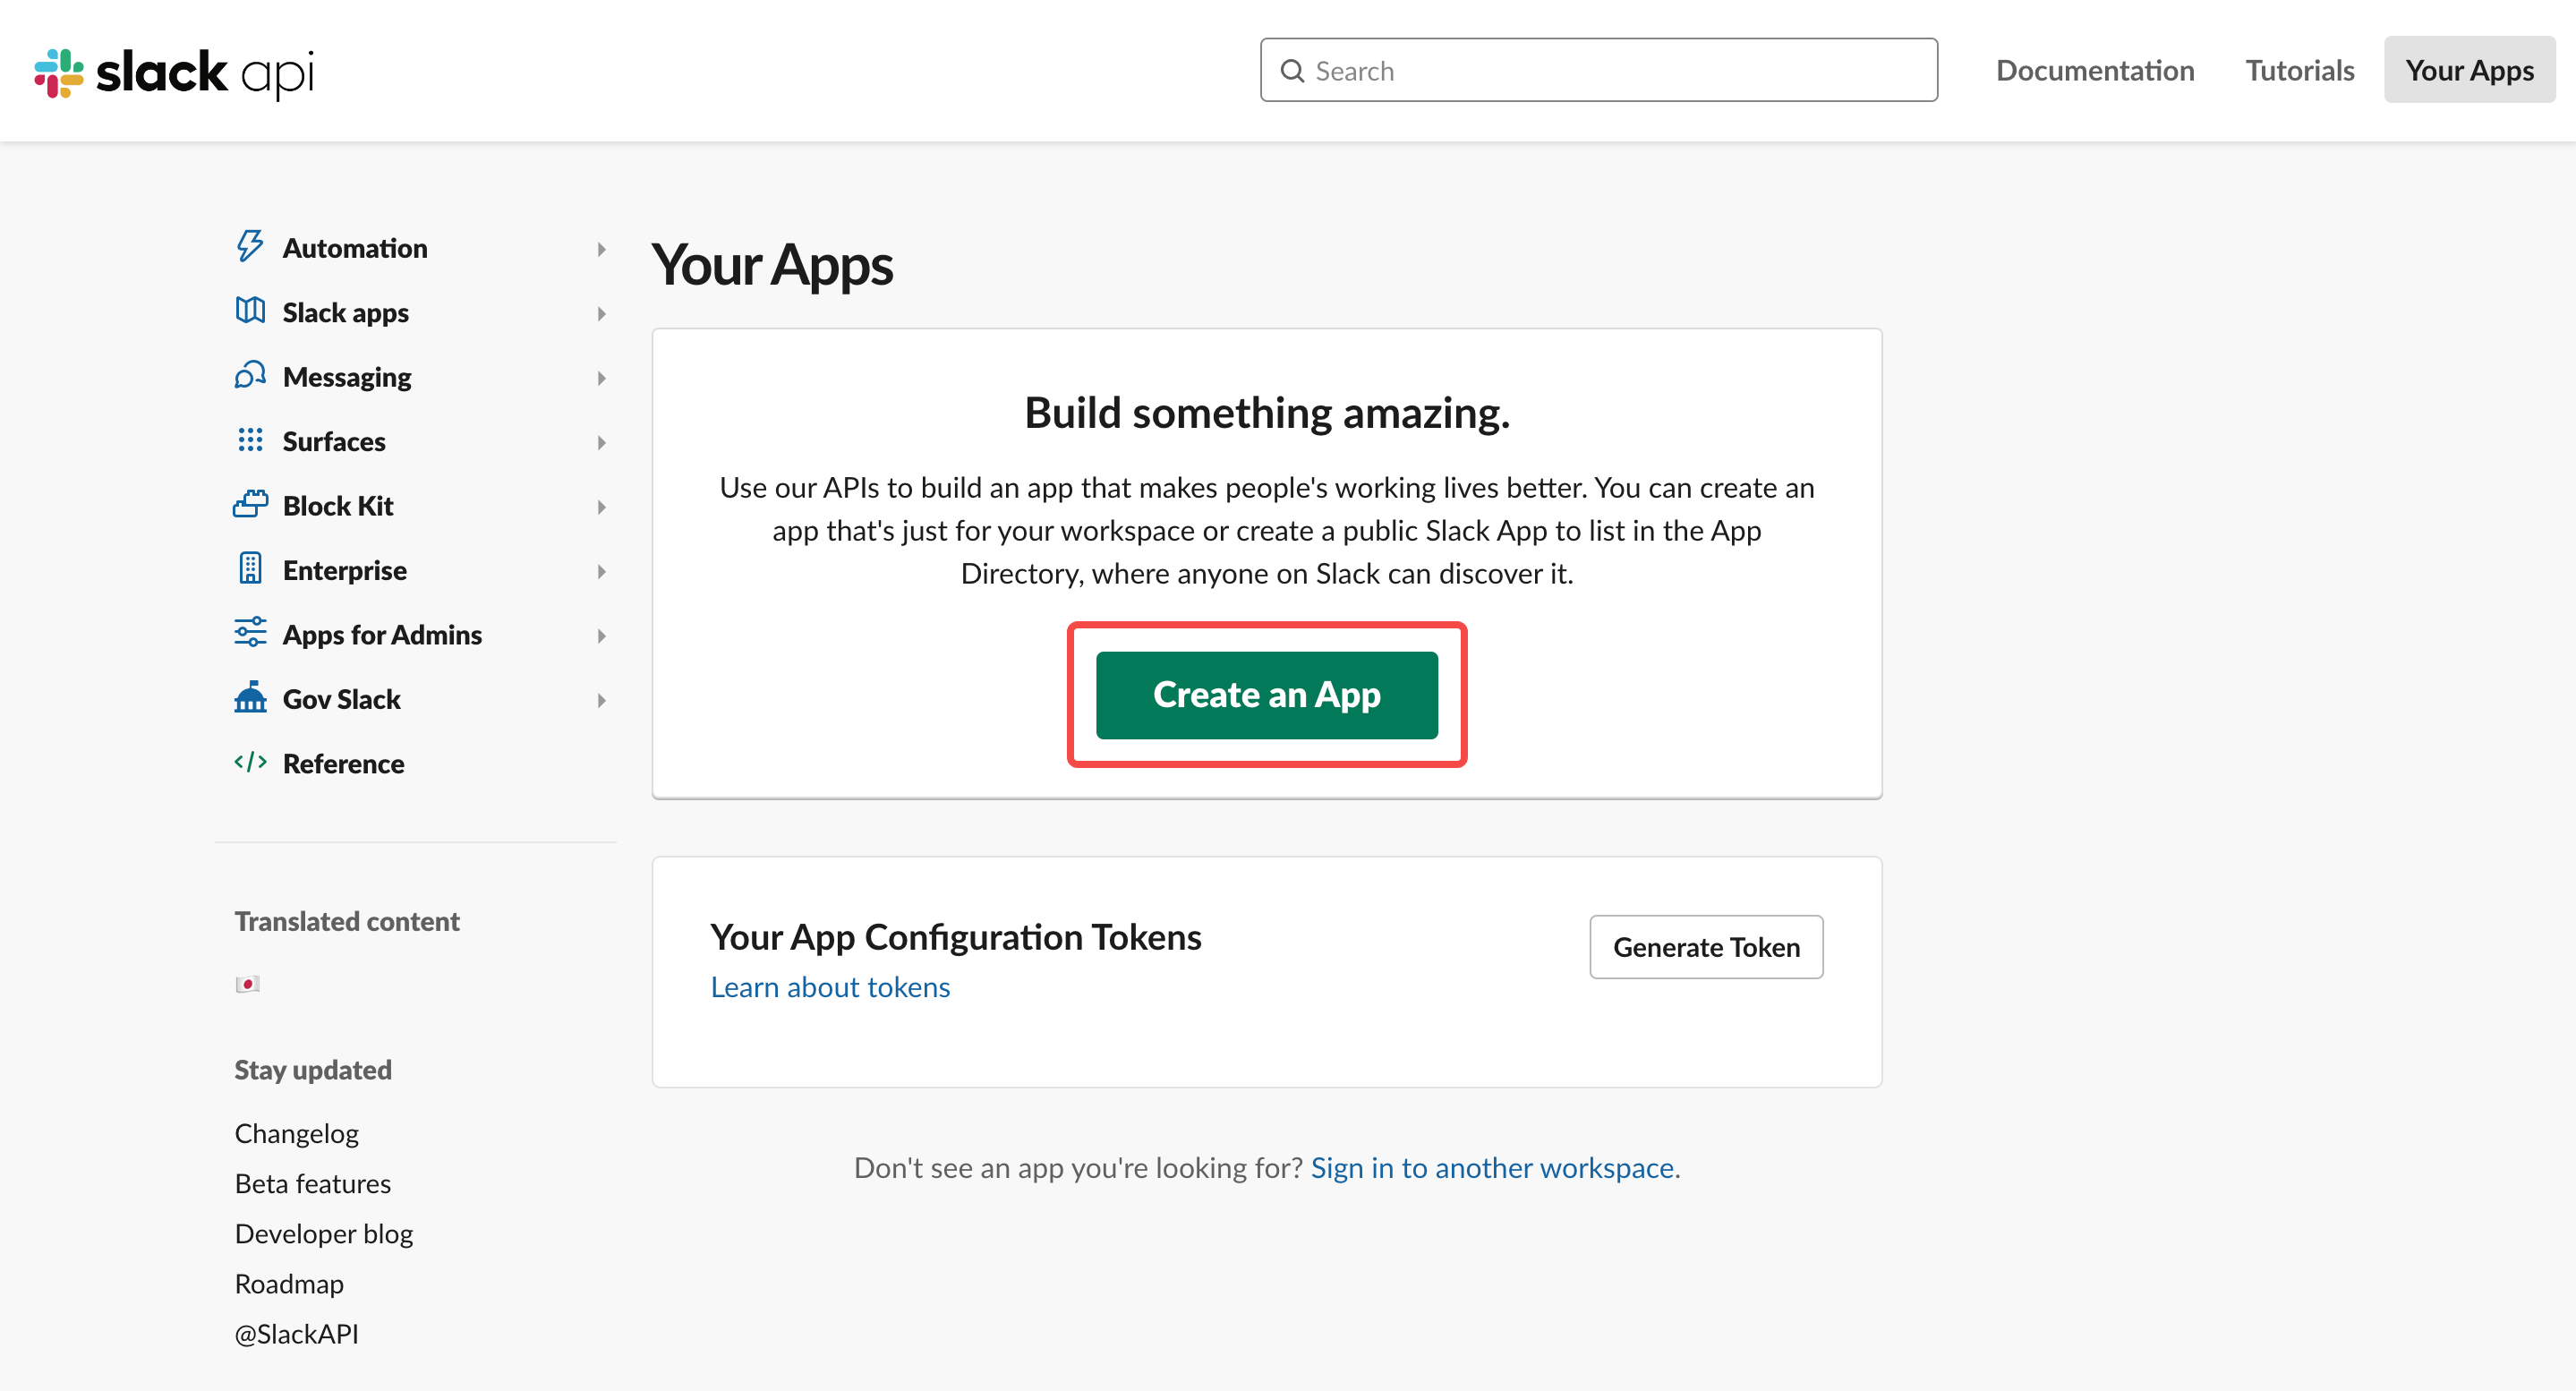
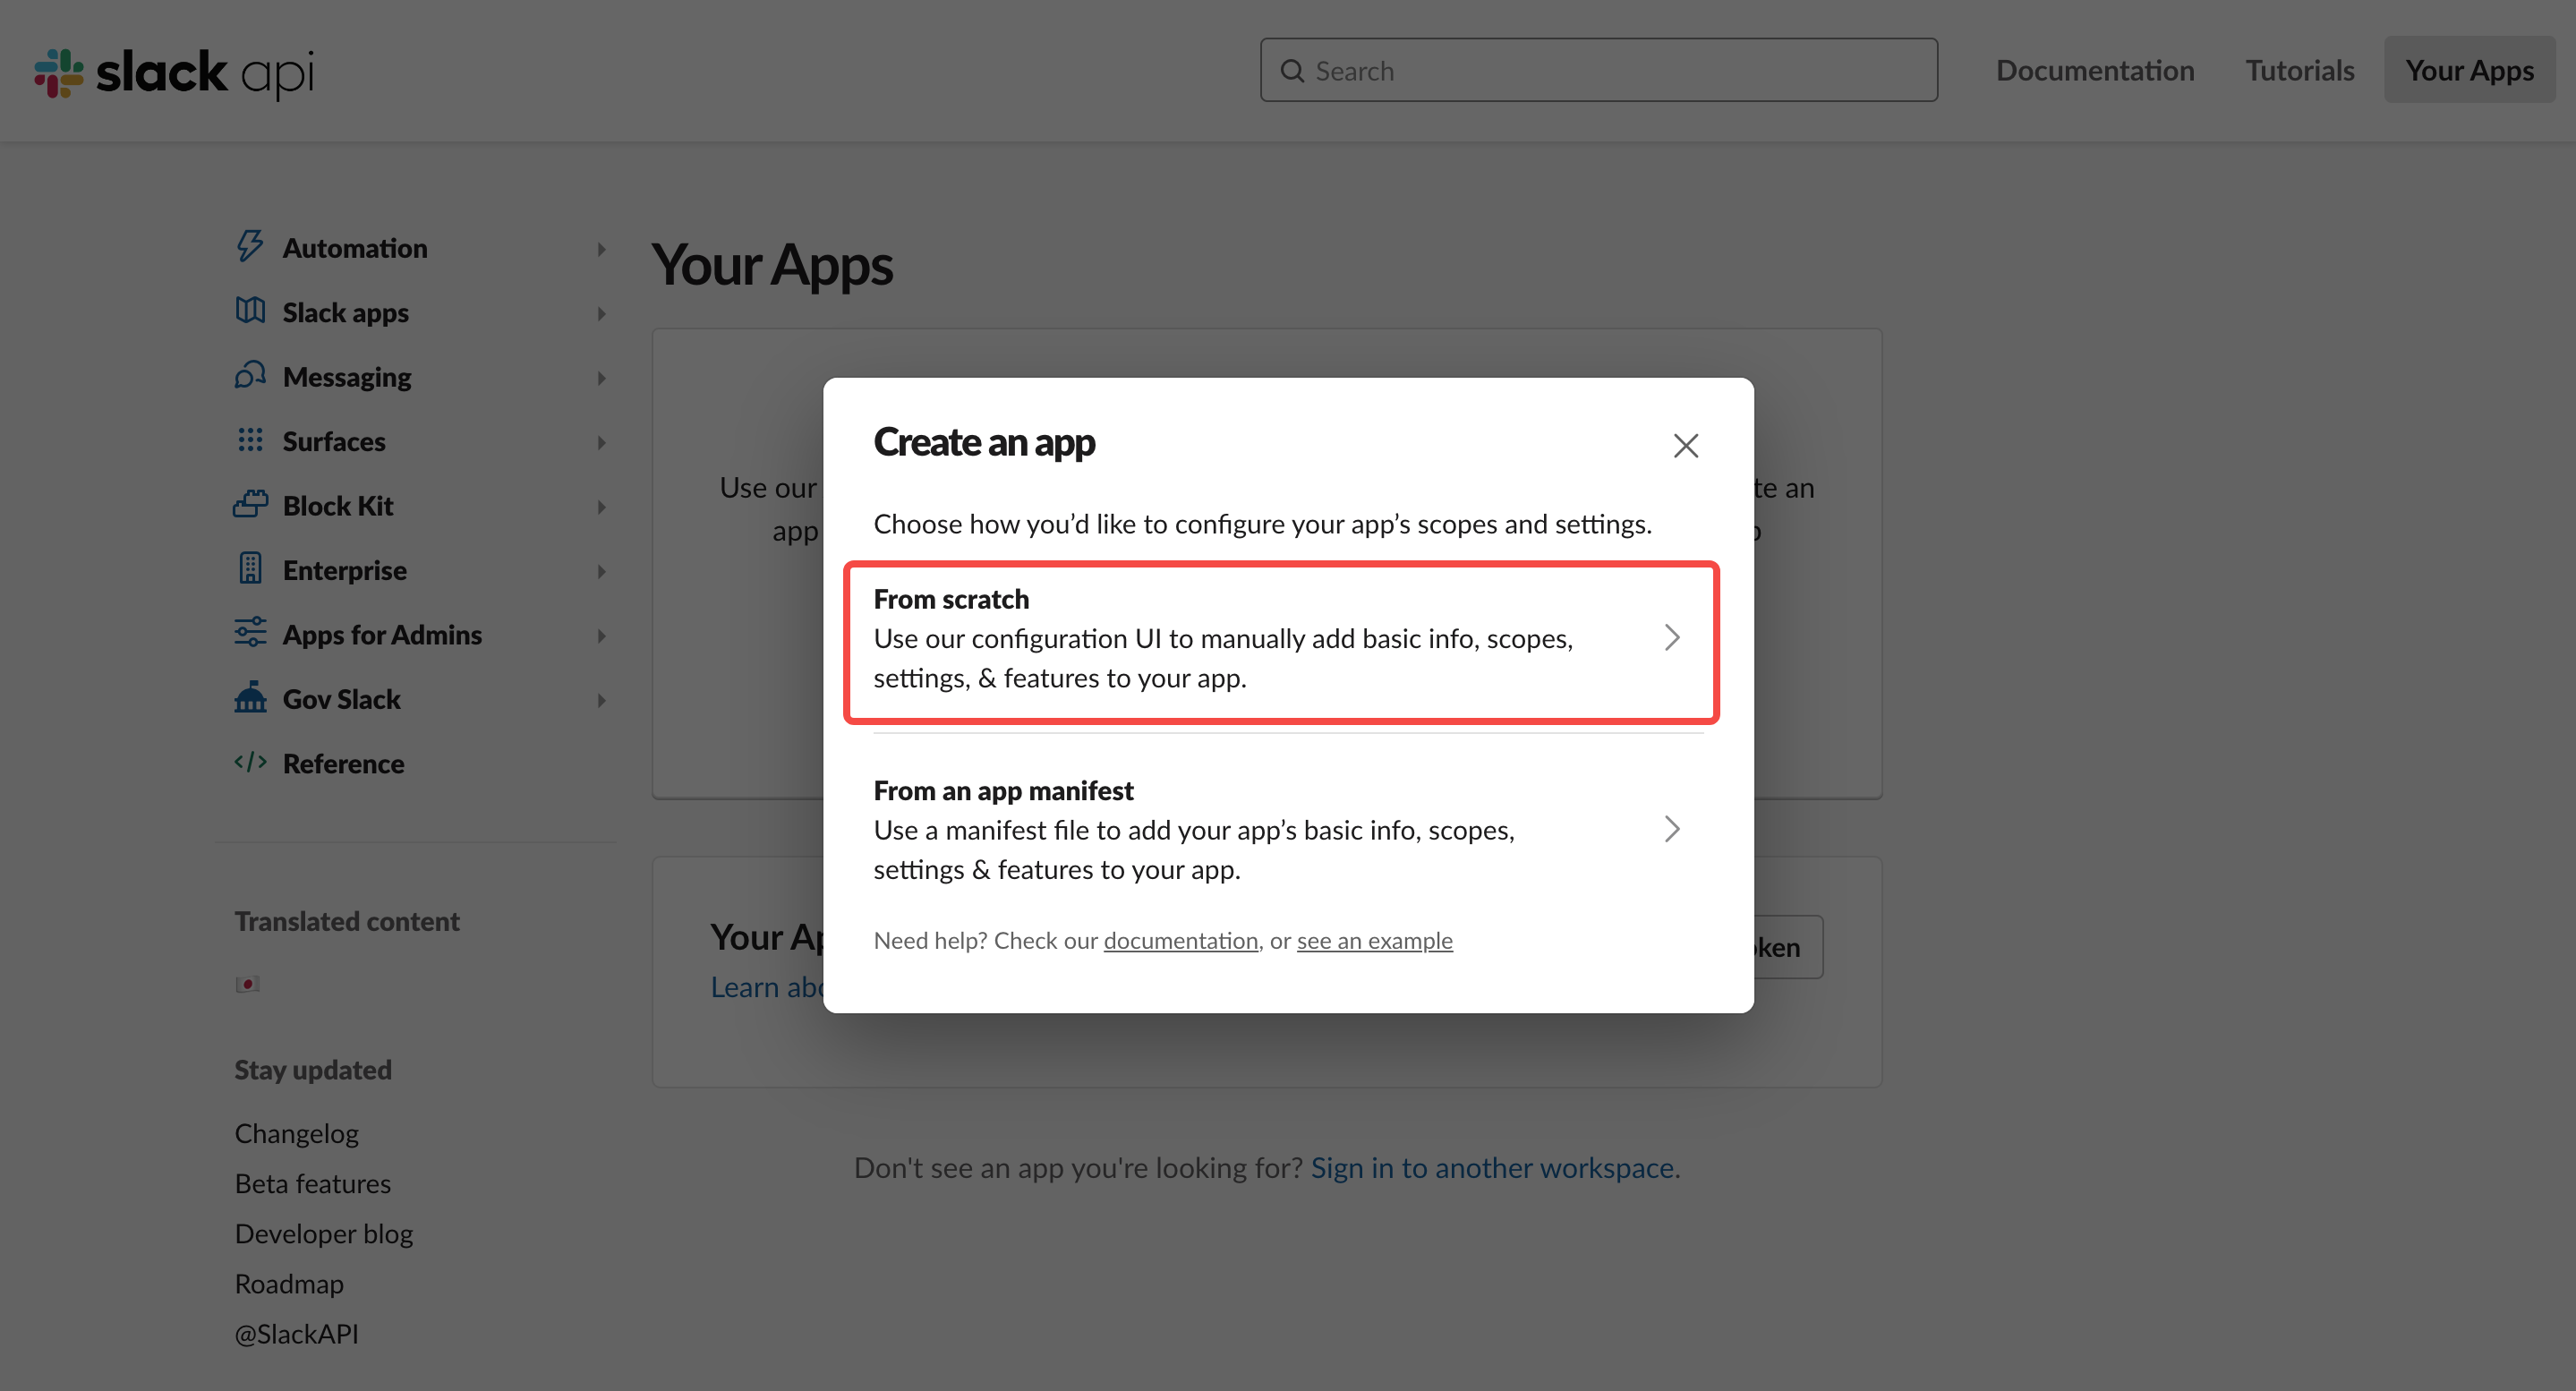
Step 2: Create a Slack App at https://api.slack.com/apps.
| Step 2.1 | Step 2.2 | Step 2.3 |
|---|---|---|
 |  | 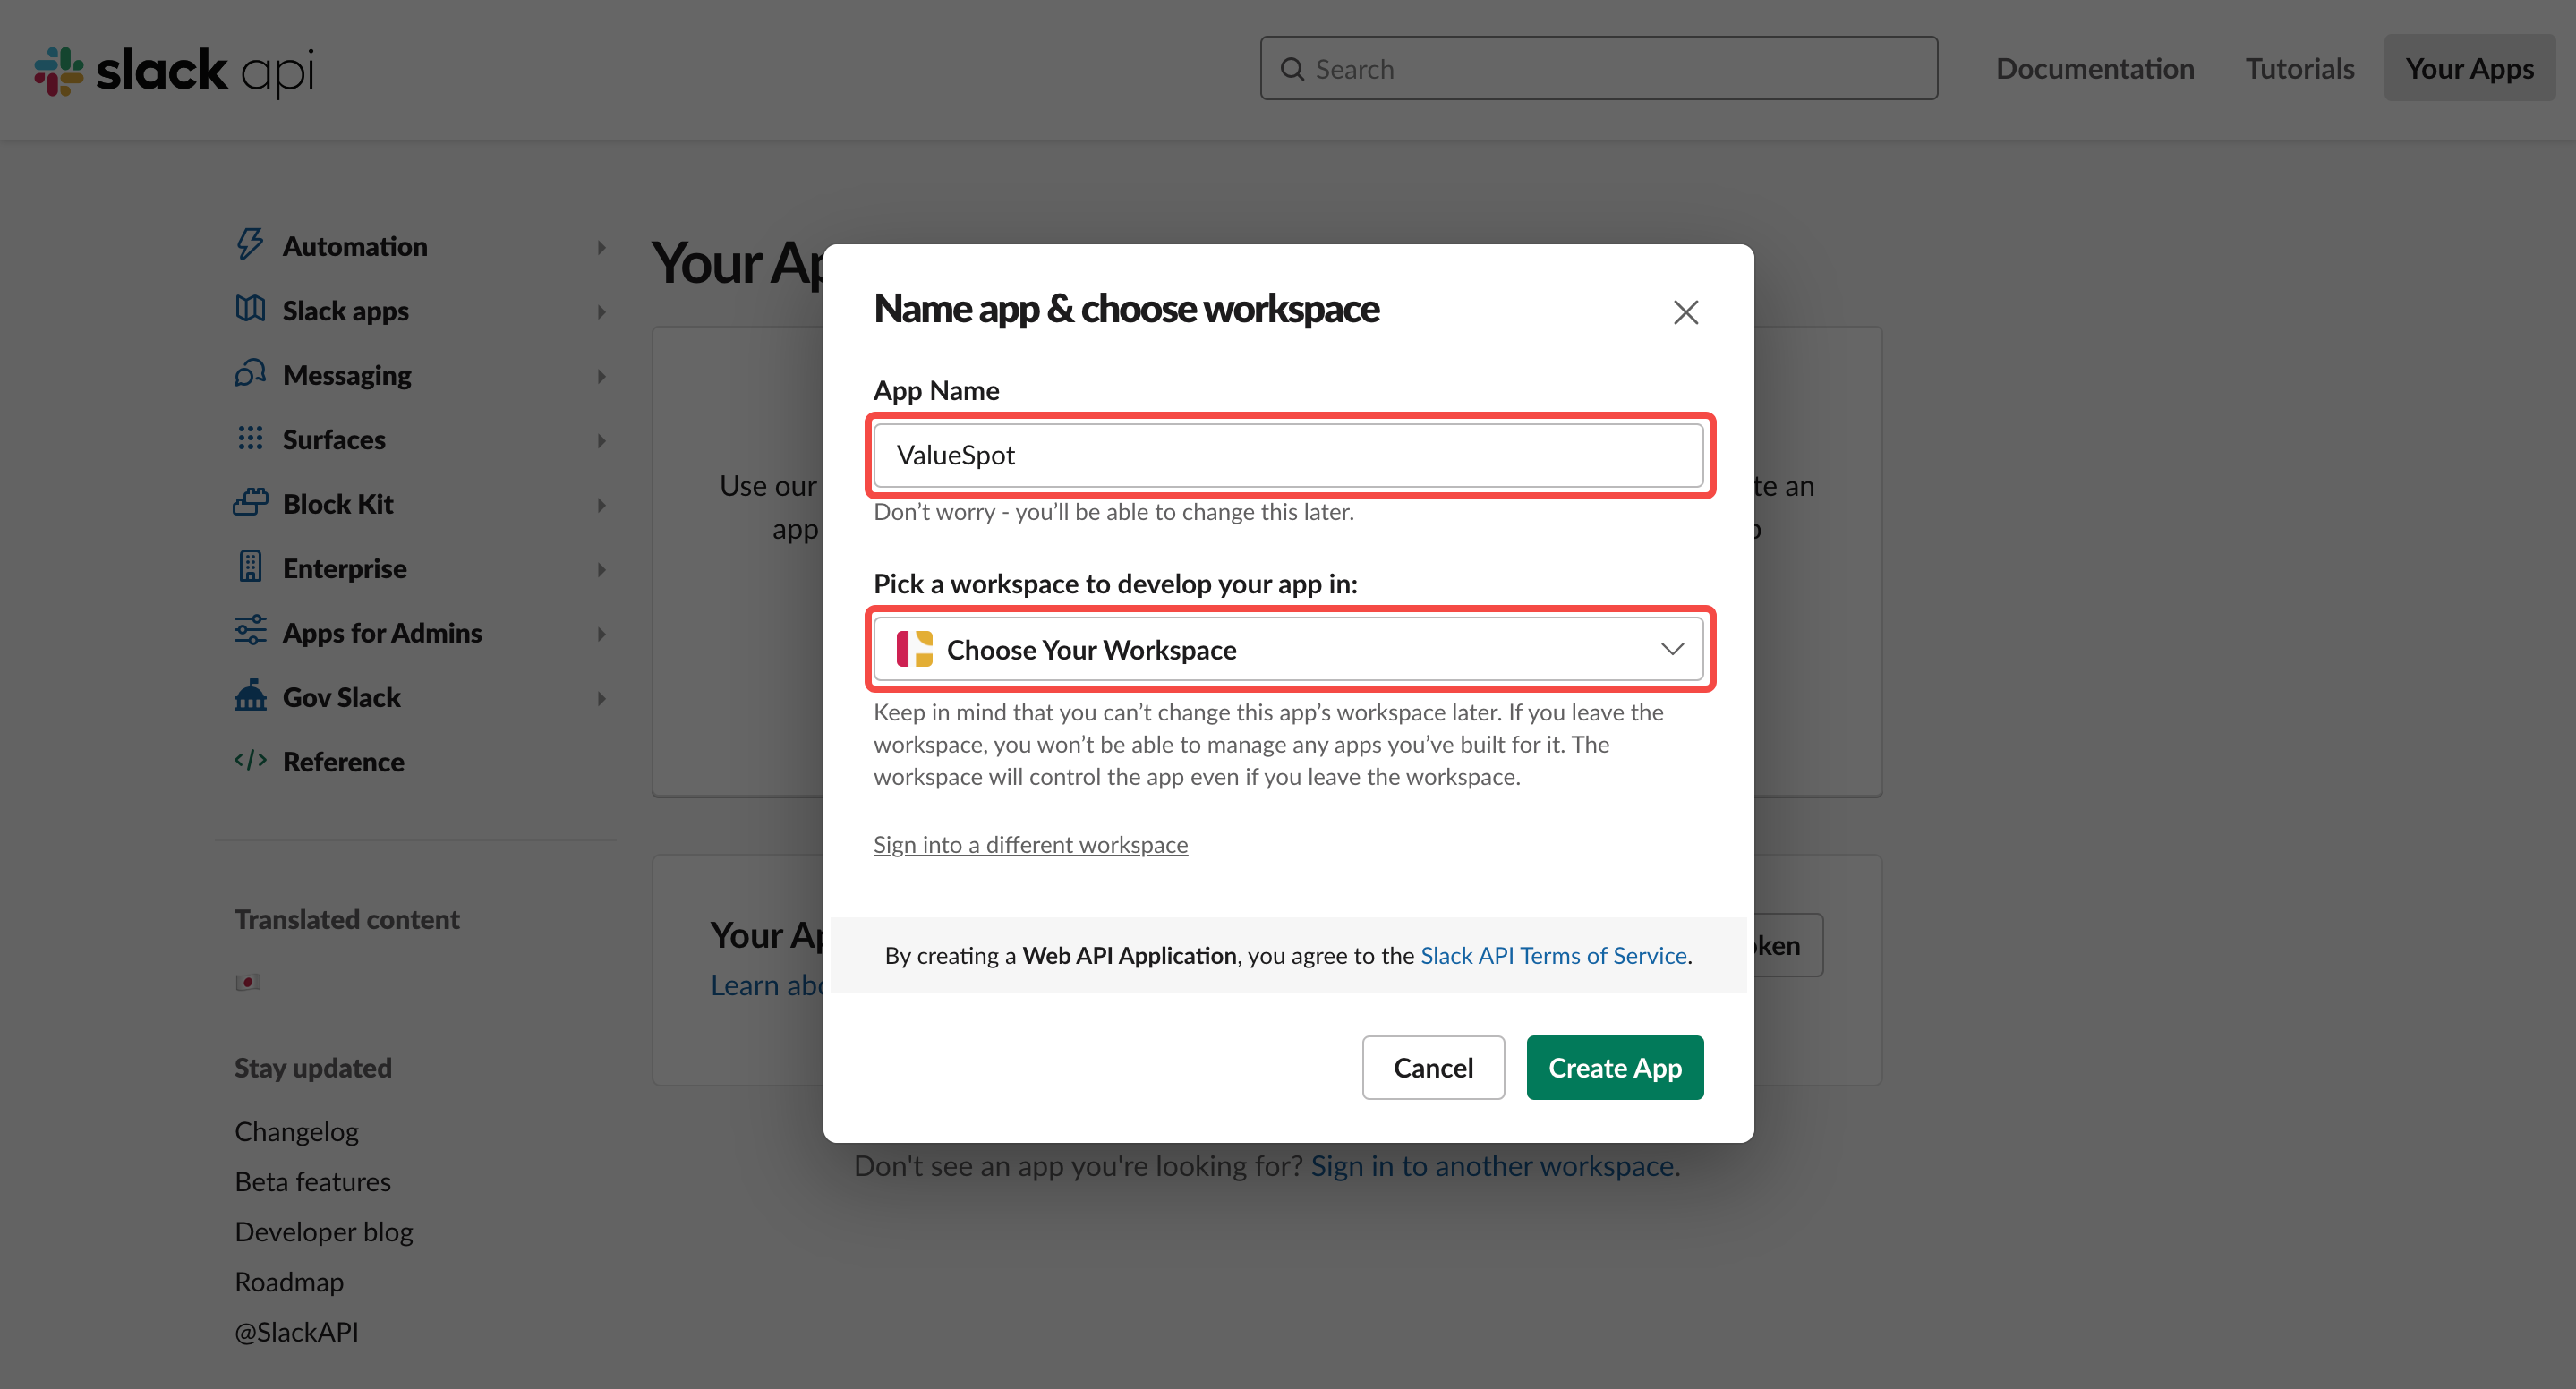 |
Step 3: Enable "Incoming Webhooks", then click "Add New Webhook to Workspace". Select the channel you just created and click "Allow".
| Step 3.1 | Step 3.2 | Step 3.3 |
|---|---|---|
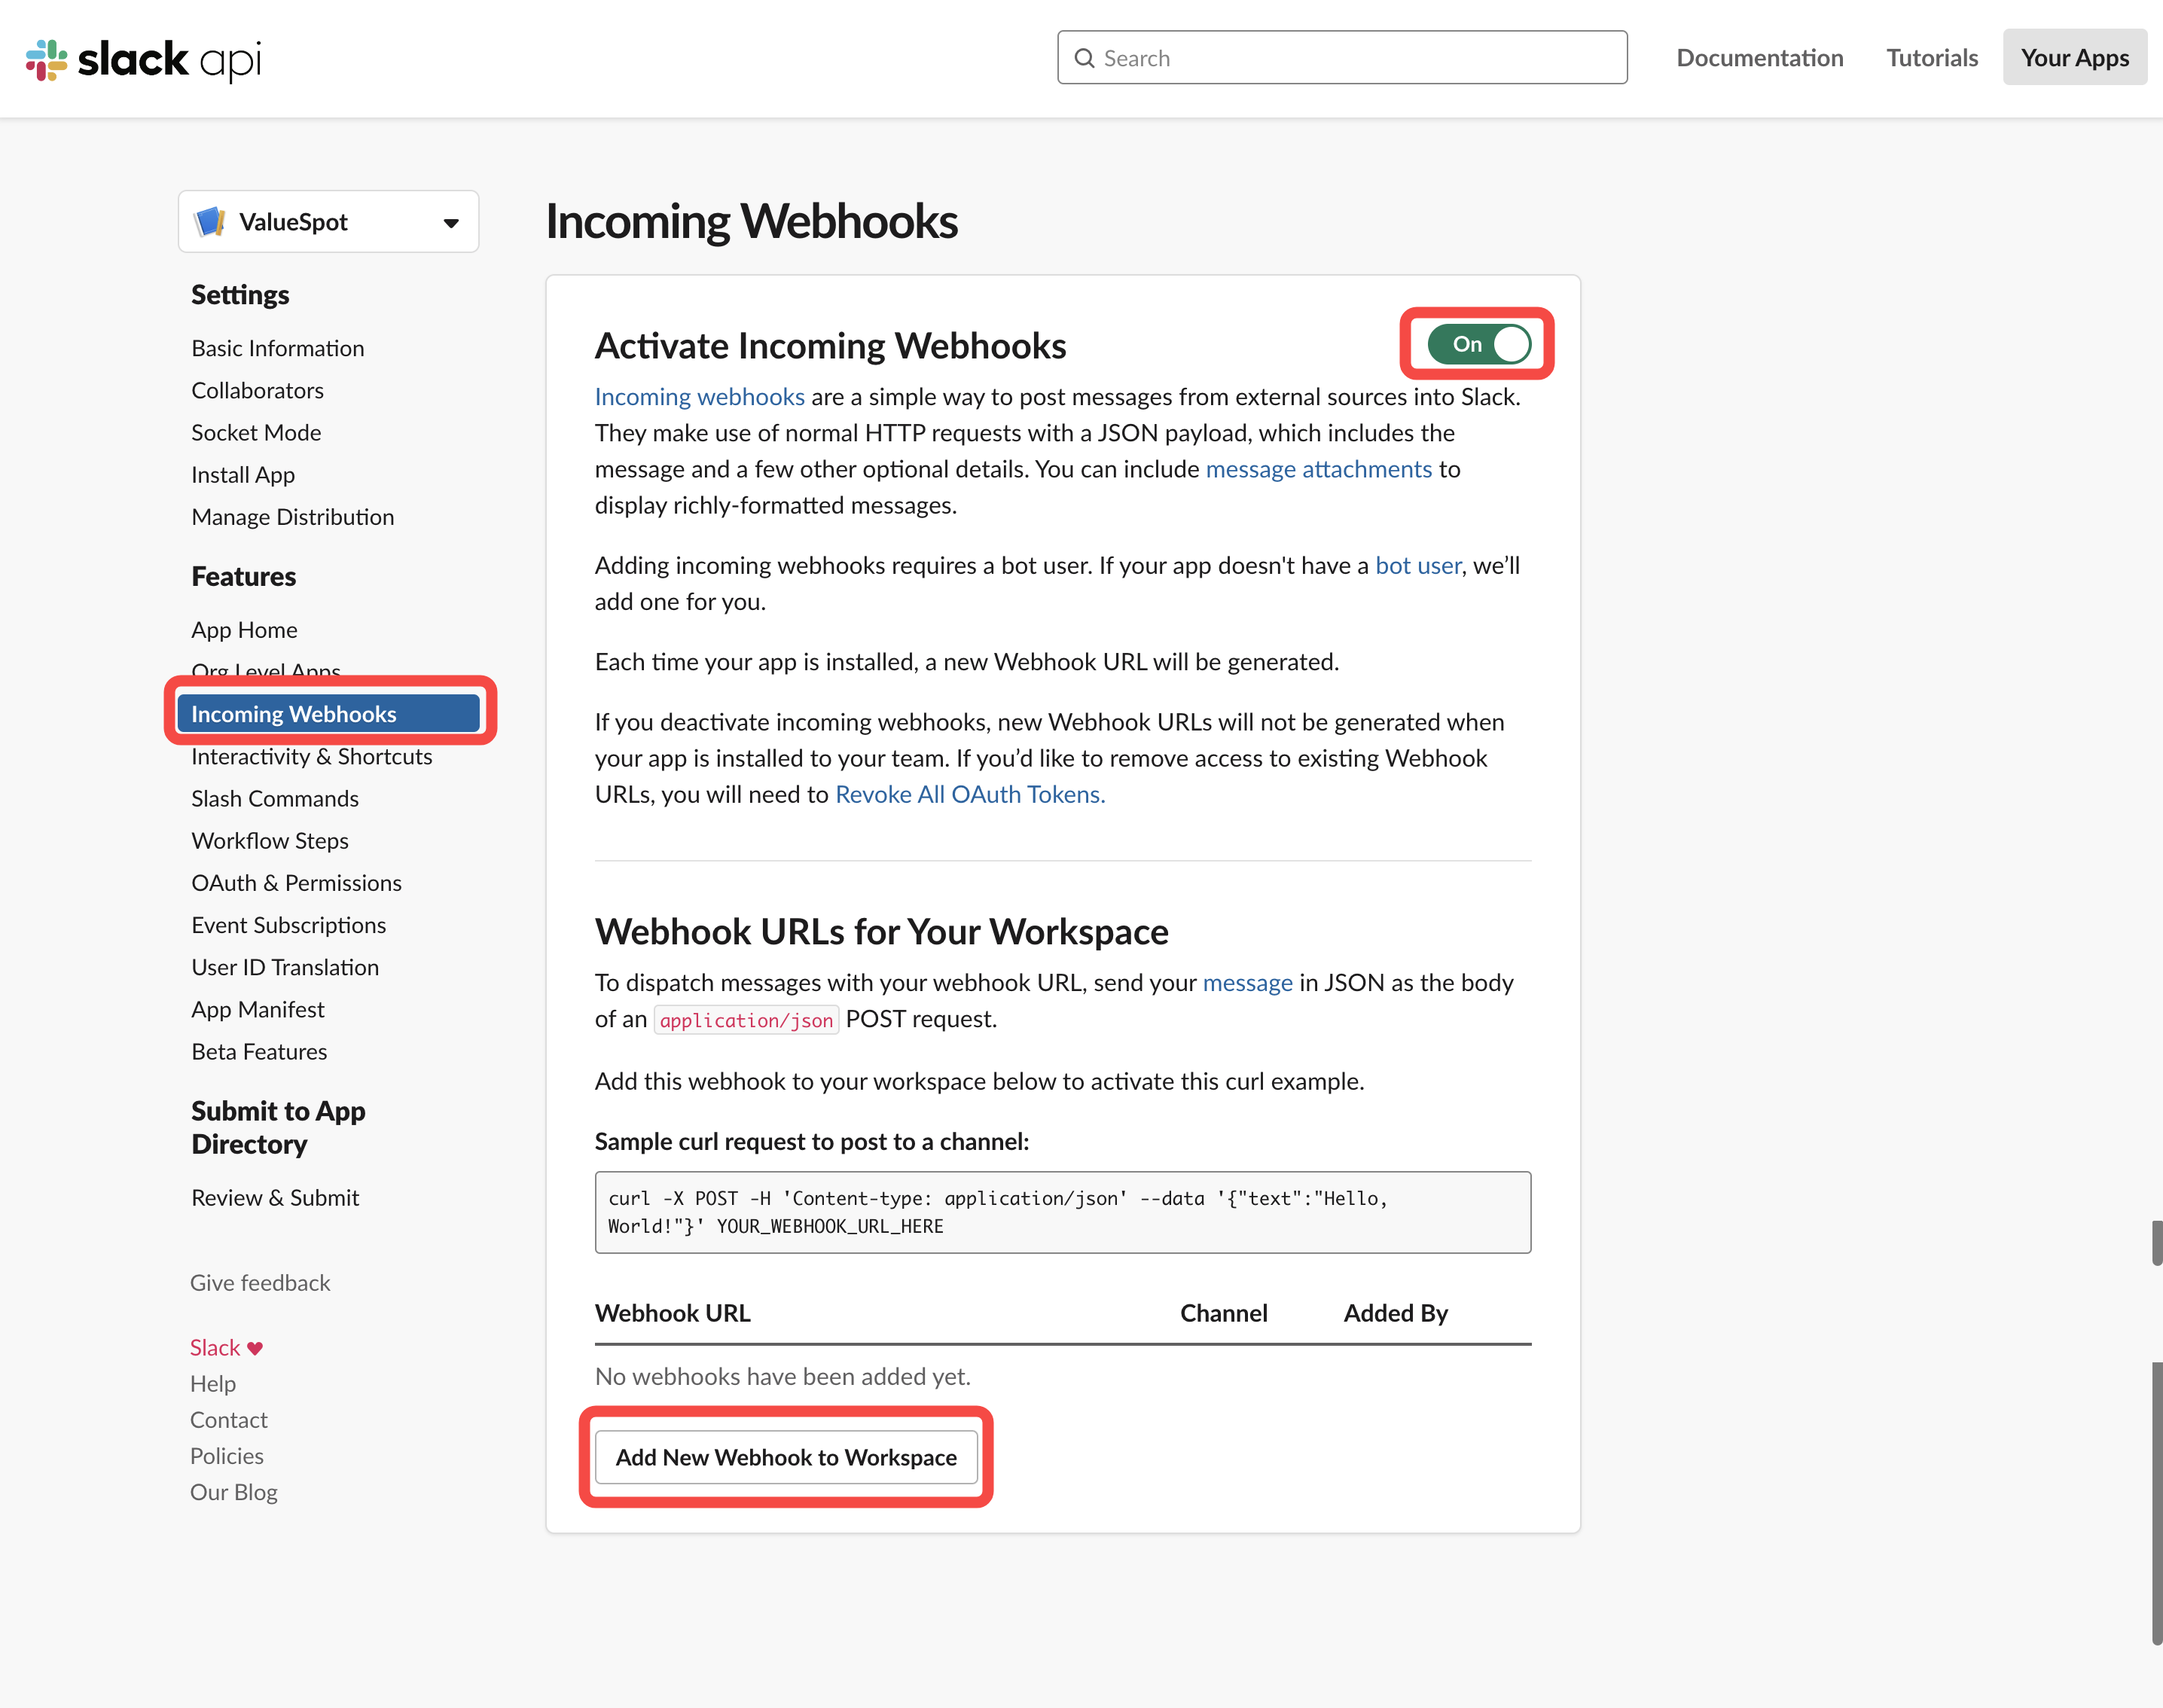 | 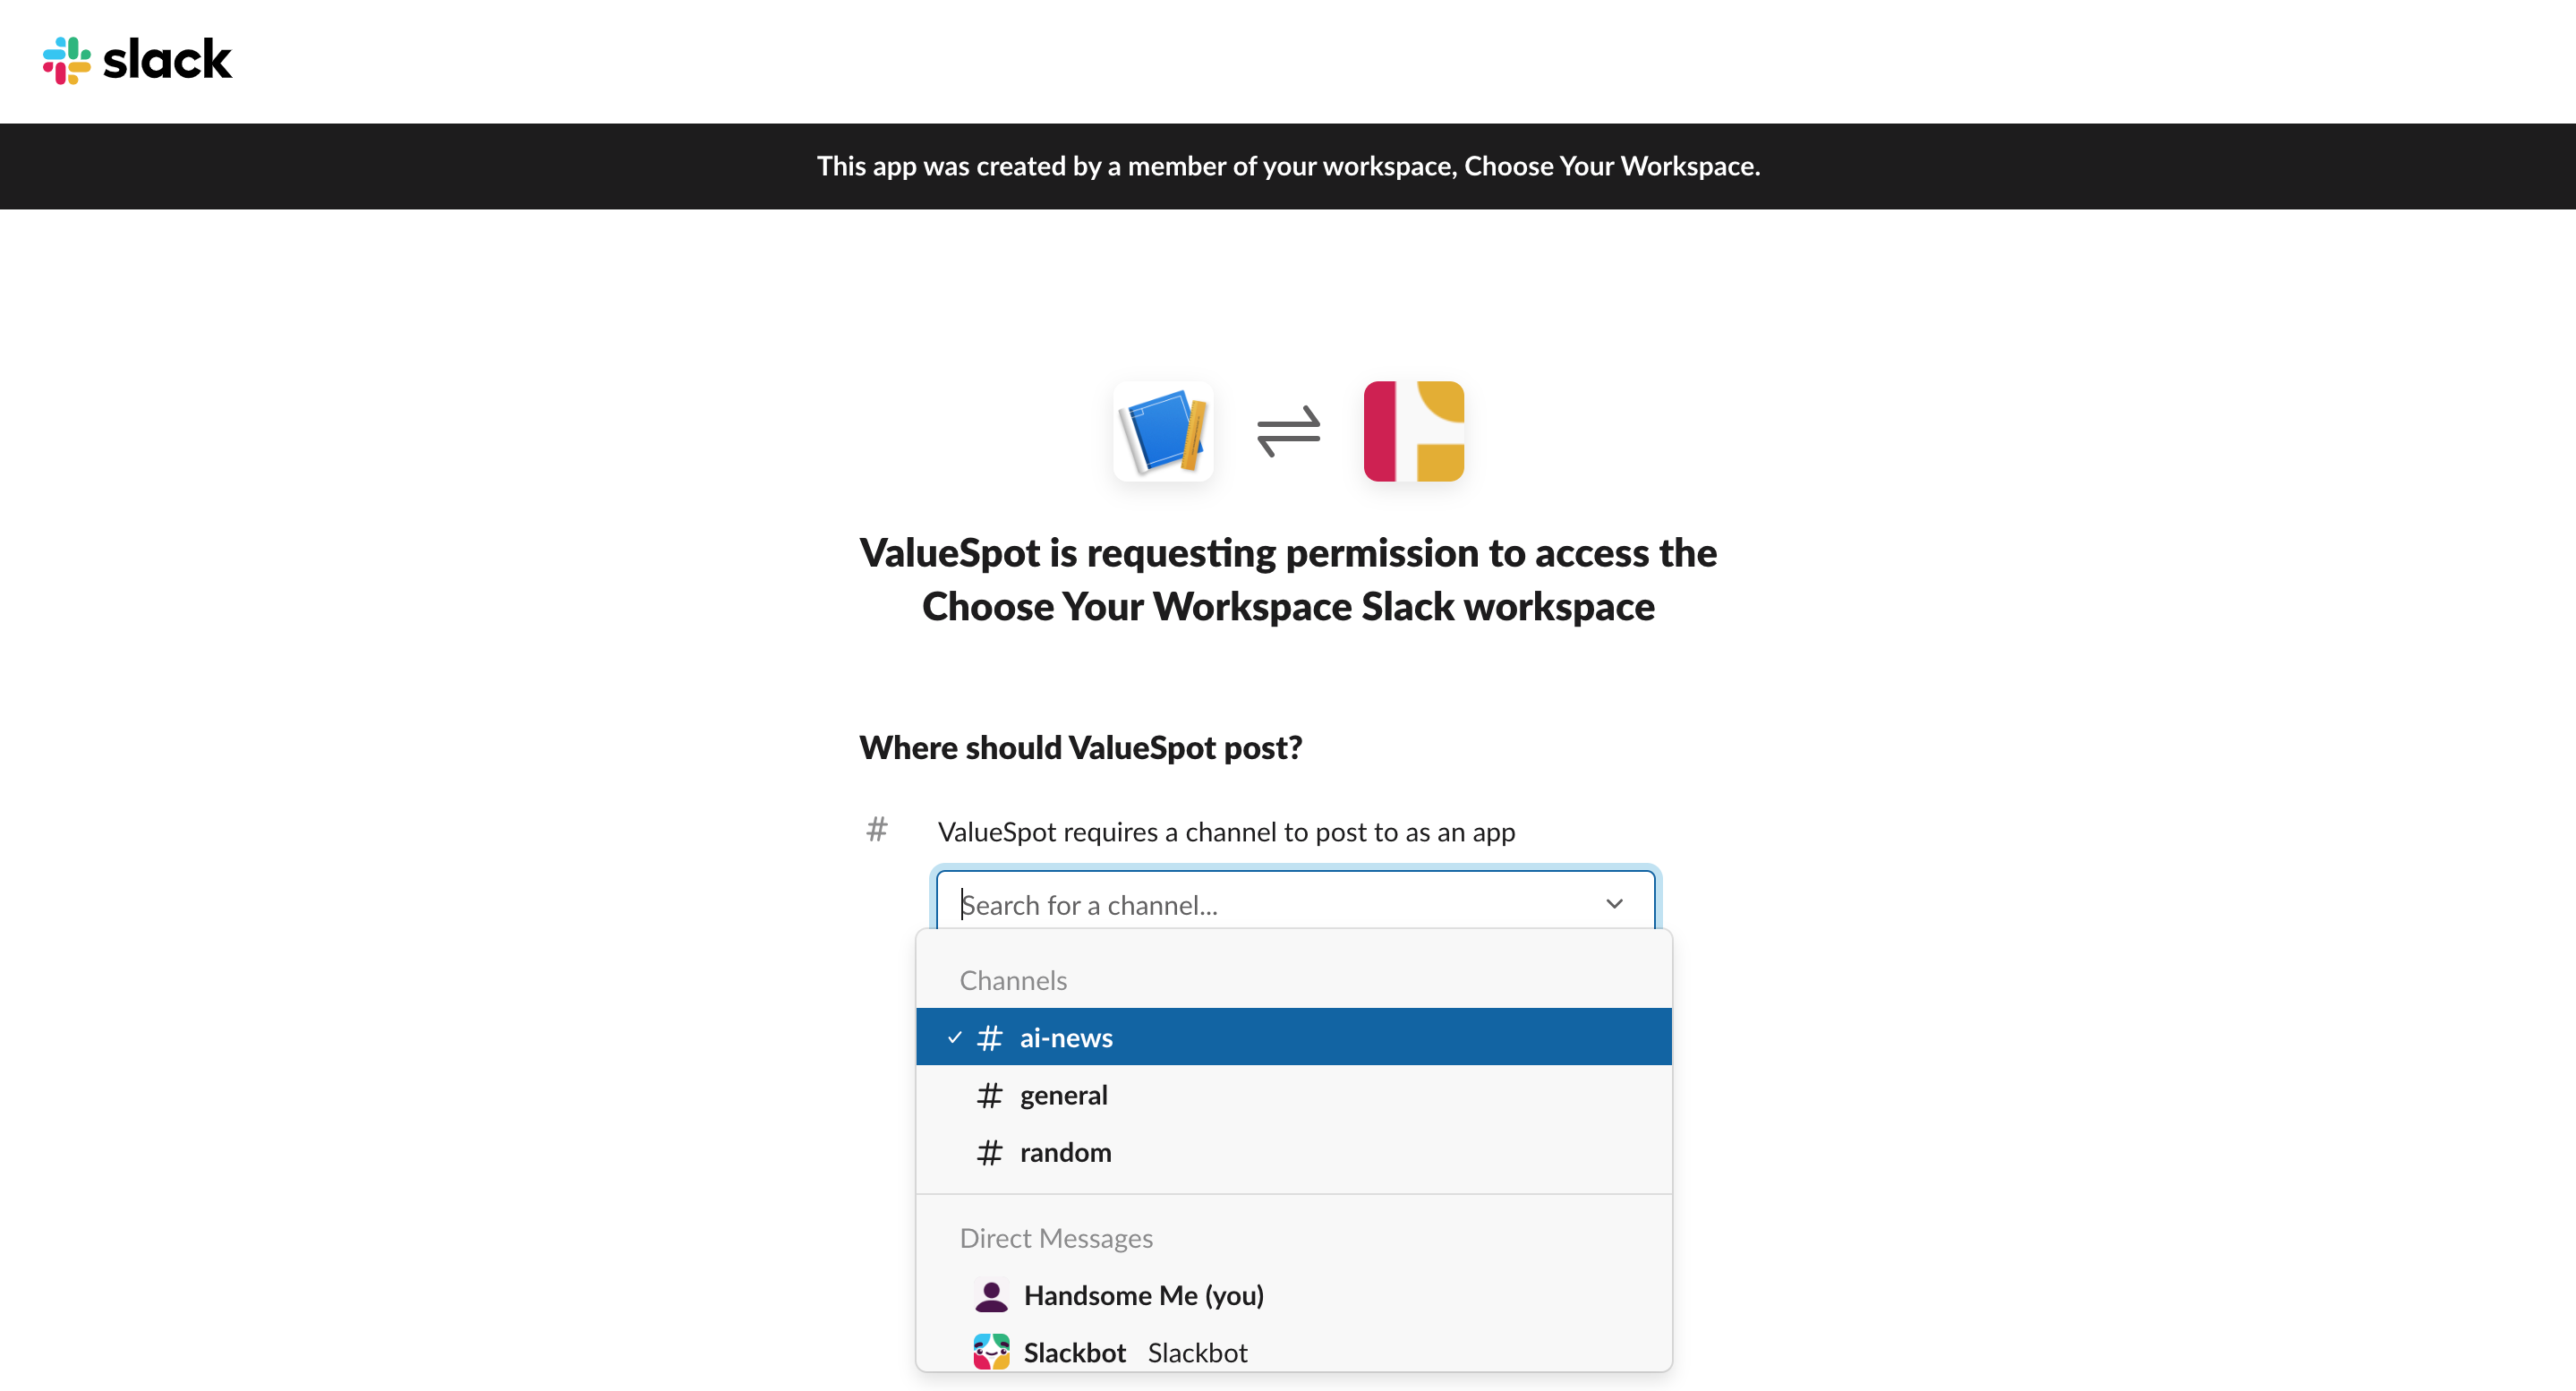 | 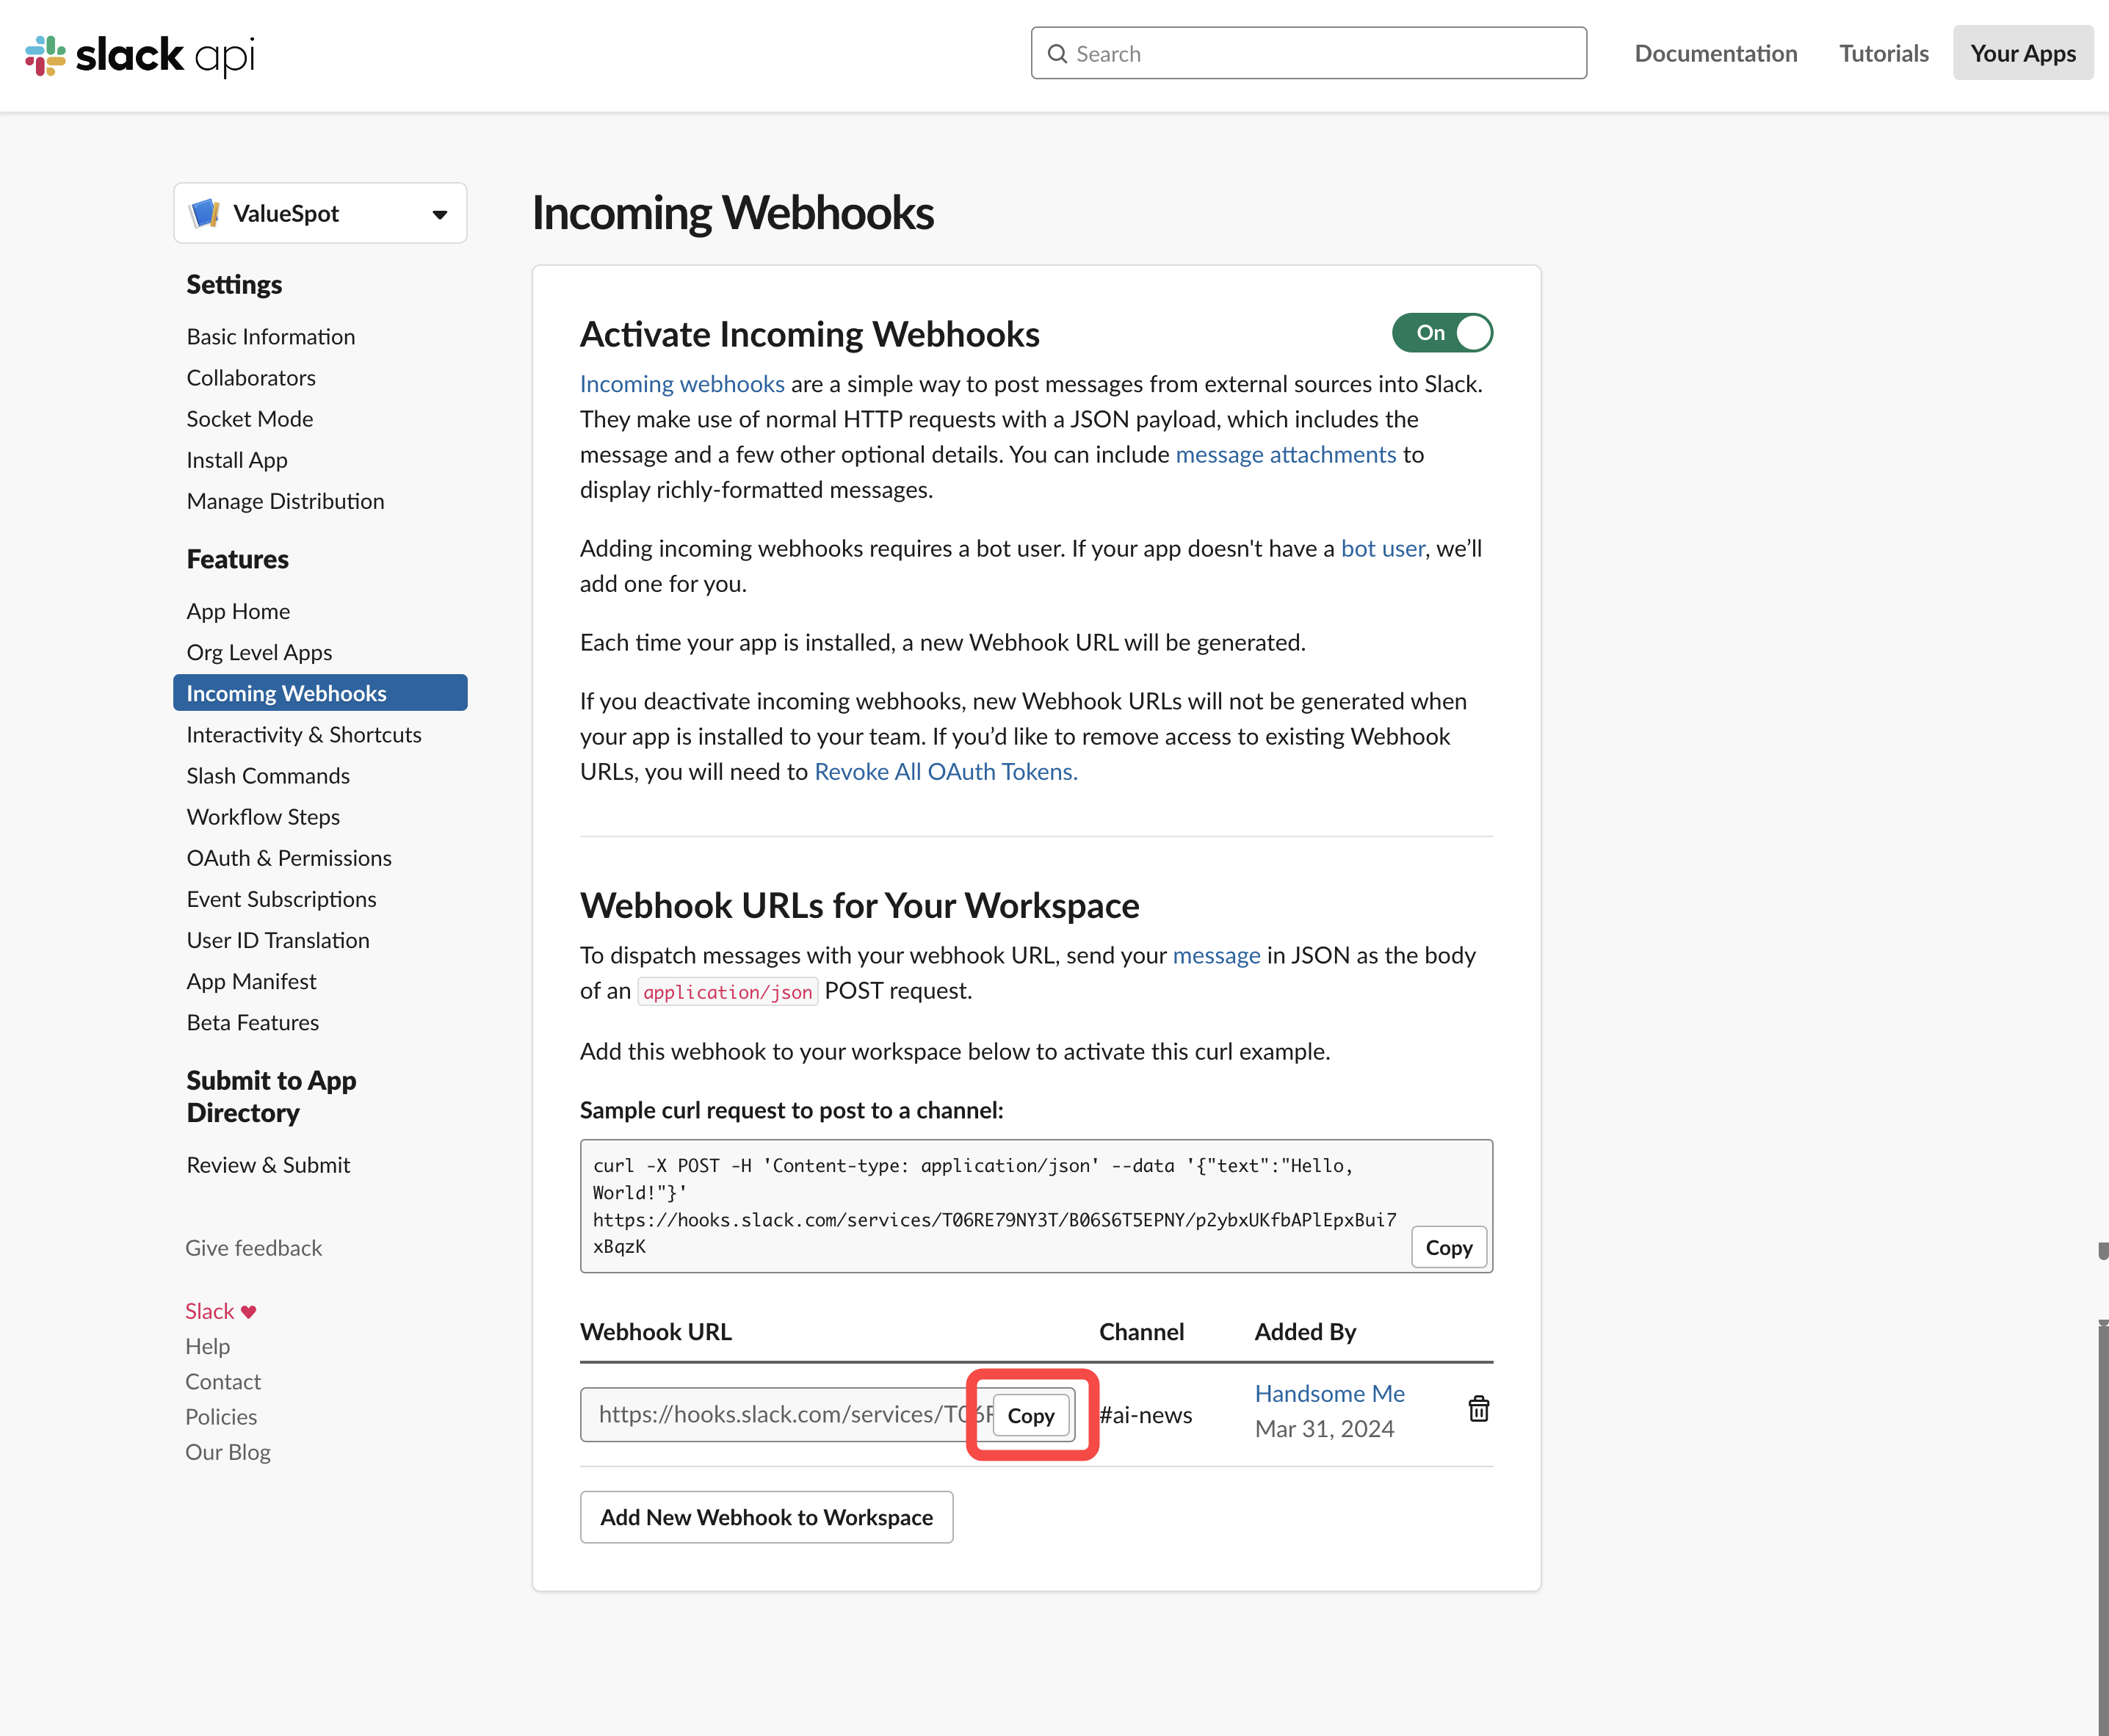 |
Step 4: Your Webhook is now set up. Click "Copy" to copy the Webhook URL and paste it into ValueSpot.
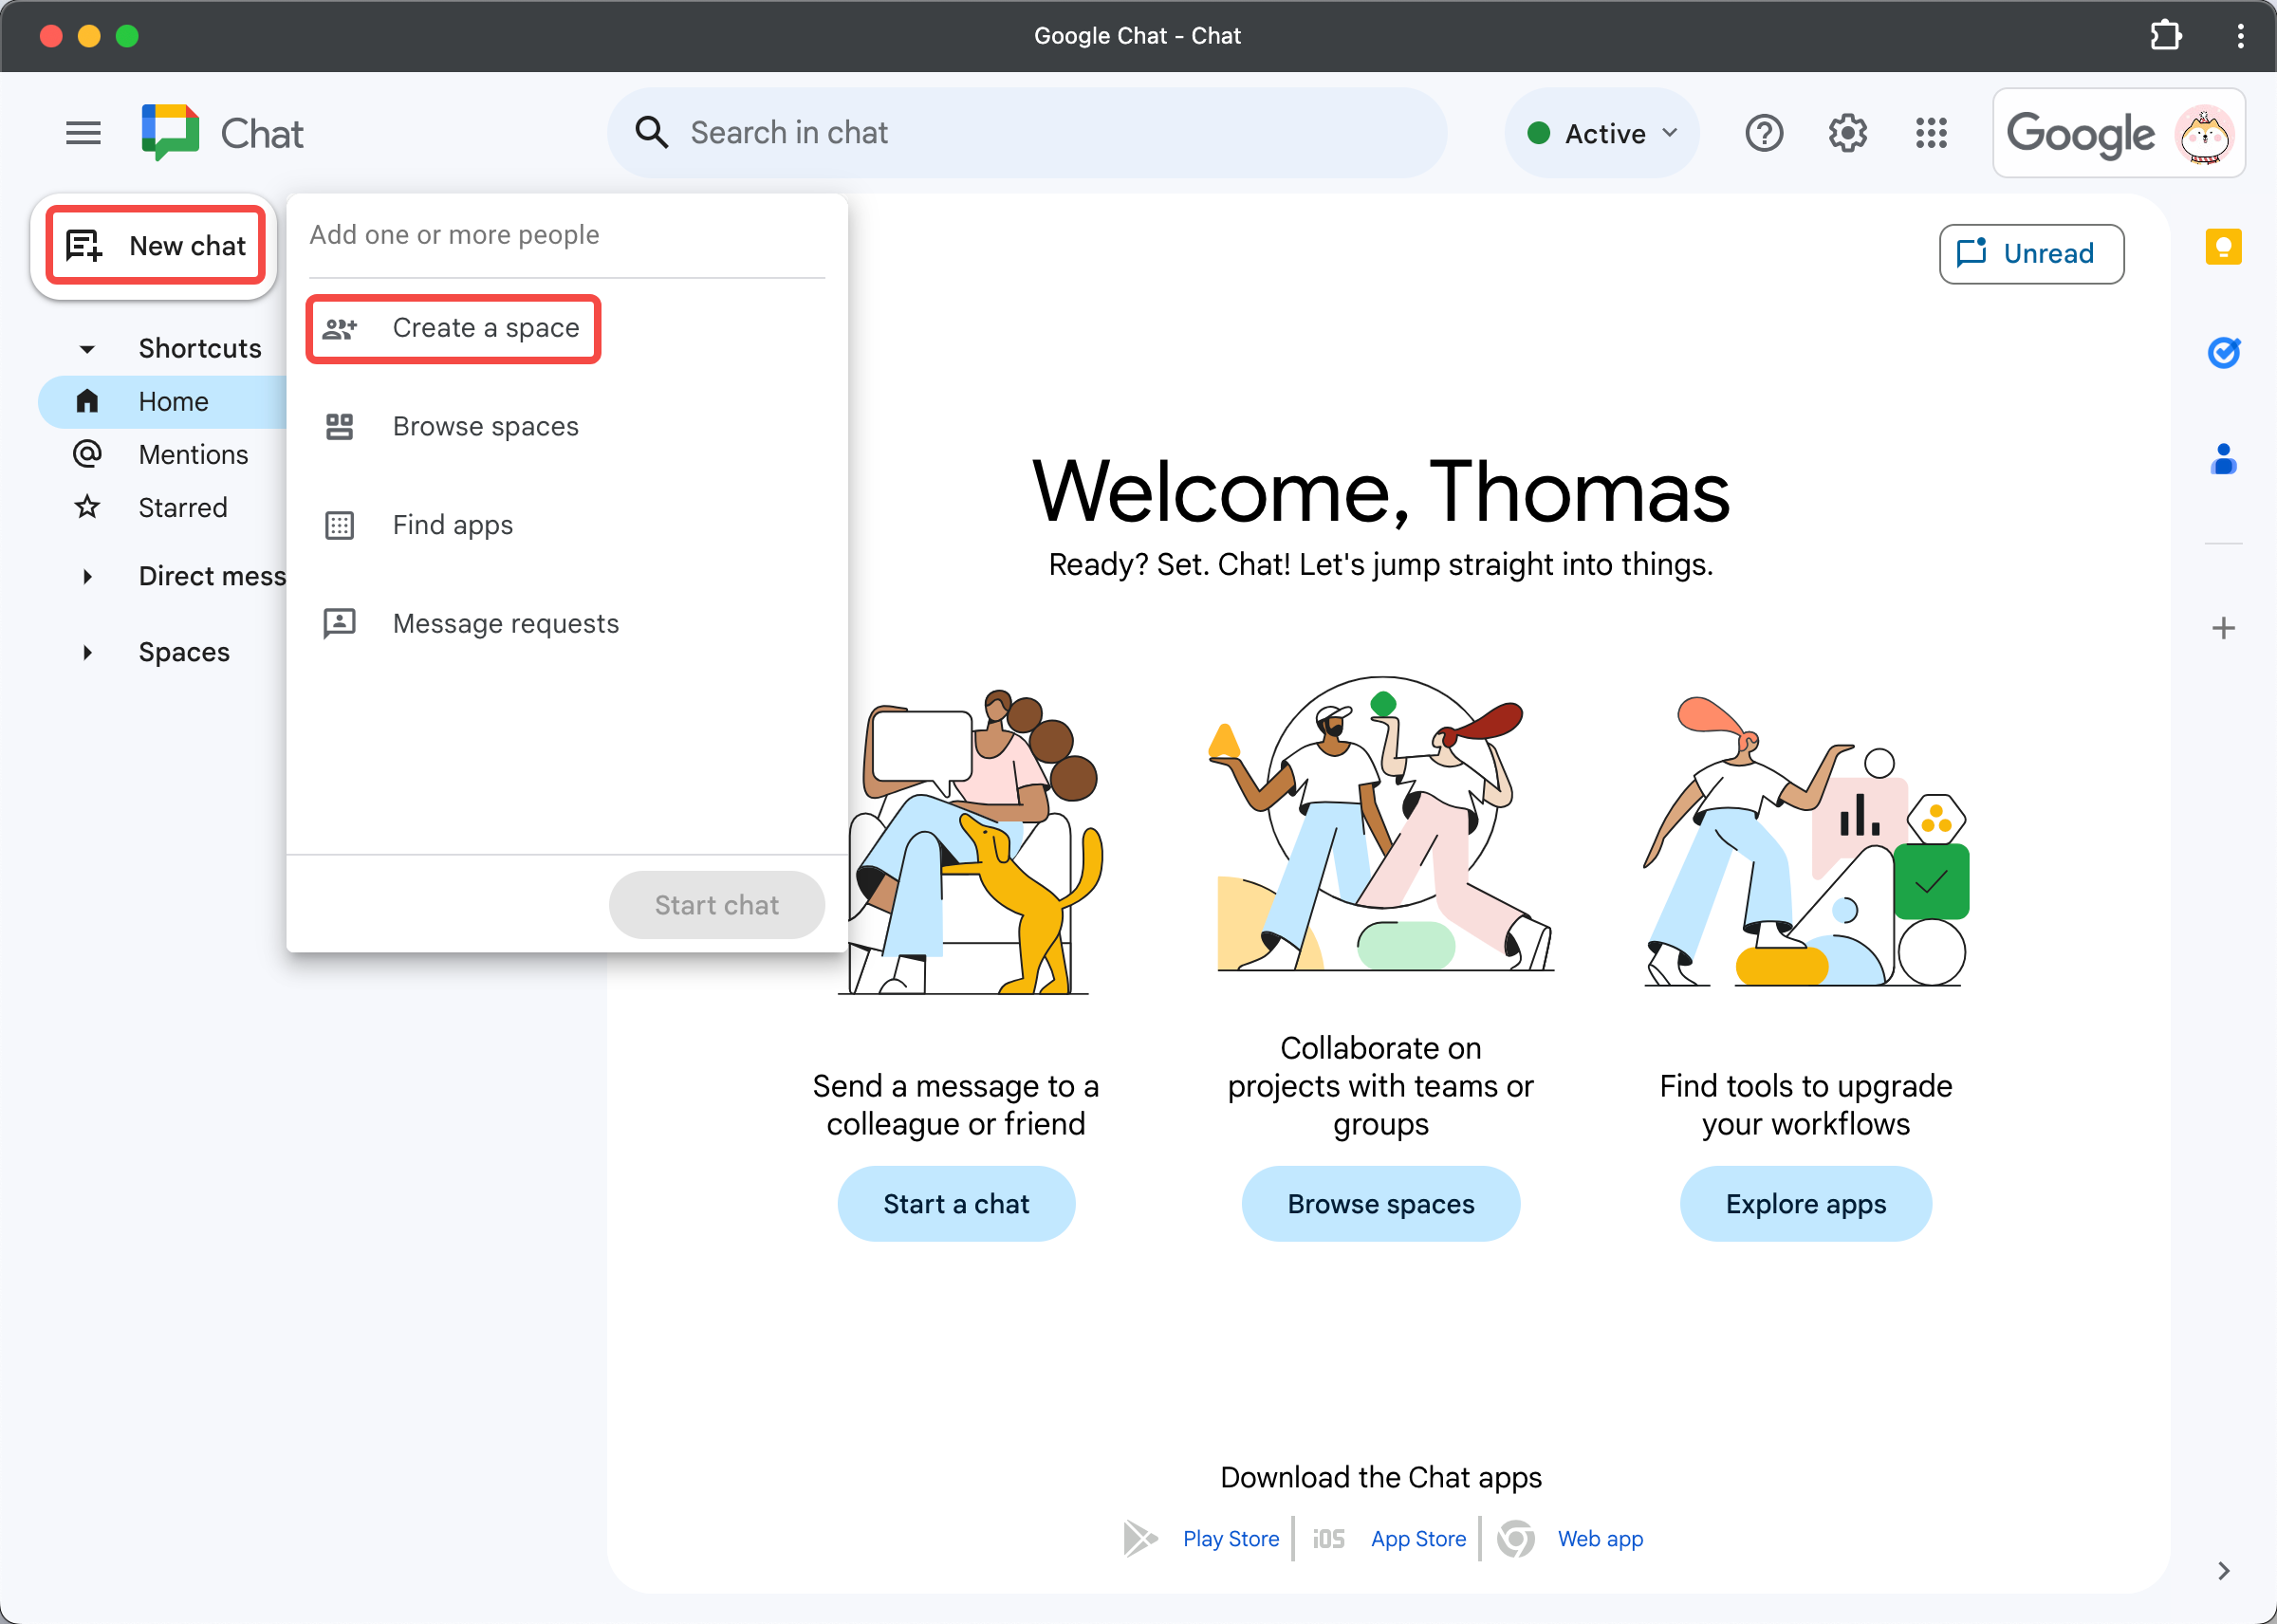
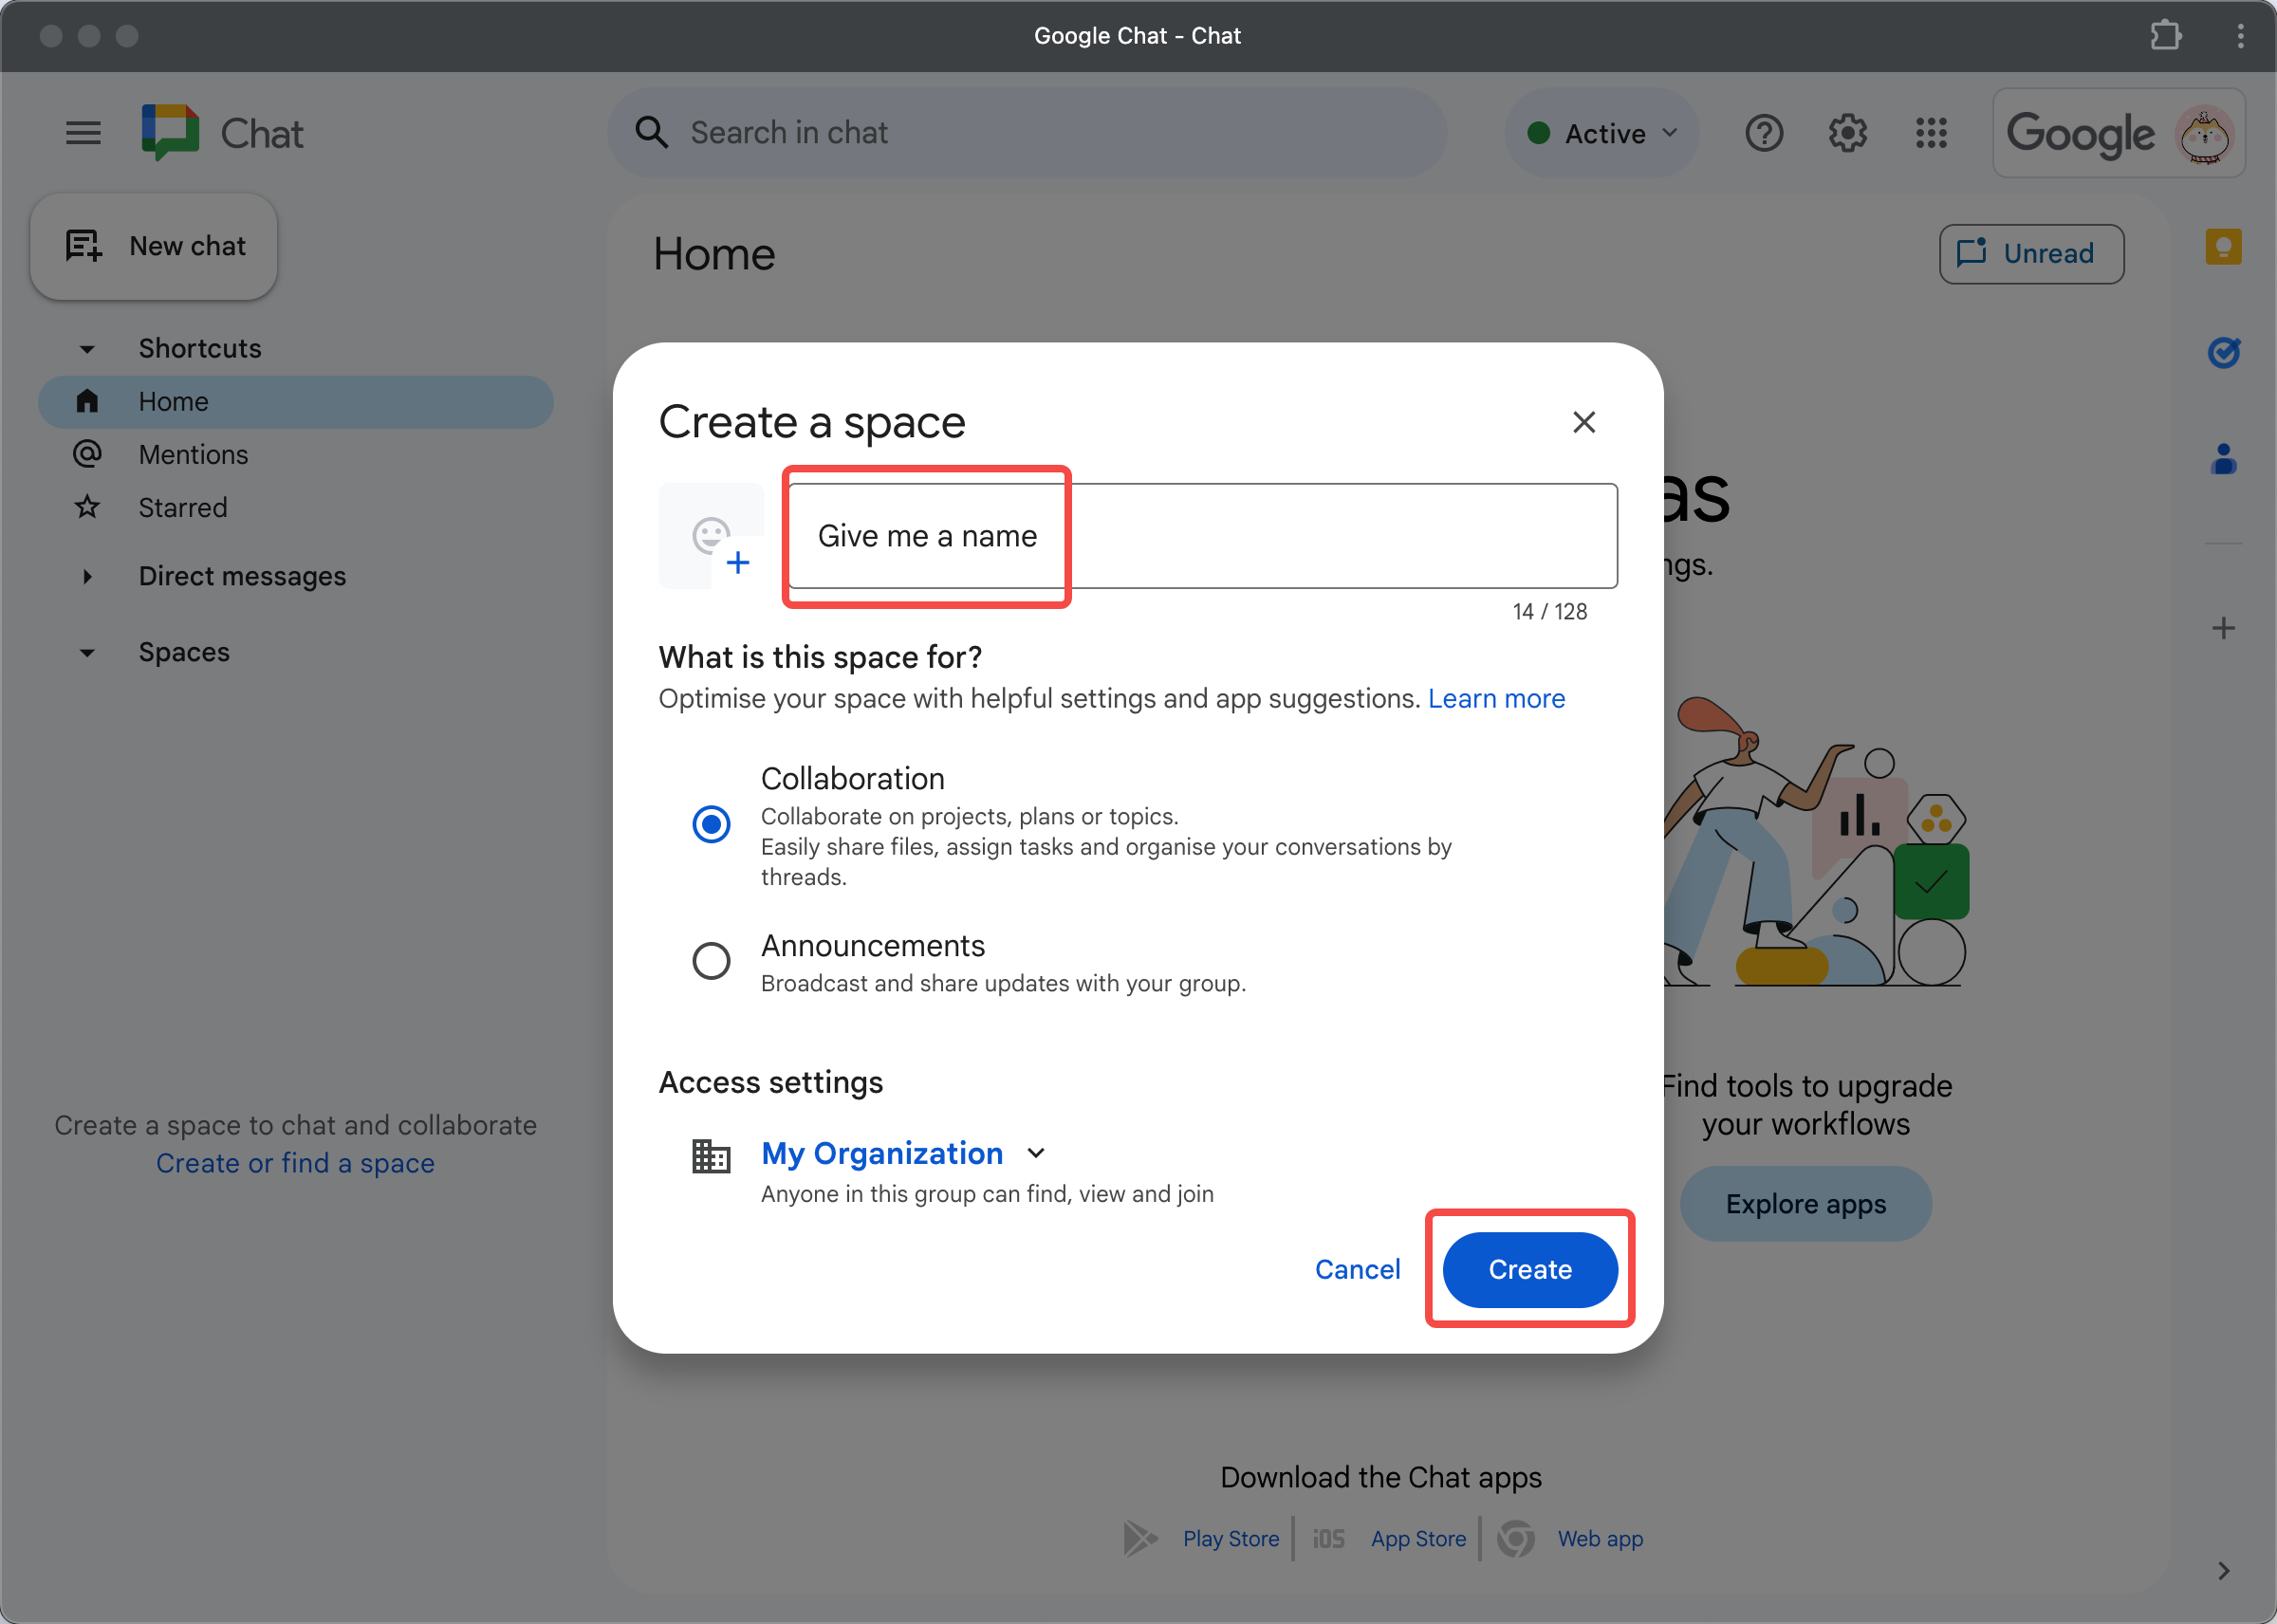
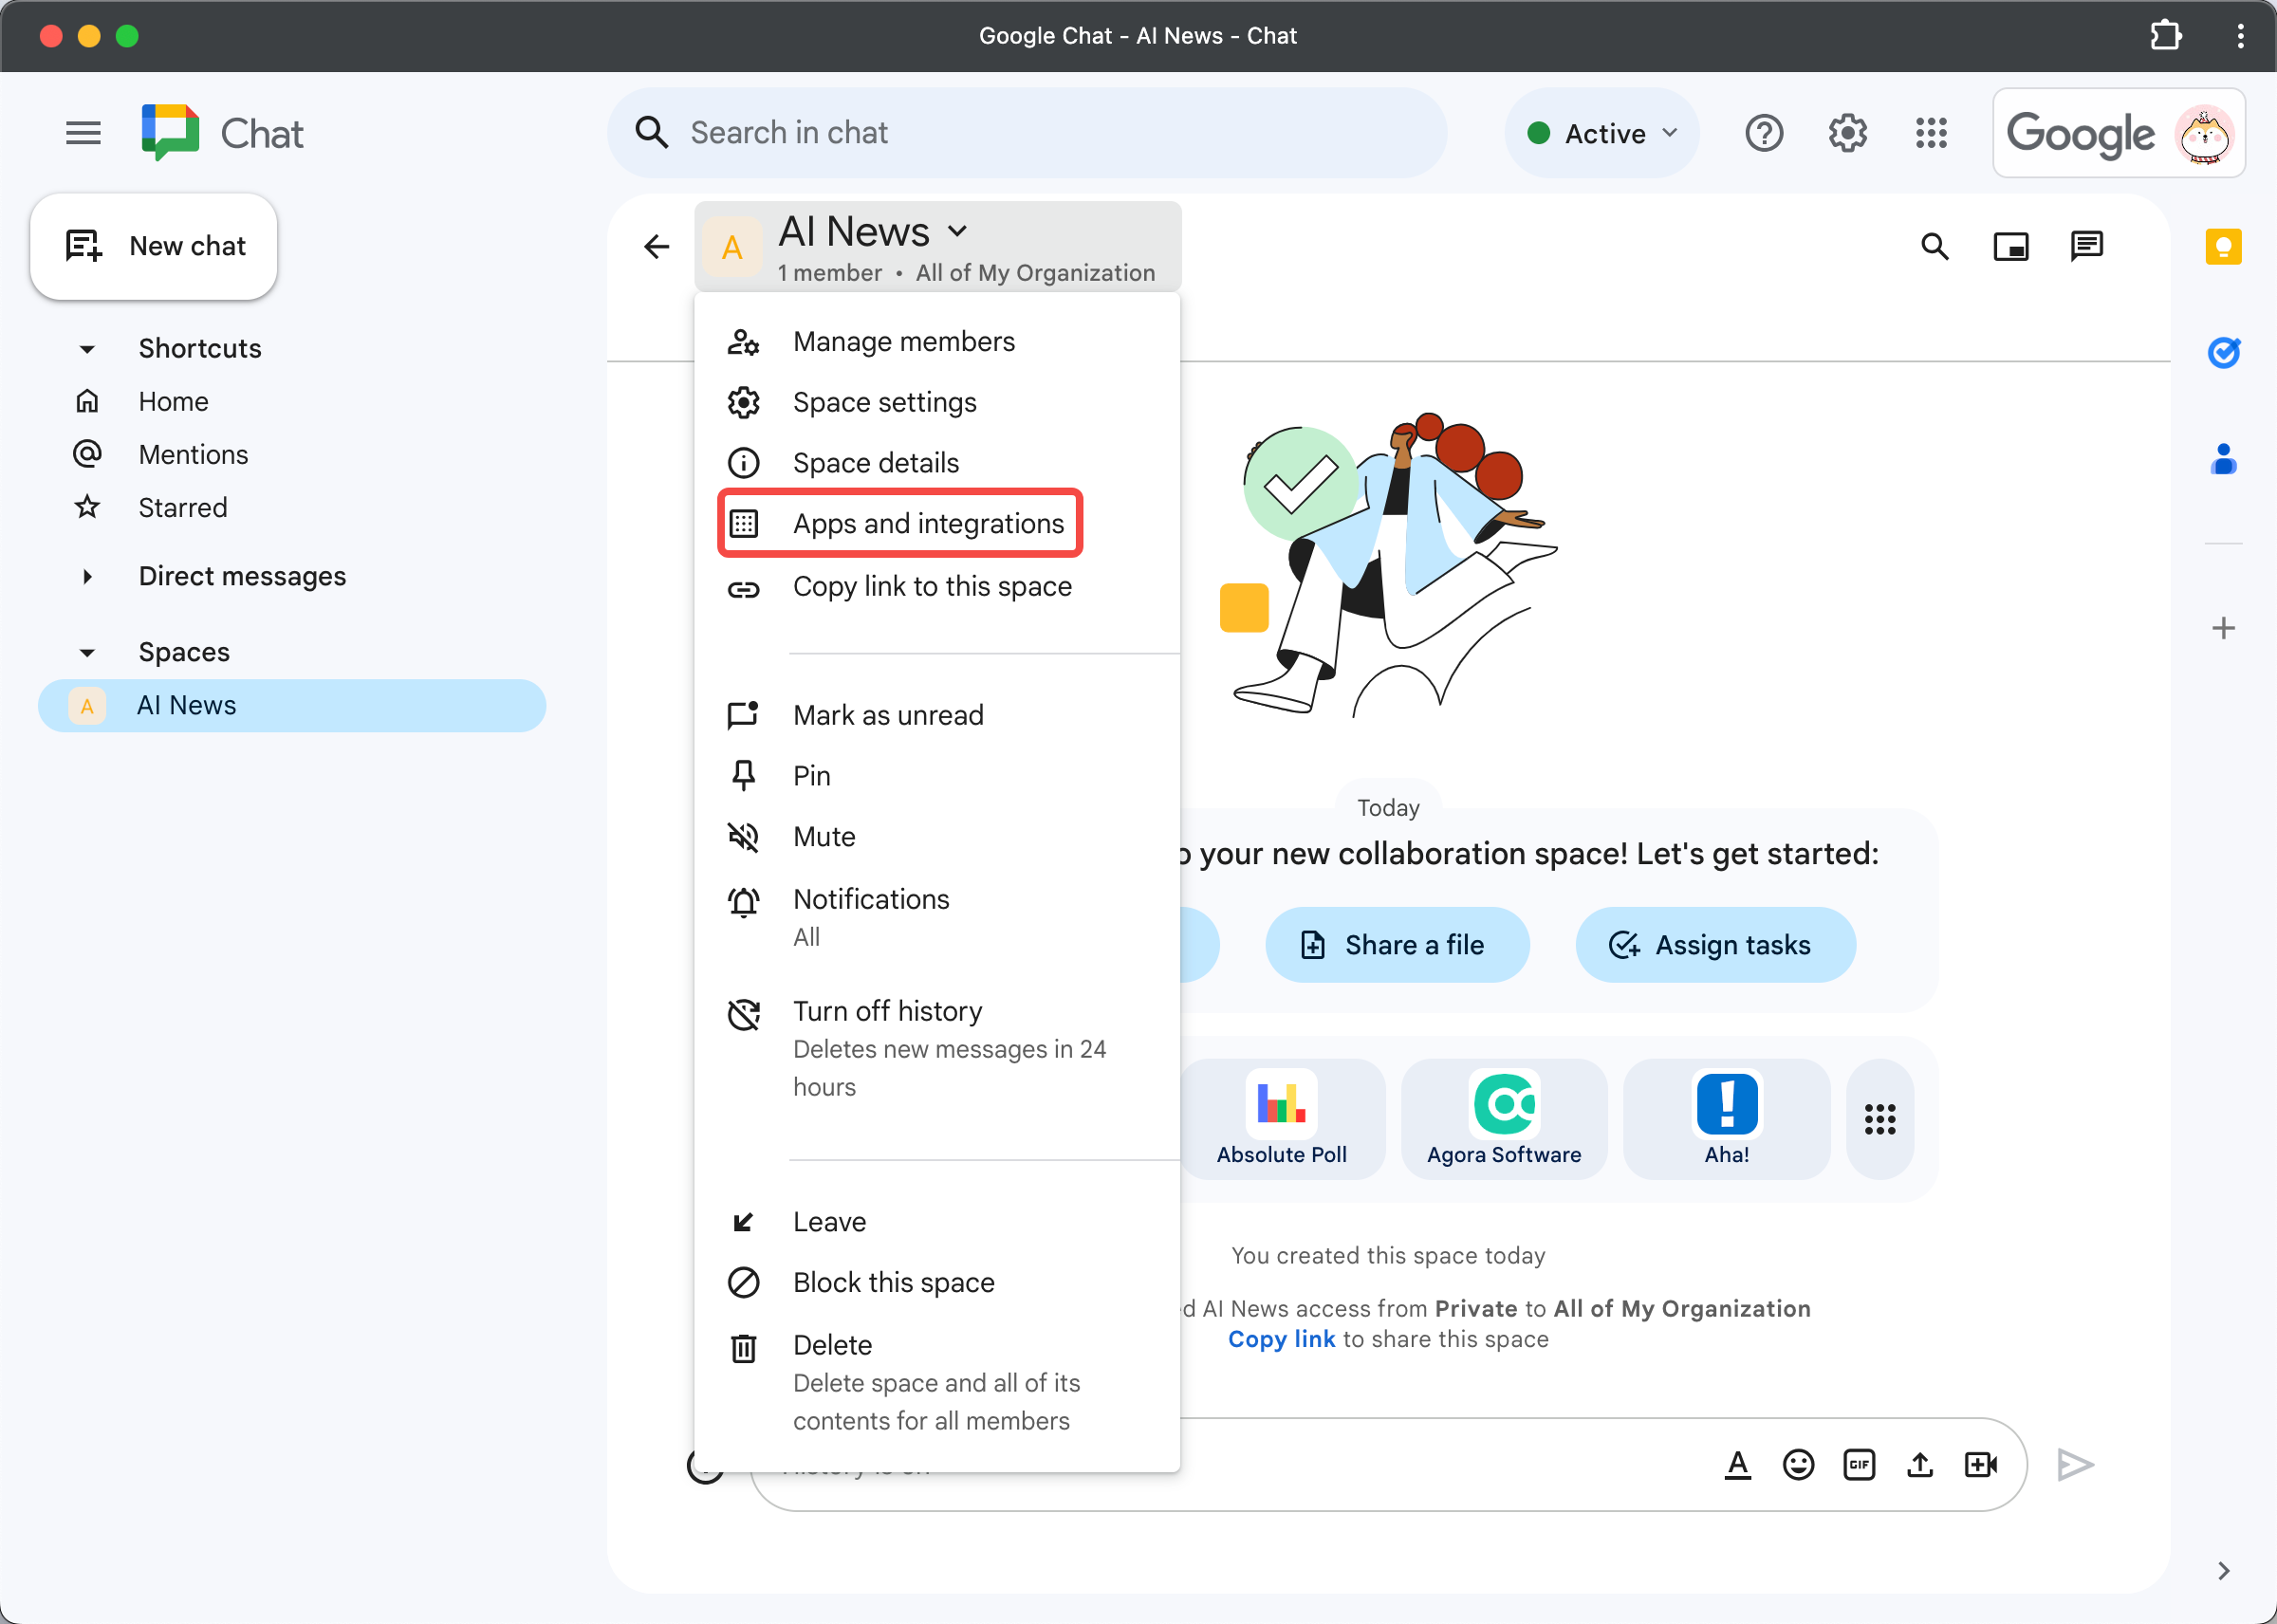
Google Chat
Step 1: Open the Google Chat main interface and create a space for receiving messages. You may also invite colleagues or friends to join this space for discussions.
| Step 1.1 | Step 1.2 |
|---|---|
 |  |
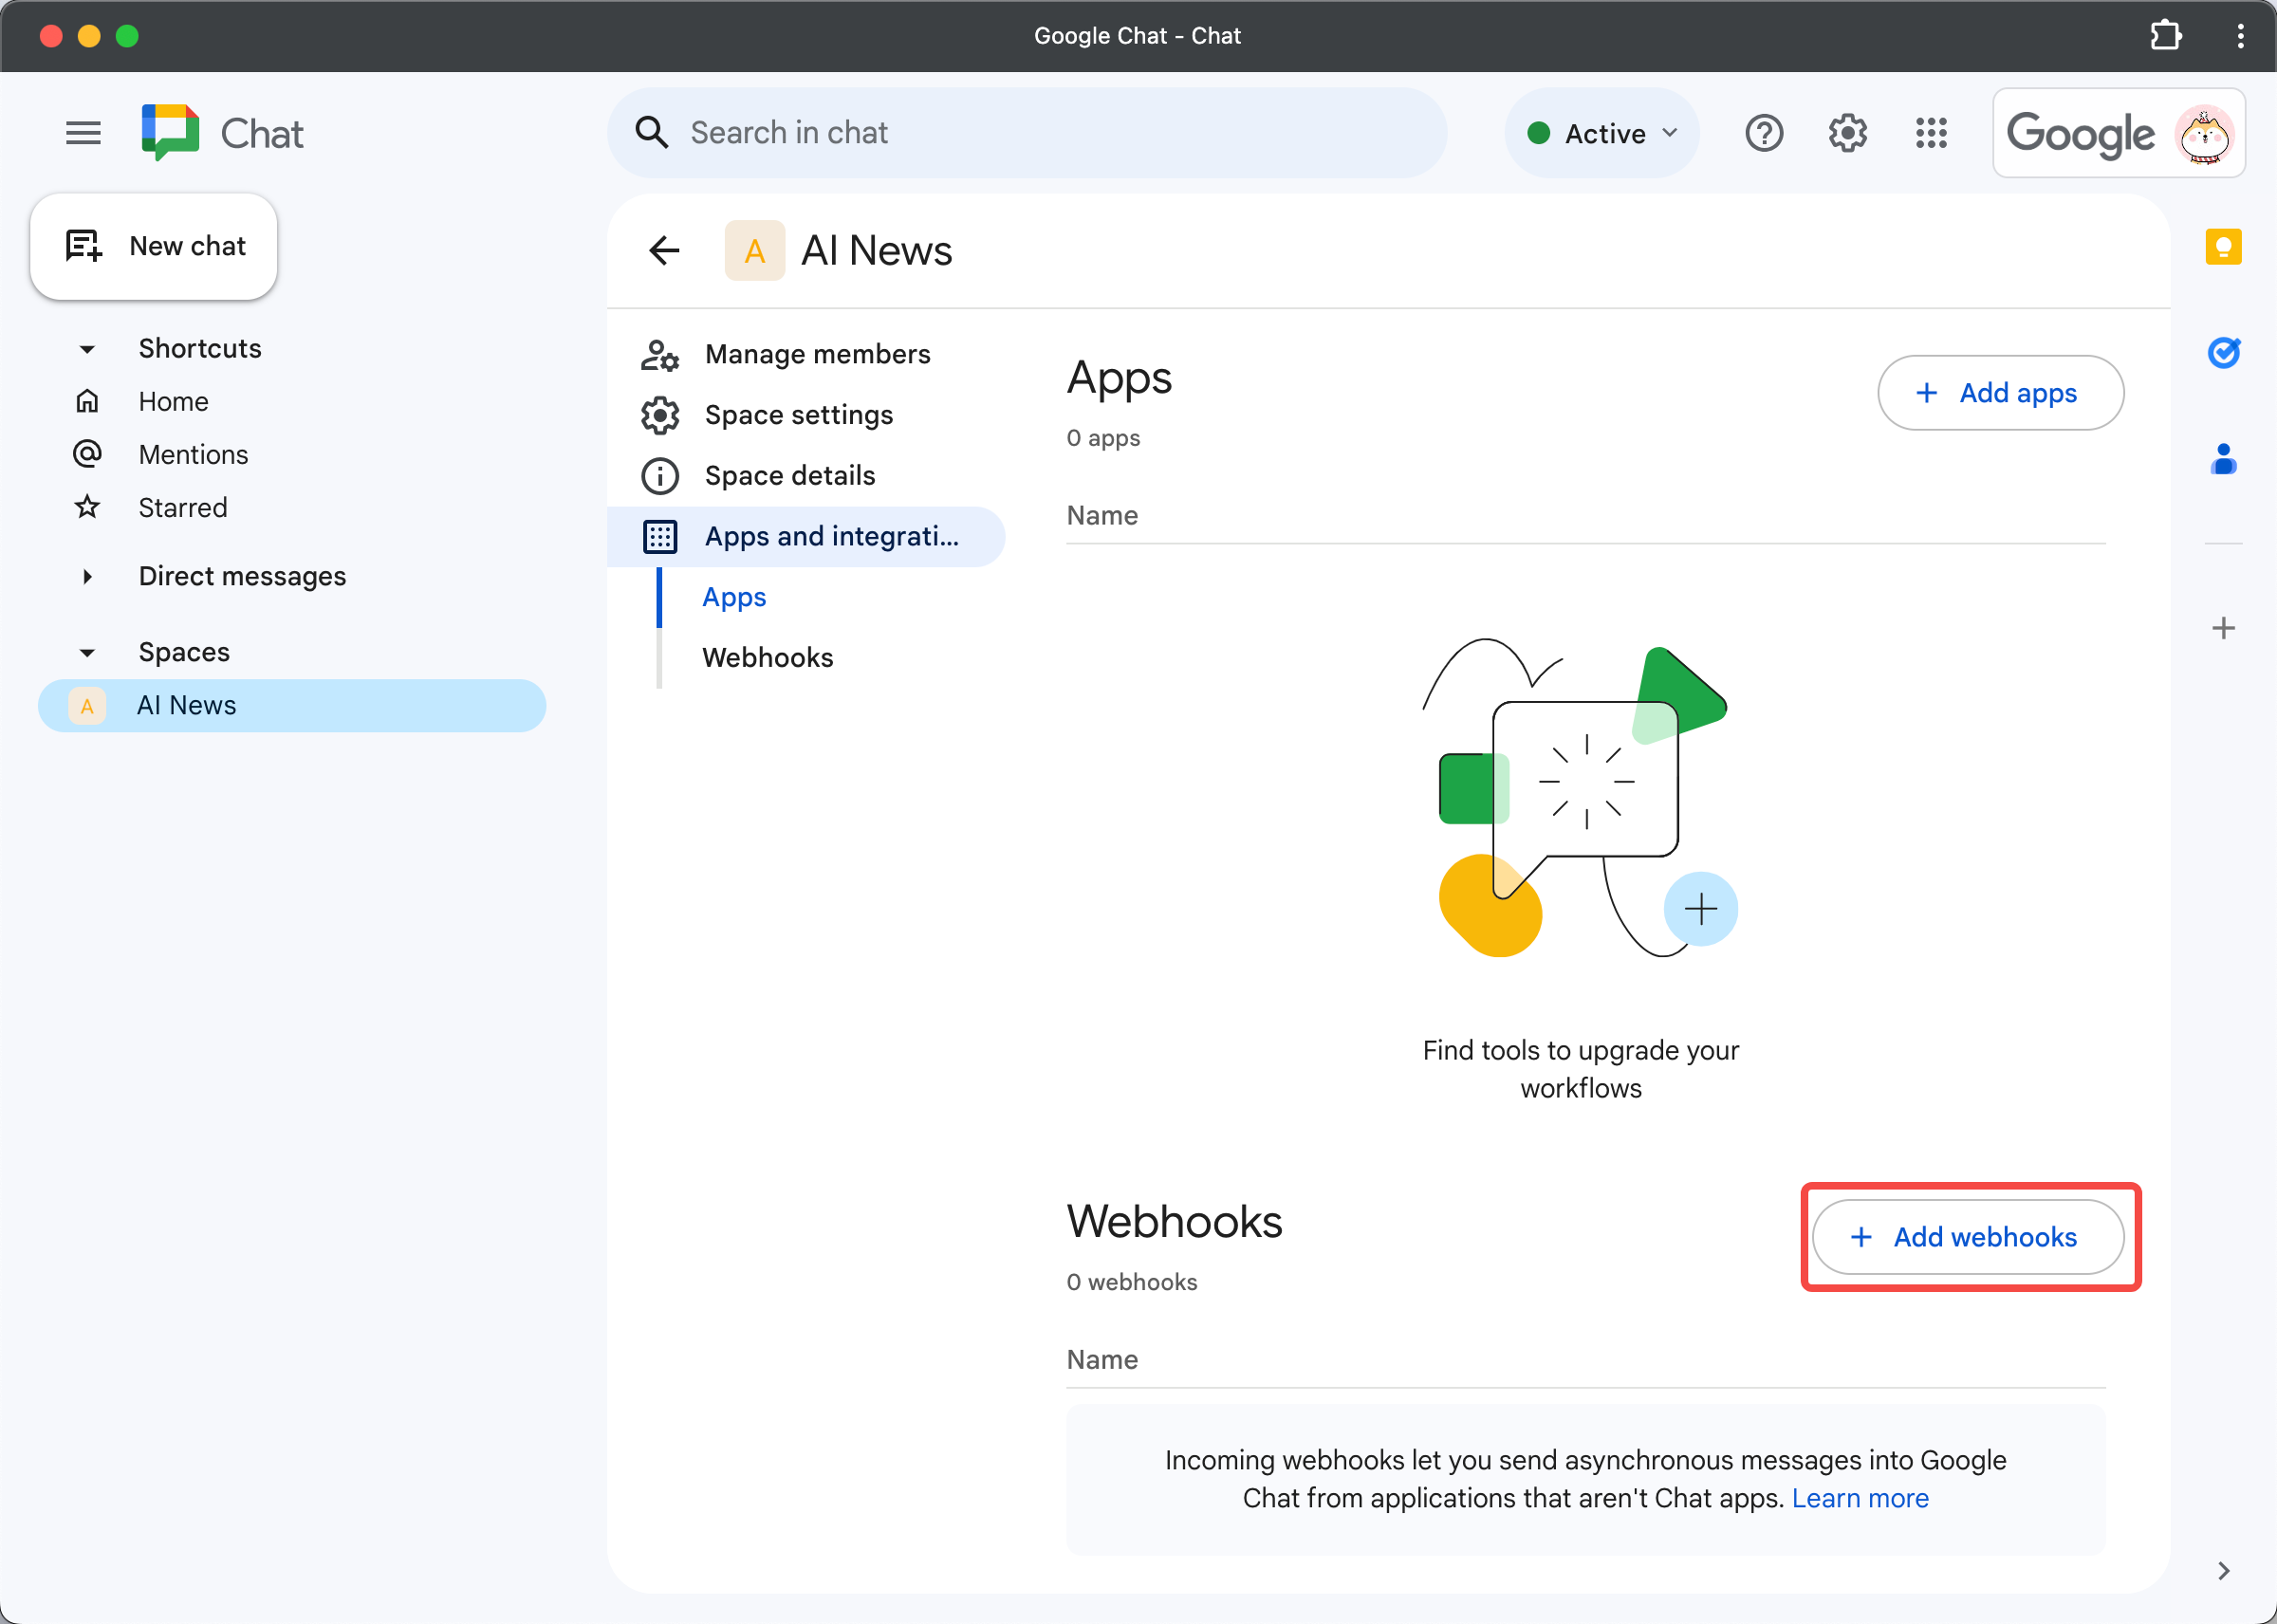
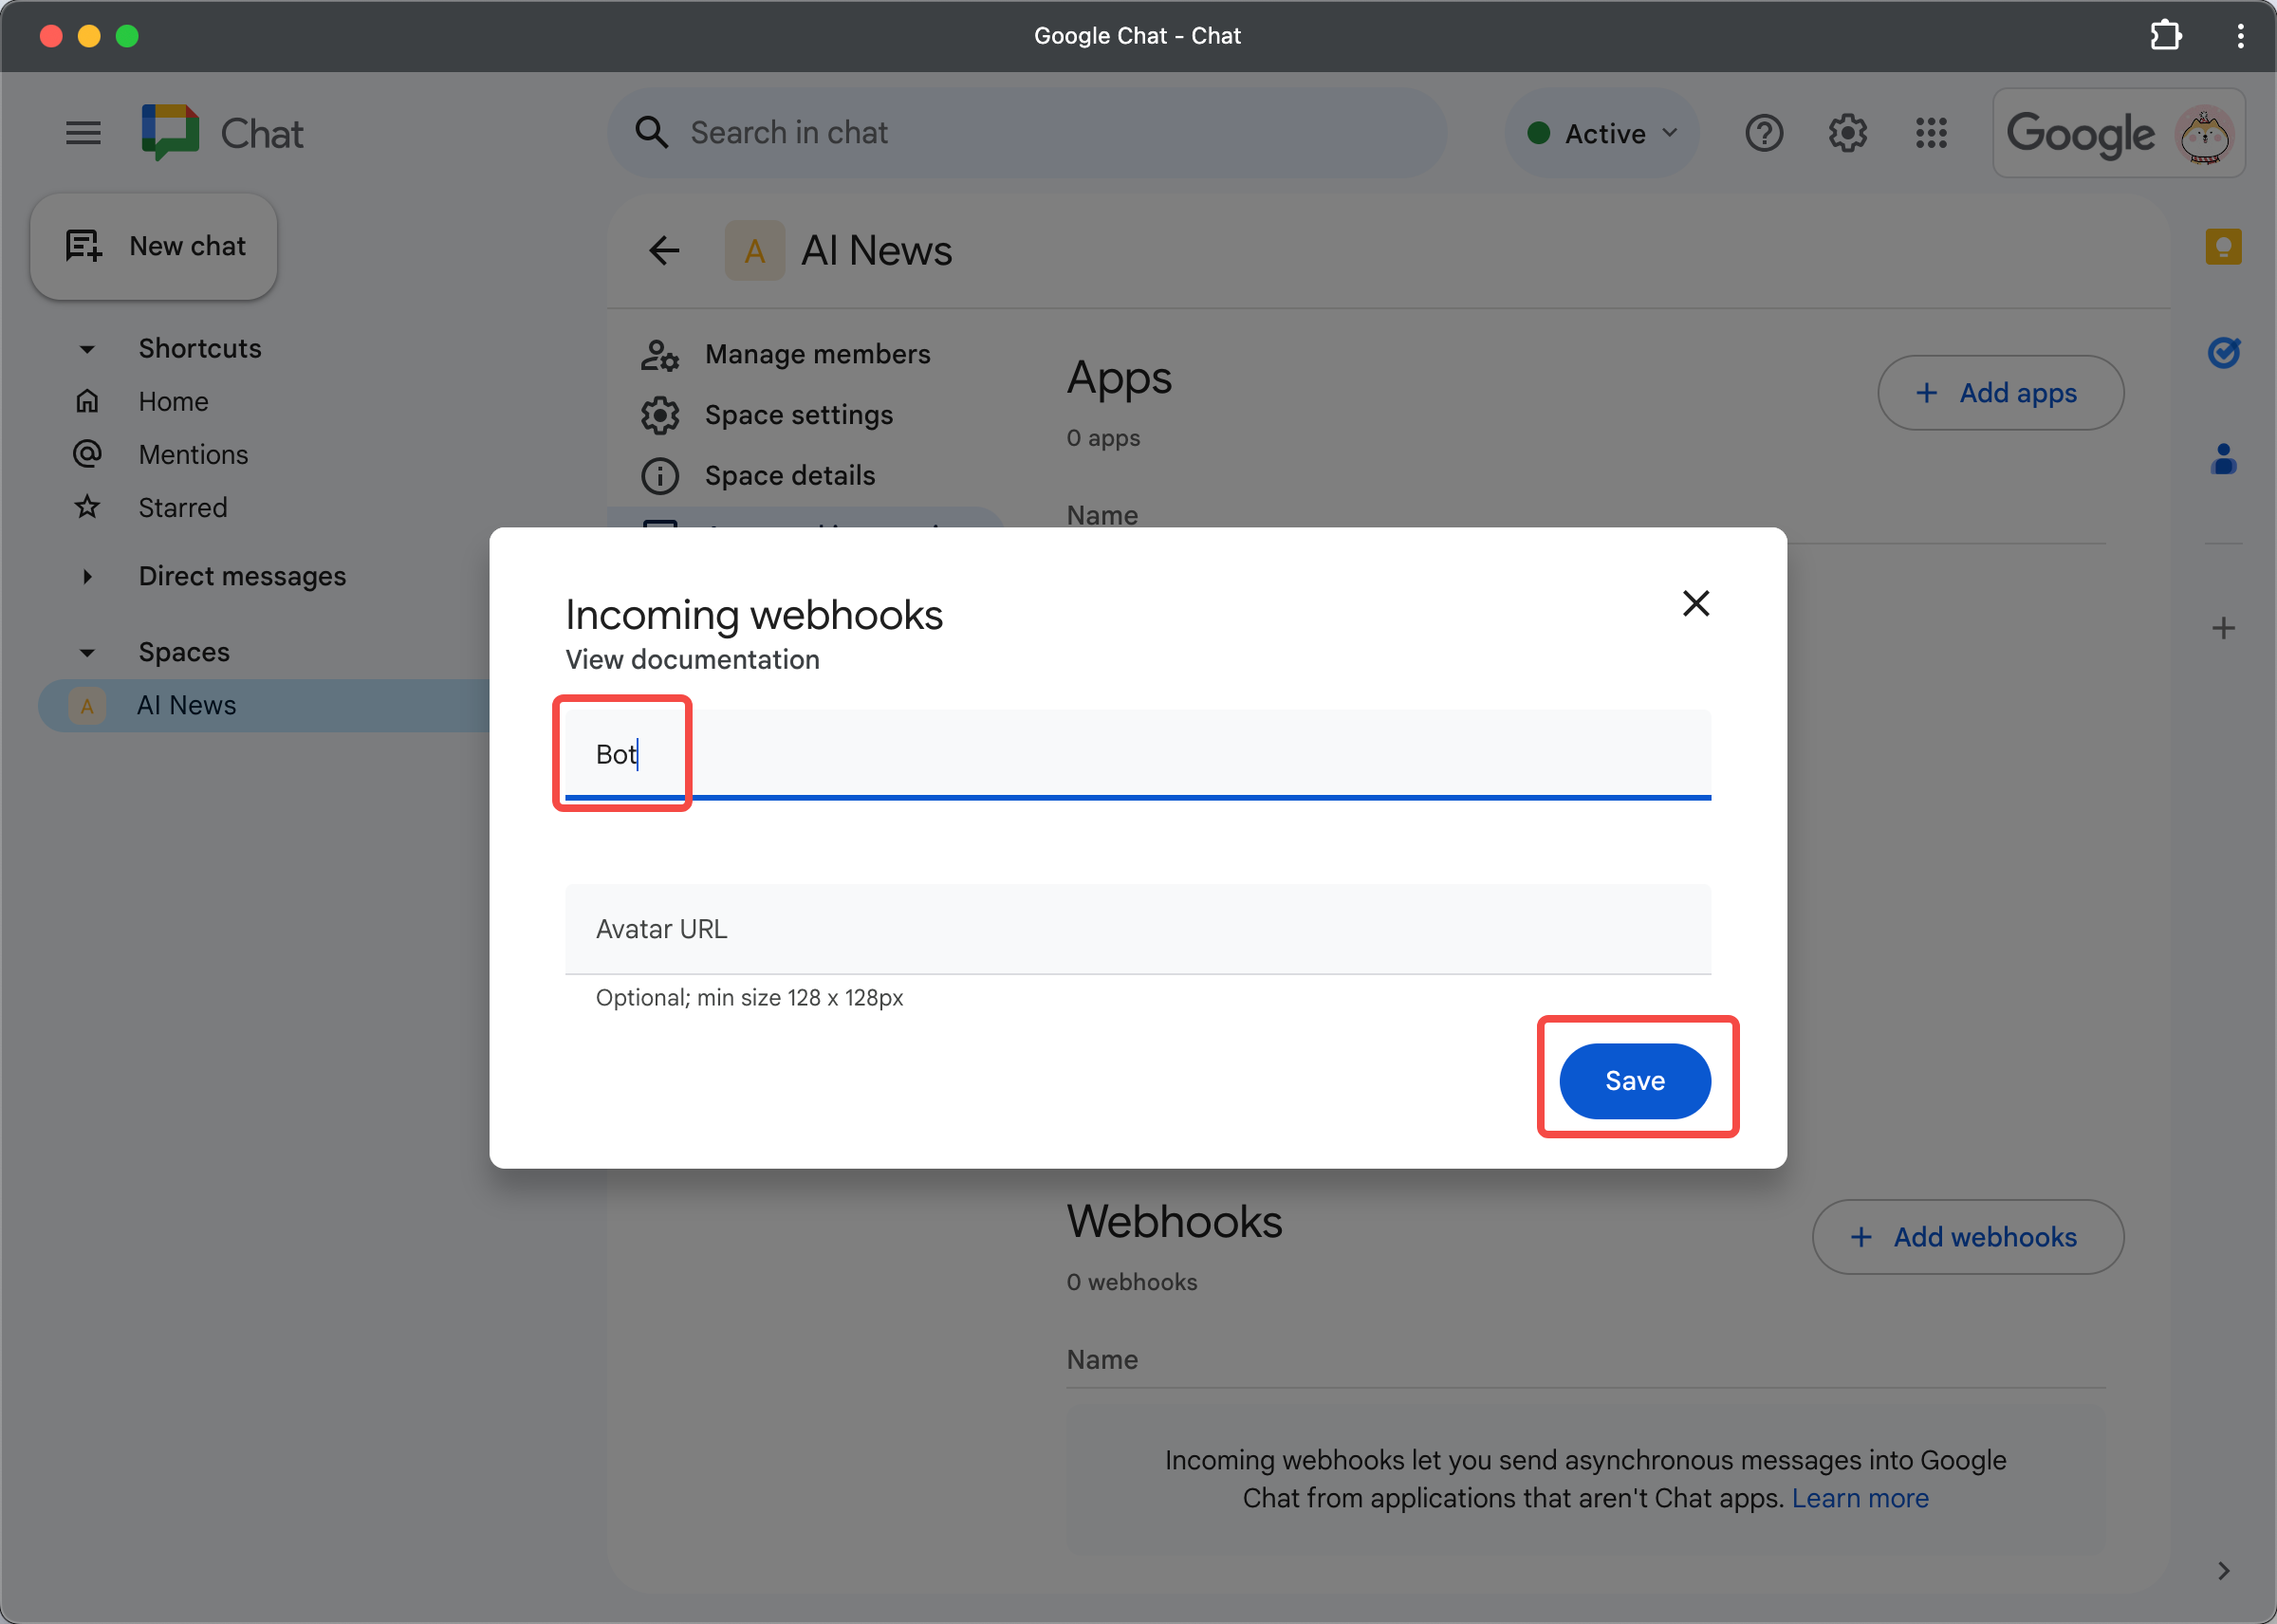
Step 2: Navigate to the "Apps and integrations" section within your space to set up a webhook.
| Step 2.1 | Step 2.2 | Step 2.3 |
|---|---|---|
 |  |  |
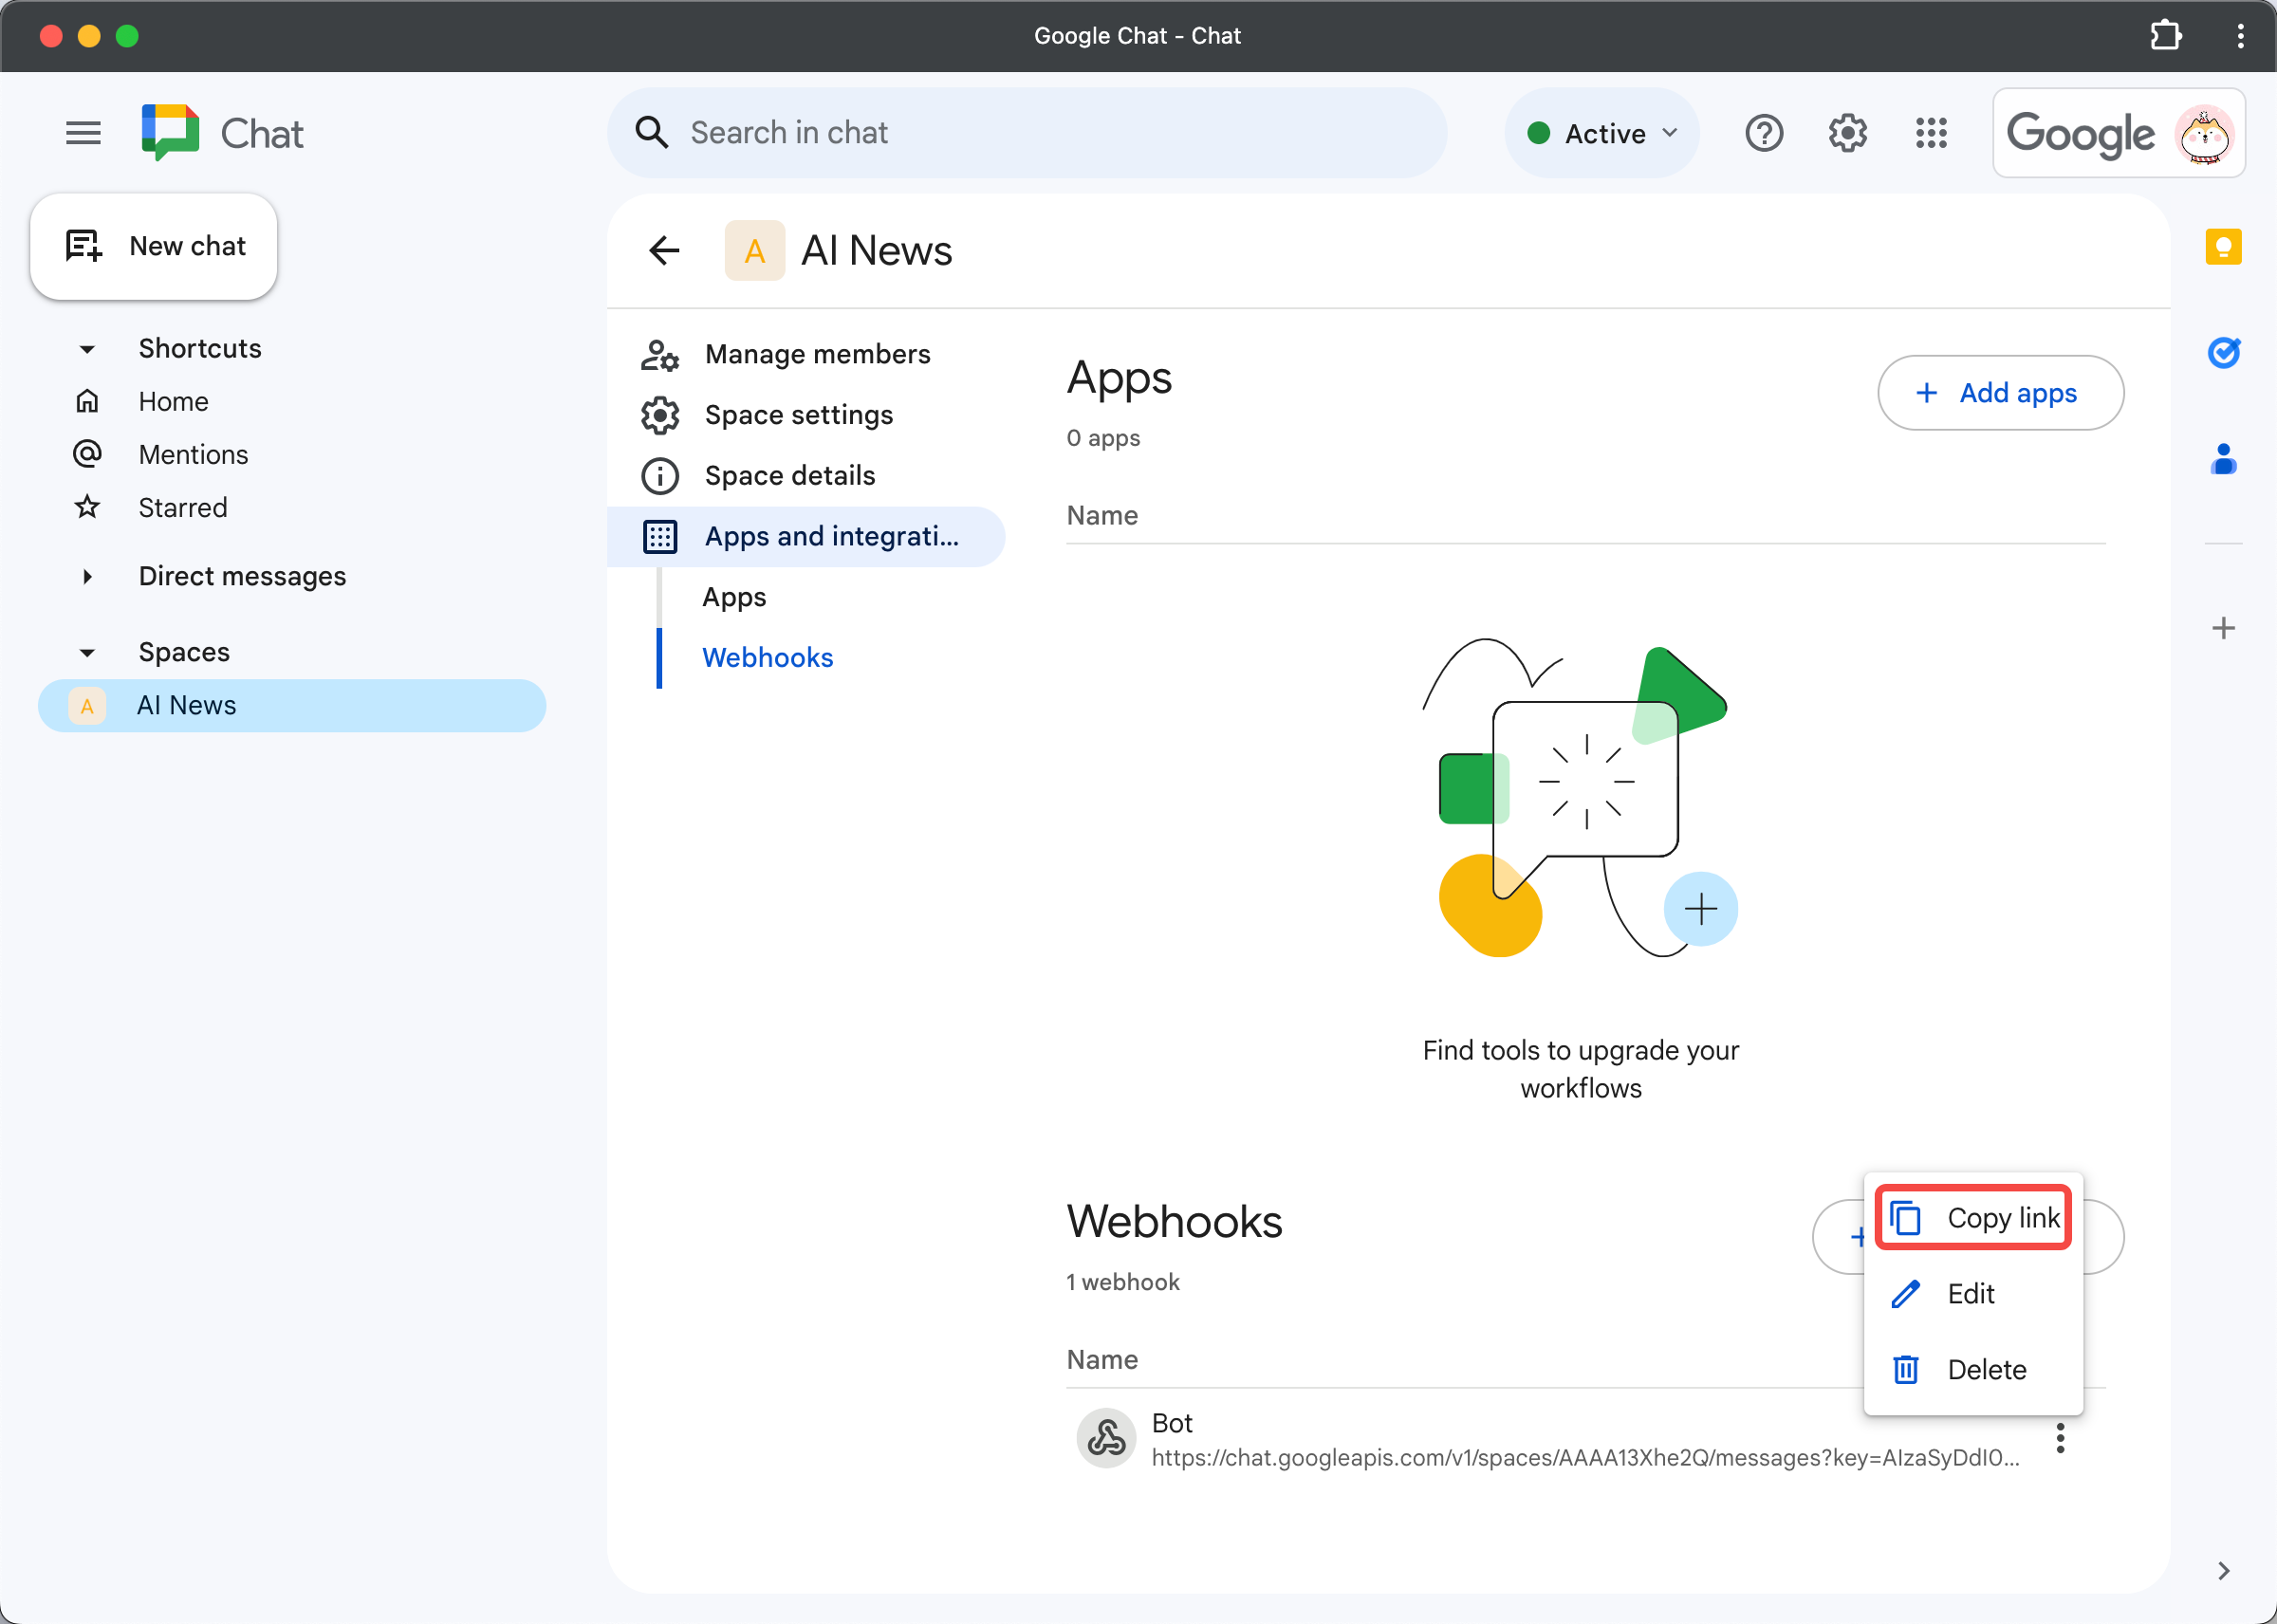
Step 3: Once your webhook is ready, click the "Copy link" button to copy the Webhook URL and paste it into ValueSpot.
| Step 3.1 | Step 3.2 |
|---|---|
 |  |
Discord
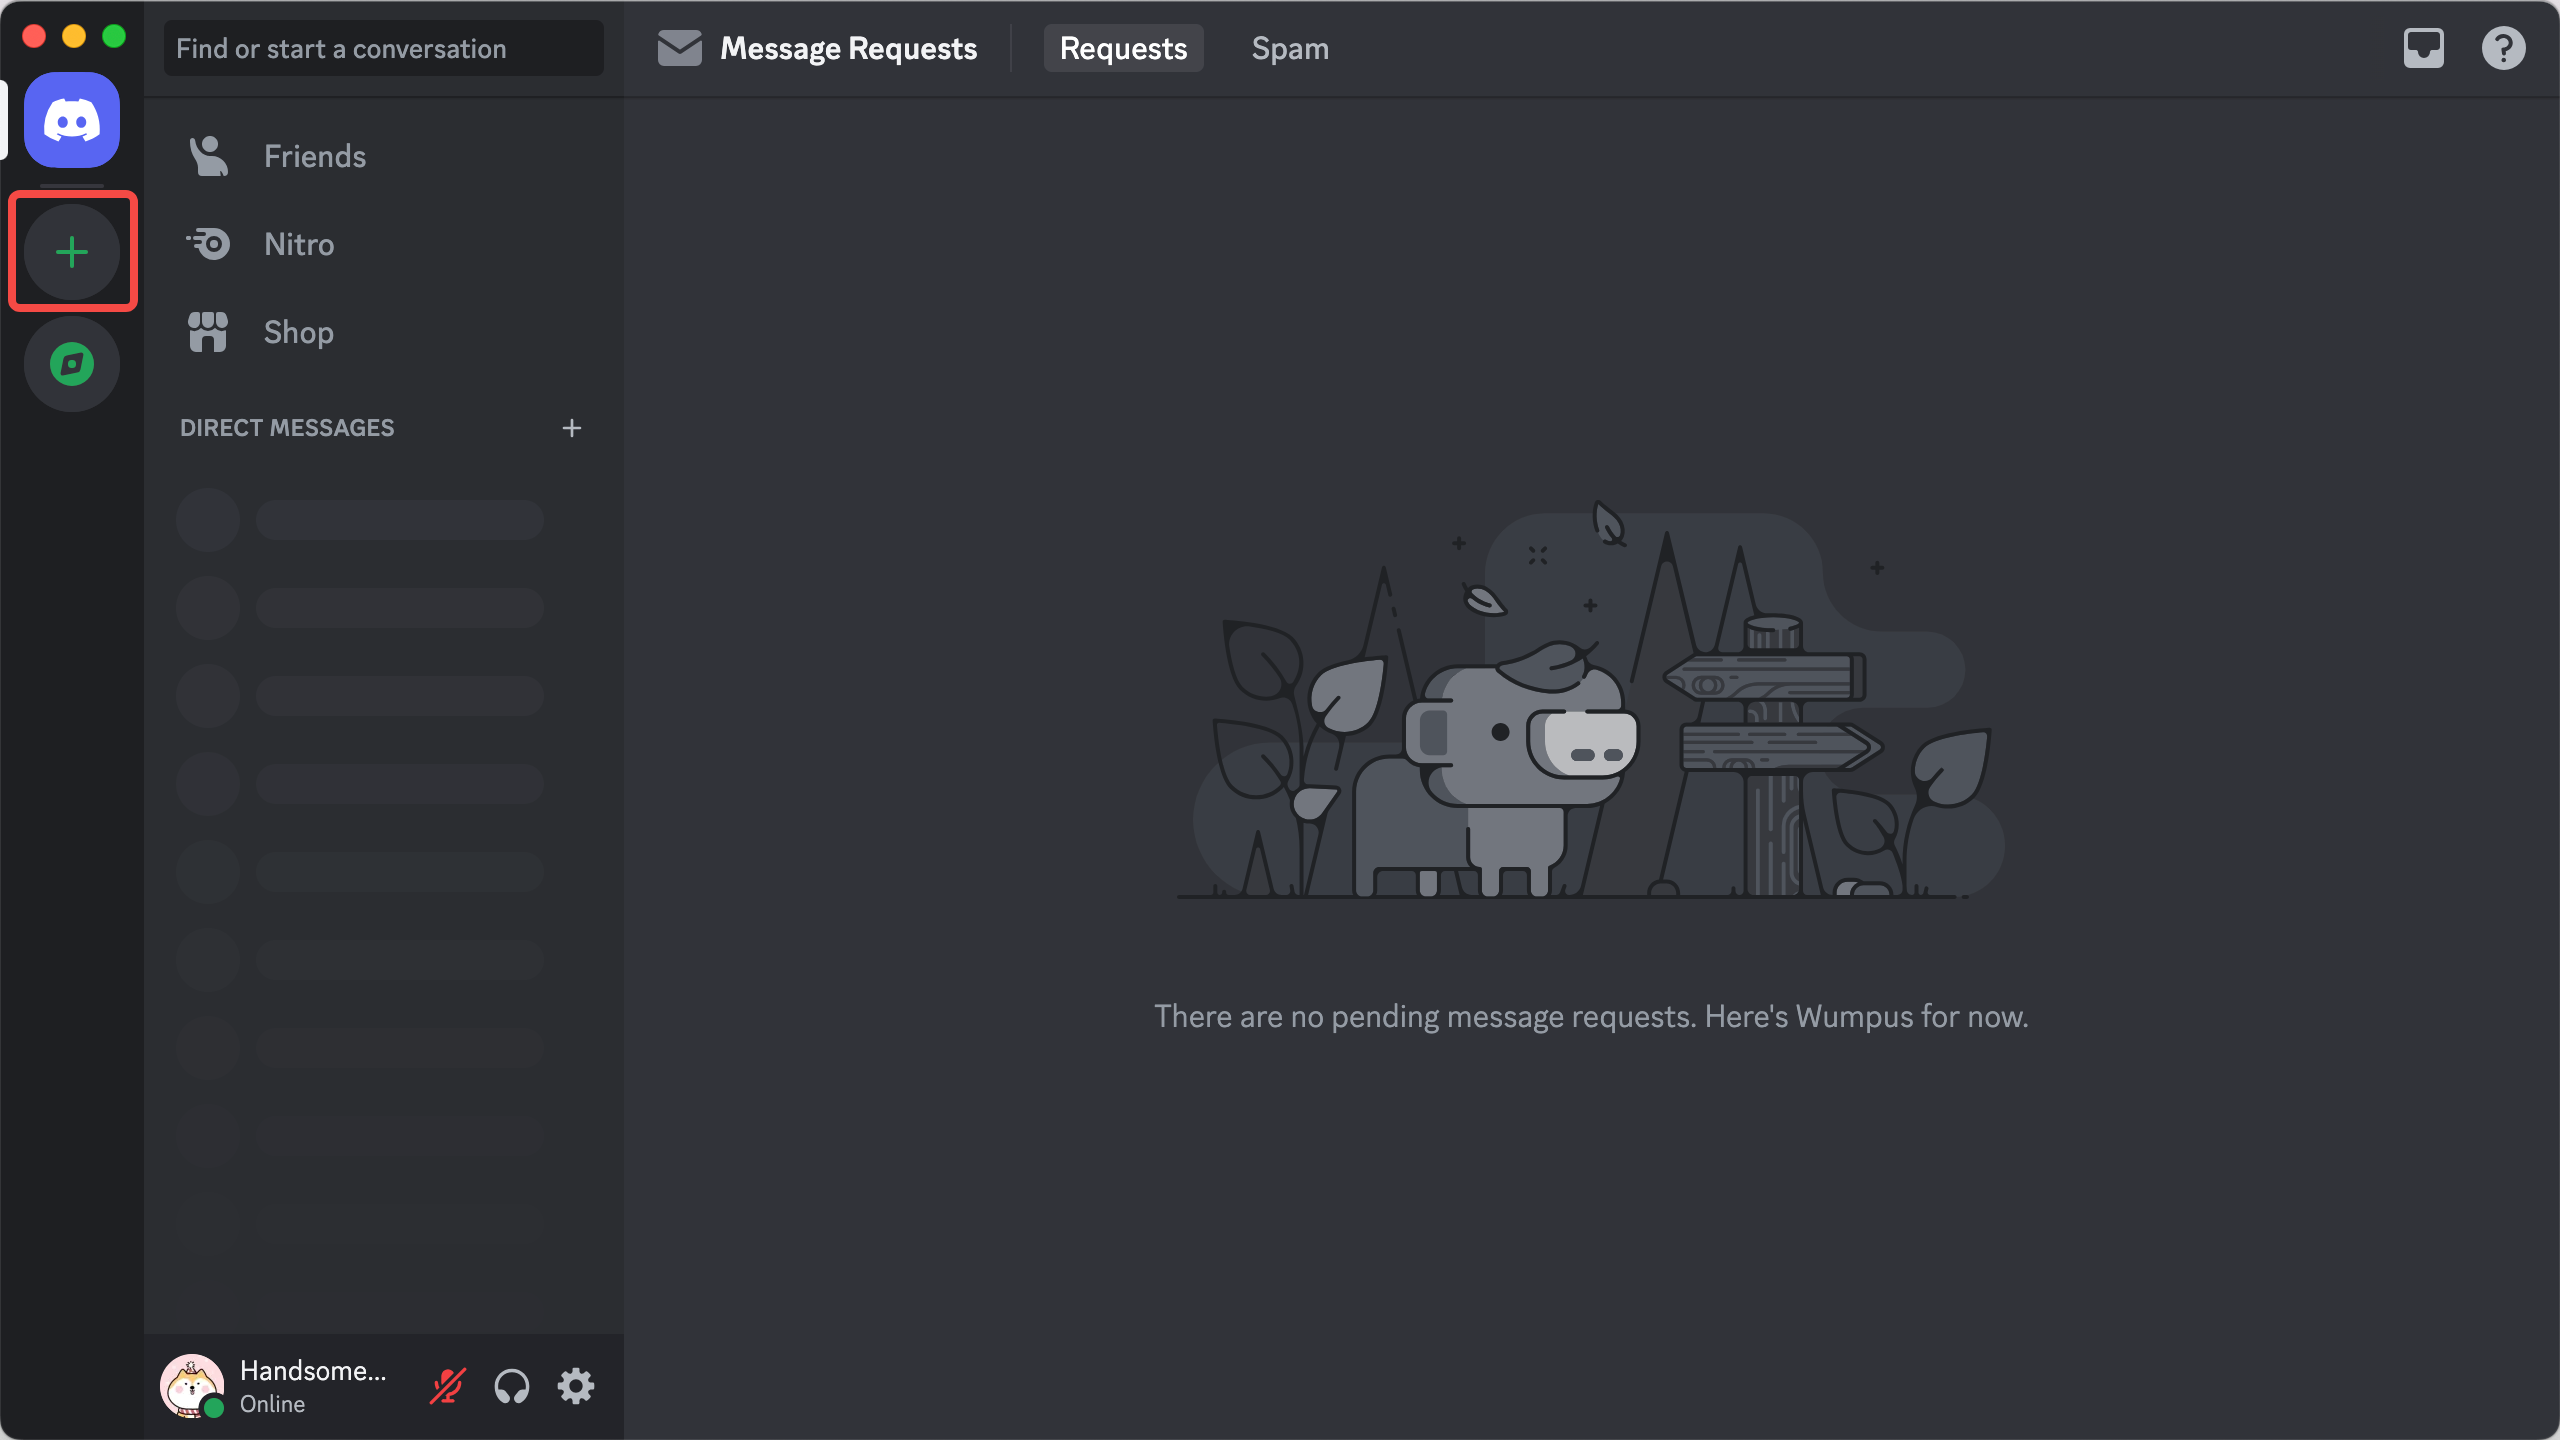
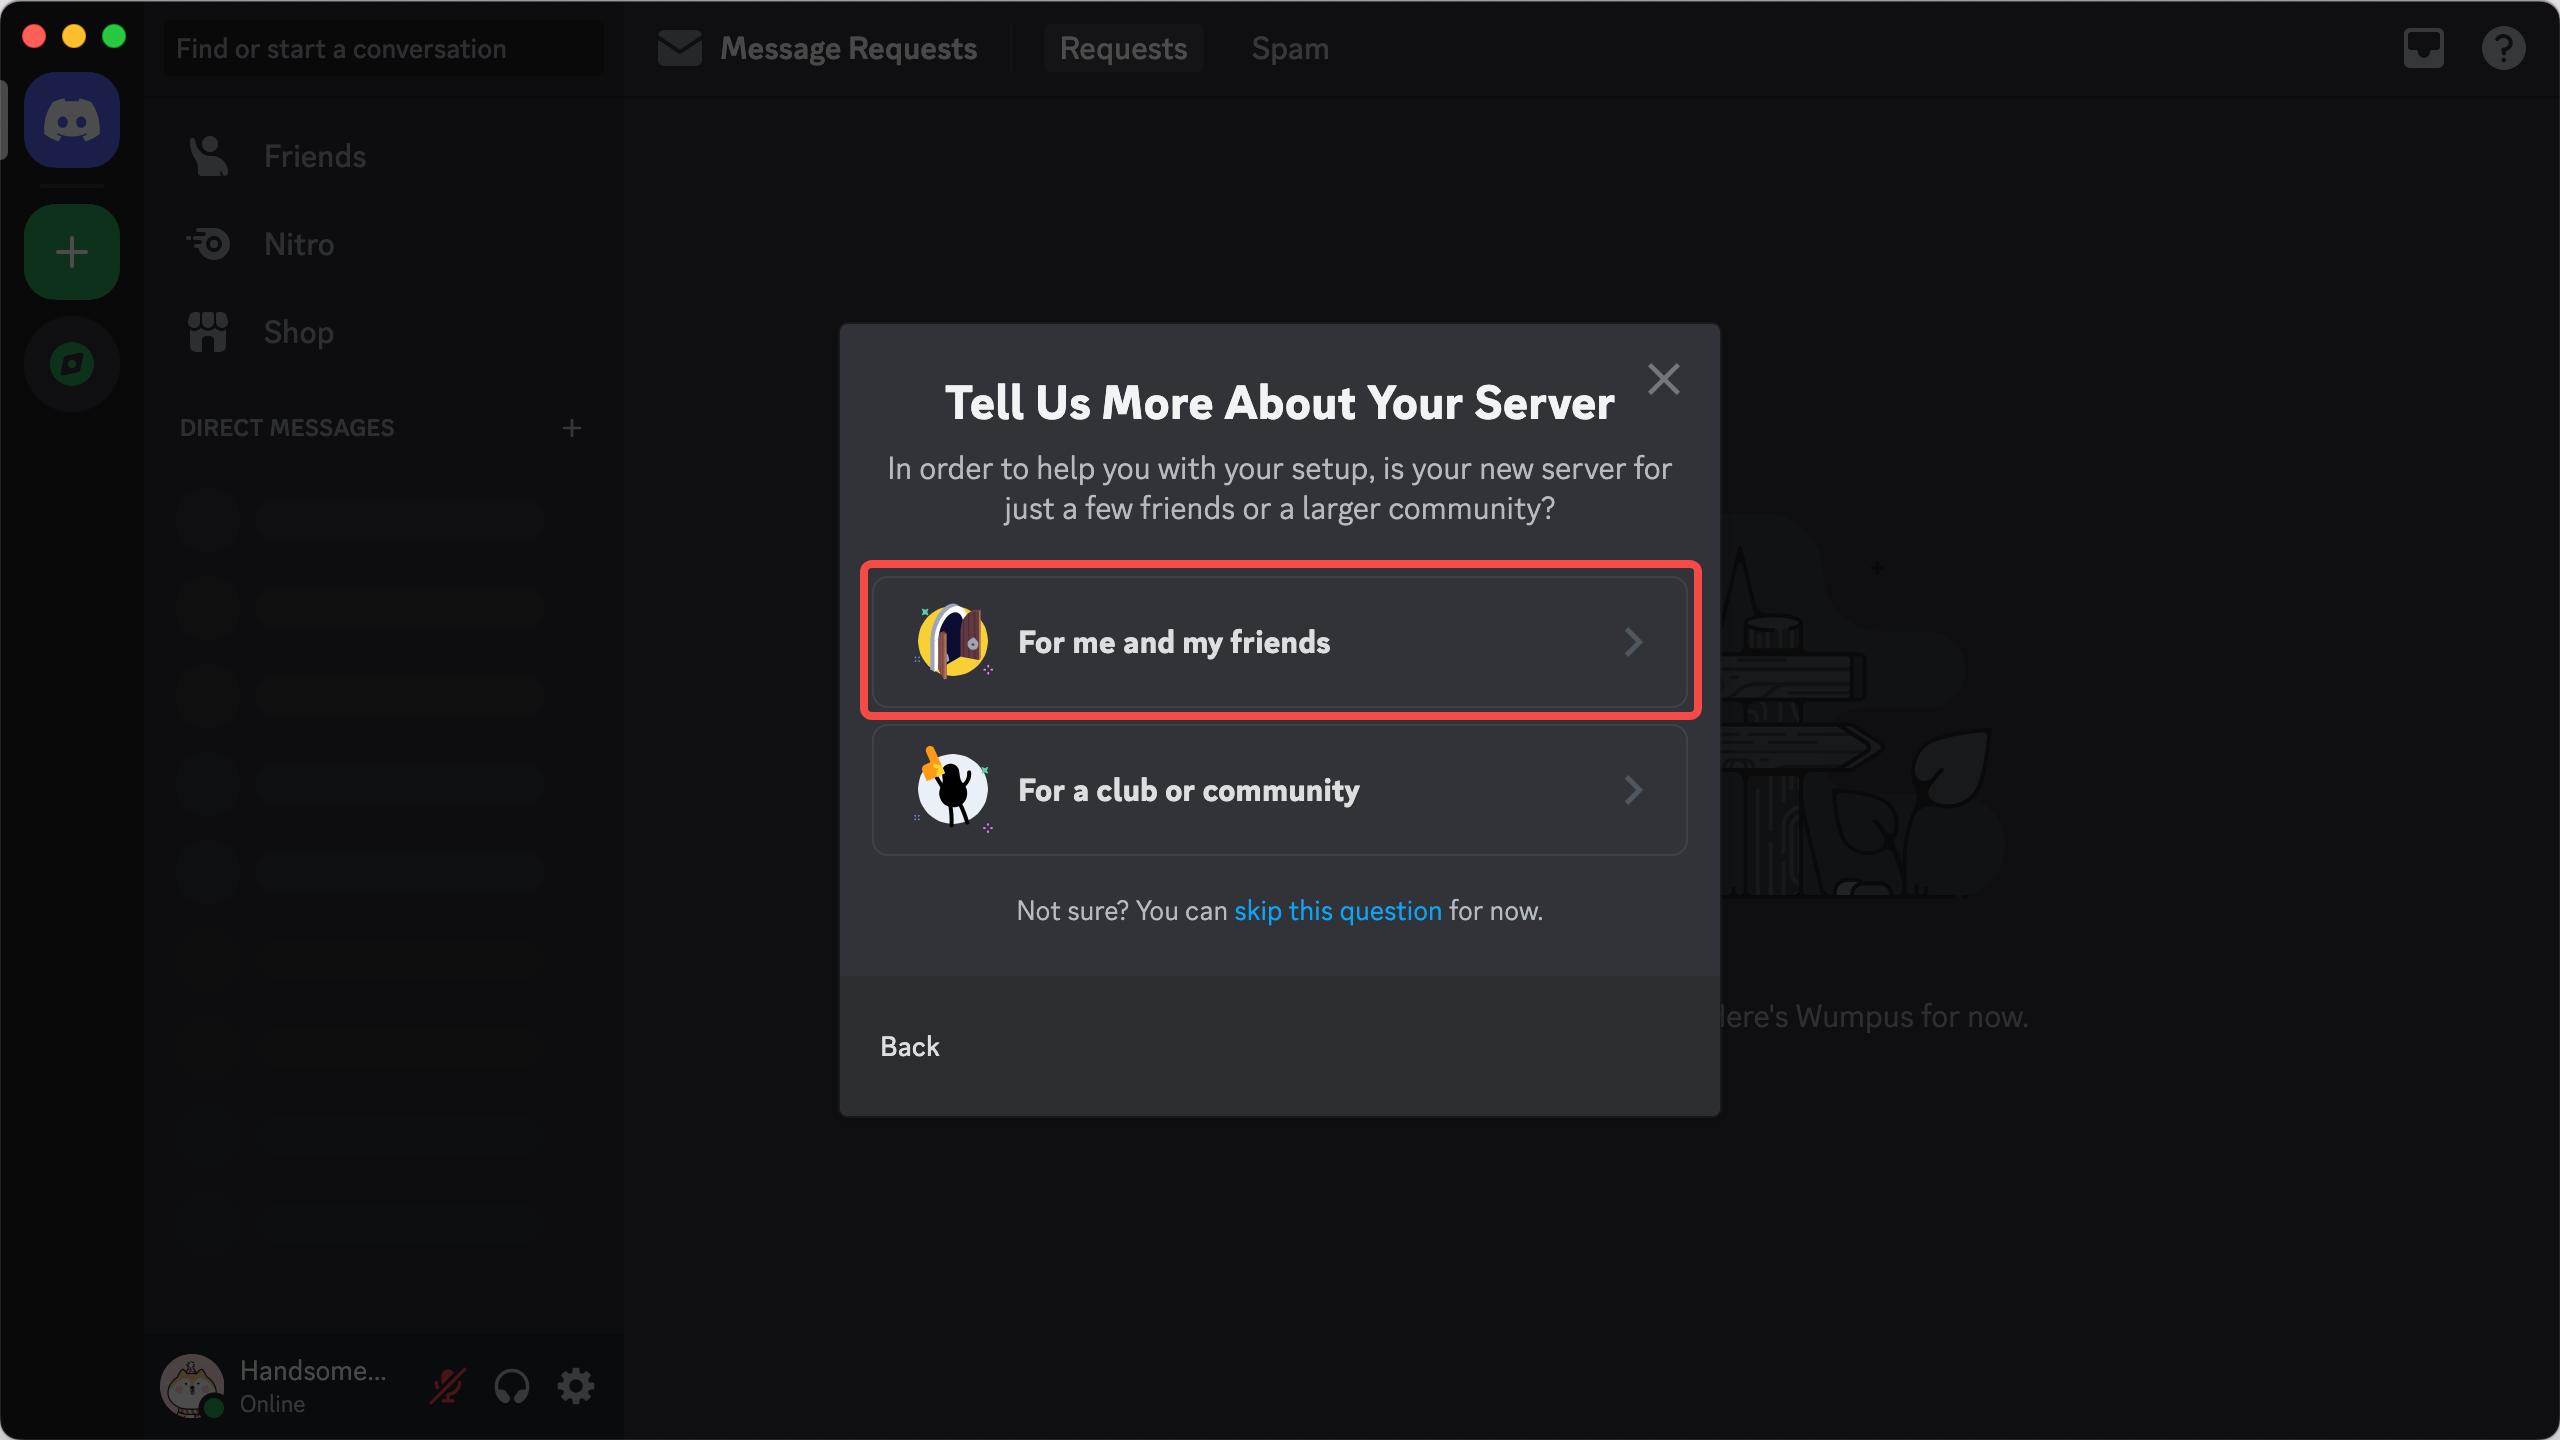
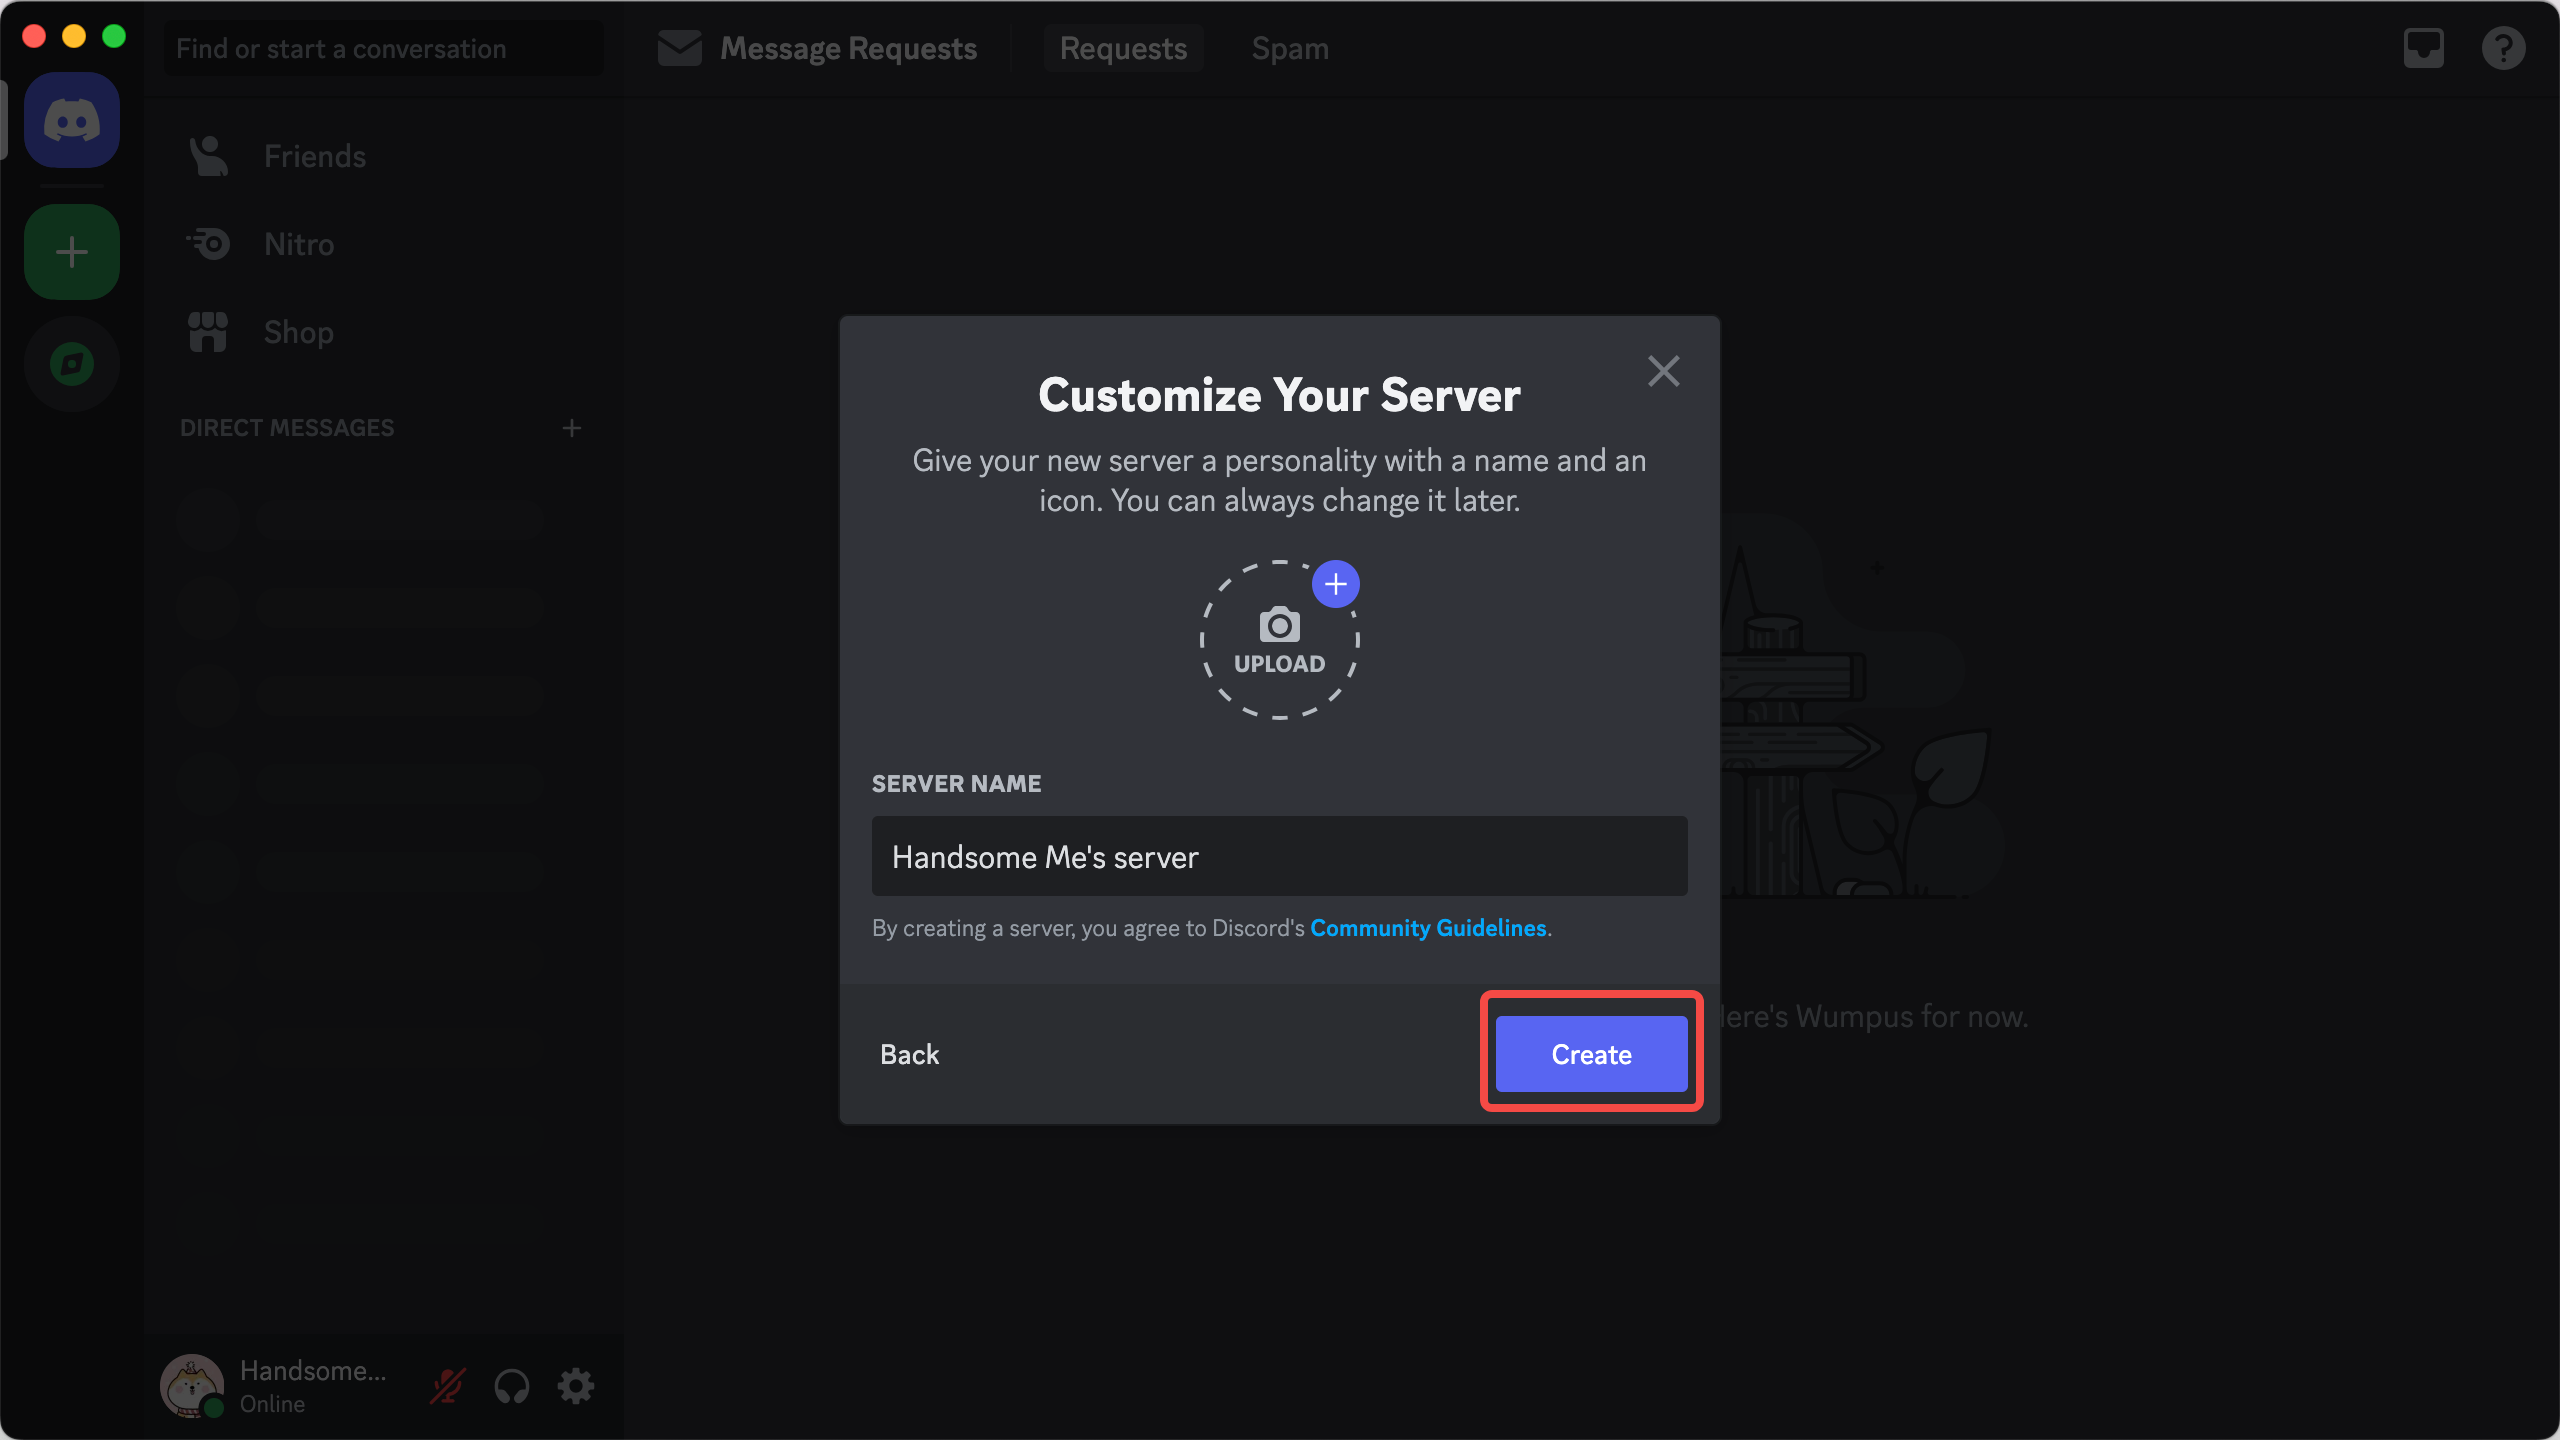
Step 1: Open the Discord main interface and create a new server. If you already have a server, you can move on to the next step.
| Step 1.1 | Step 1.2 | Step 1.3 | Step 1.4 |
|---|---|---|---|
 |  |  |  |
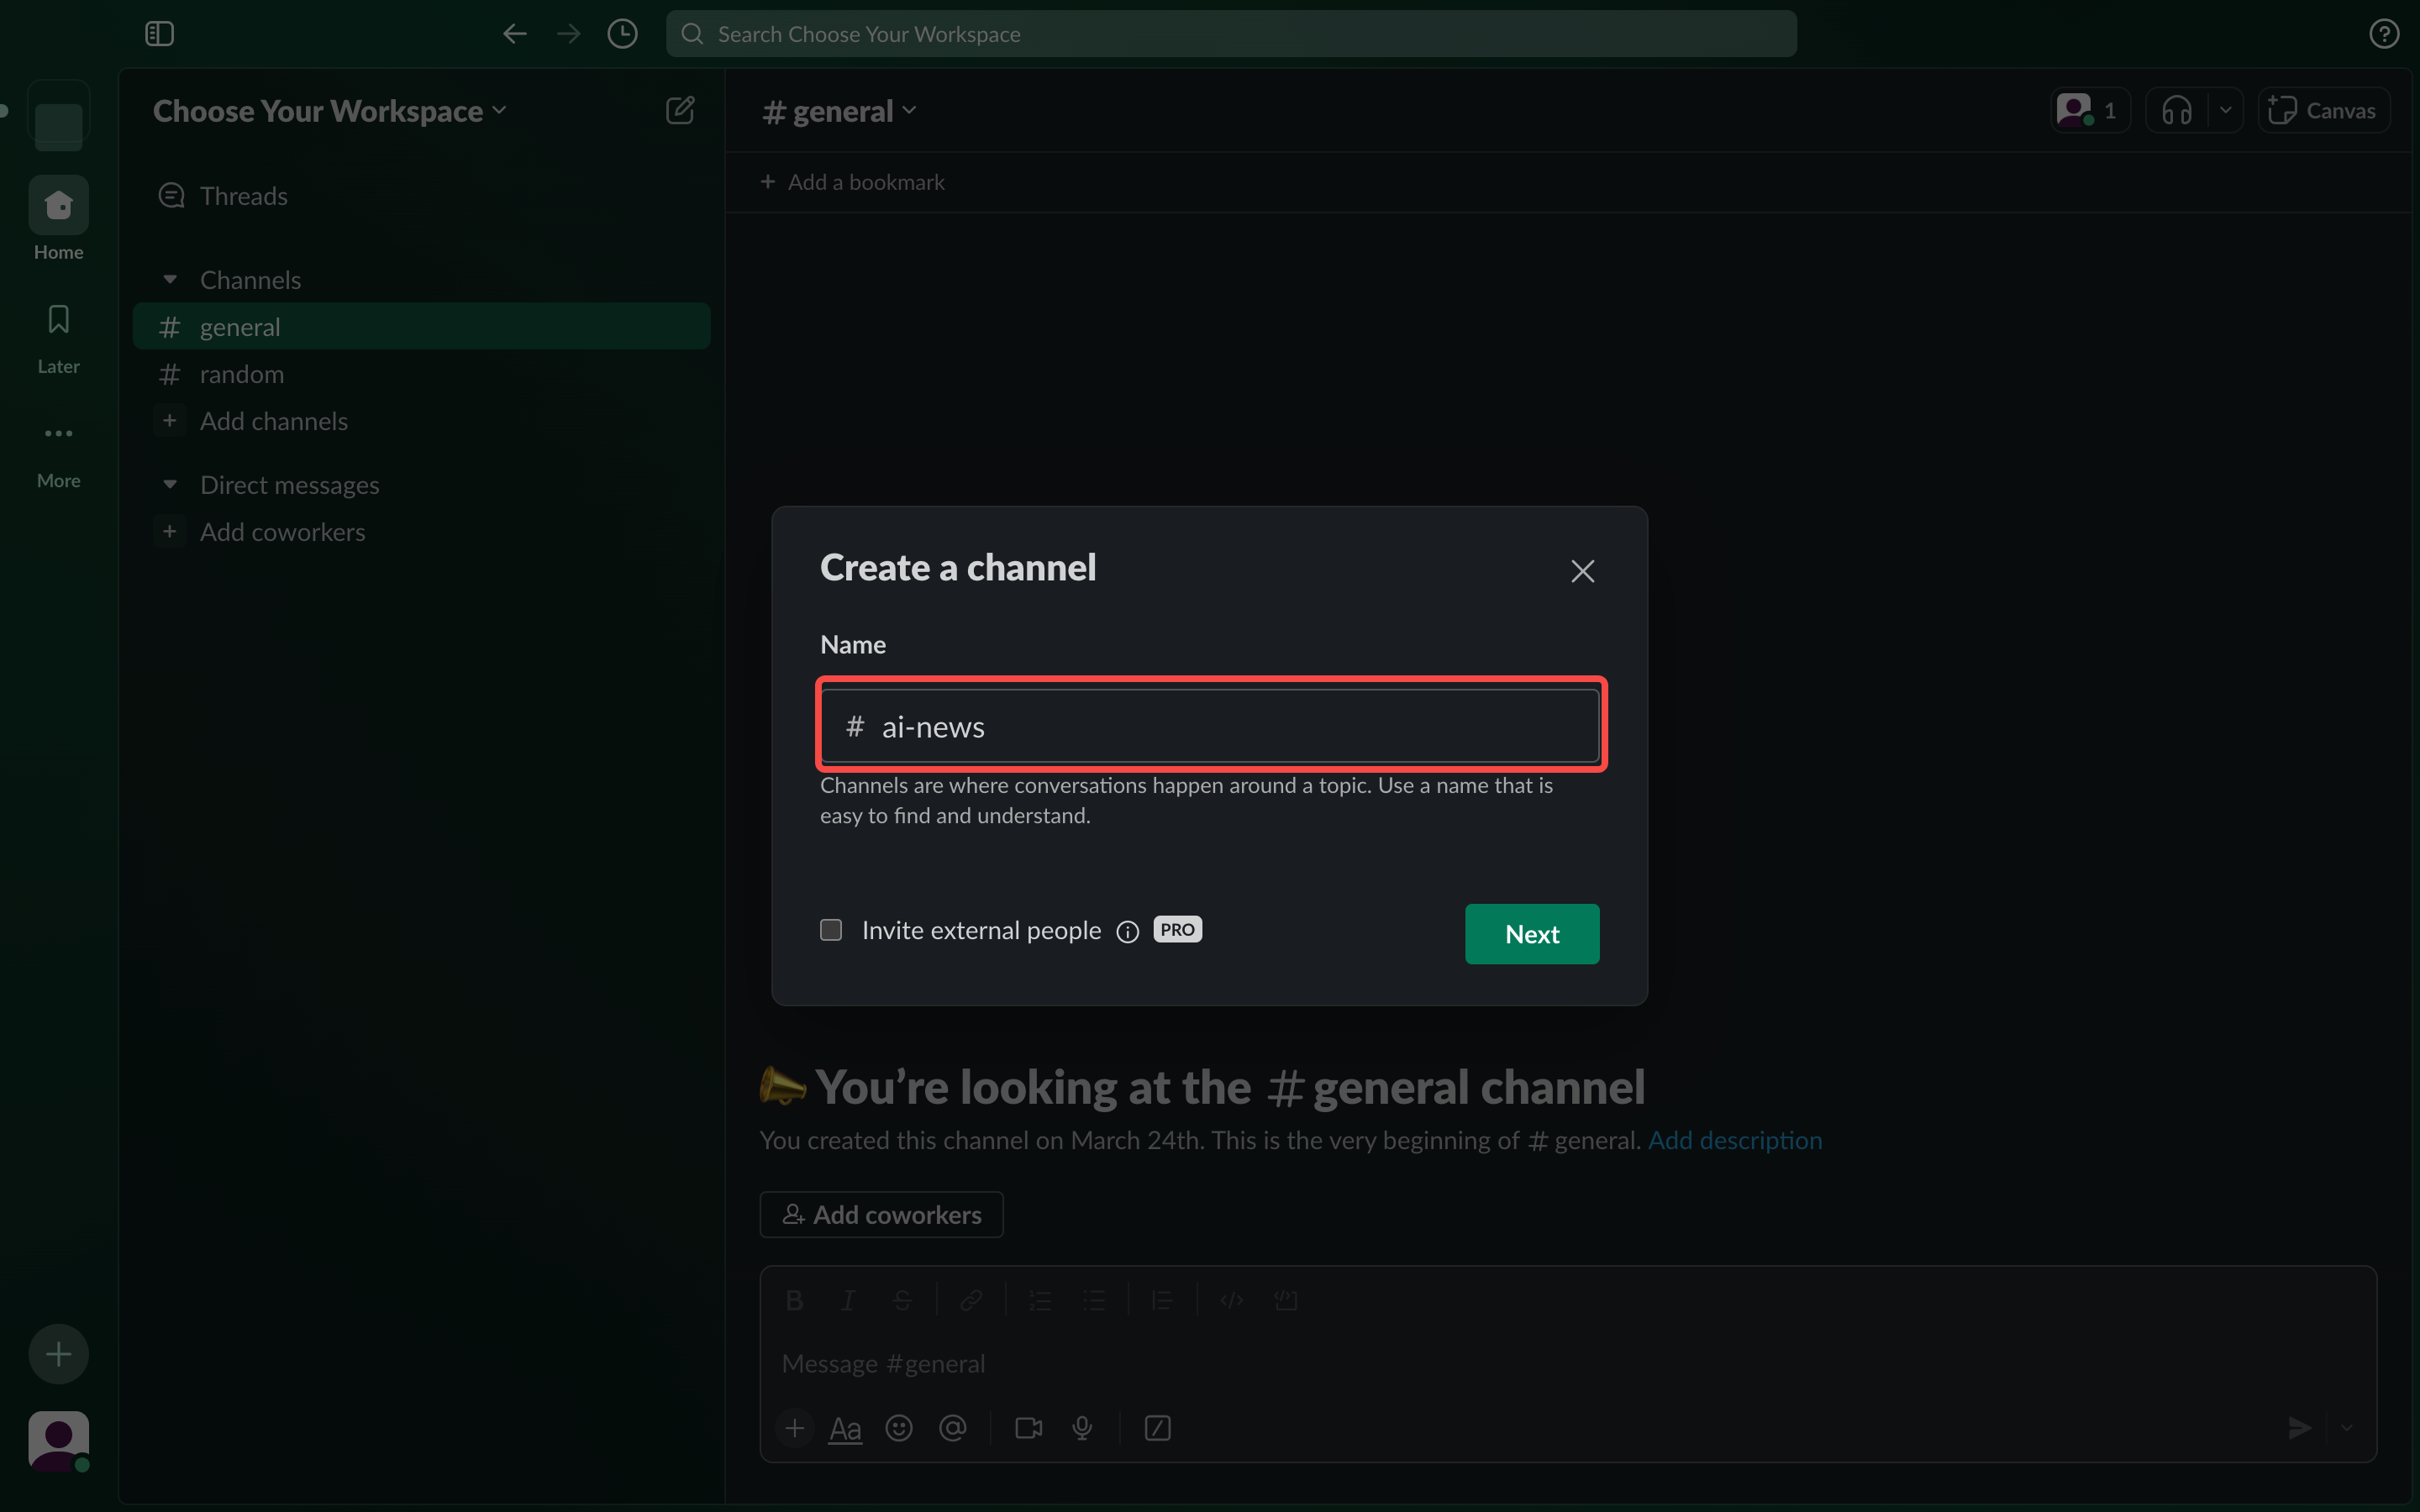
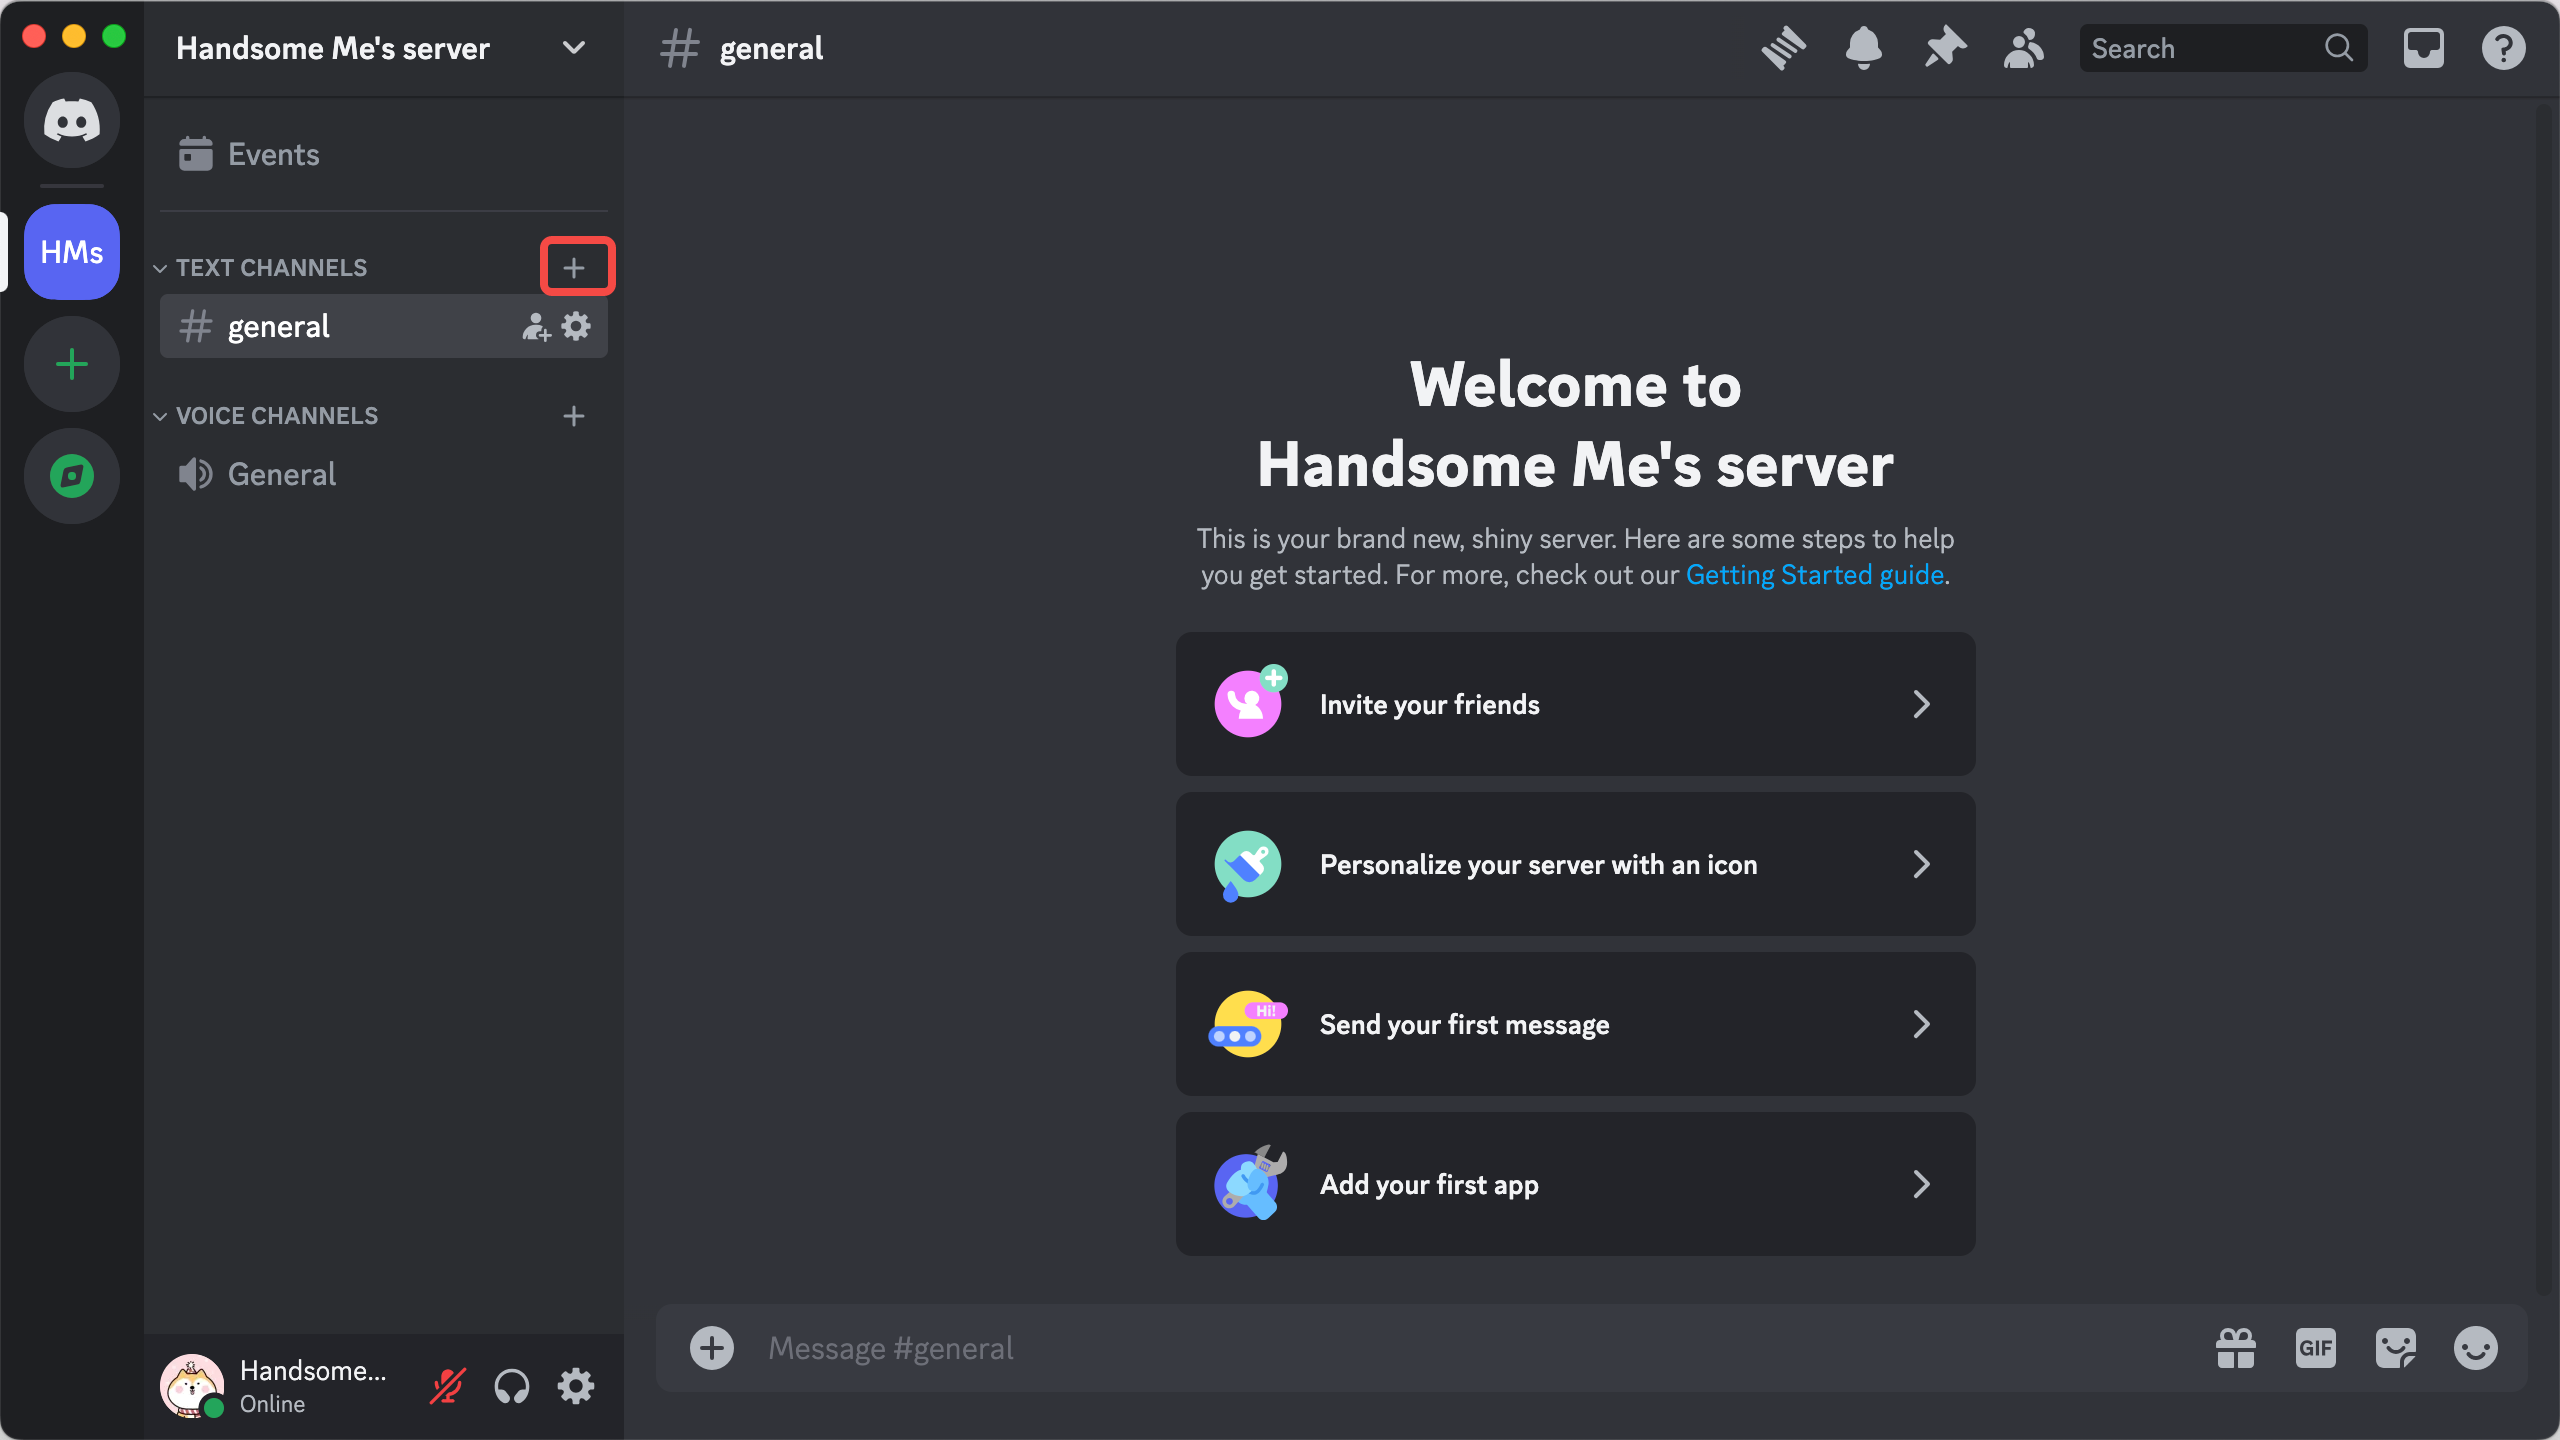
Step 2: Inside your newly created or existing server, create a channel for receiving messages. You can also invite friends to join the channel for discussions.
| Step 2.1 | Step 2.2 |
|---|---|
 | 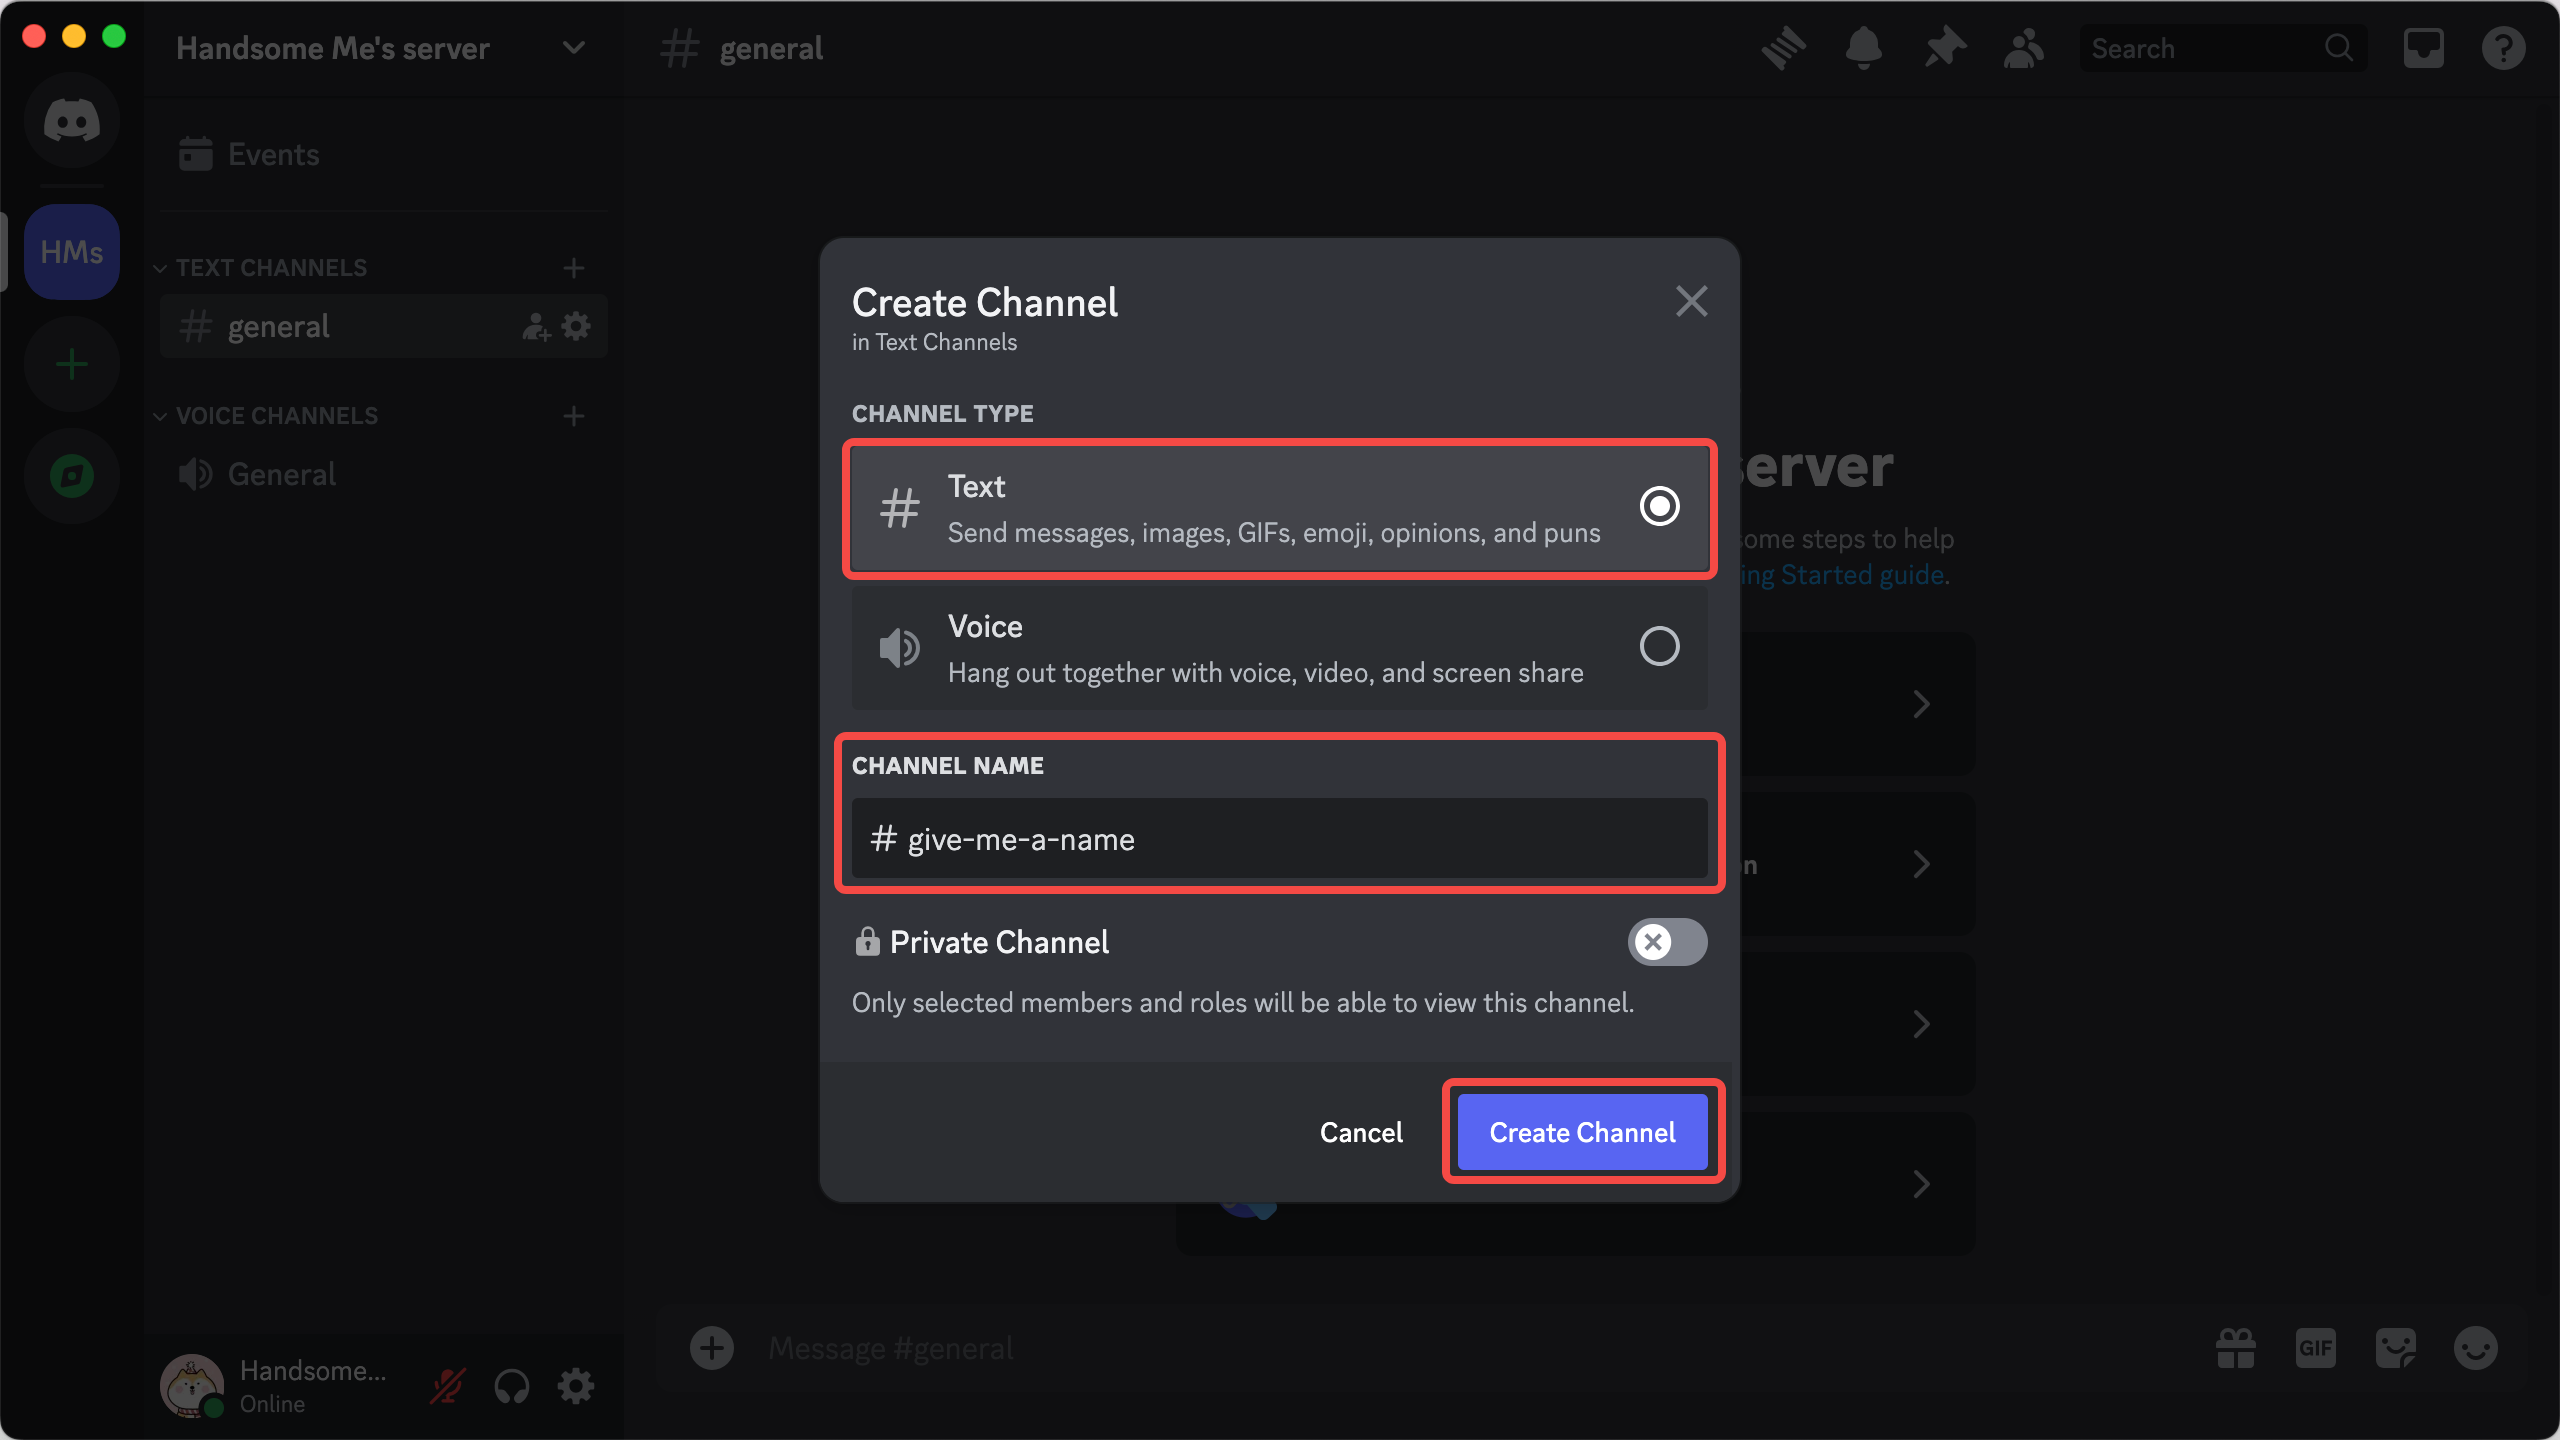 |
Step 3: Go to the channel settings to create a webhook specifically for it.
| Step 3.1 | Step 3.2 |
|---|---|
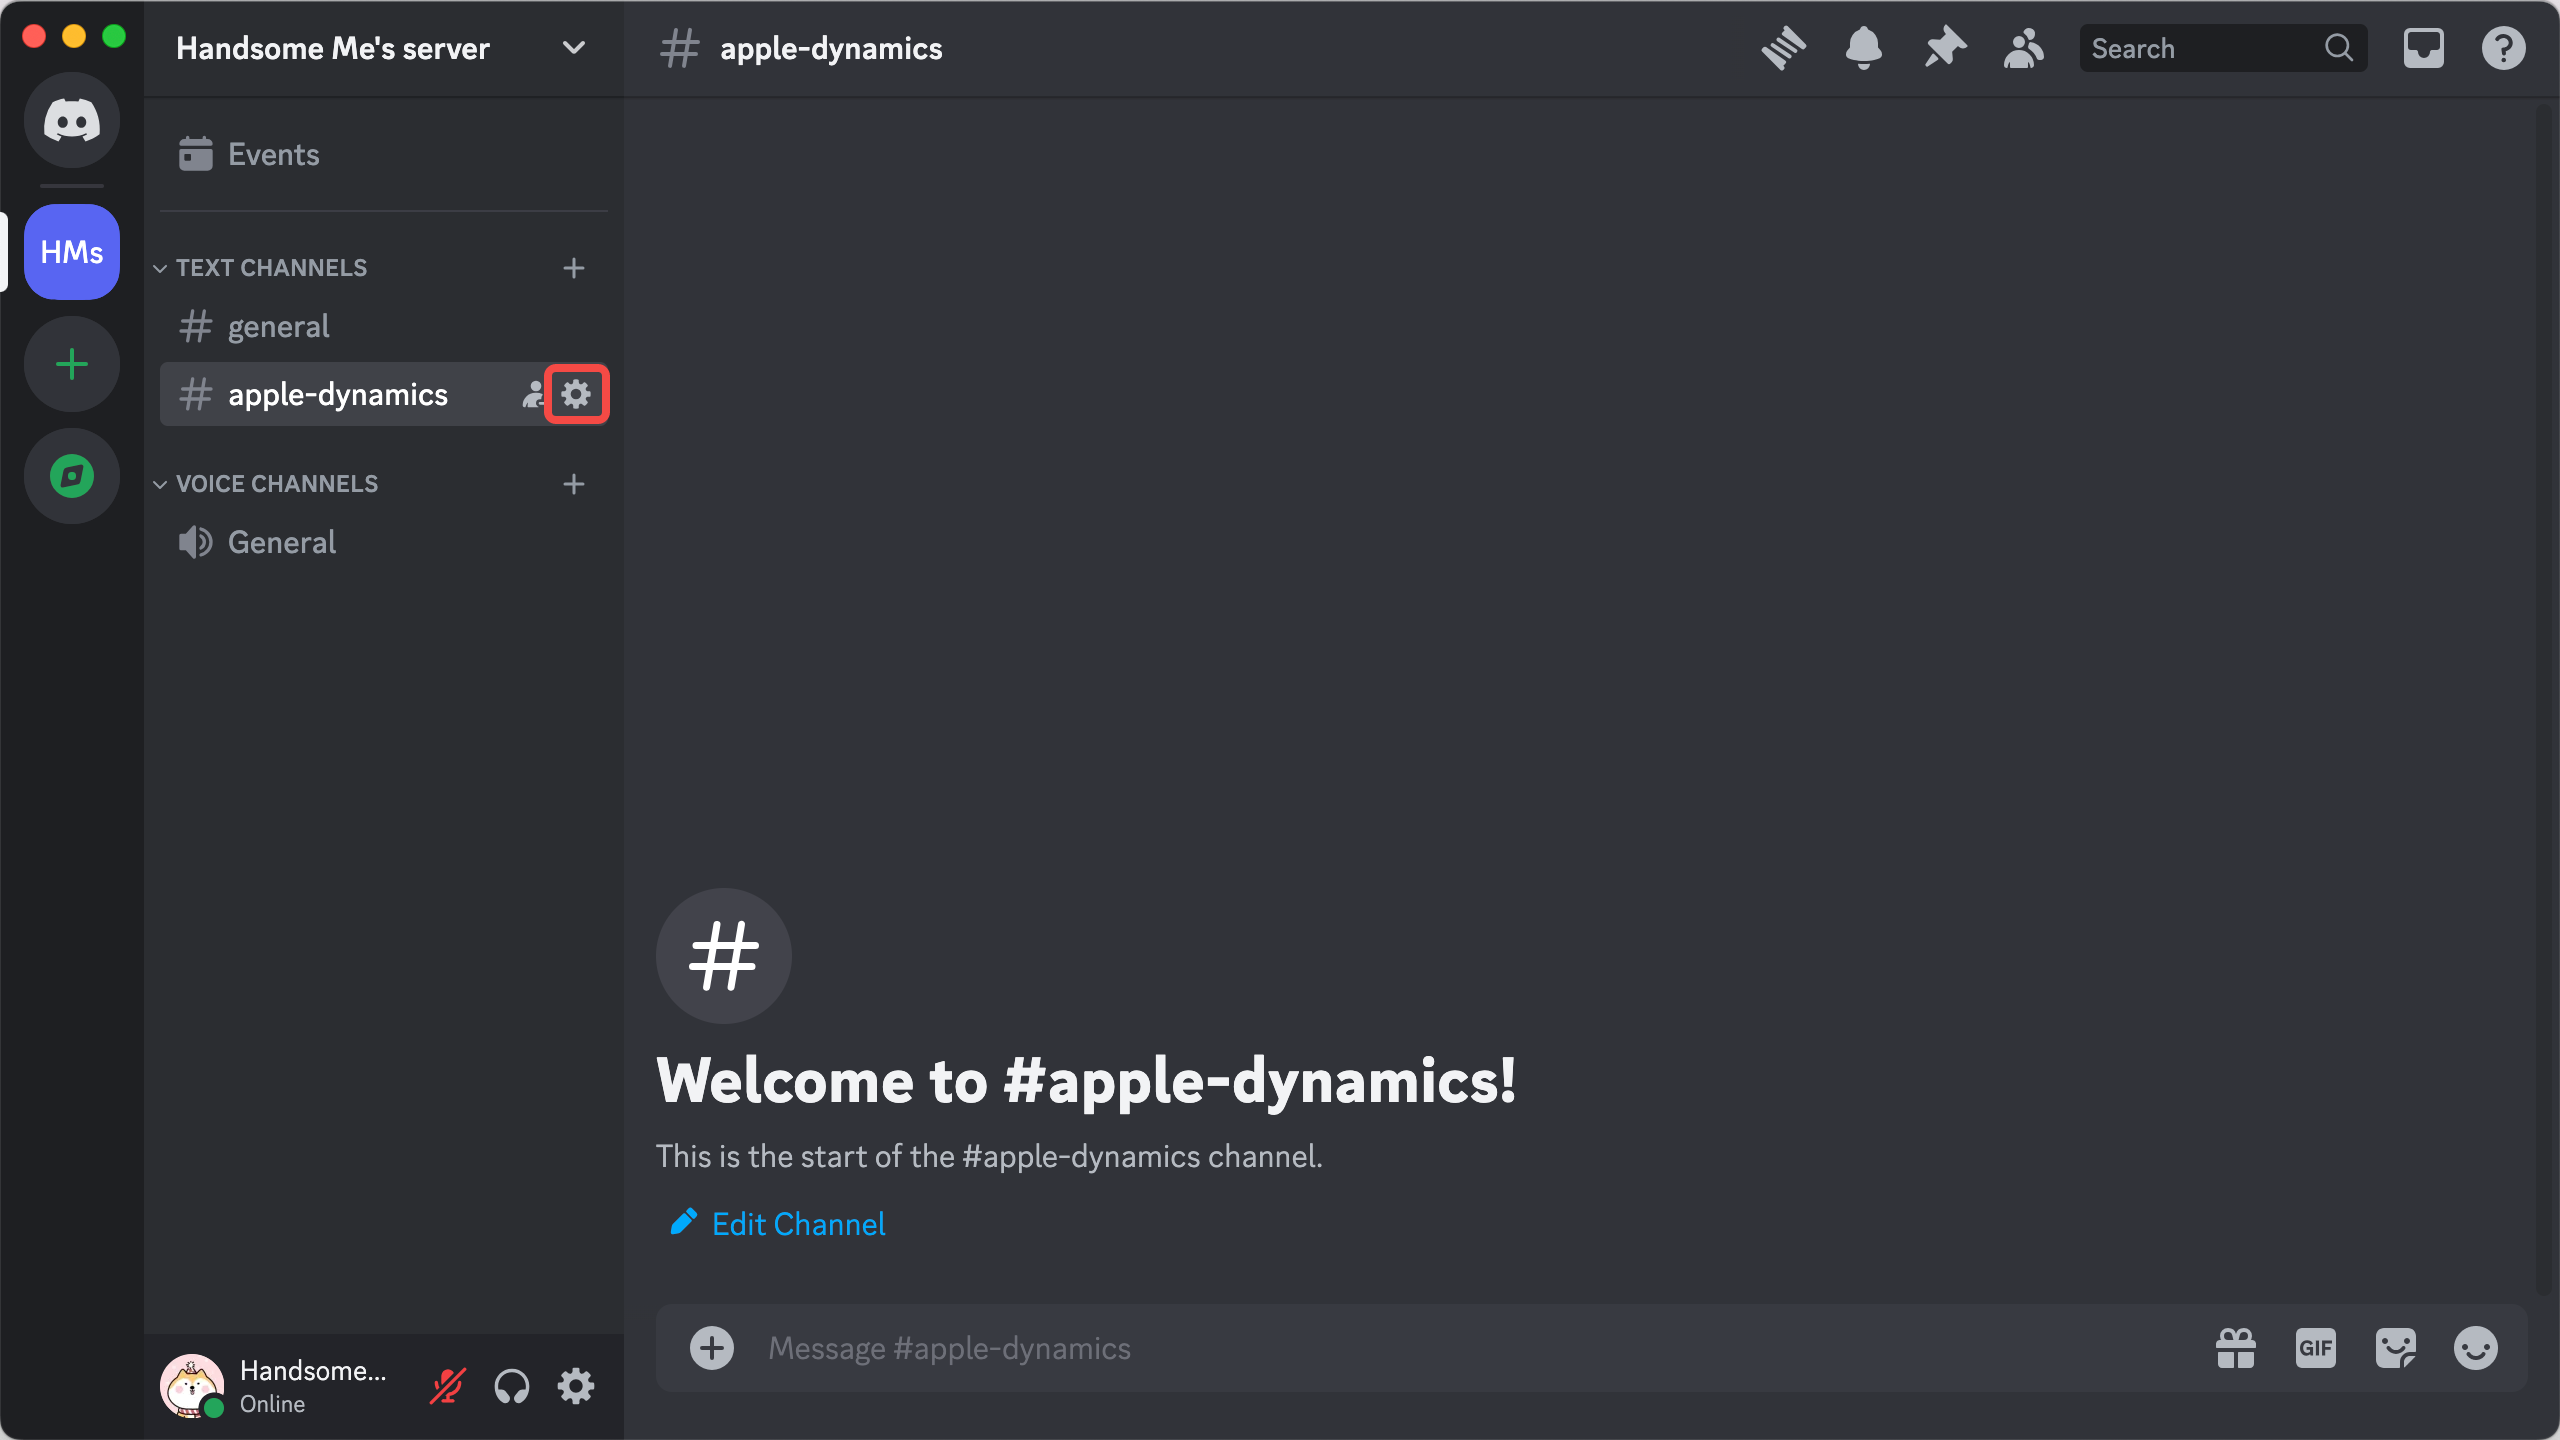 | 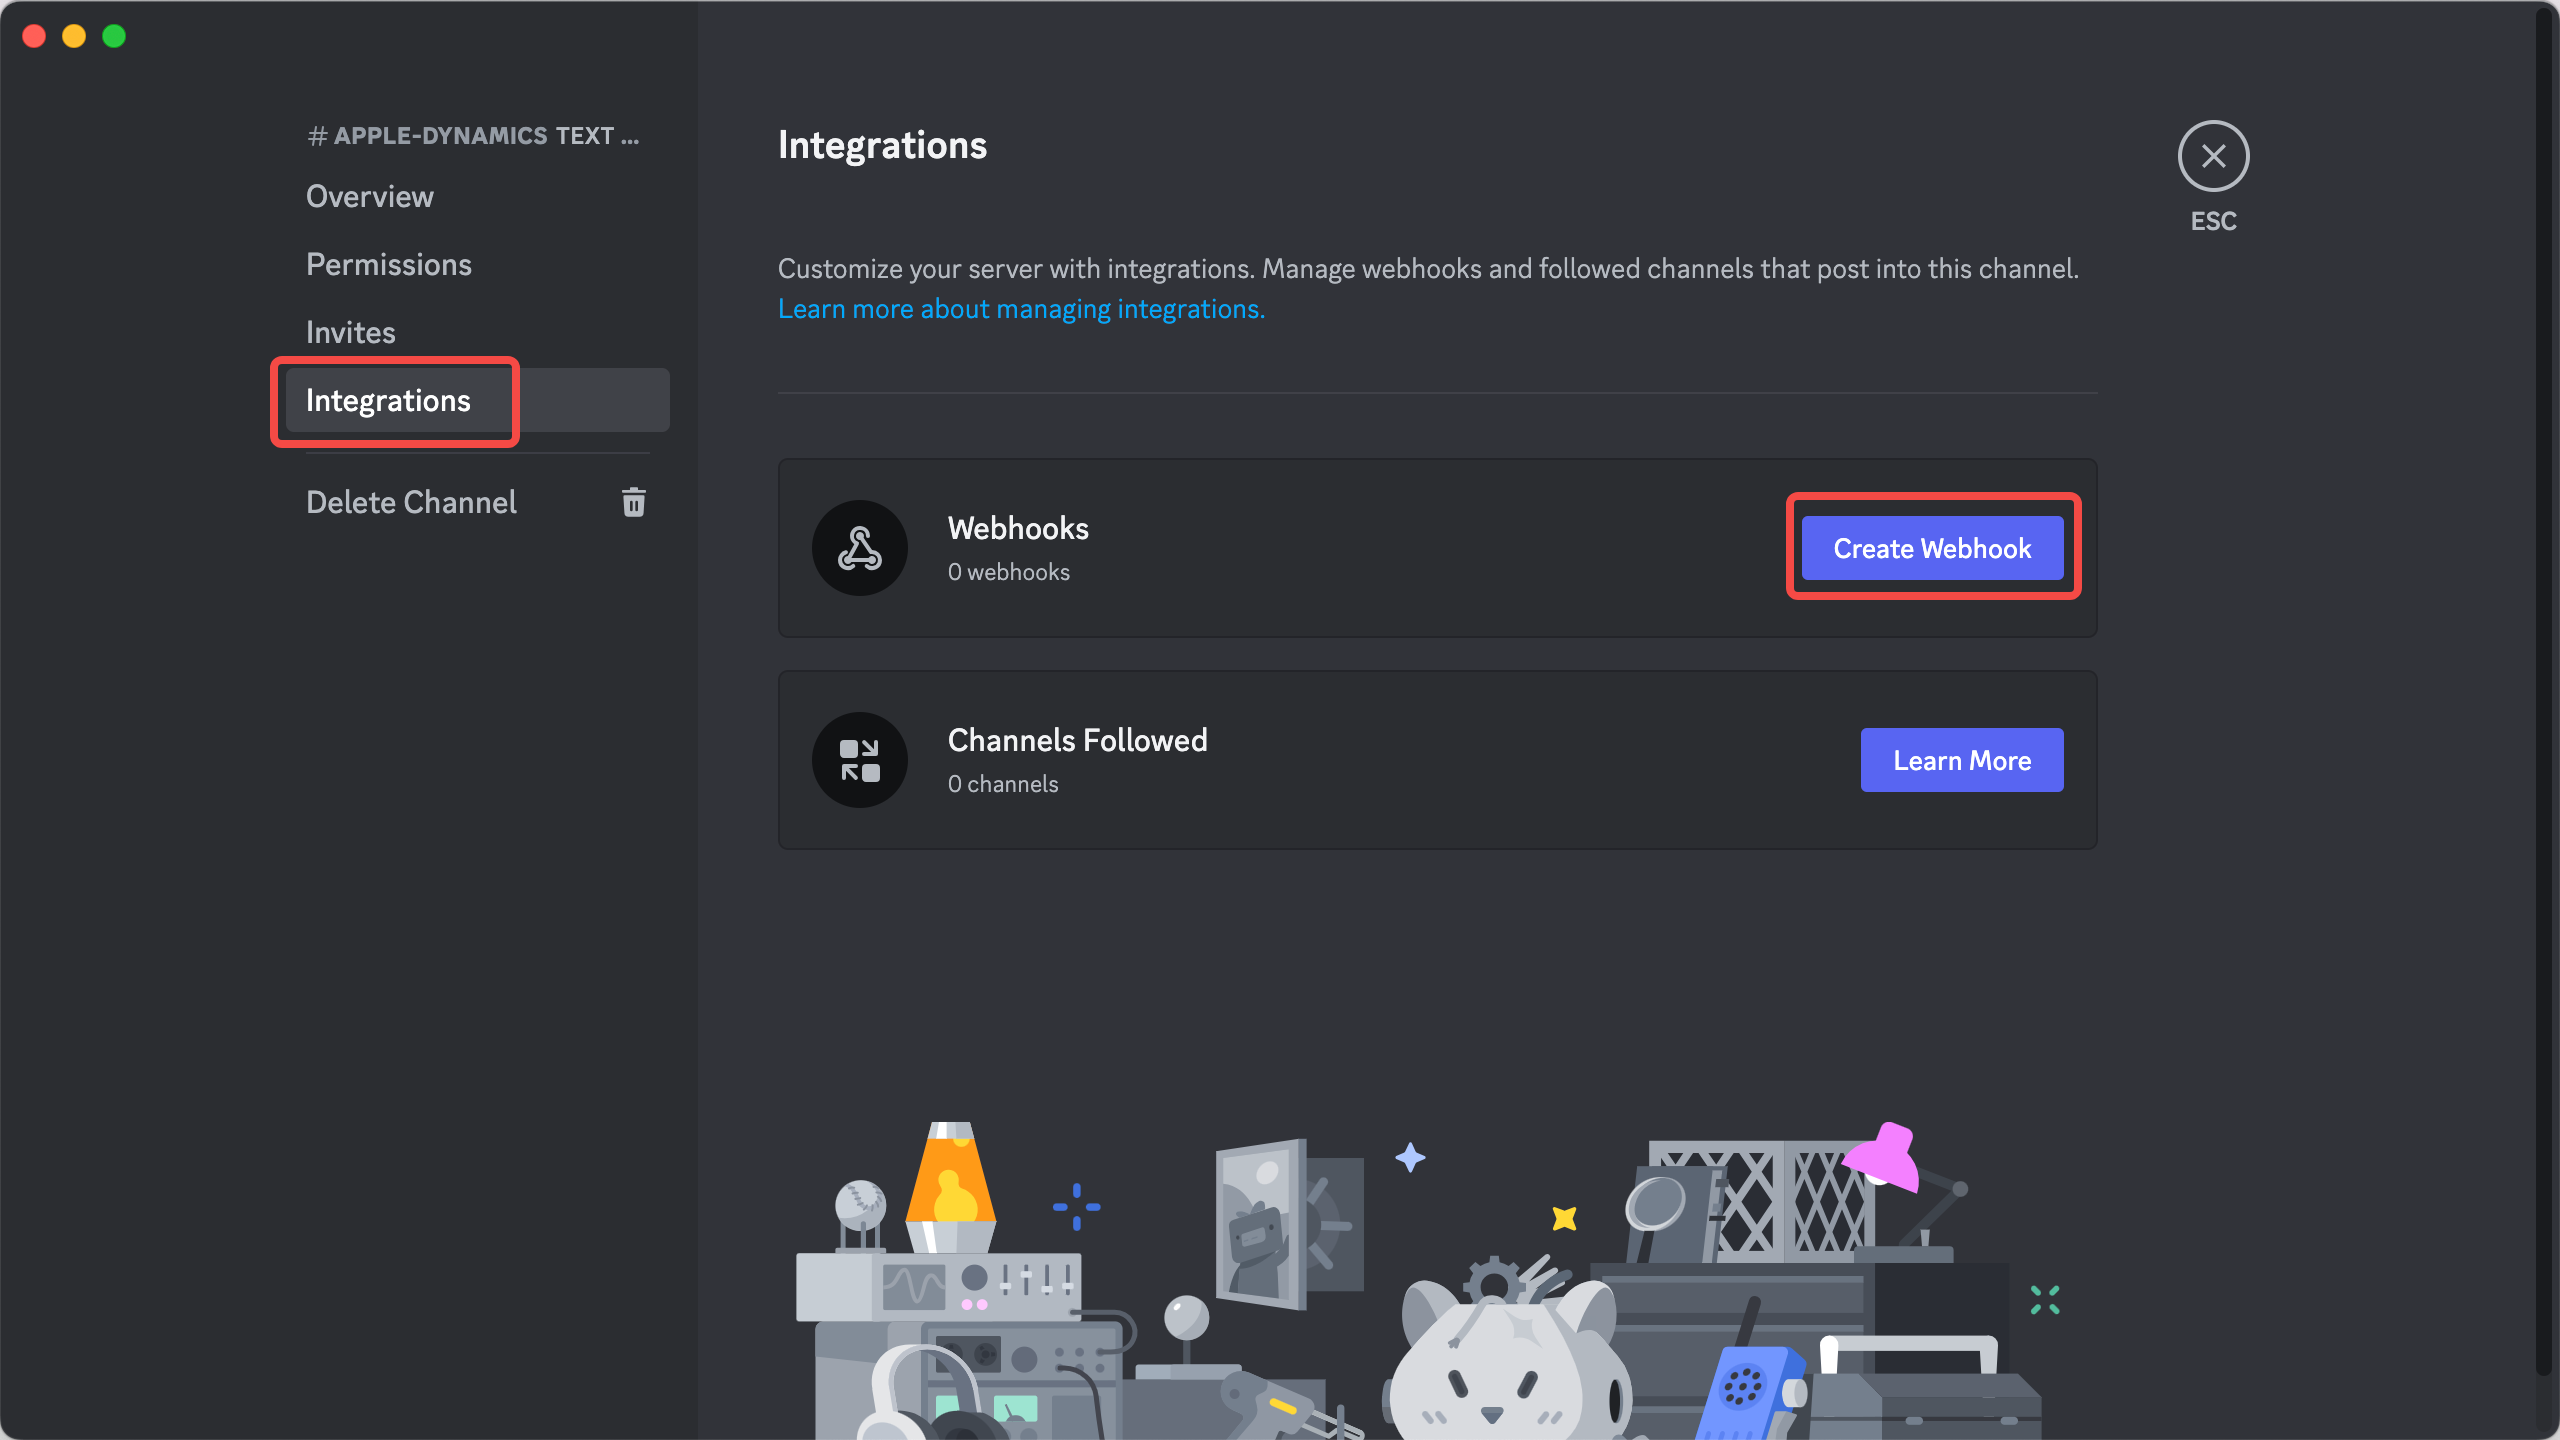 |
Step 4: Once your webhook is ready, you can give it a unique name. Then, click the "Copy Webhook URL" button to copy the Webhook URL and paste it into ValueSpot.
| Step 4.1 | Step 4.2 |
|---|---|
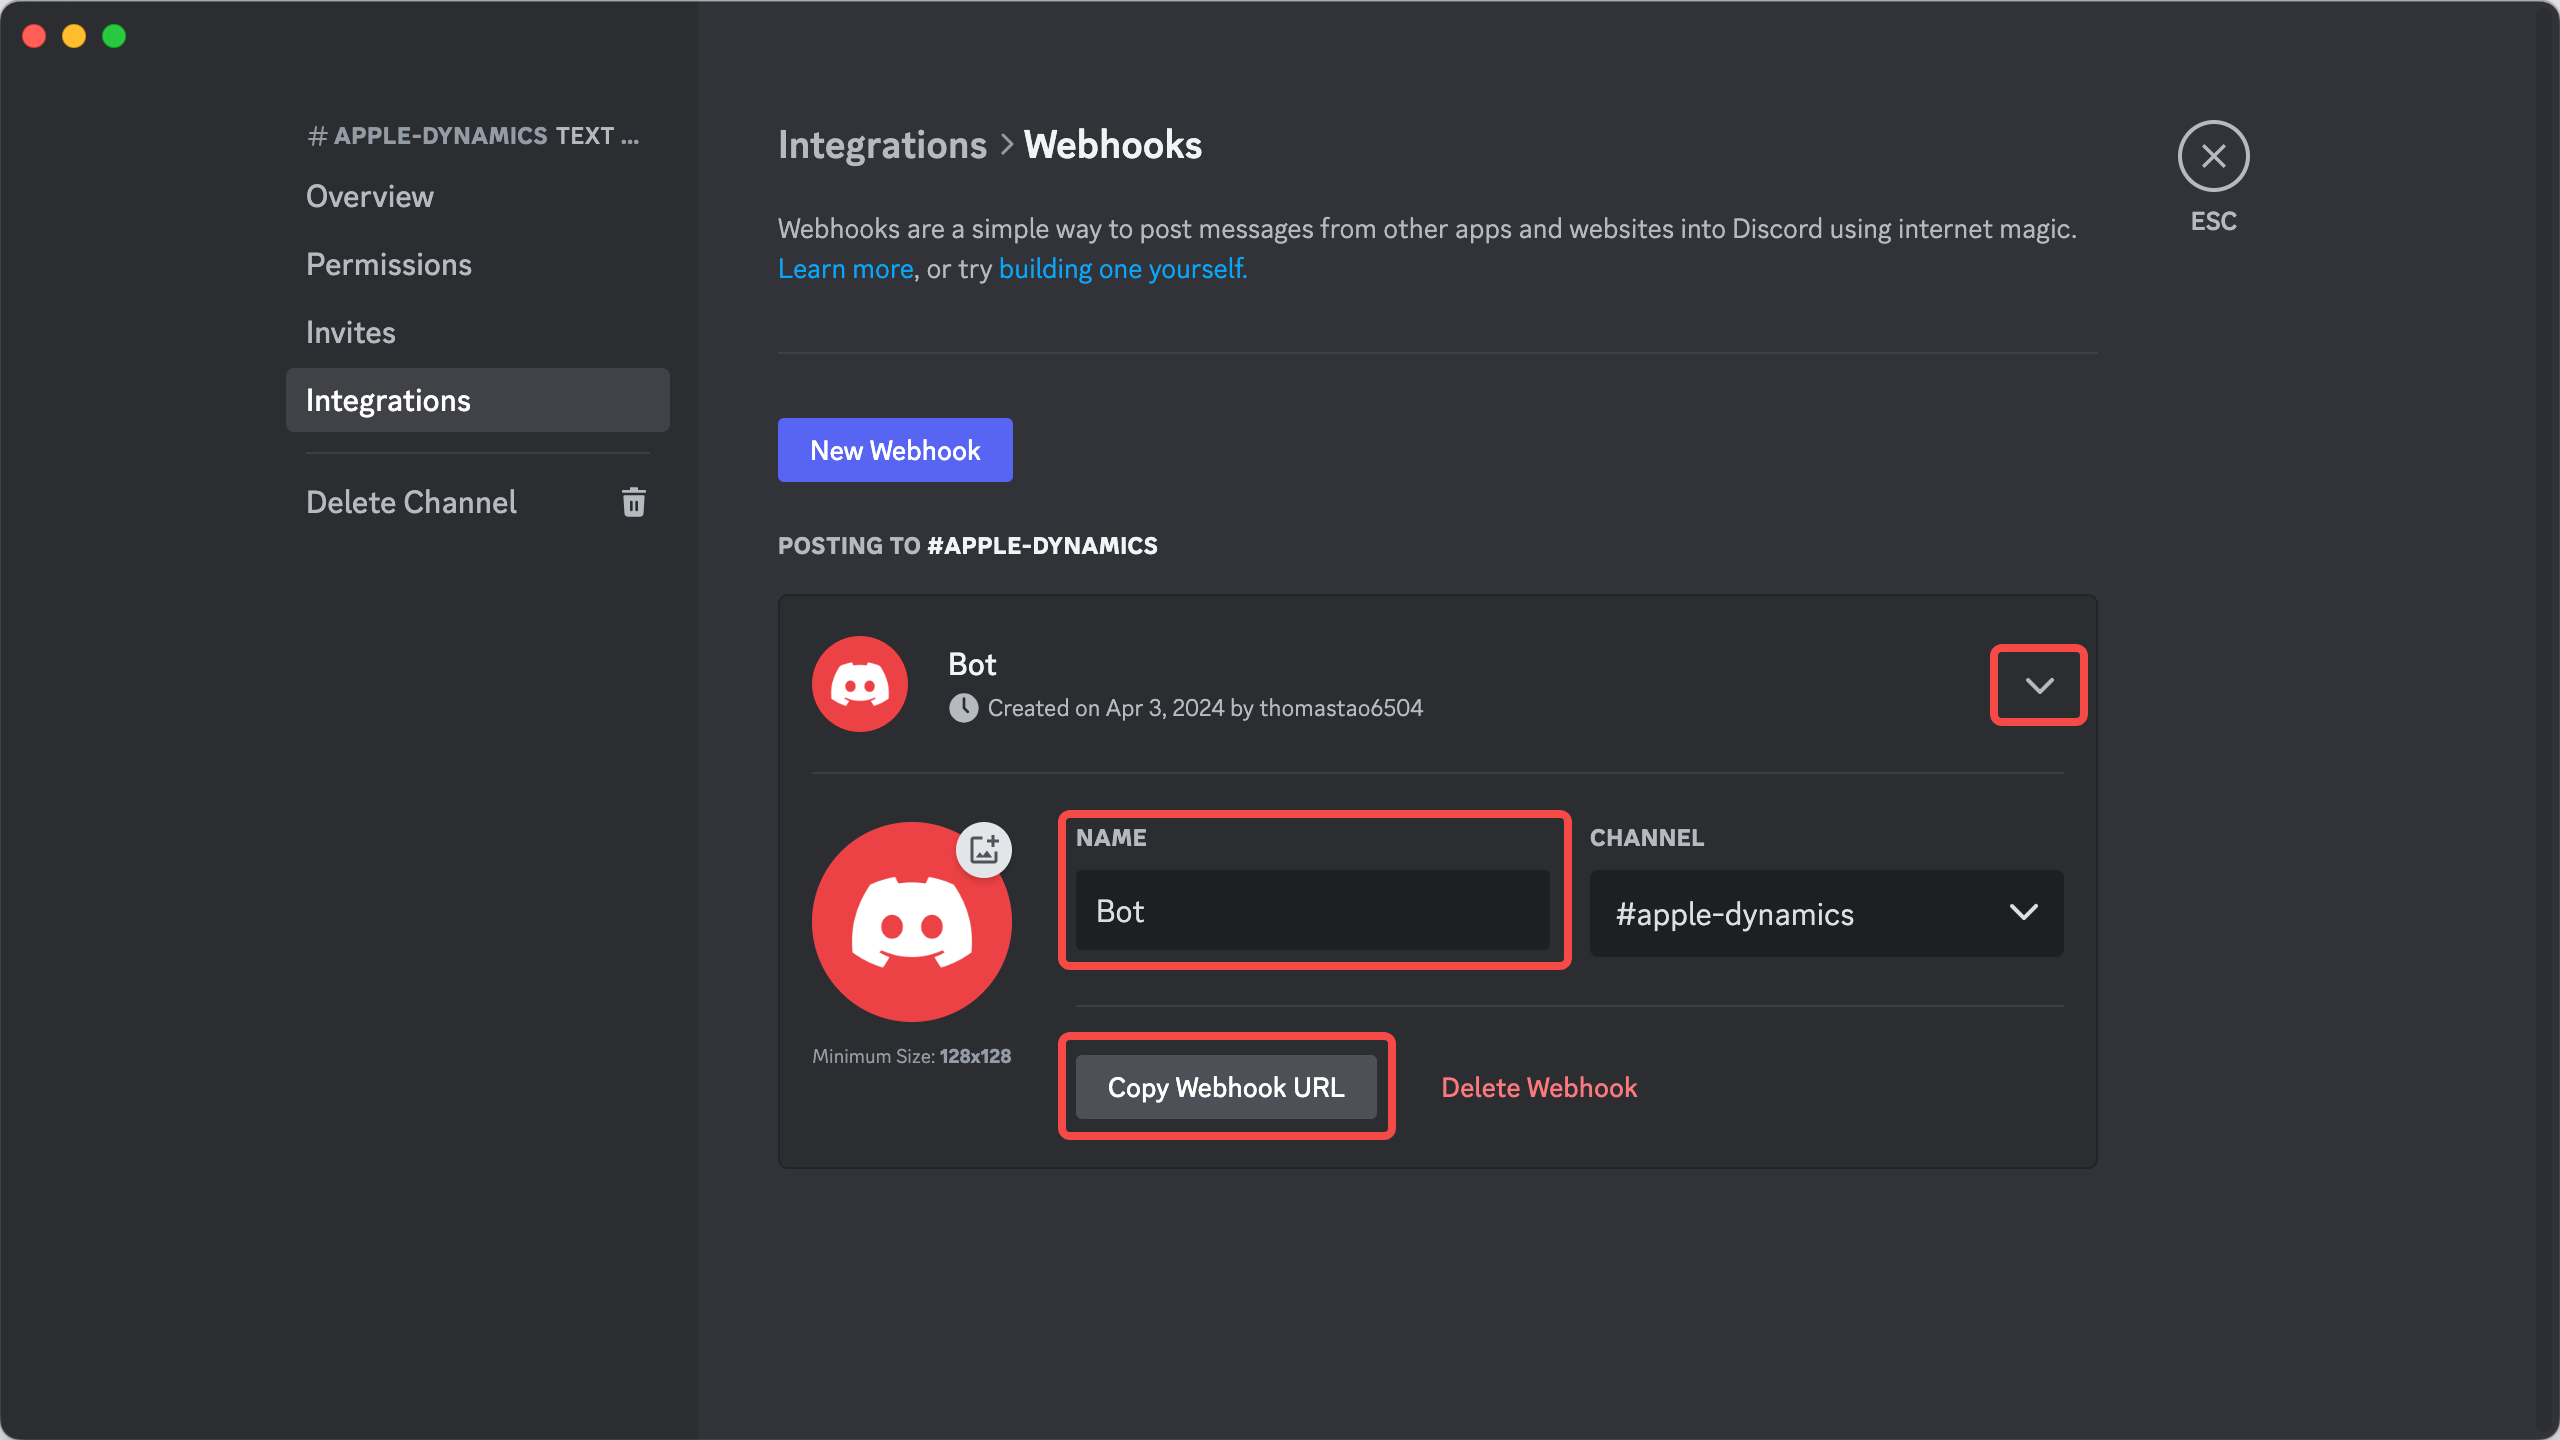 |  |
X / Twitter
Using ValueSpot, you can create an autopost bot to automatically publish posts on X that meet your requirements. Here are some demos: @apple_news_top, @google_news_top, @ai_bulletin_top.
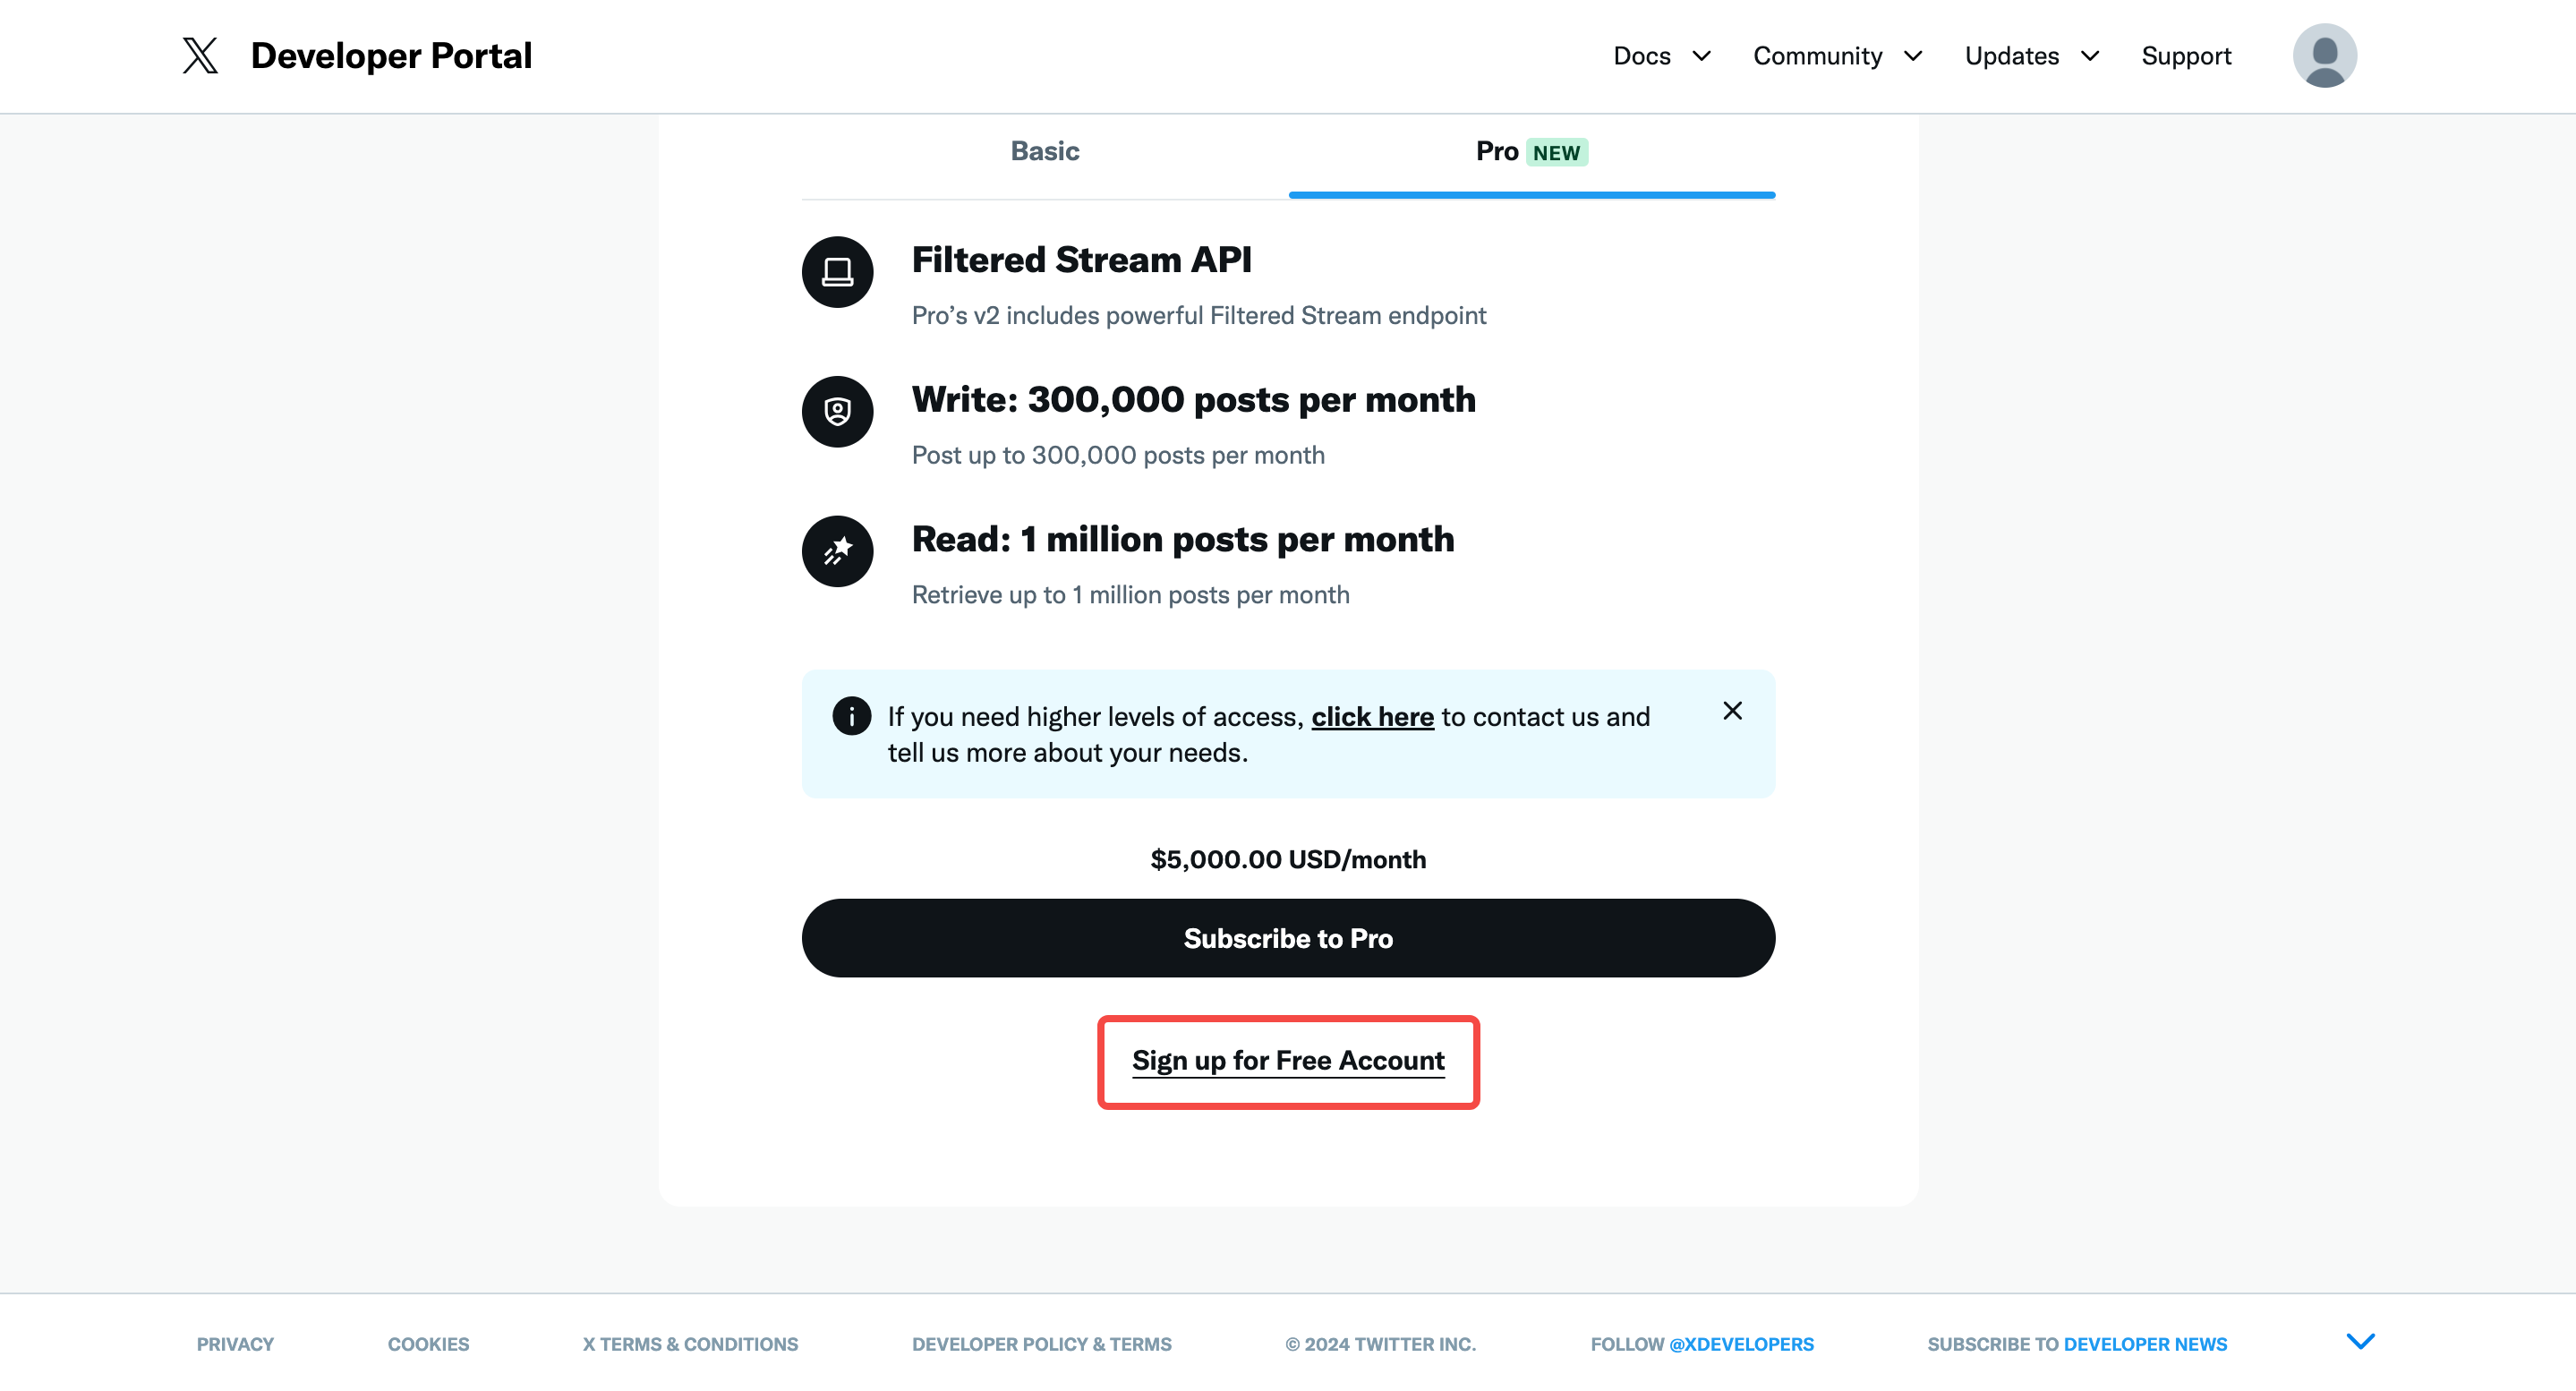
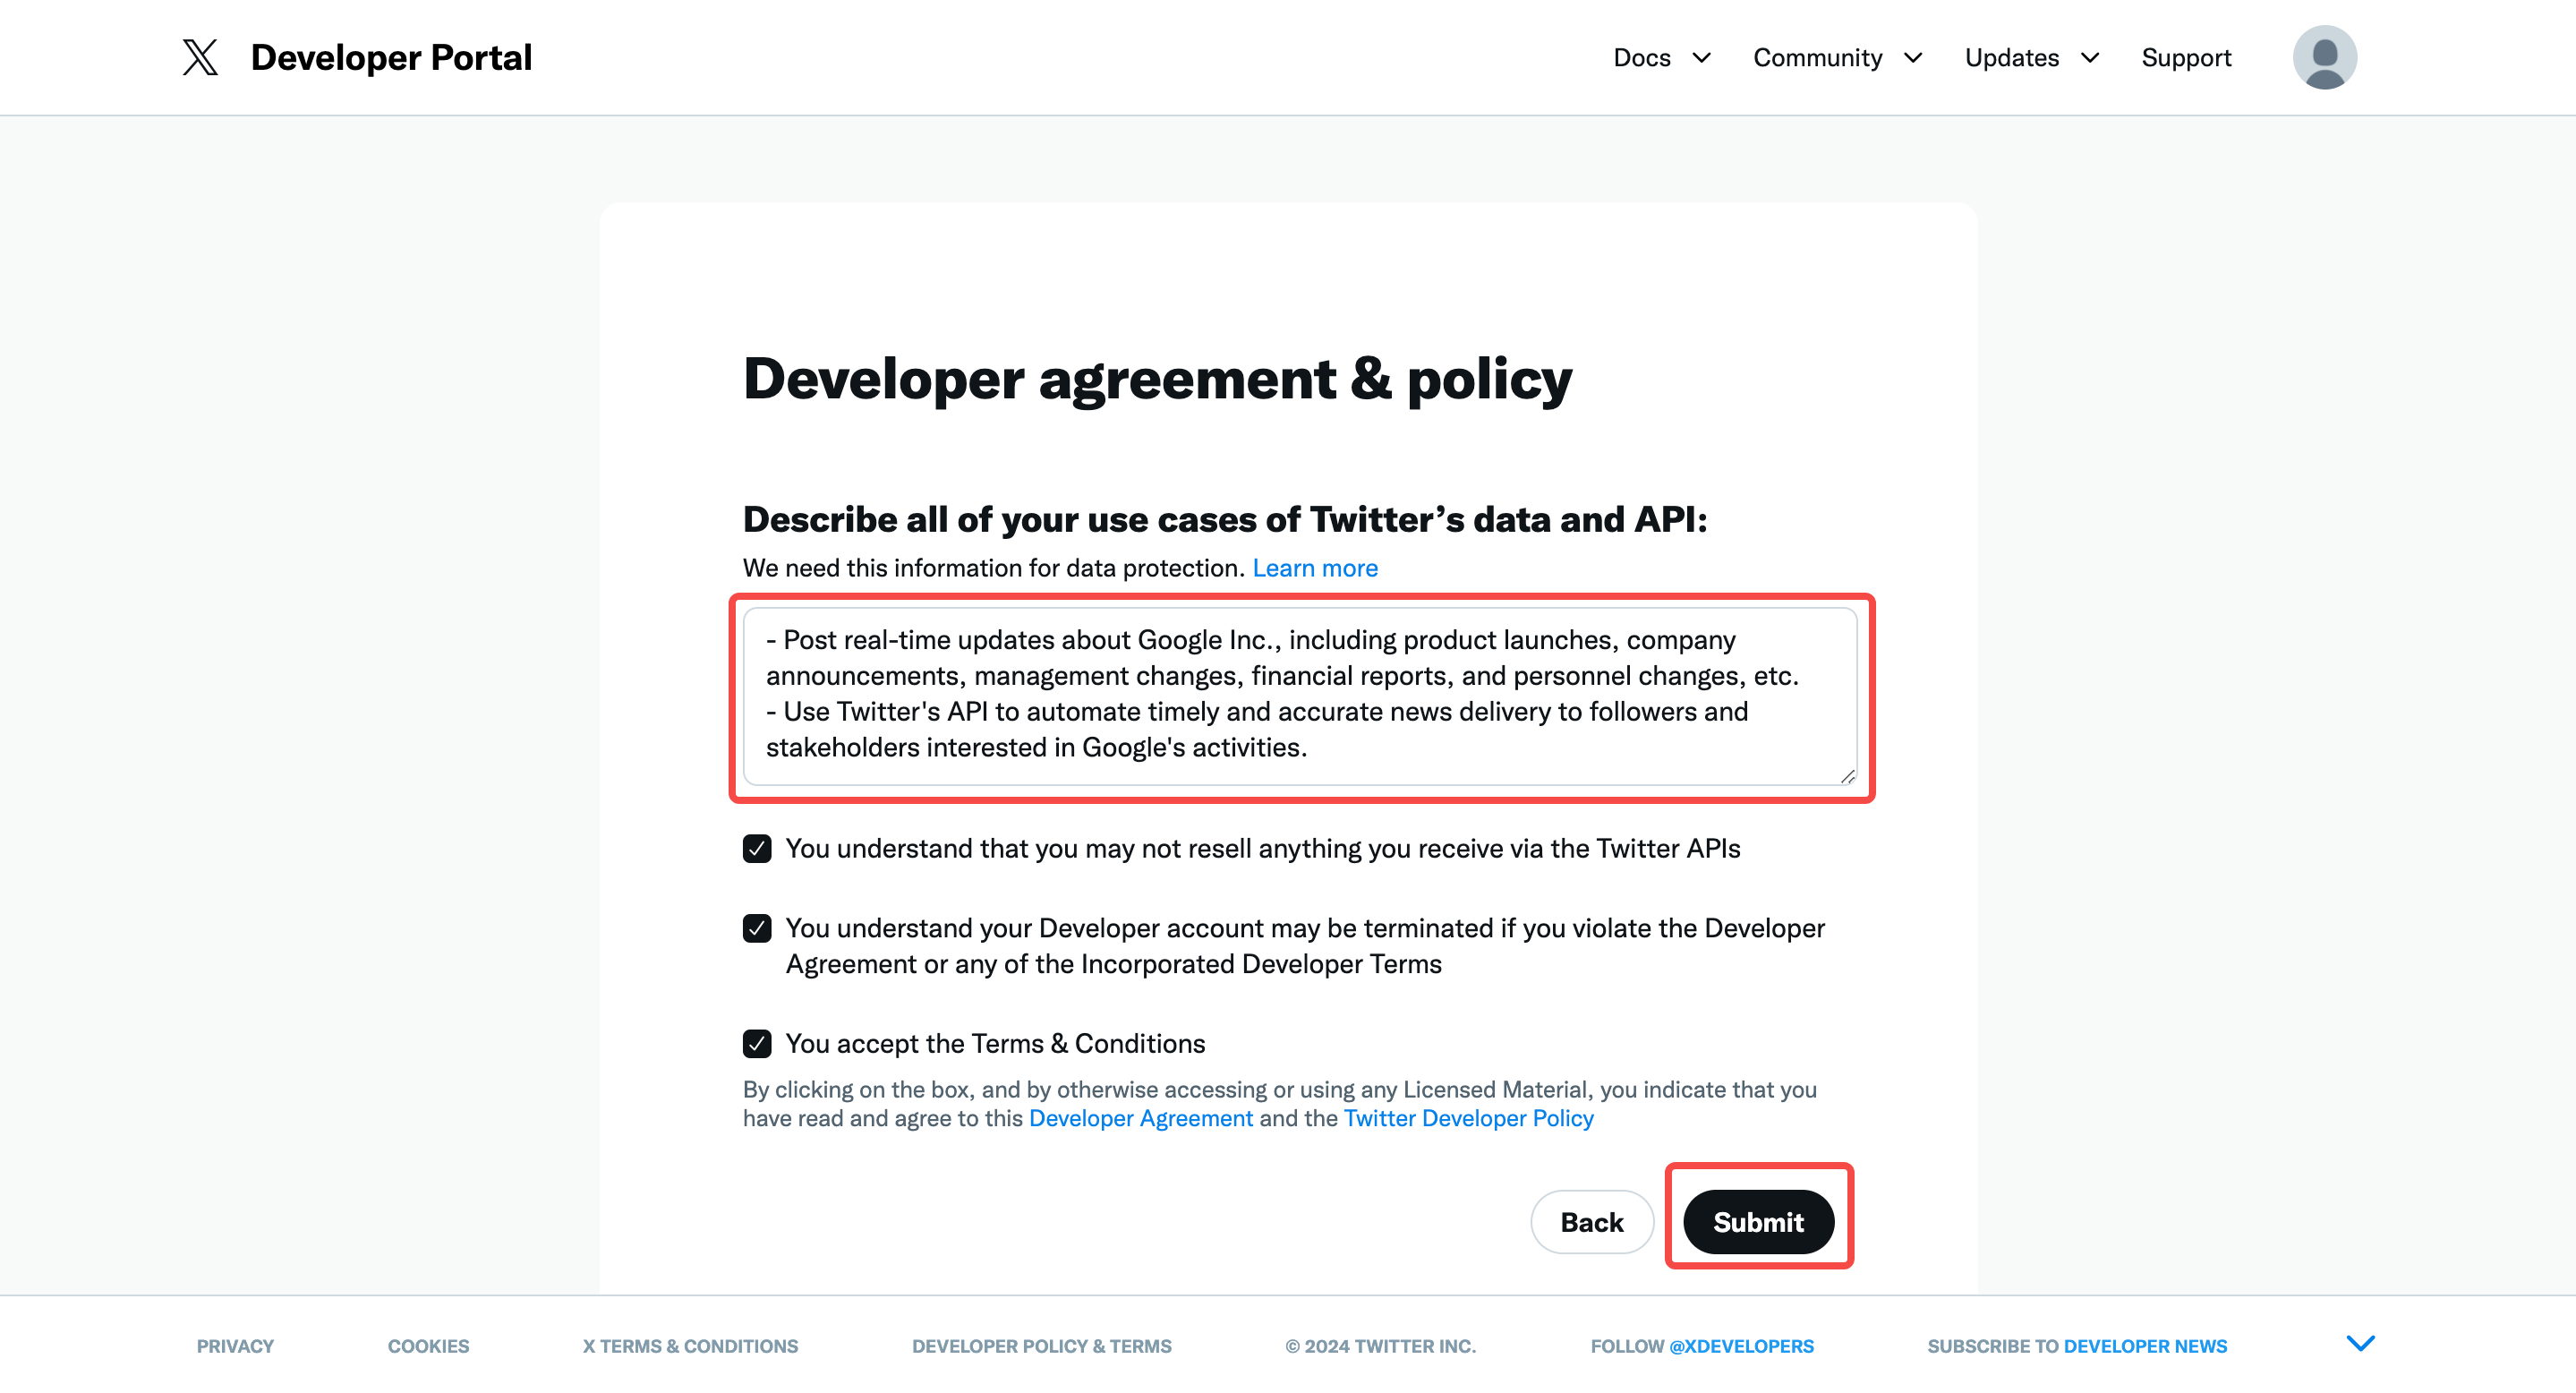
Step 1: Go to the X Developer Portal and register for a developer account. A free account allows you to post up to 1500 posts per month, which is usually sufficient.
| Step 1.1 | Step 1.2 |
|---|---|
 |  |
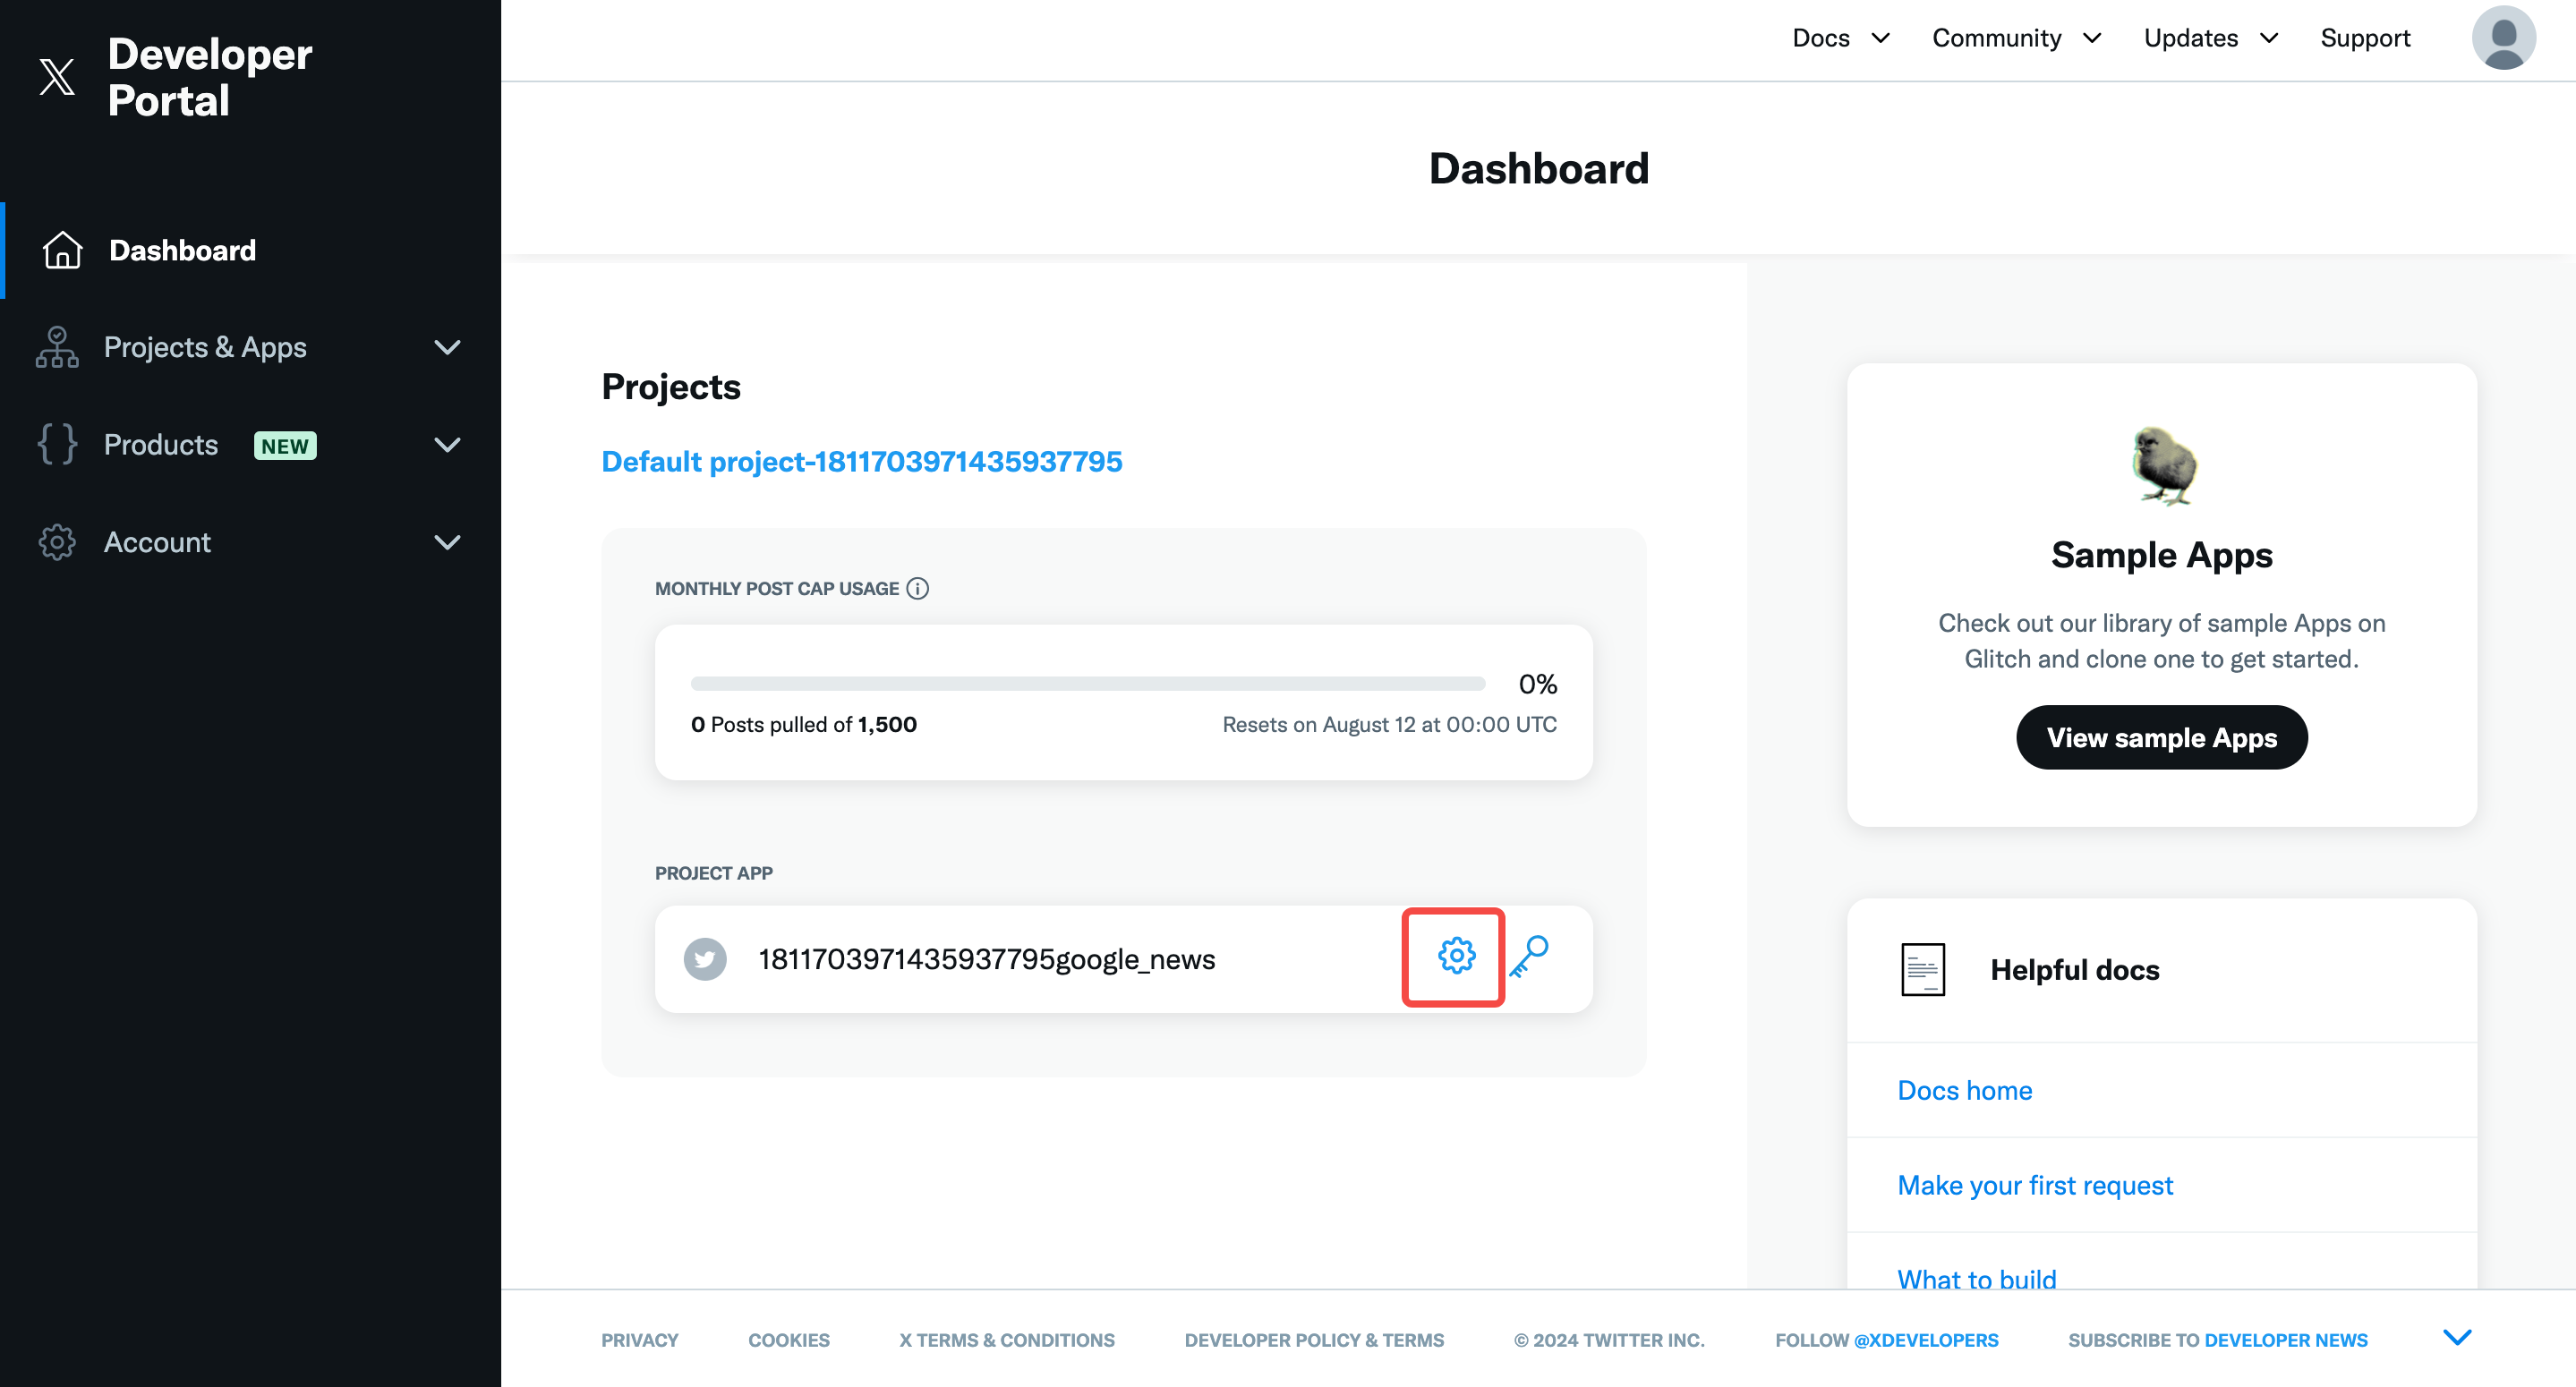
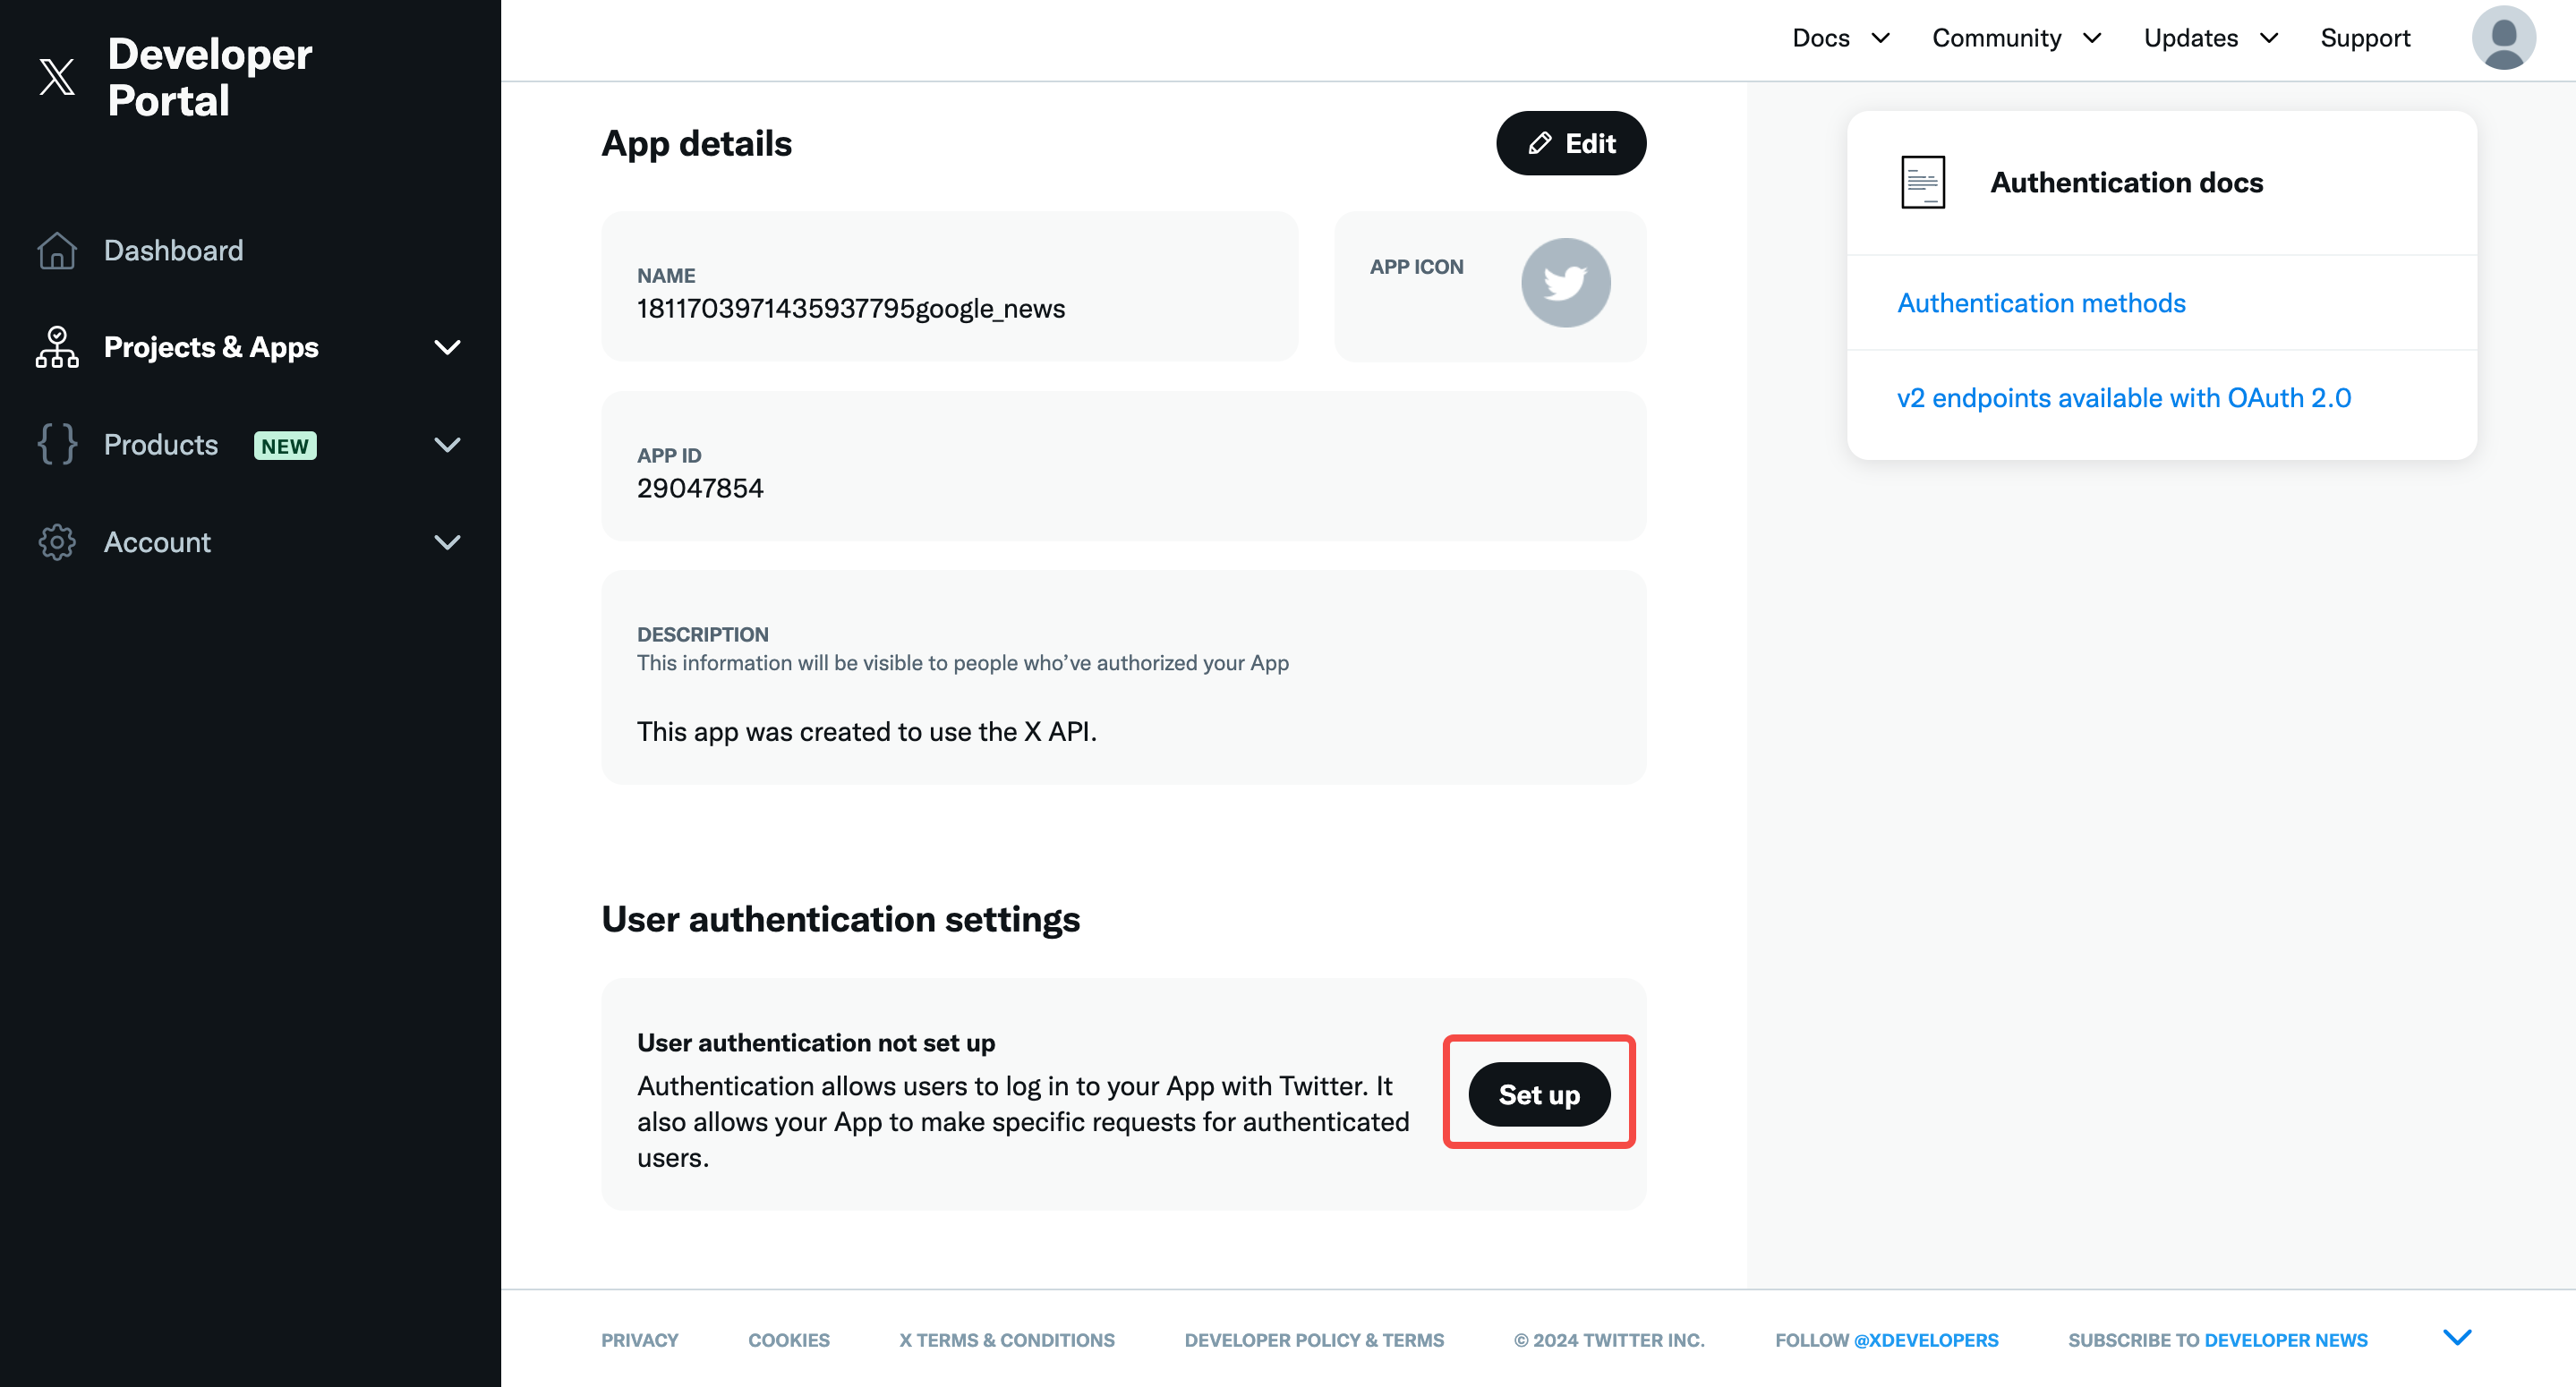
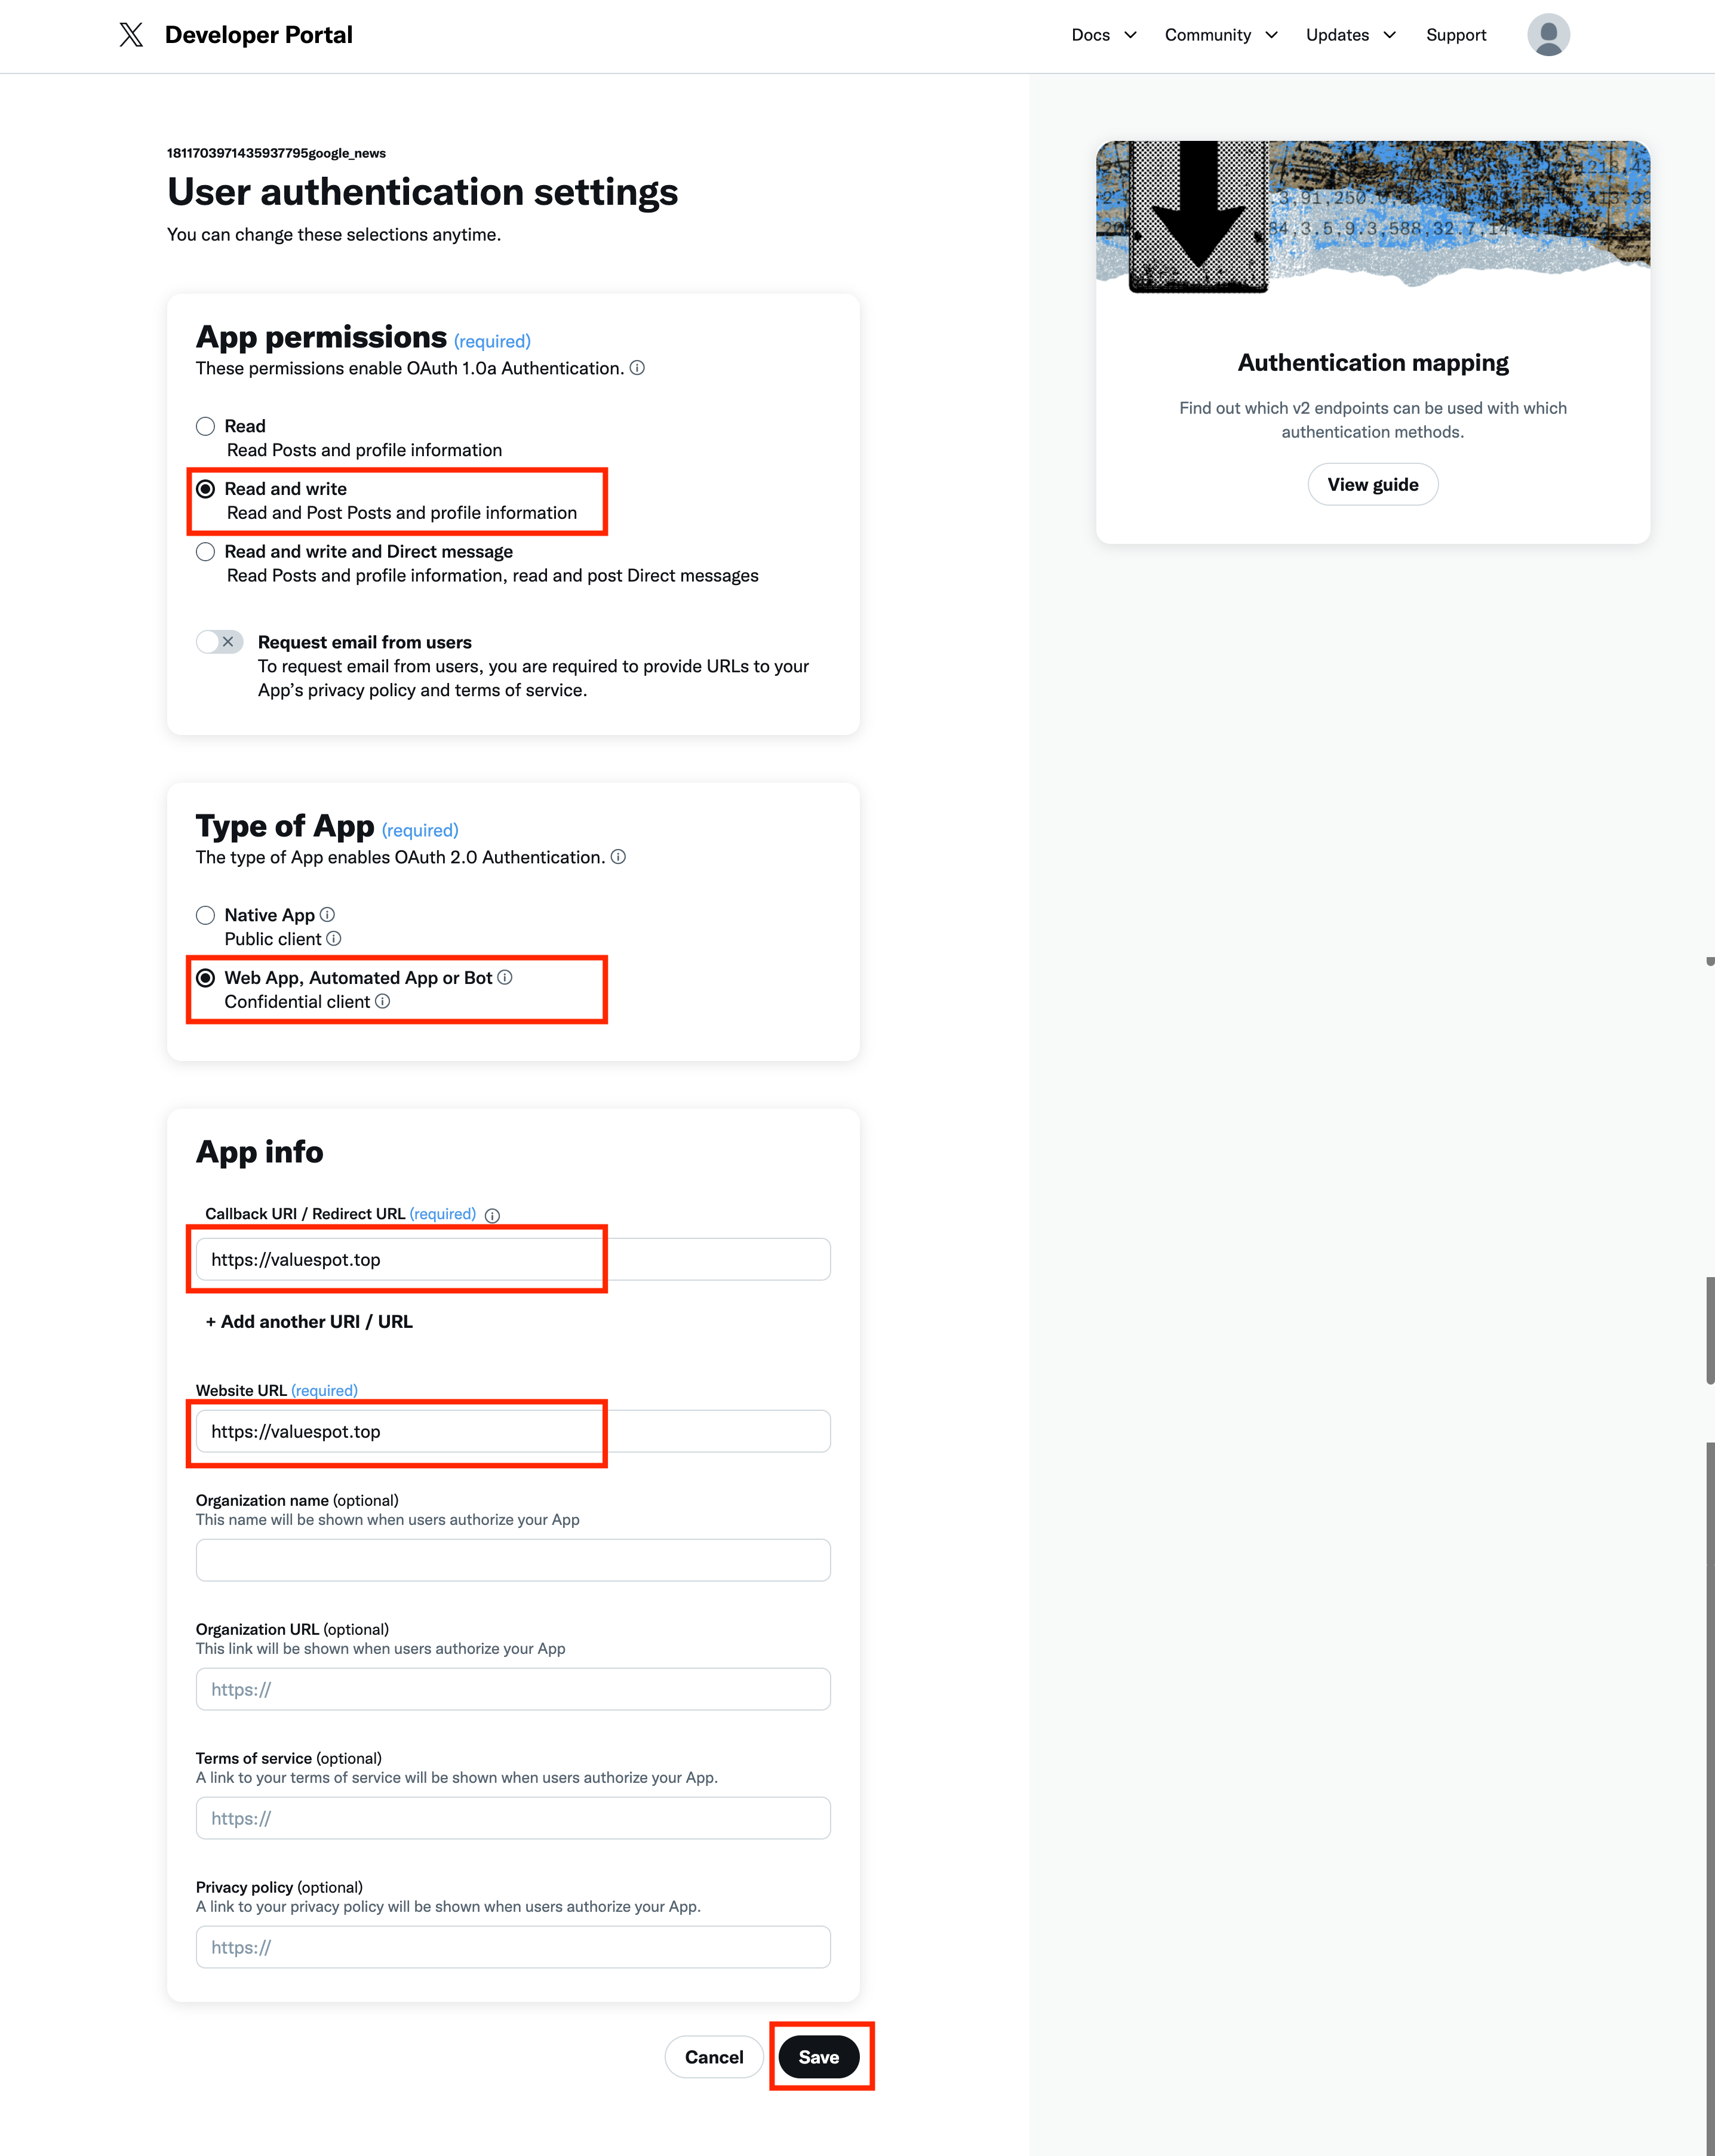
Step 2: After logging in the X Developer Portal, X will automatically create a default Project and App. For simplicity, we will use these defaults. To enable automatic posting, we need to set Write permissions for the App. During this setup, X will enable the OAuth 2.0 authentication mechanism and generate a Client ID and Client Secret. Since we use the OAuth 1.0a authentication mechanism, we can ignore the Client ID and Secret.
| Step 2.1 | Step 2.2 | Step 2.3 | Step 2.4 |
|---|---|---|---|
 |  |  |  |
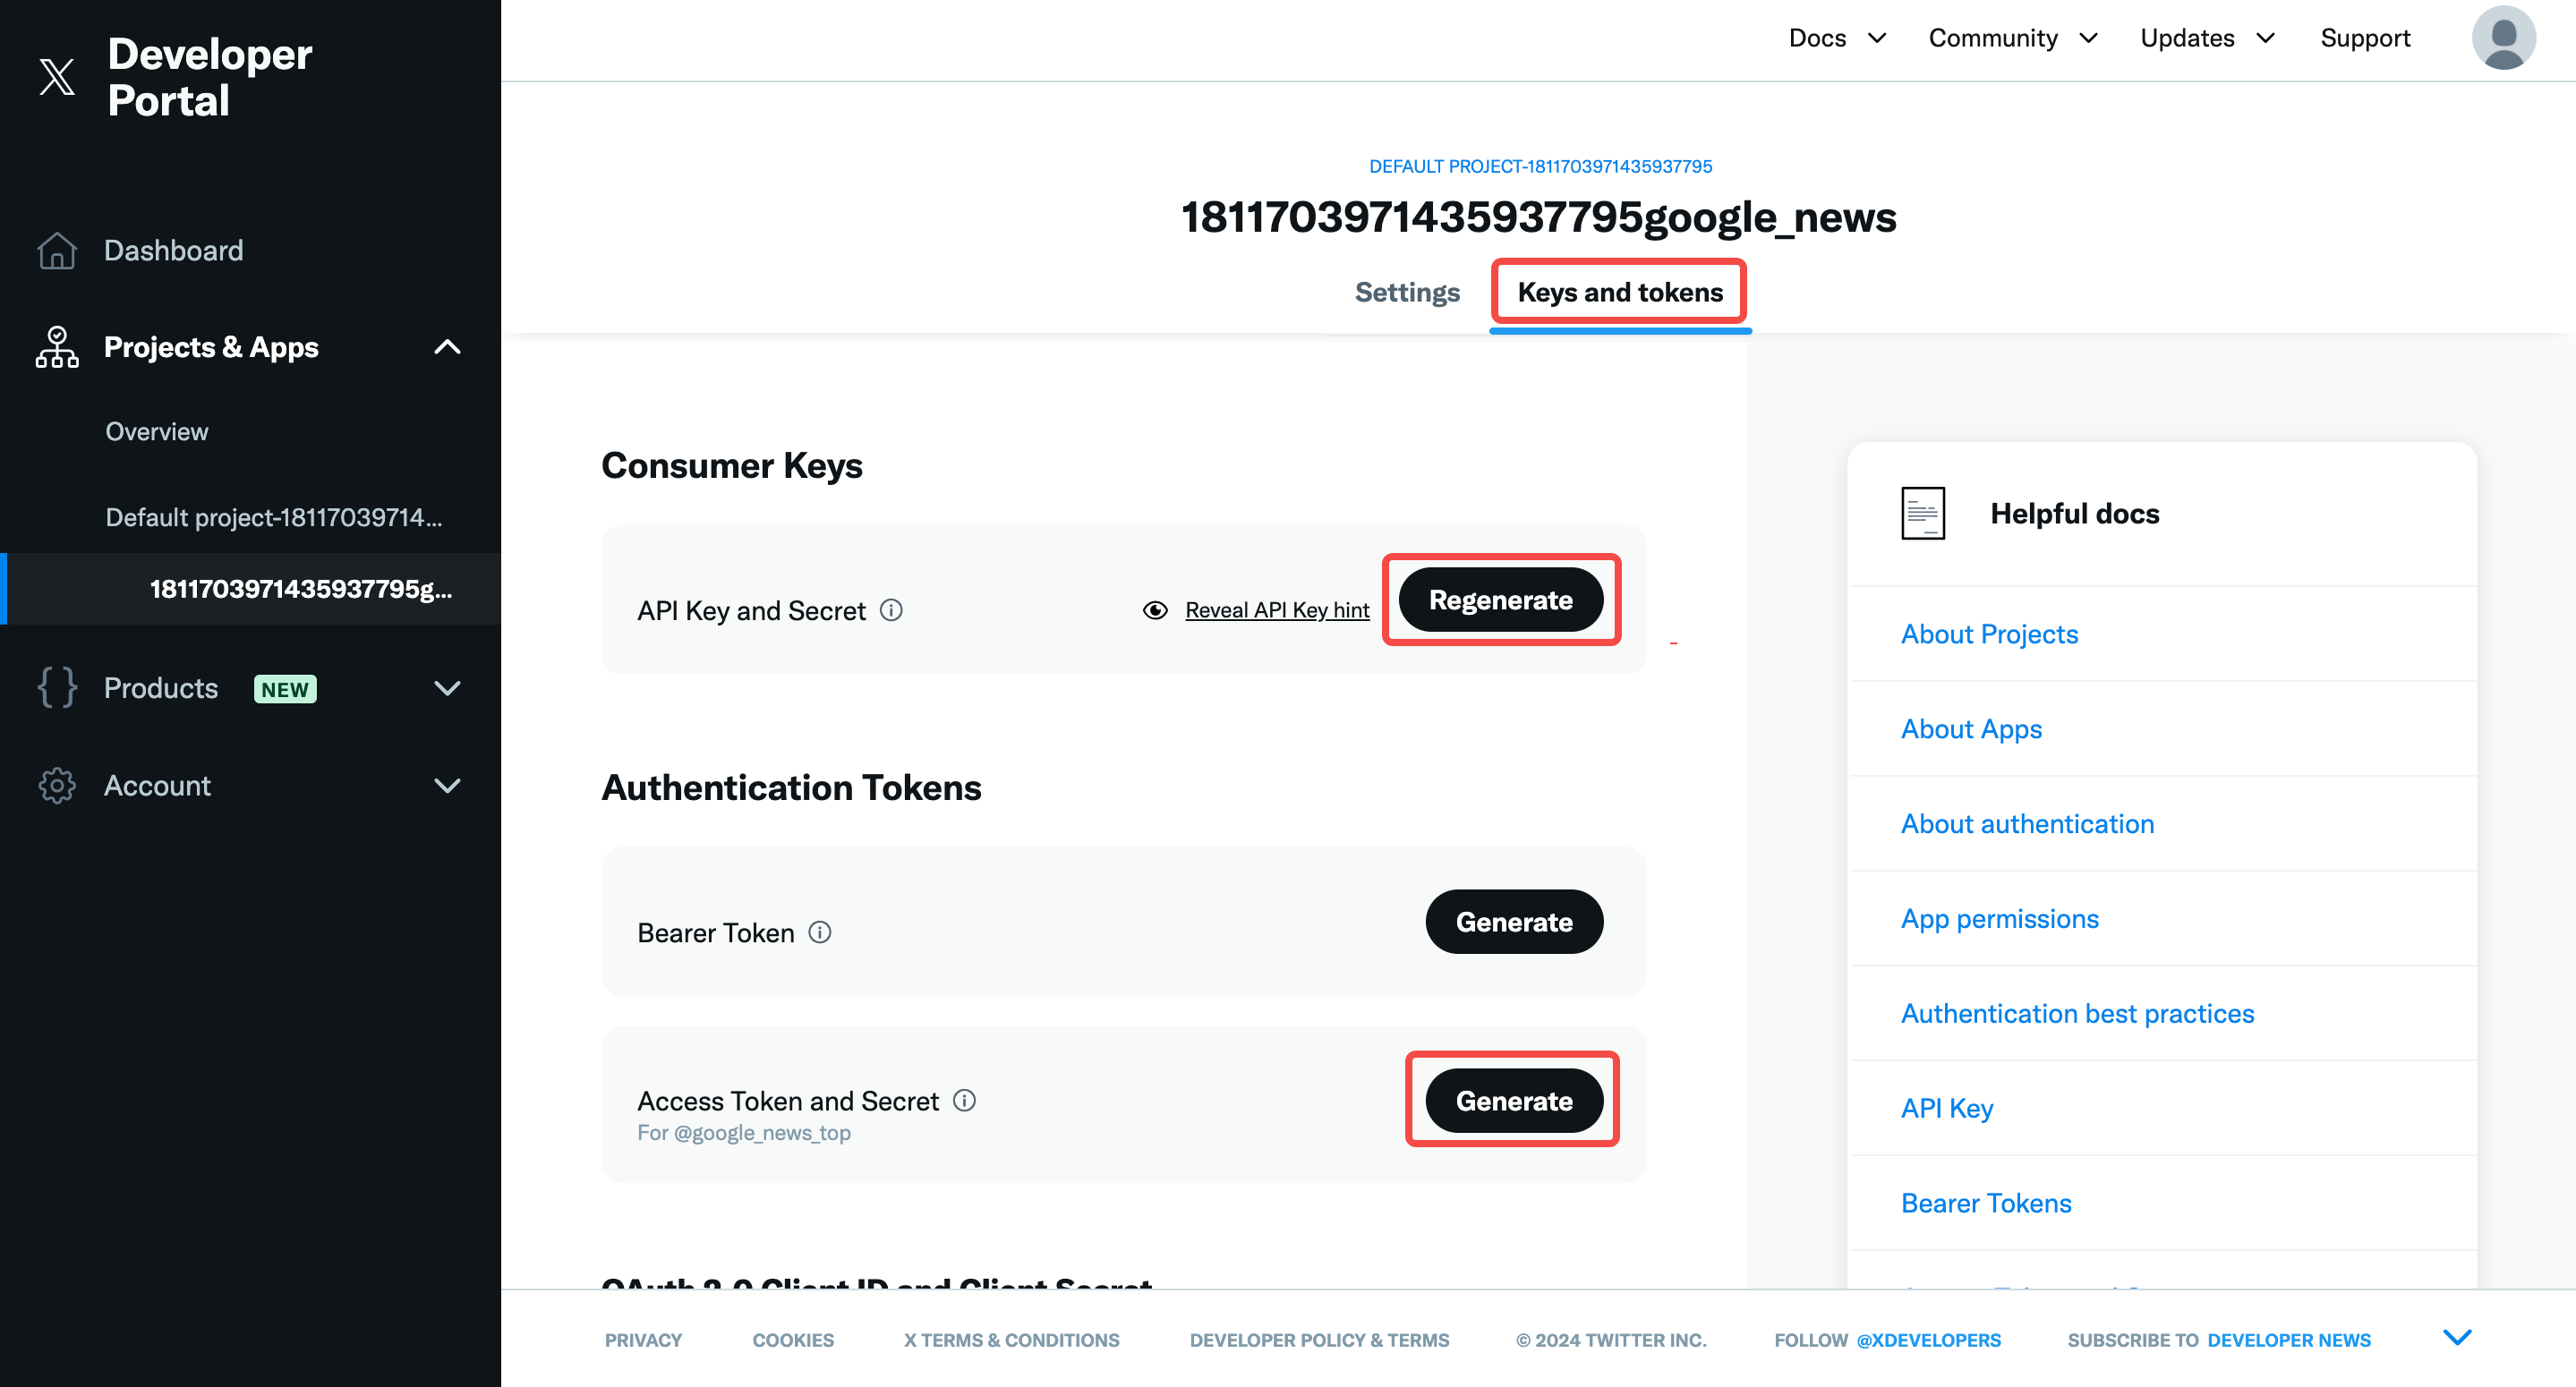
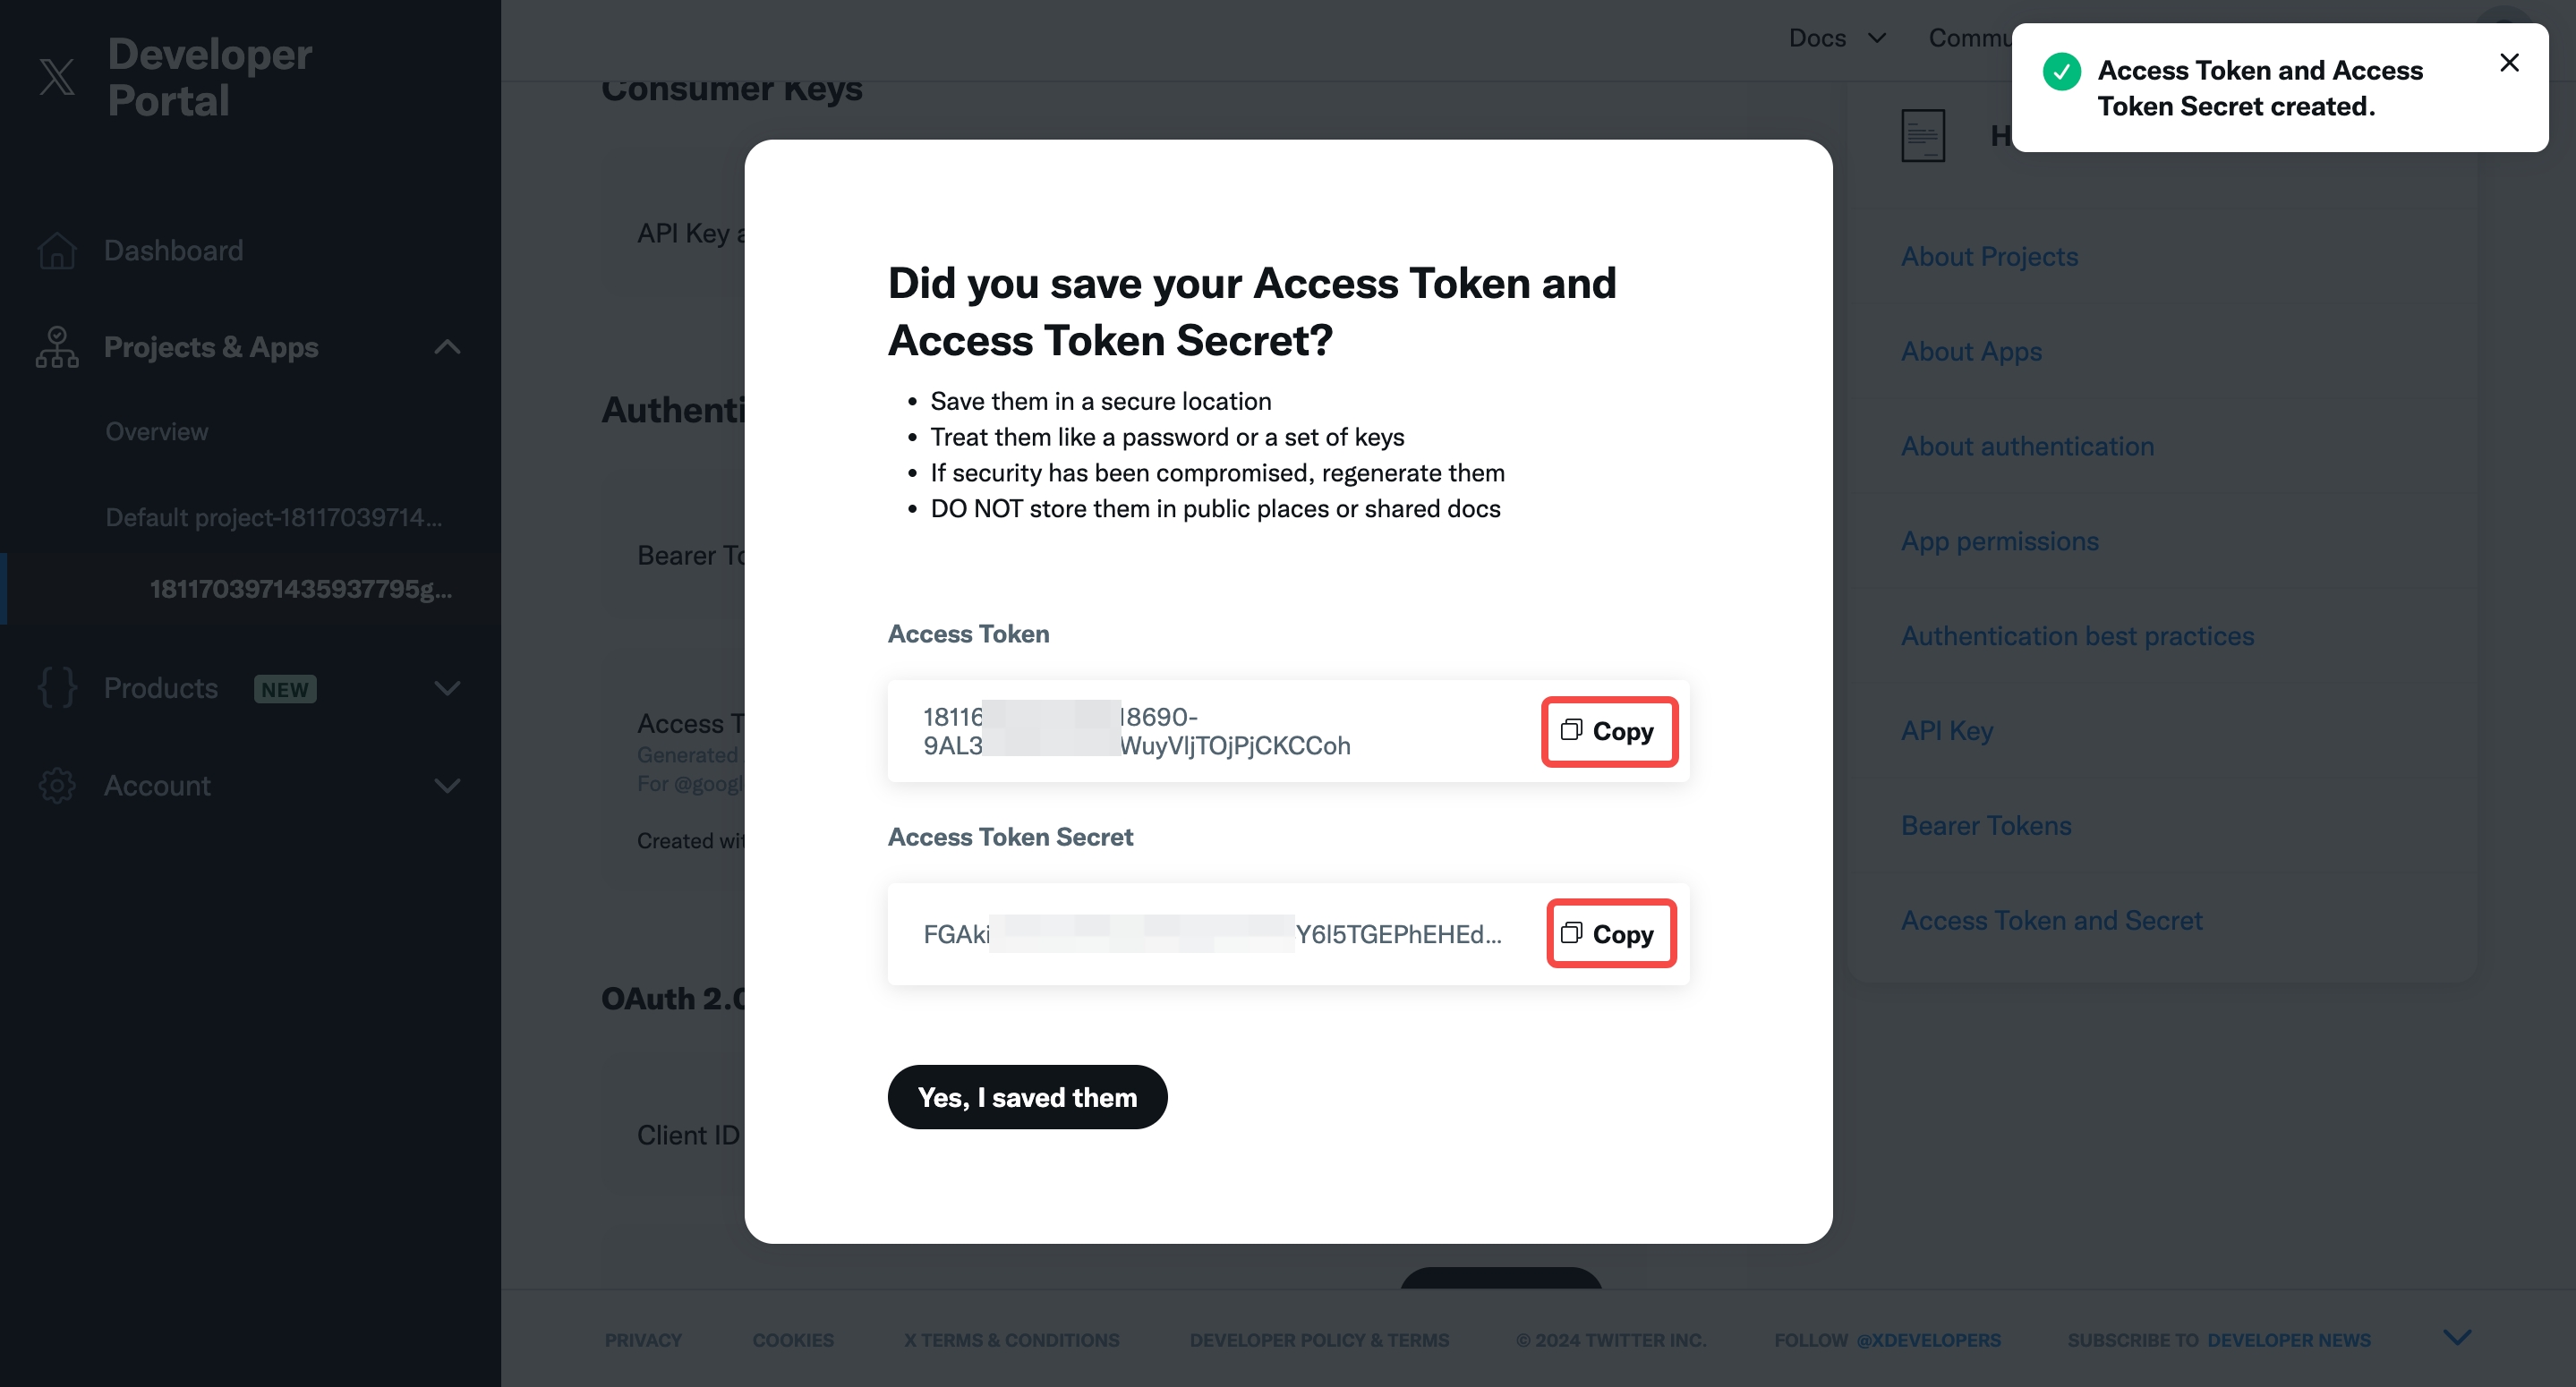
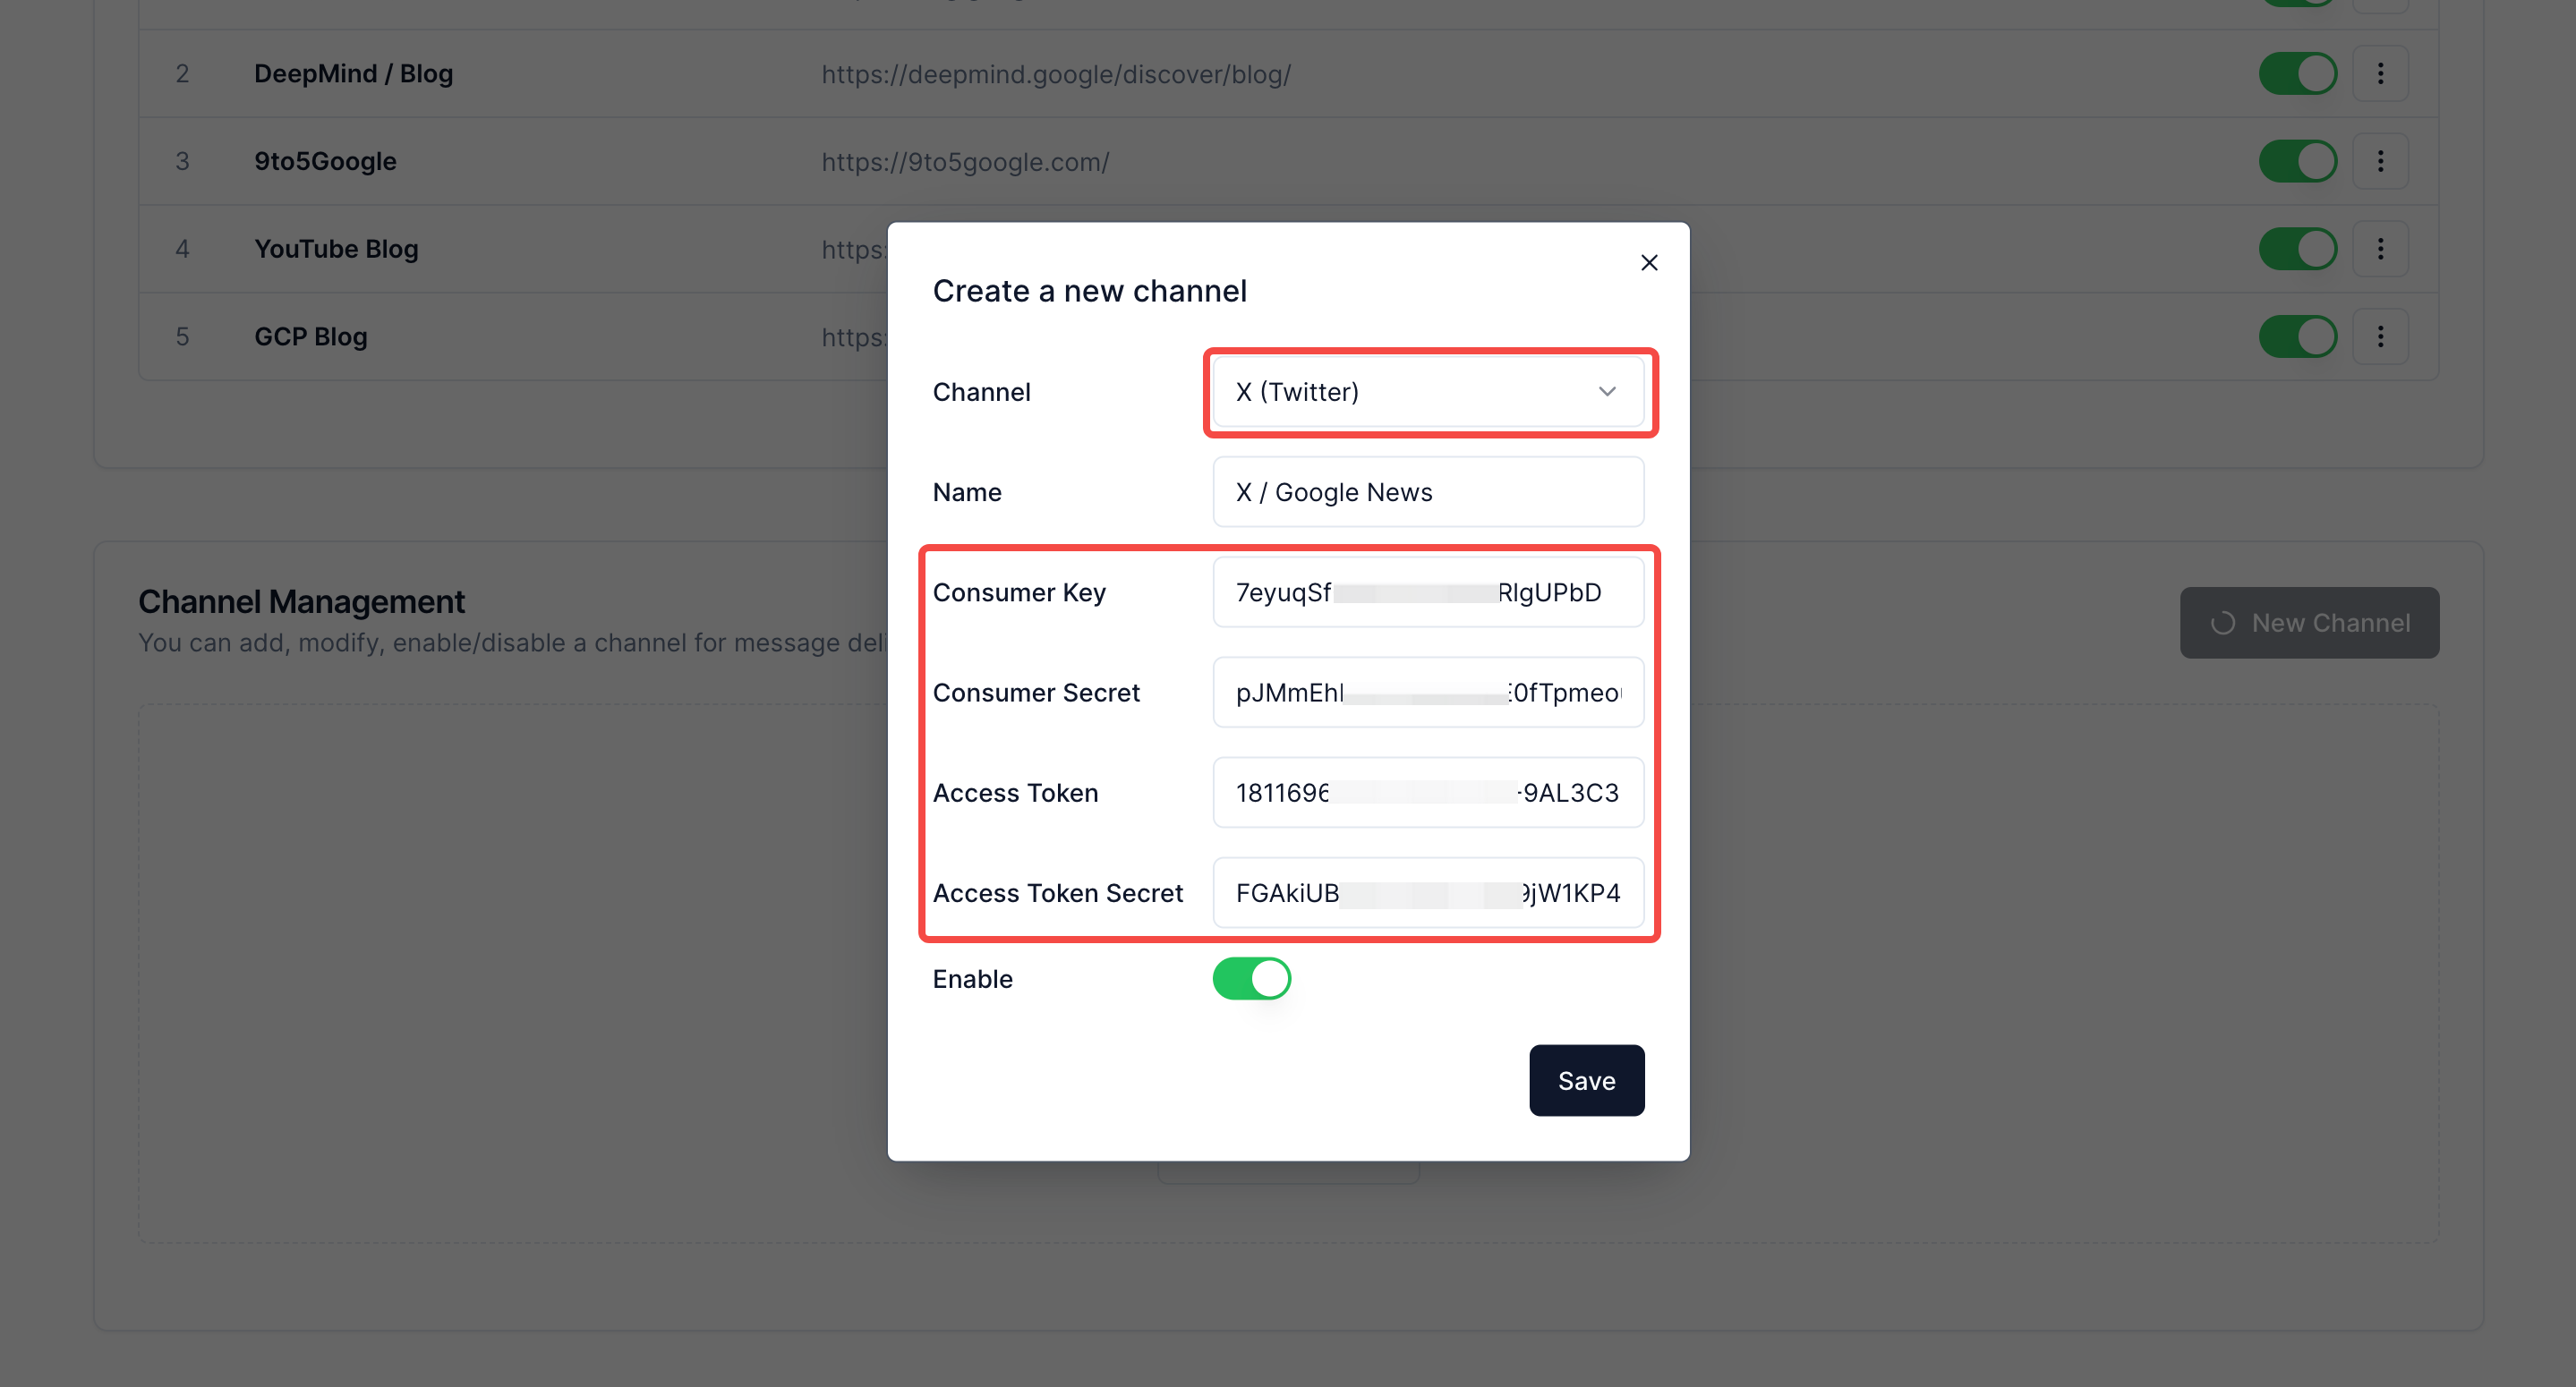
Step 3: Create the Consumer (API) Key and Secret, Access Token and Secret needed to call the X API, and add them to ValueSpot.
| Step 3.1 | Step 3.2 | Step 3.3 | Step 3.4 |
|---|---|---|---|
 |  |  |  |
DingTalk (钉钉)
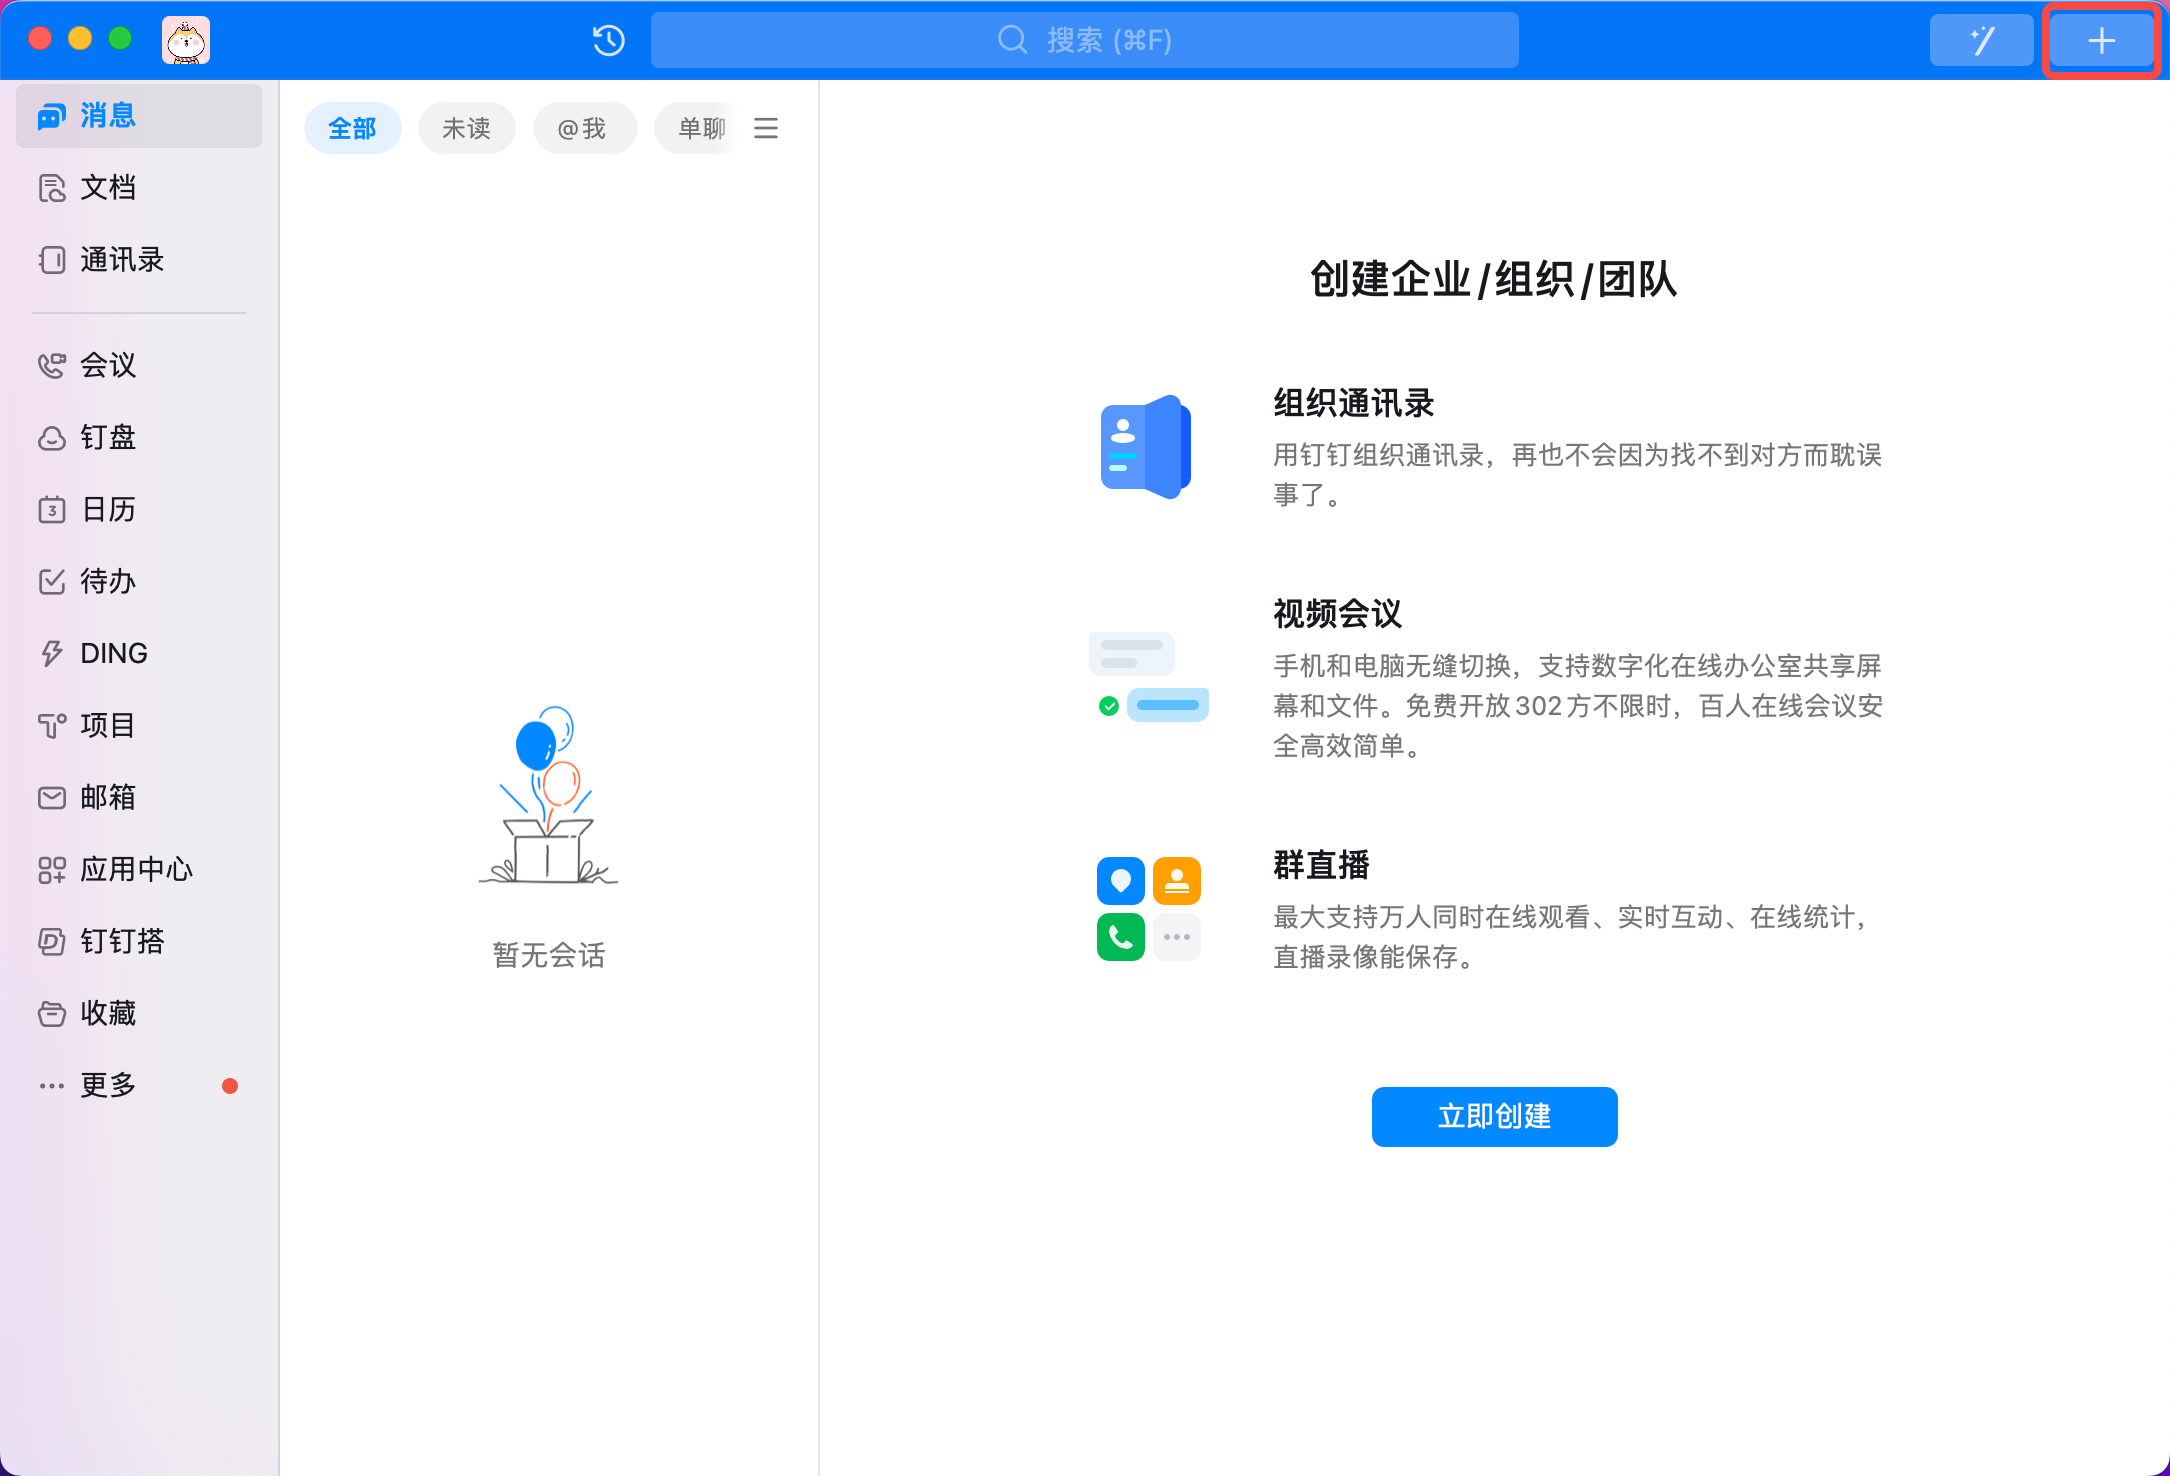
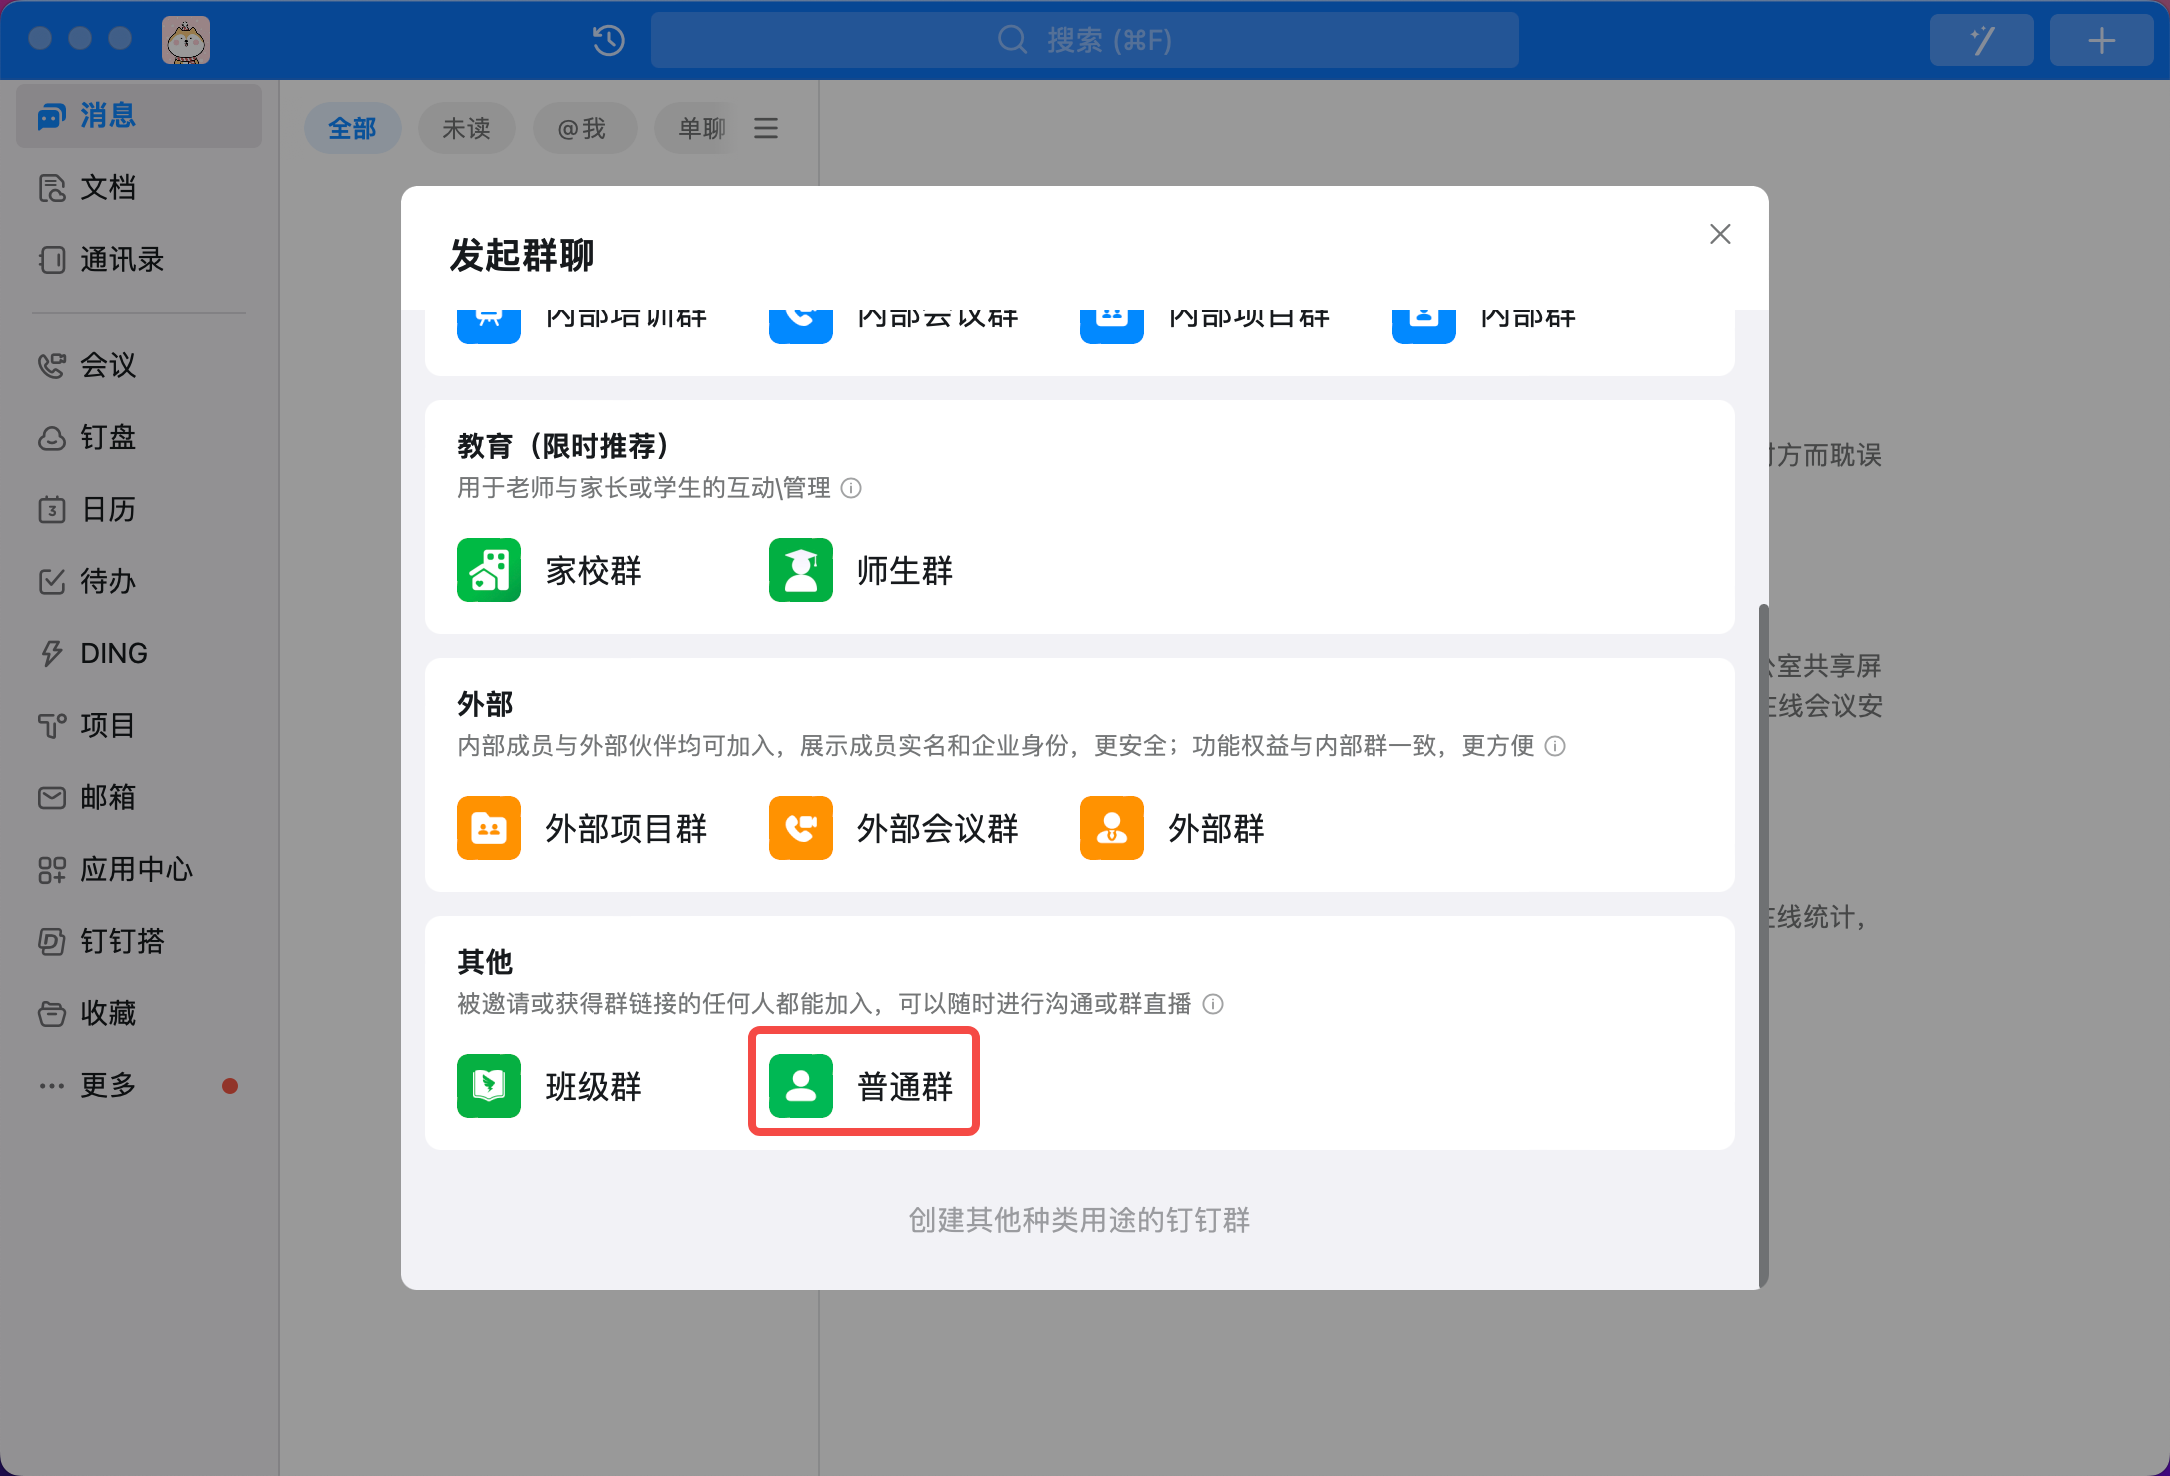
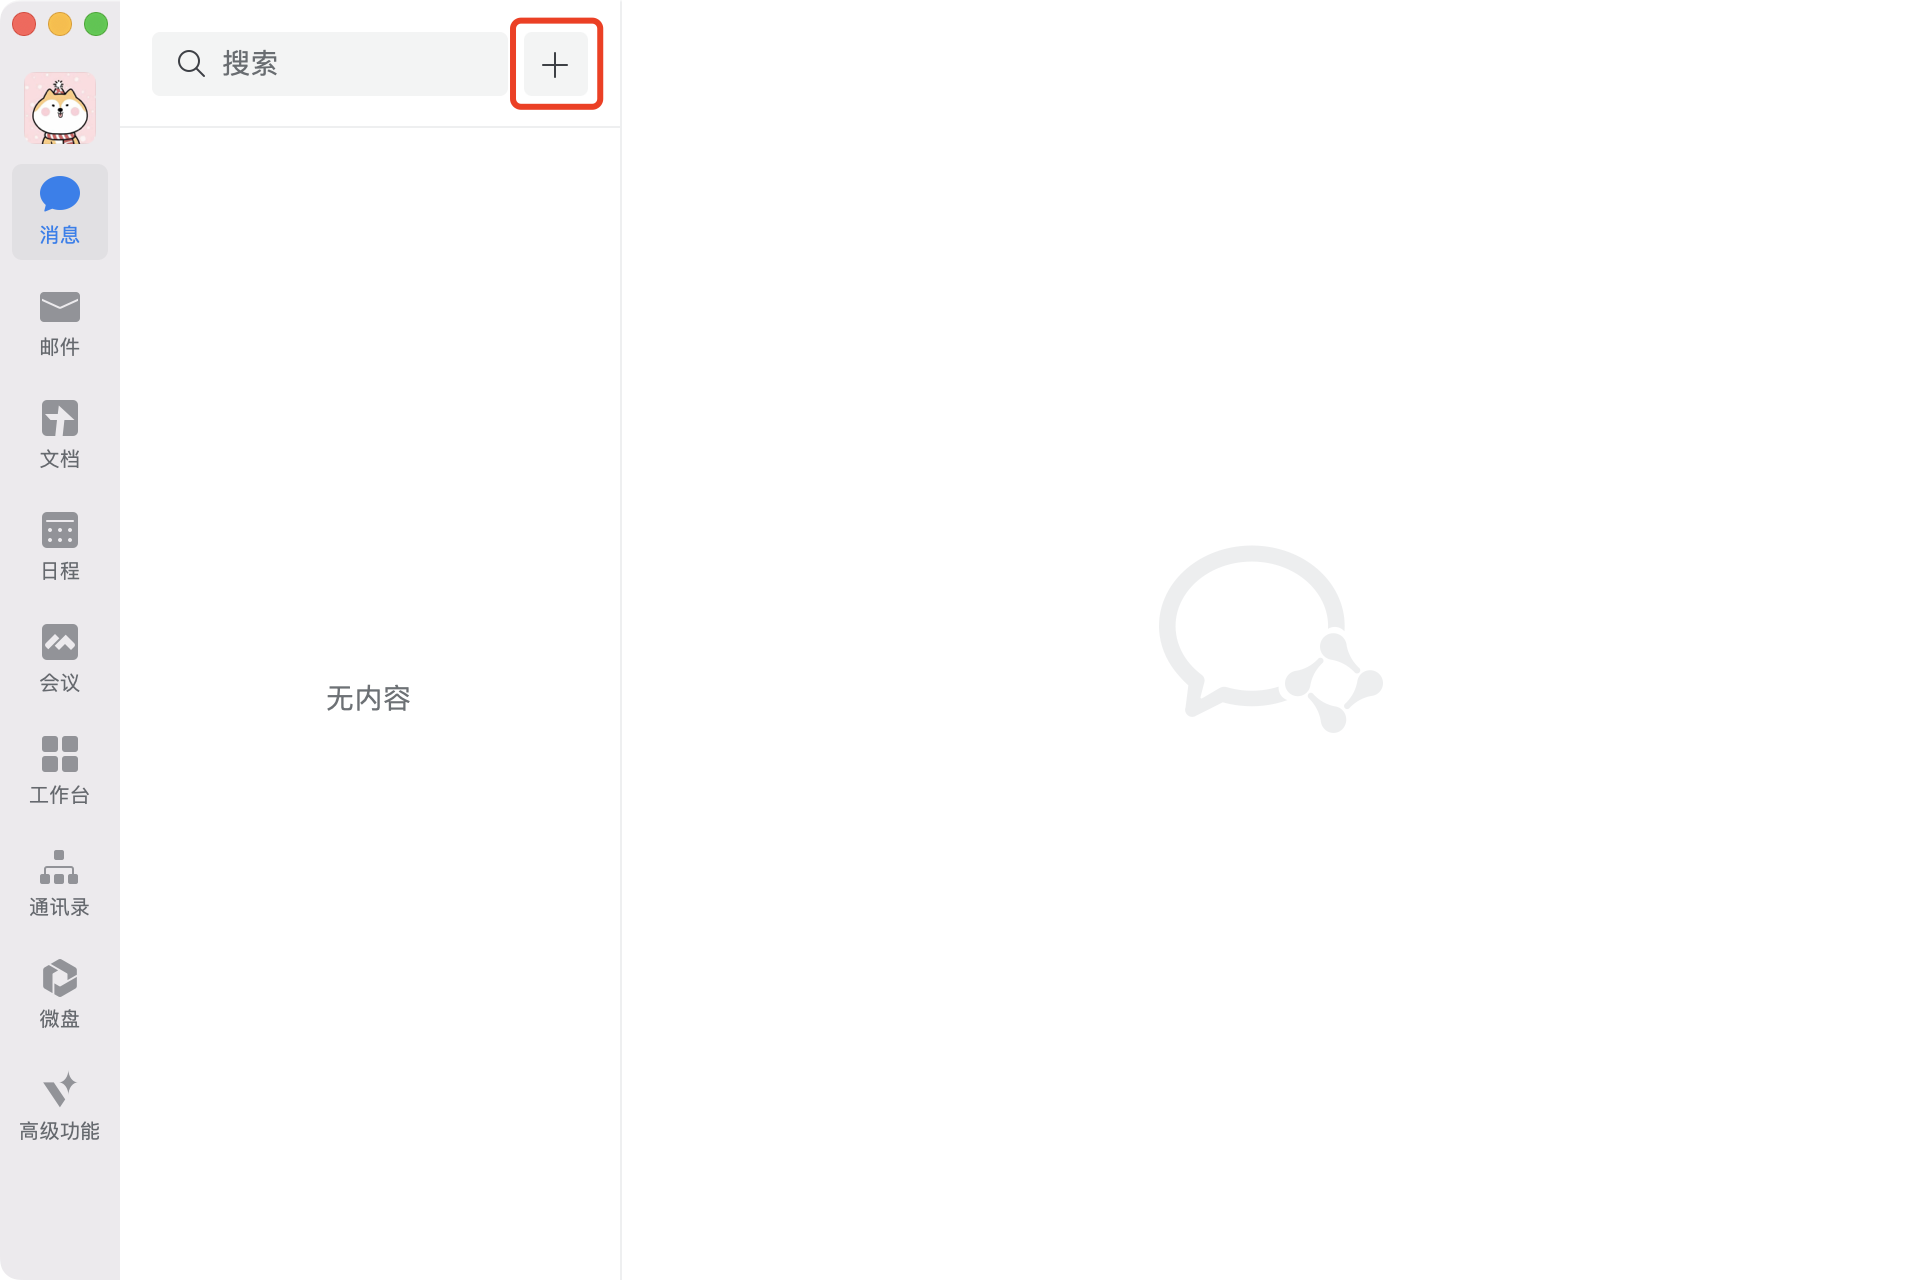
Step 1: Open the DingTalk main interface and create a group chat. Please note that DingTalk requires you to add at least two friends to create a group chat.
Reminder: If you wish to create a dedicated DingTalk group, you can remove other members from the group chat after it has been created.
| Step 1.1 | Step 1.2 | Step 1.3 |
|---|---|---|
 |  |  |
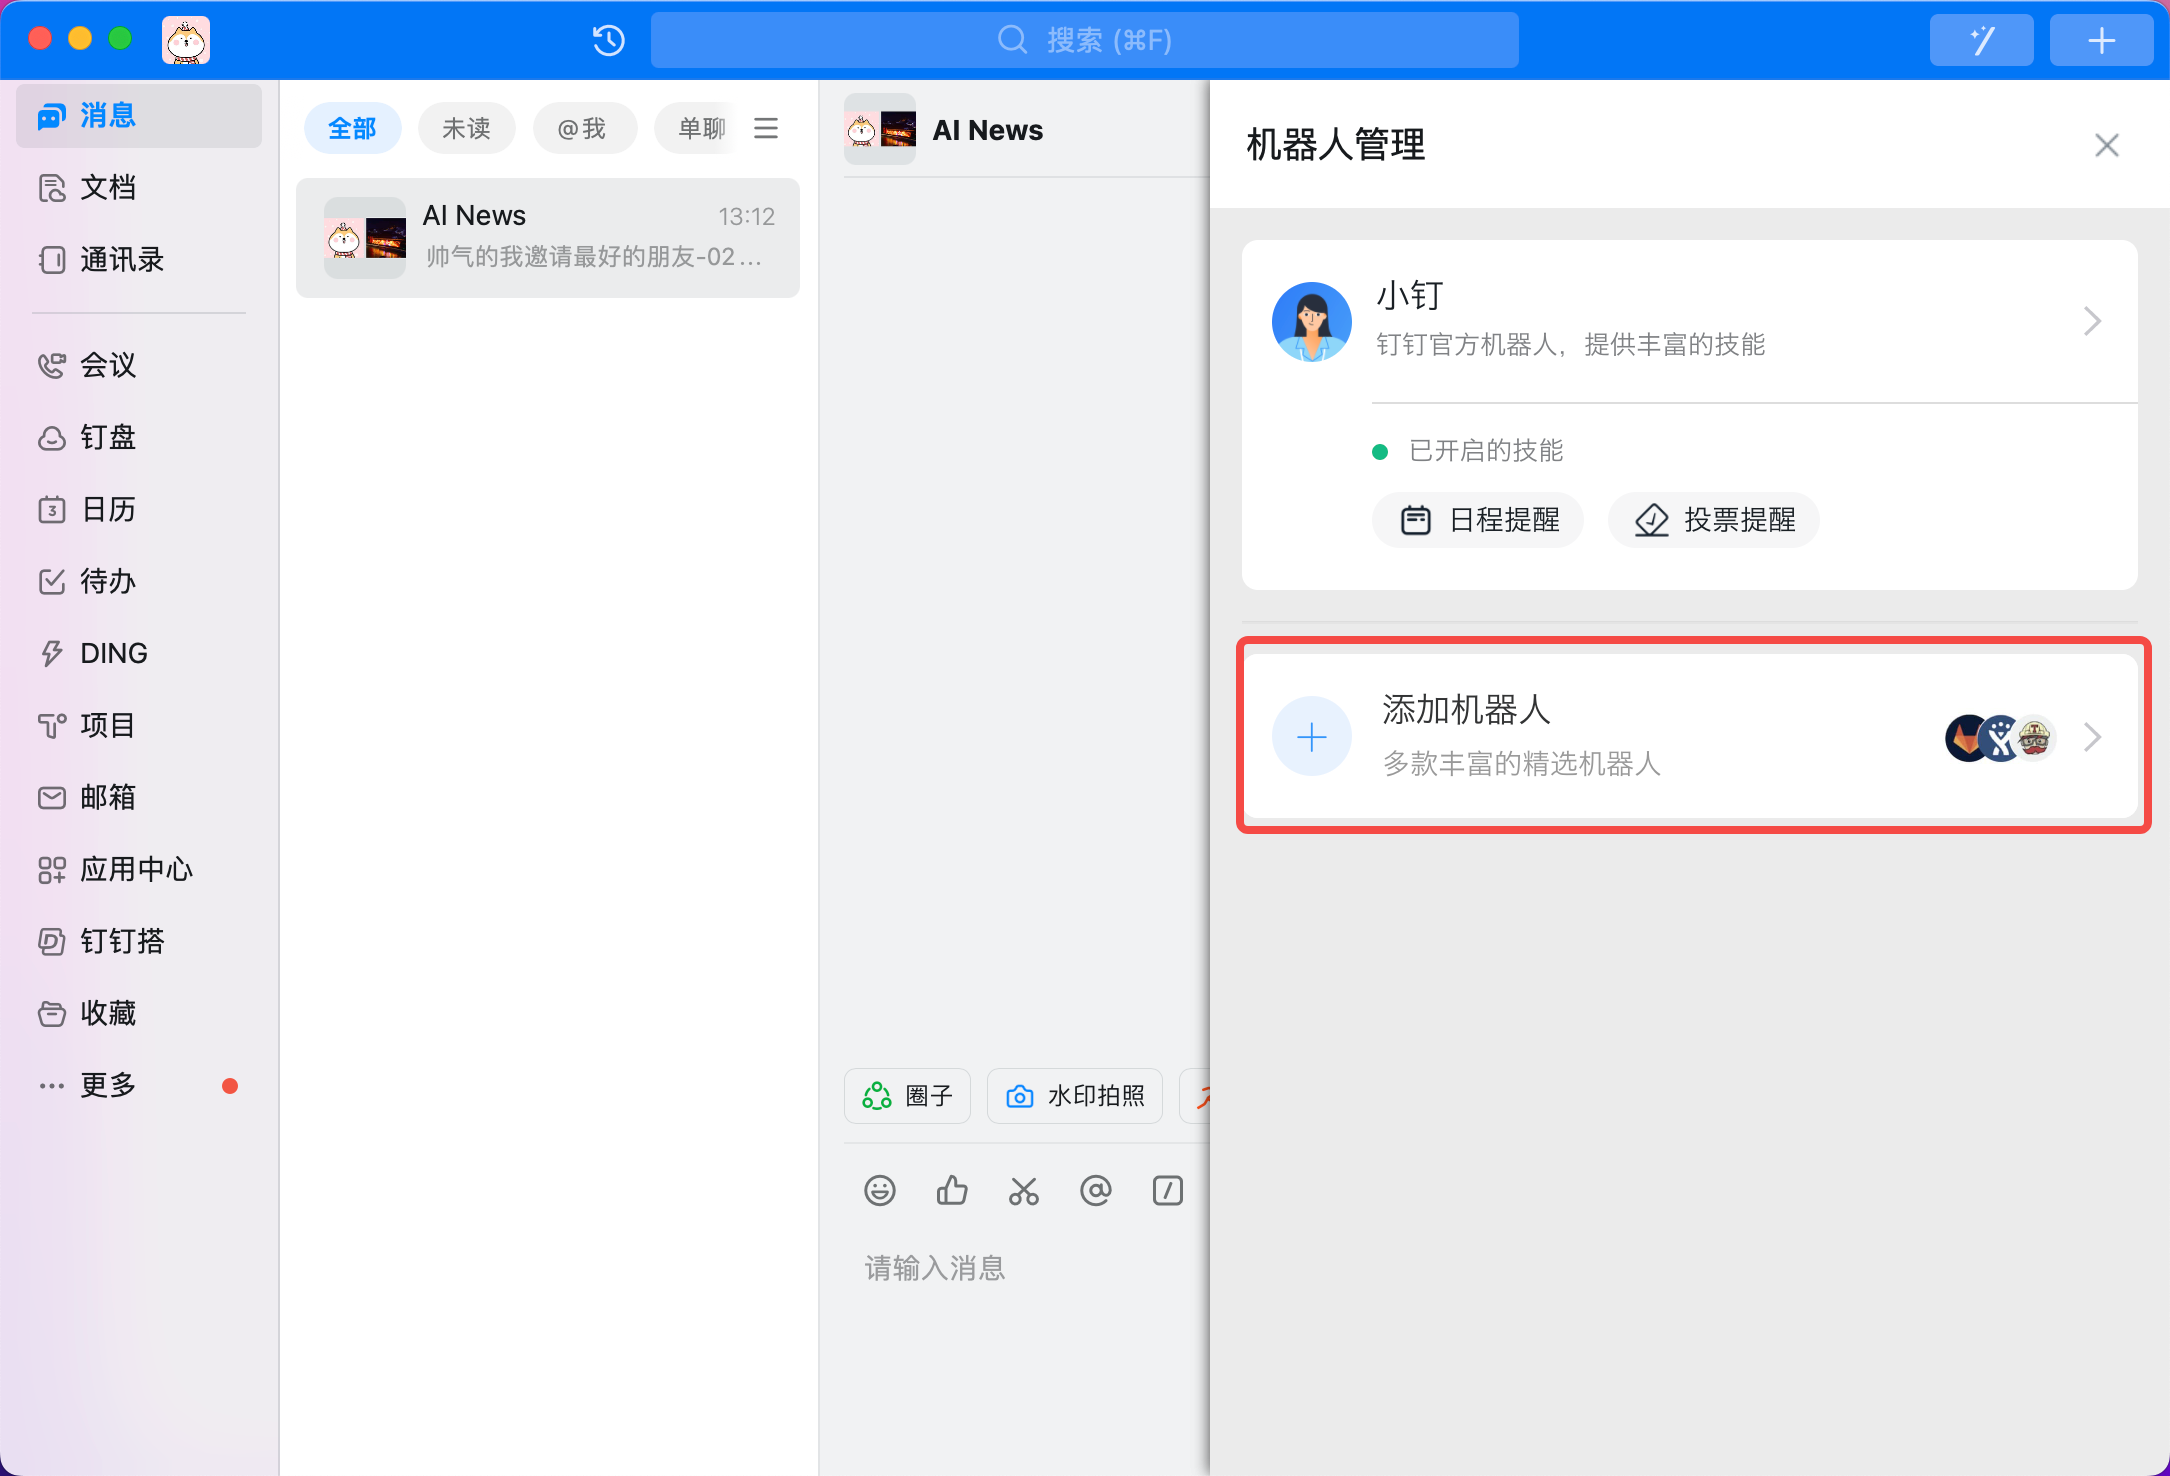
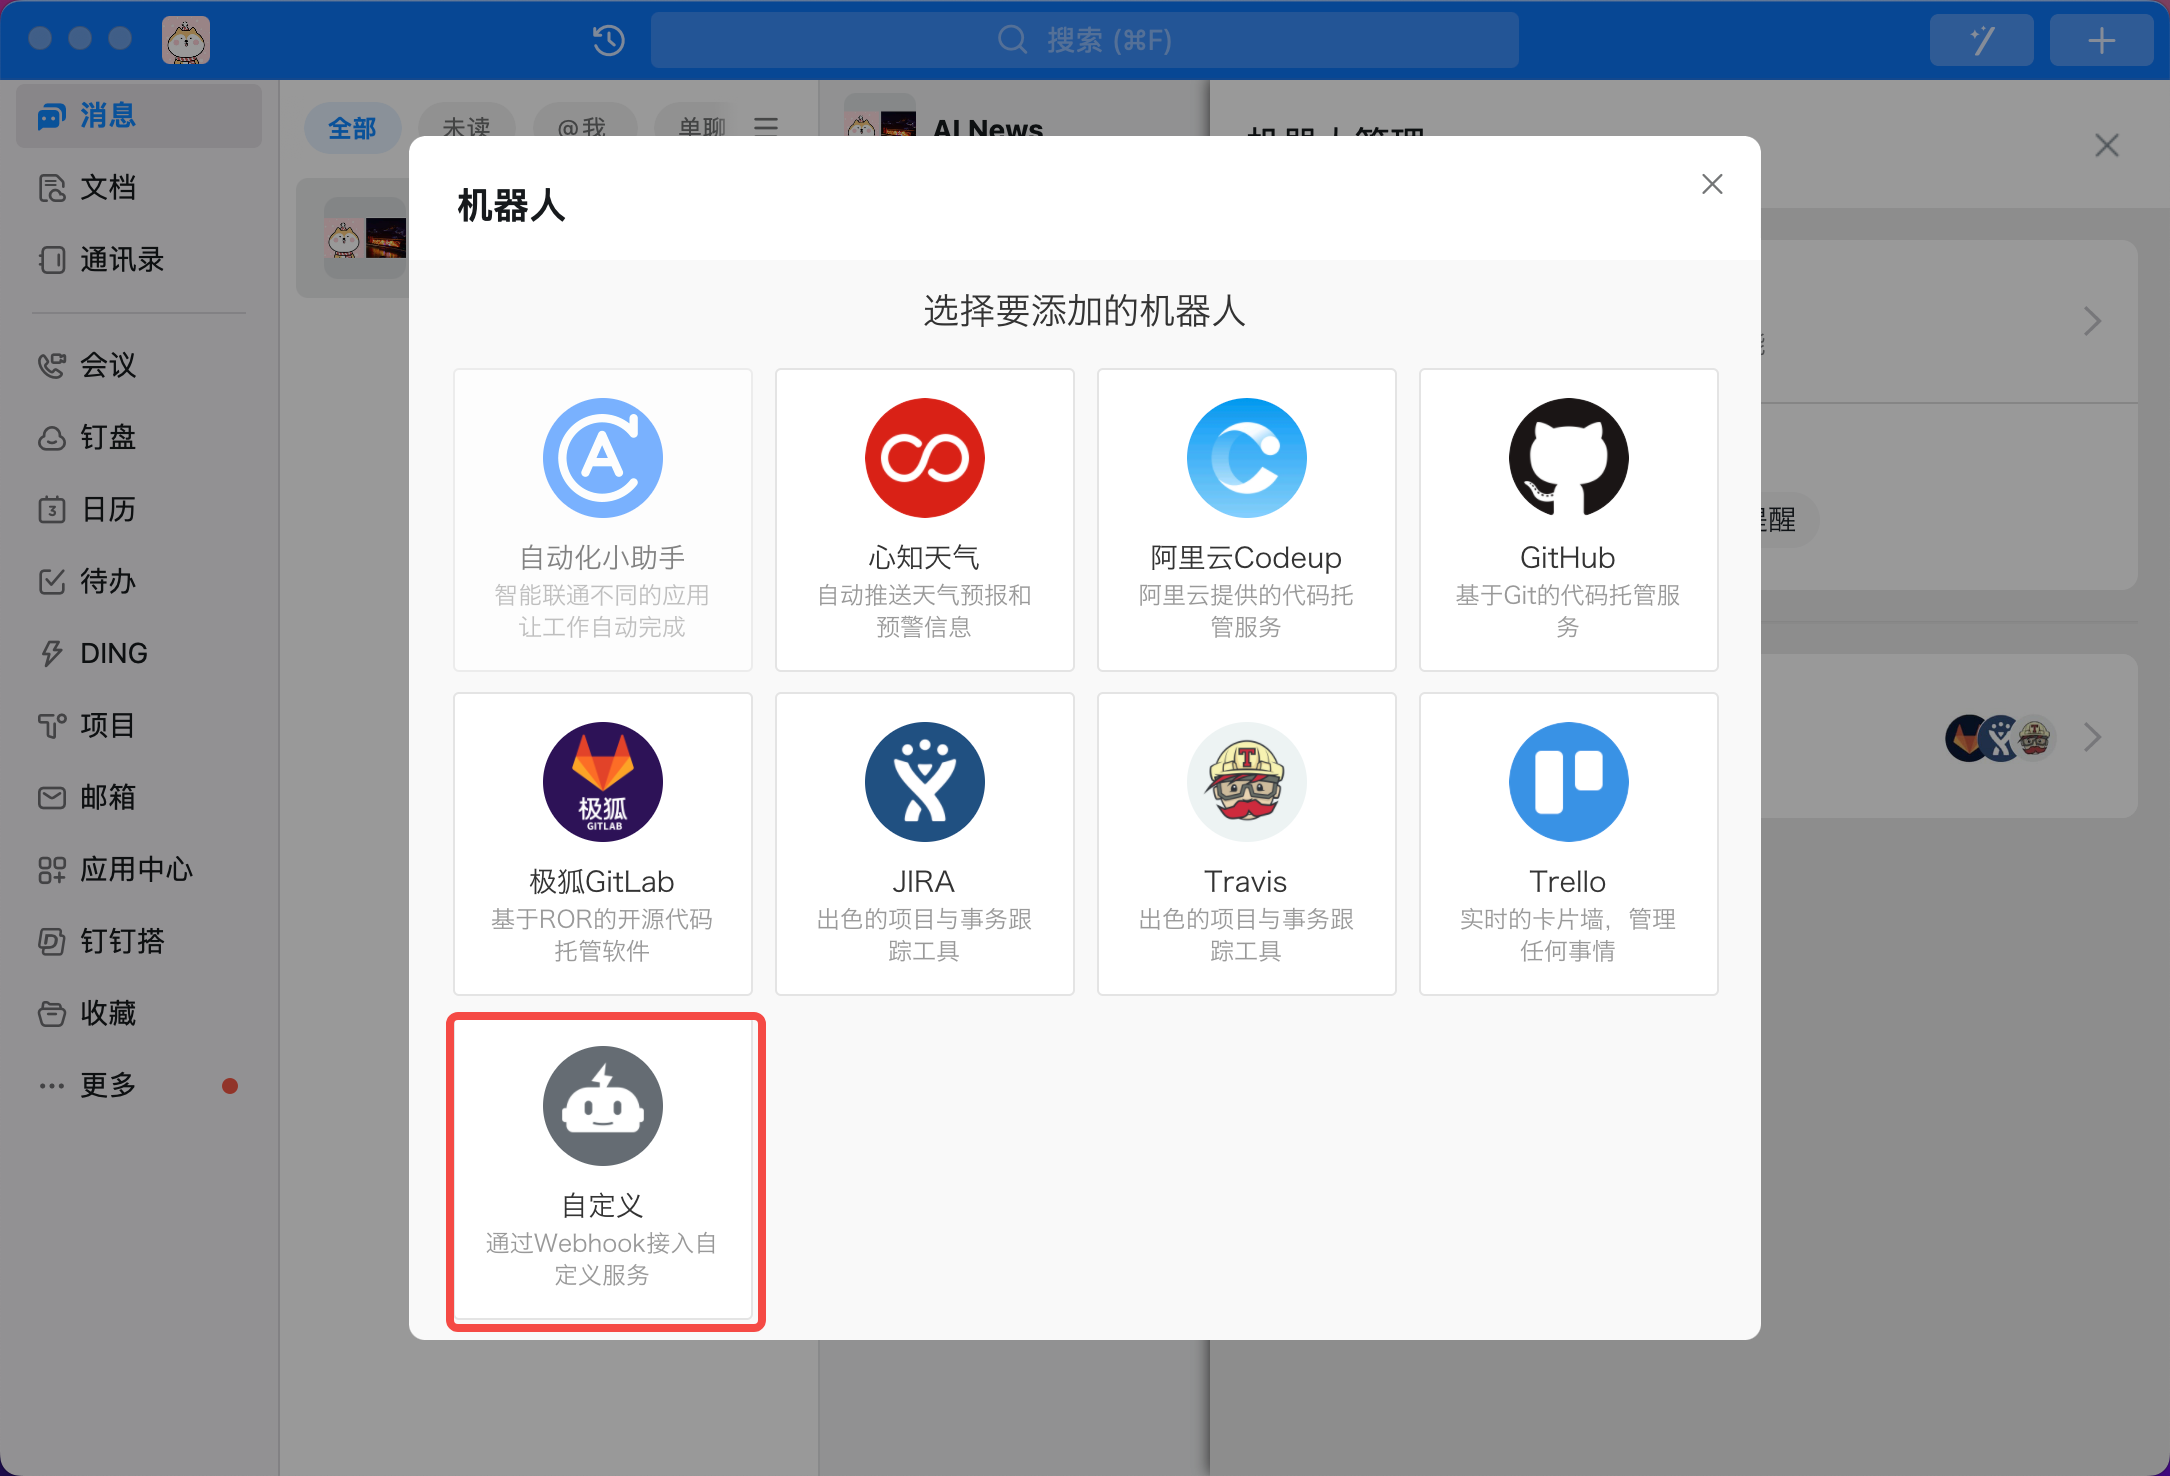
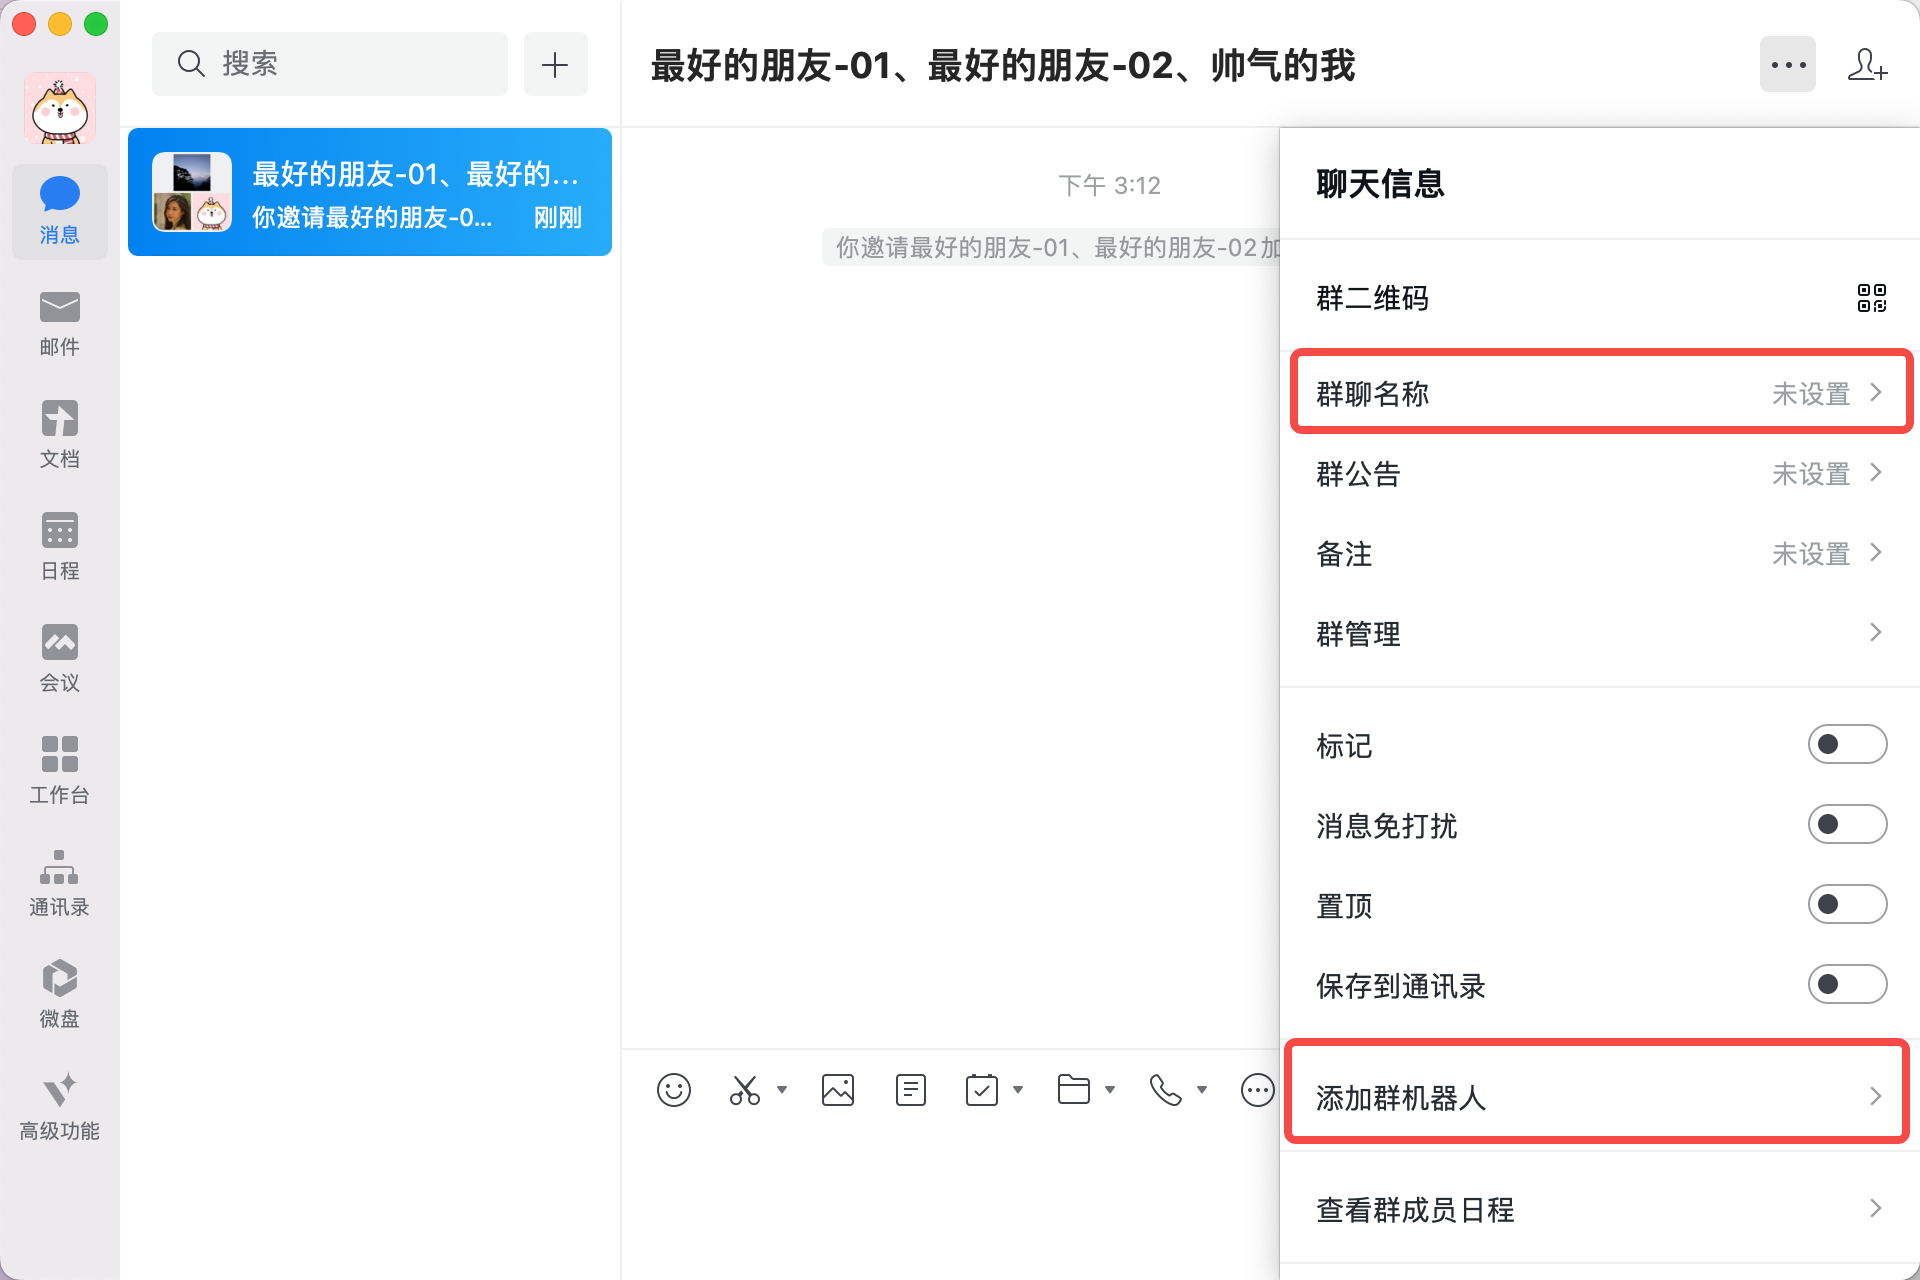
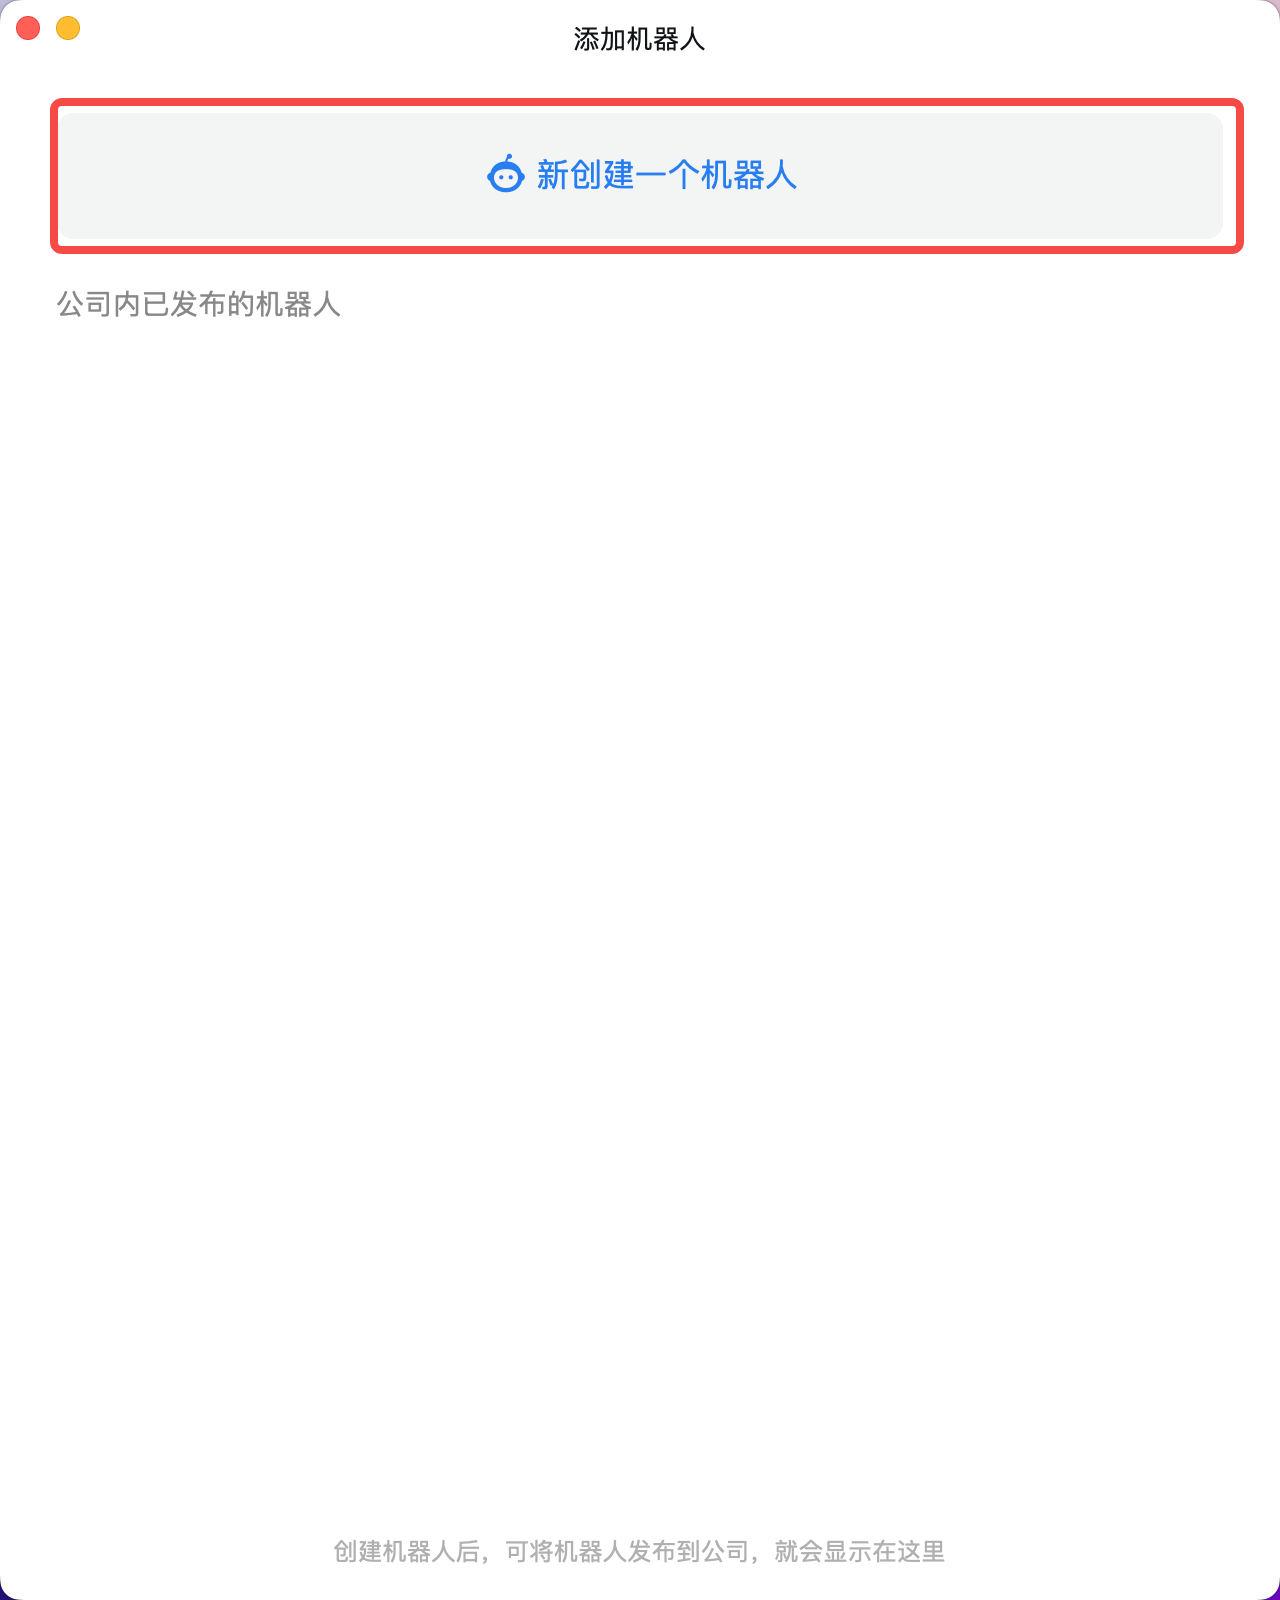
Step 2: Go to the group settings to add a bot to this group.
| Step 2.1 | Step 2.2 | Step 2.3 | Step 2.4 |
|---|---|---|---|
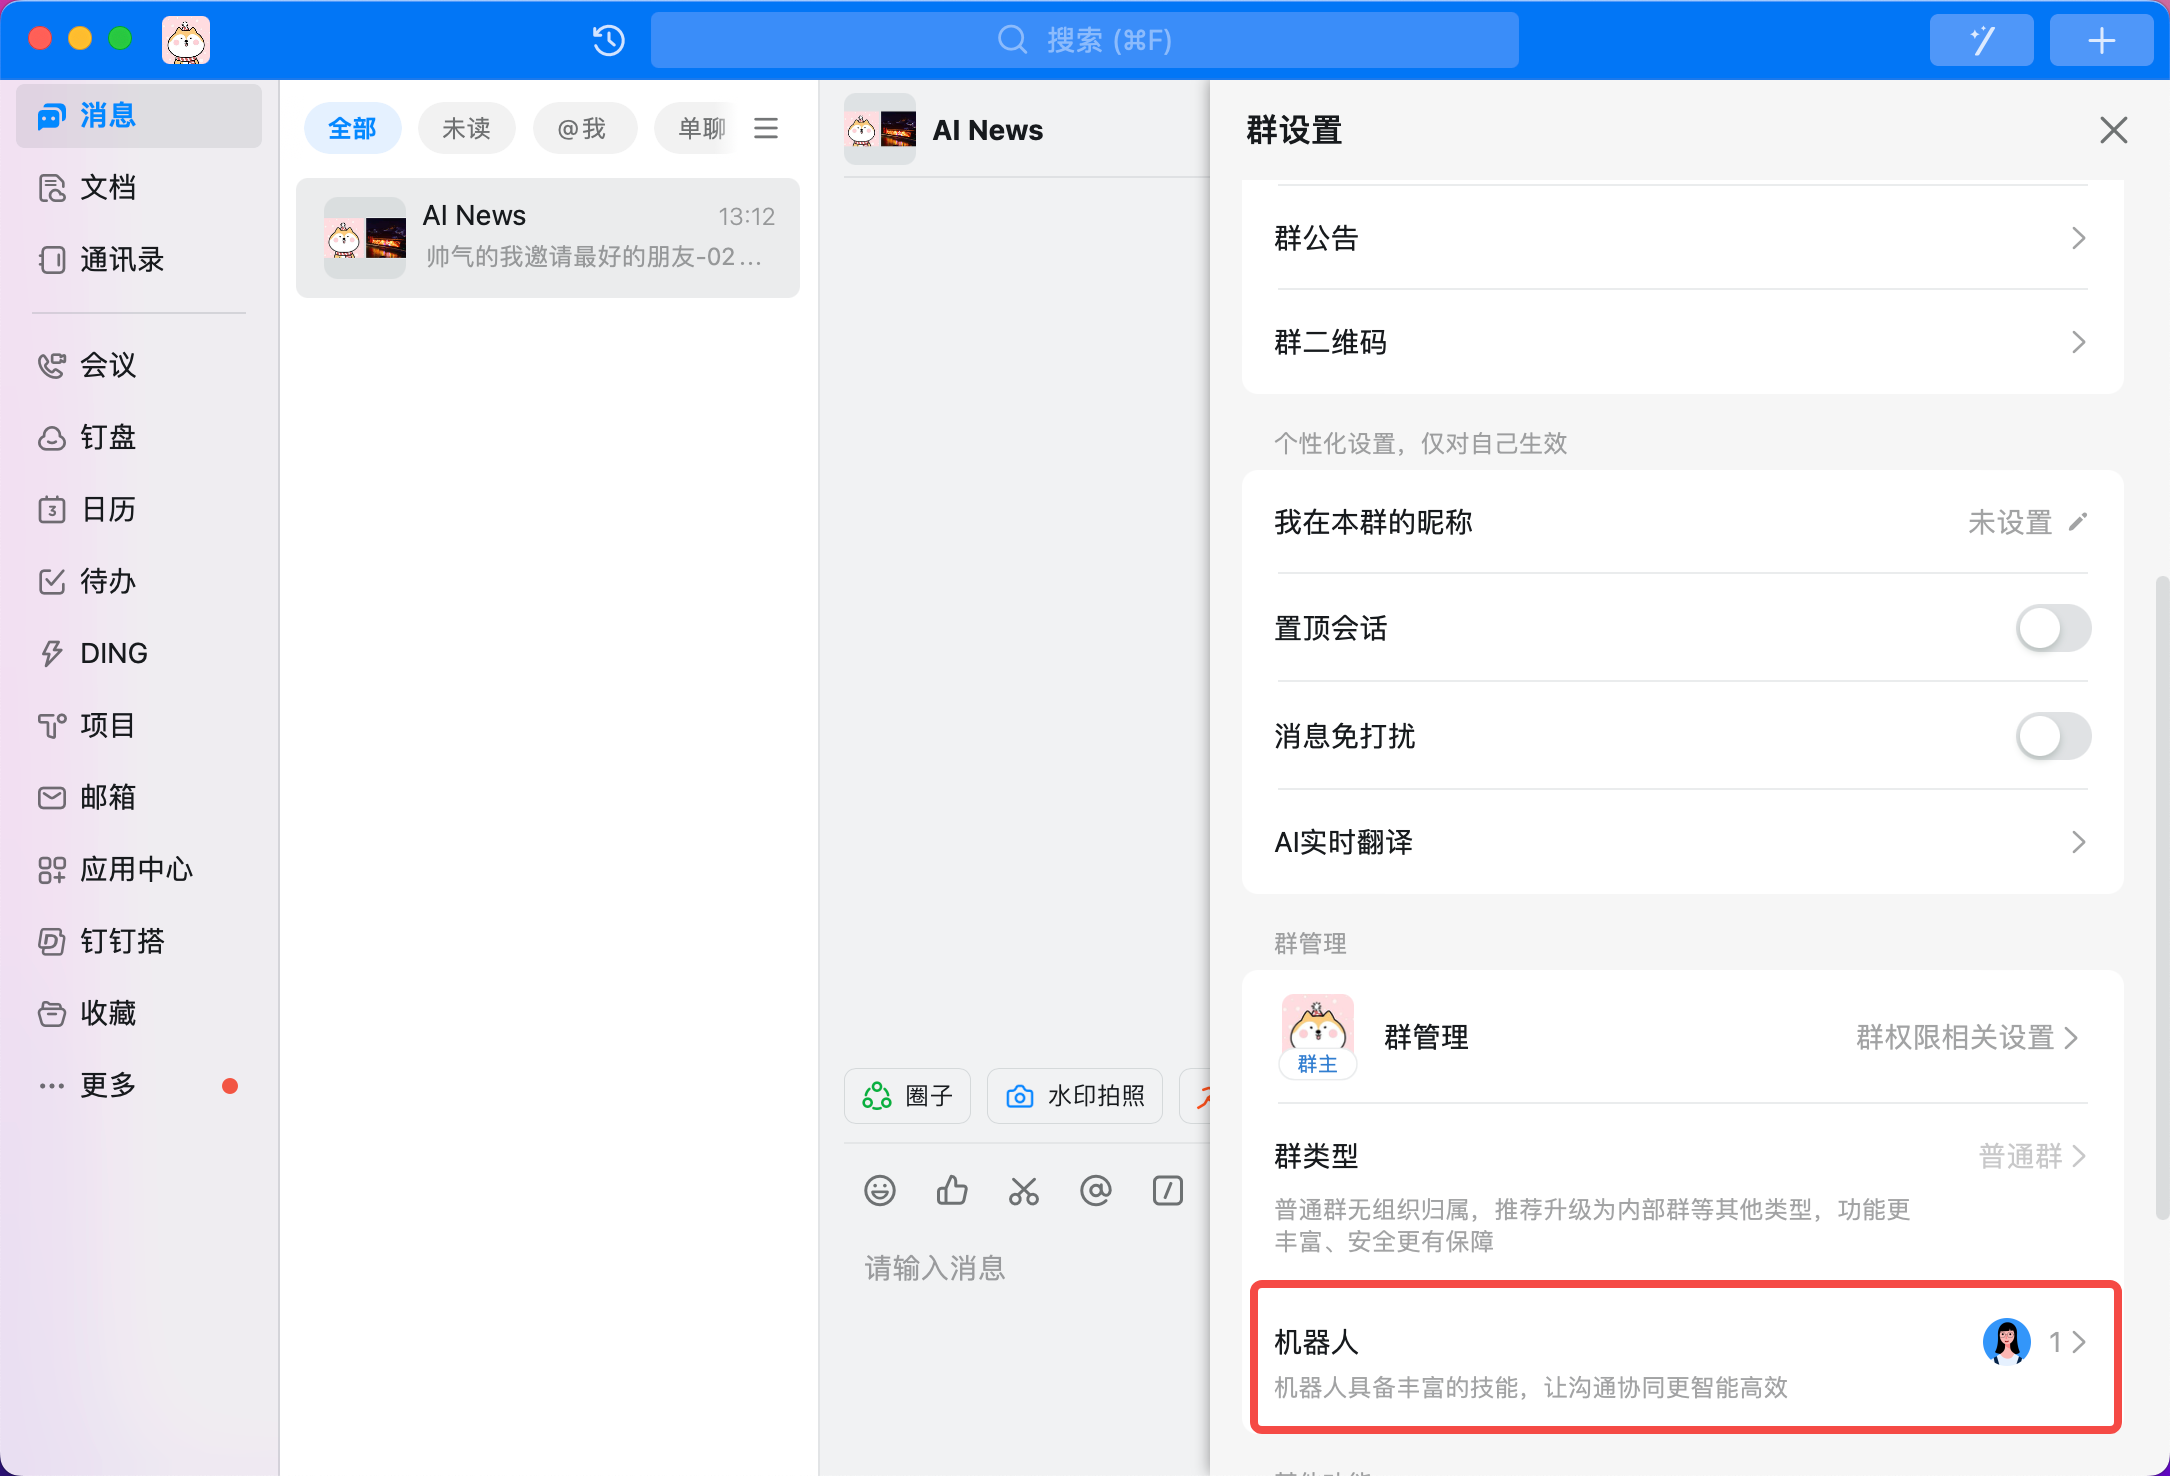 |  |  |  |
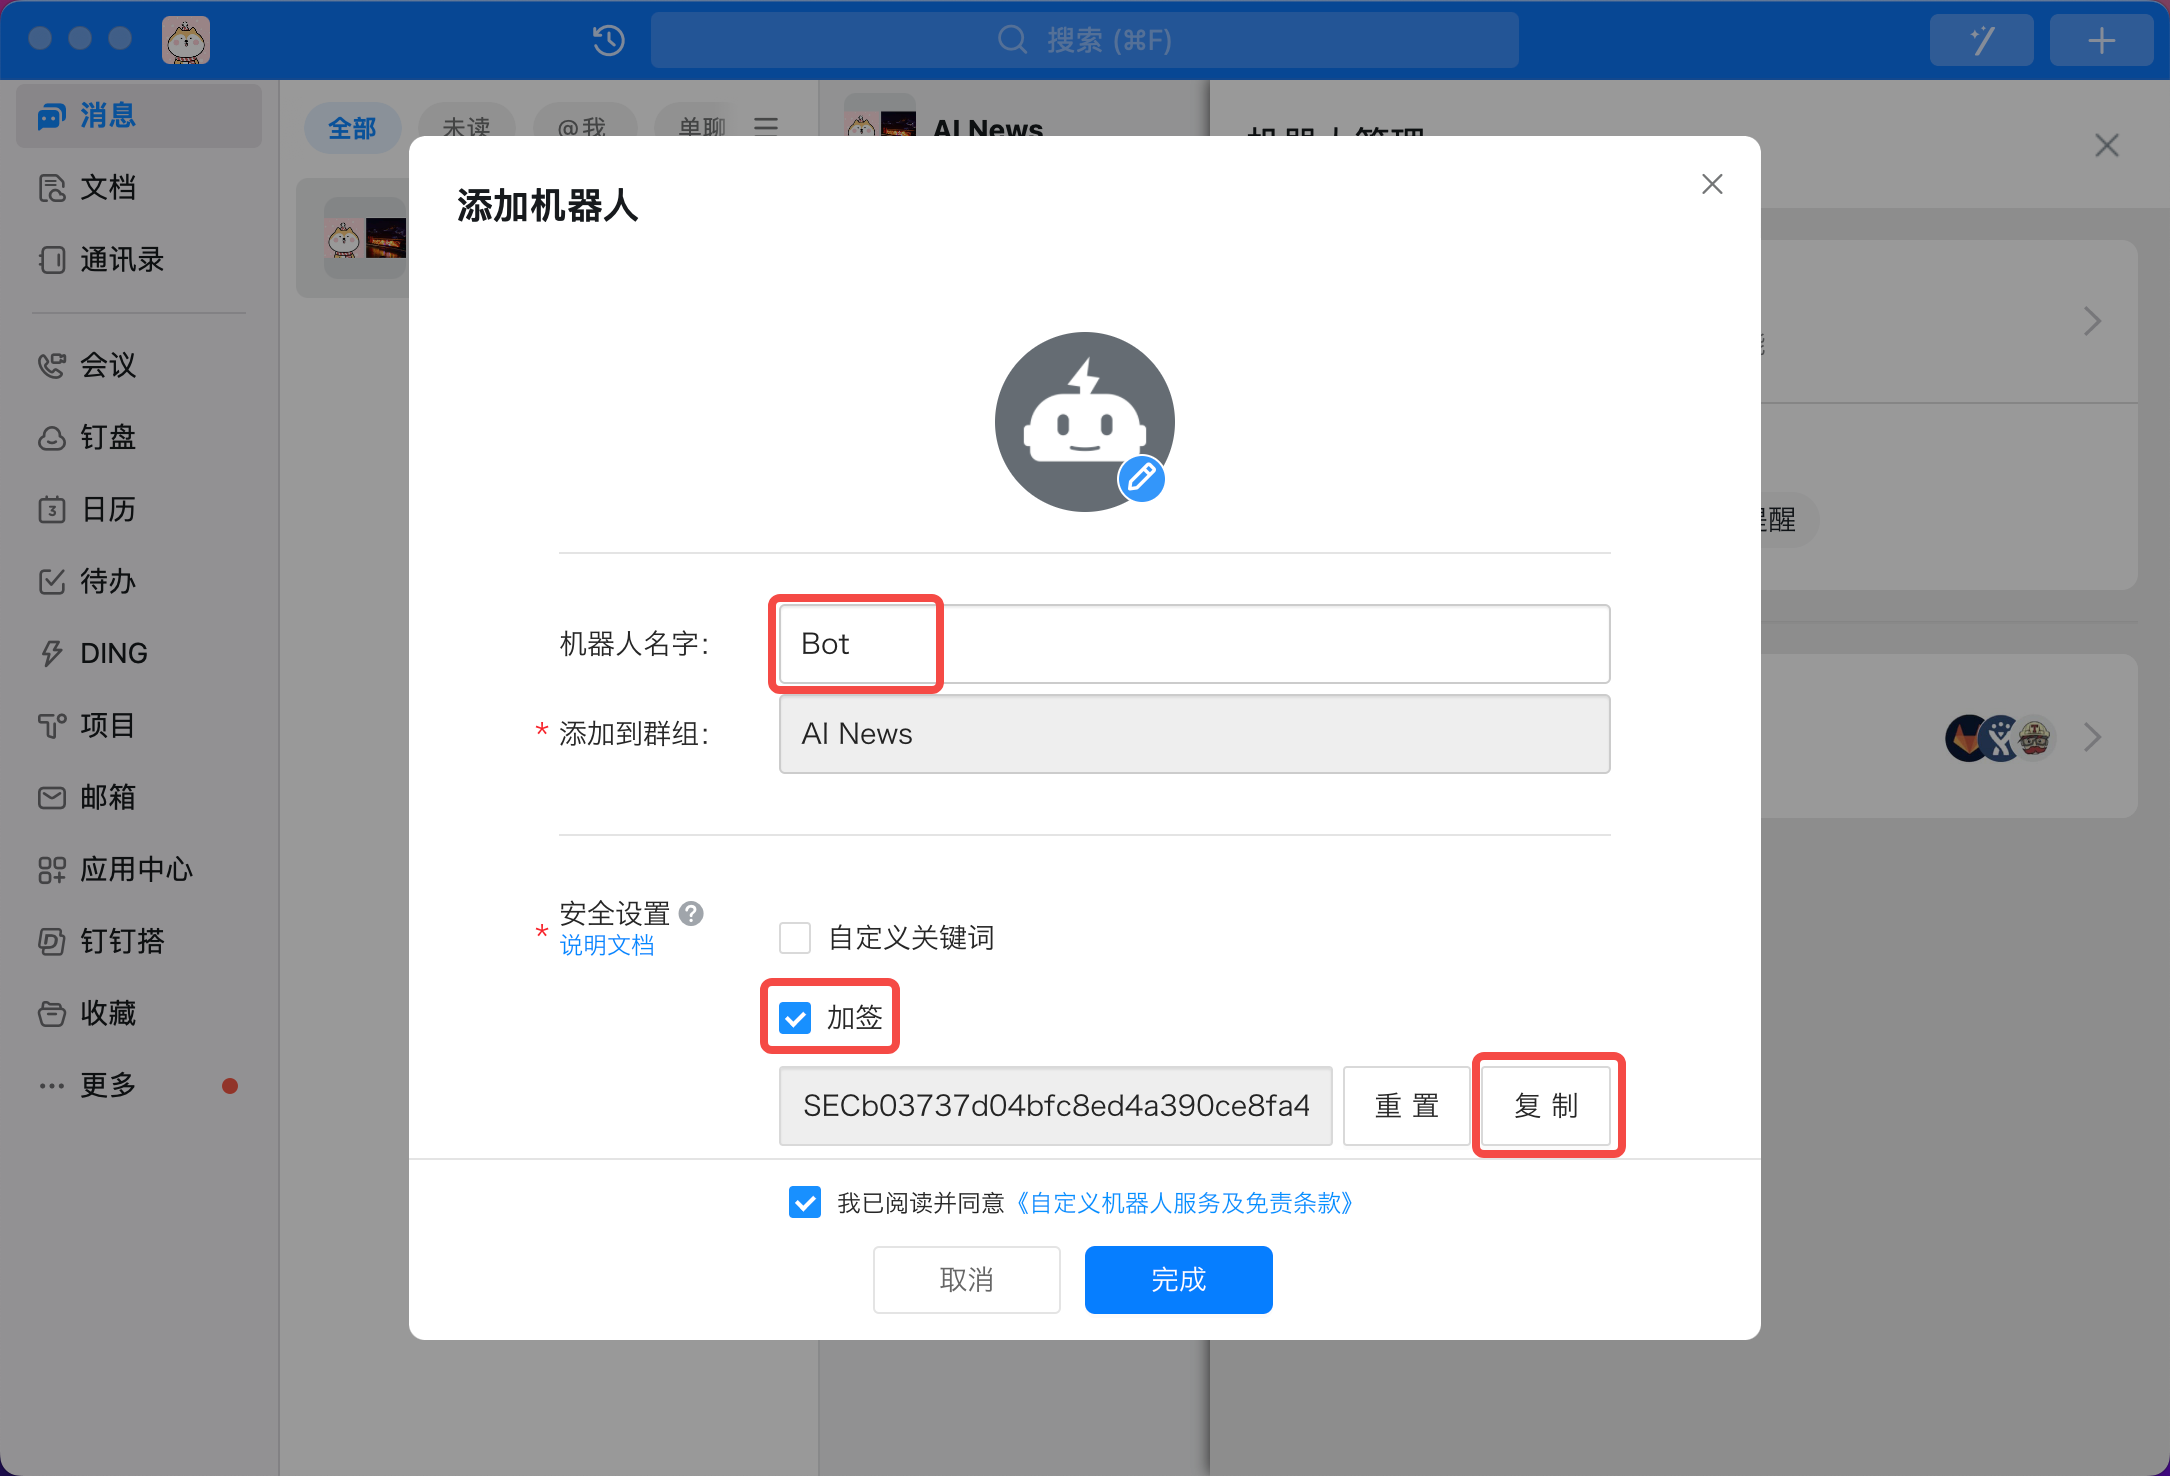
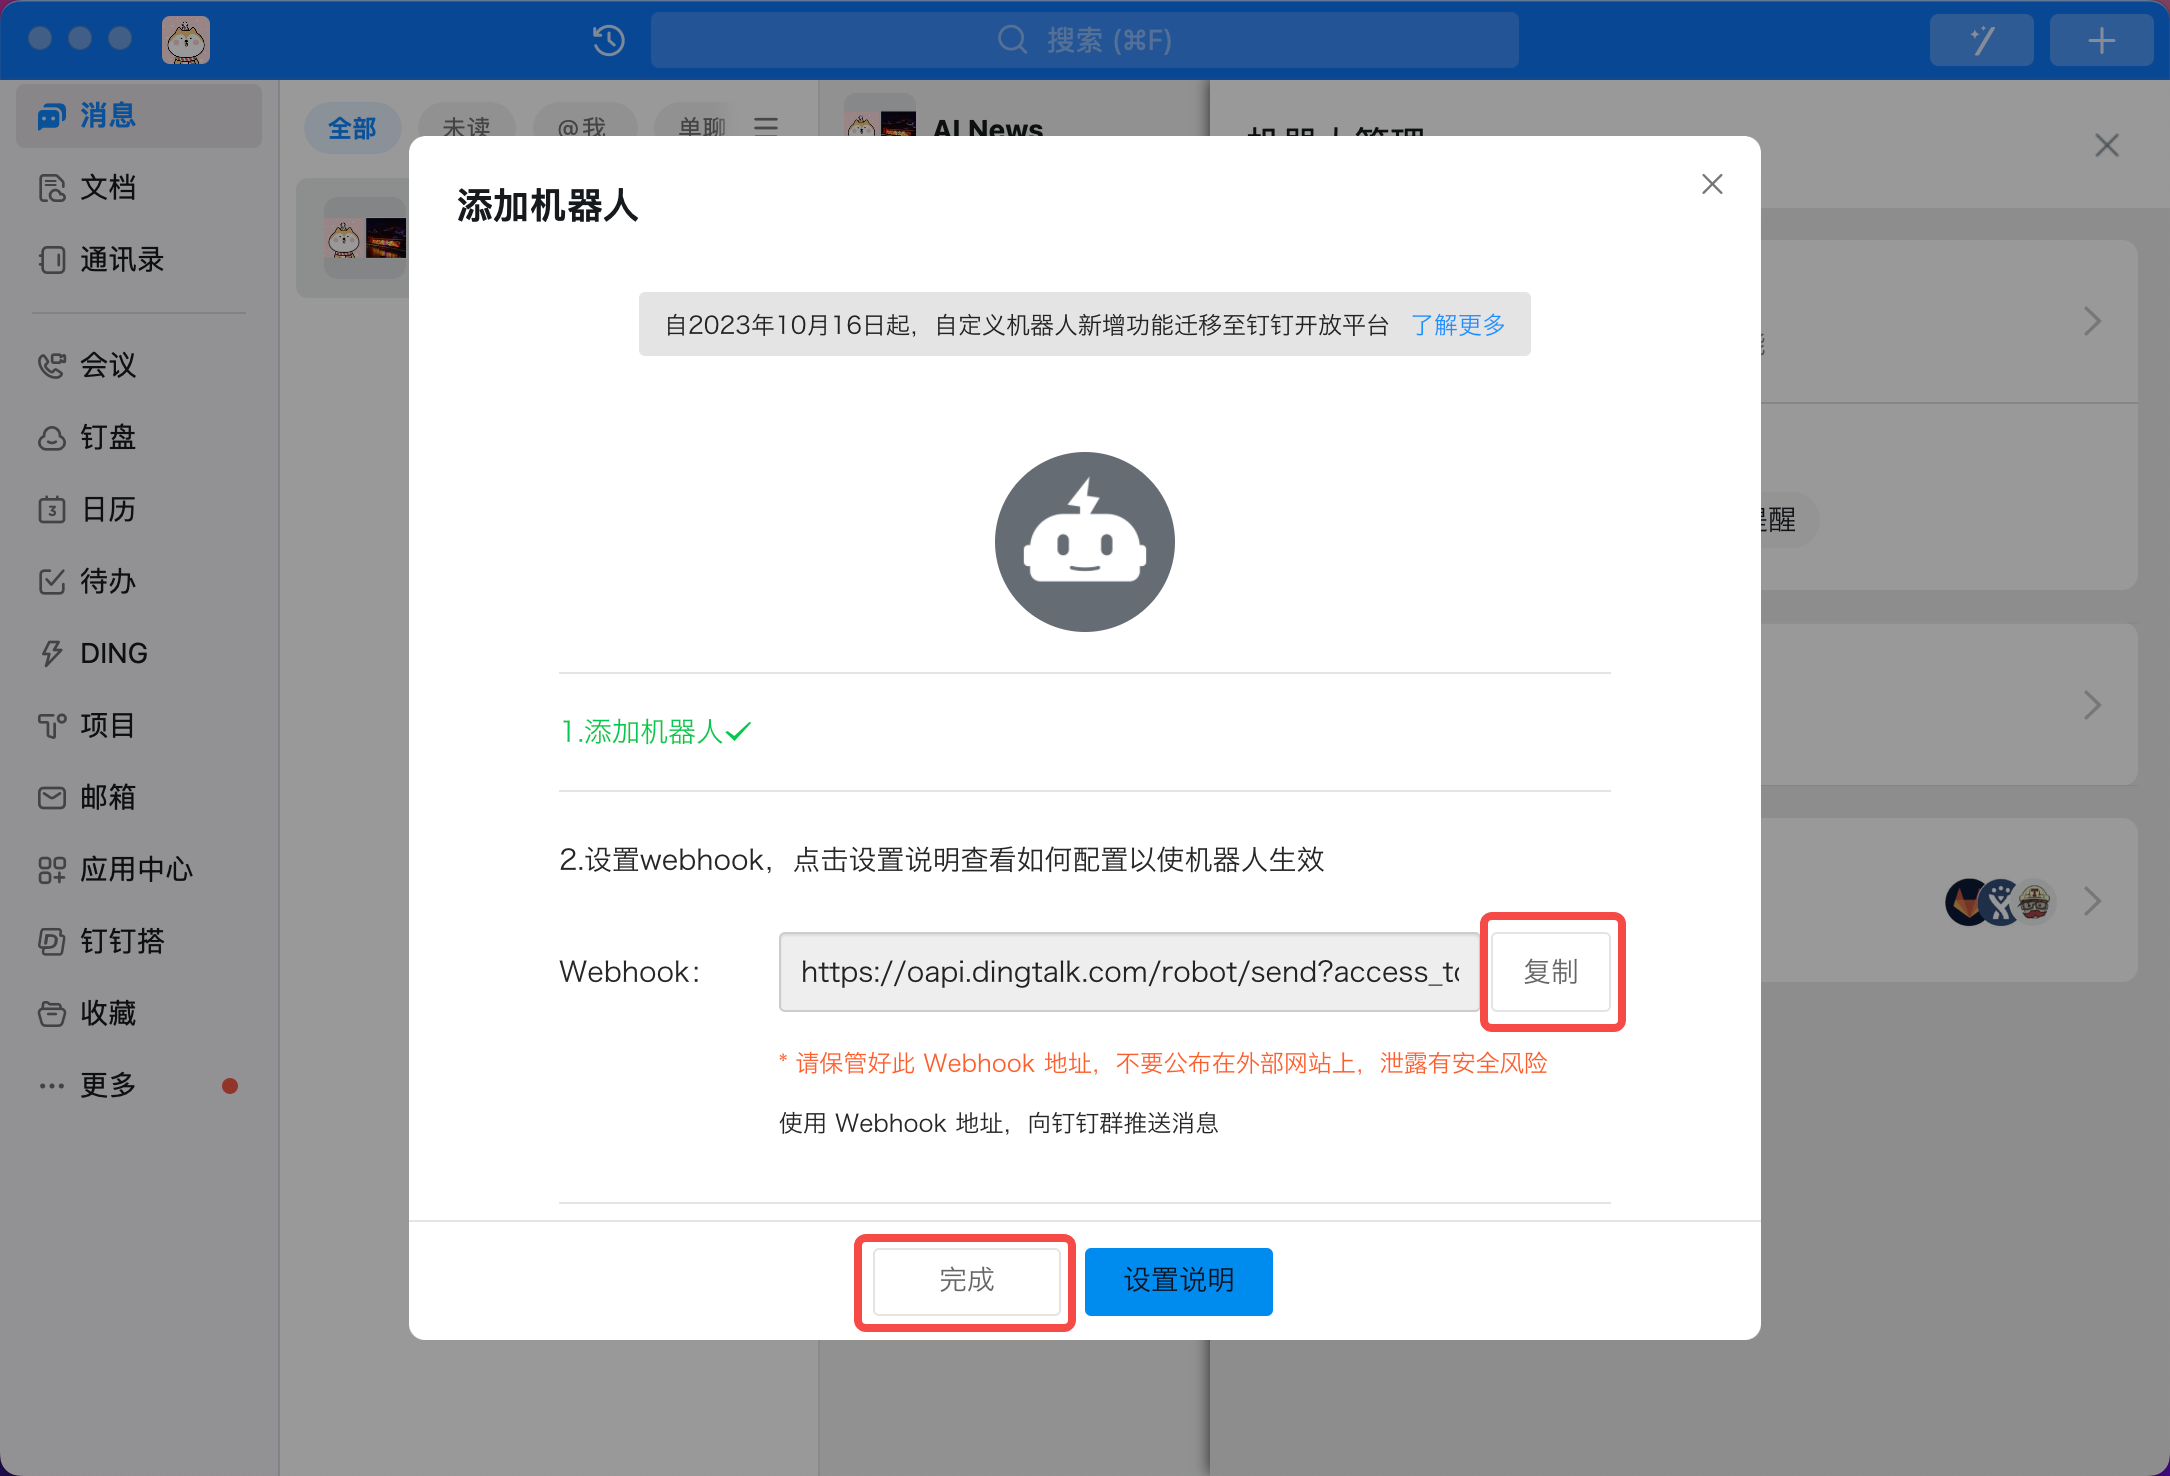
Step 3: Your bot is now set up; feel free to assign it a name. Click "Copy" buttons to copy the Webhook URL and secret token and paste them into ValueSpot.
| Step 3.1 | Step 3.2 | Step 3.3 |
|---|---|---|
 |  |  |
WeCom (企业微信)
Step 1: Open the WeCom main interface and create a group chat. Please note that WeCom requires you to add at least two friends to create a group chat.
Reminder: If you wish to create a dedicated WeCom group, you can remove other members from the group chat after it has been created.
| Step 1.1 | Step 1.2 |
|---|---|
 |  |
Step 2: Go to the group settings, give the group a suitable name, and add a bot to the group.
| Step 2.1 | Step 2.2 | Step 2.3 |
|---|---|---|
 |  | 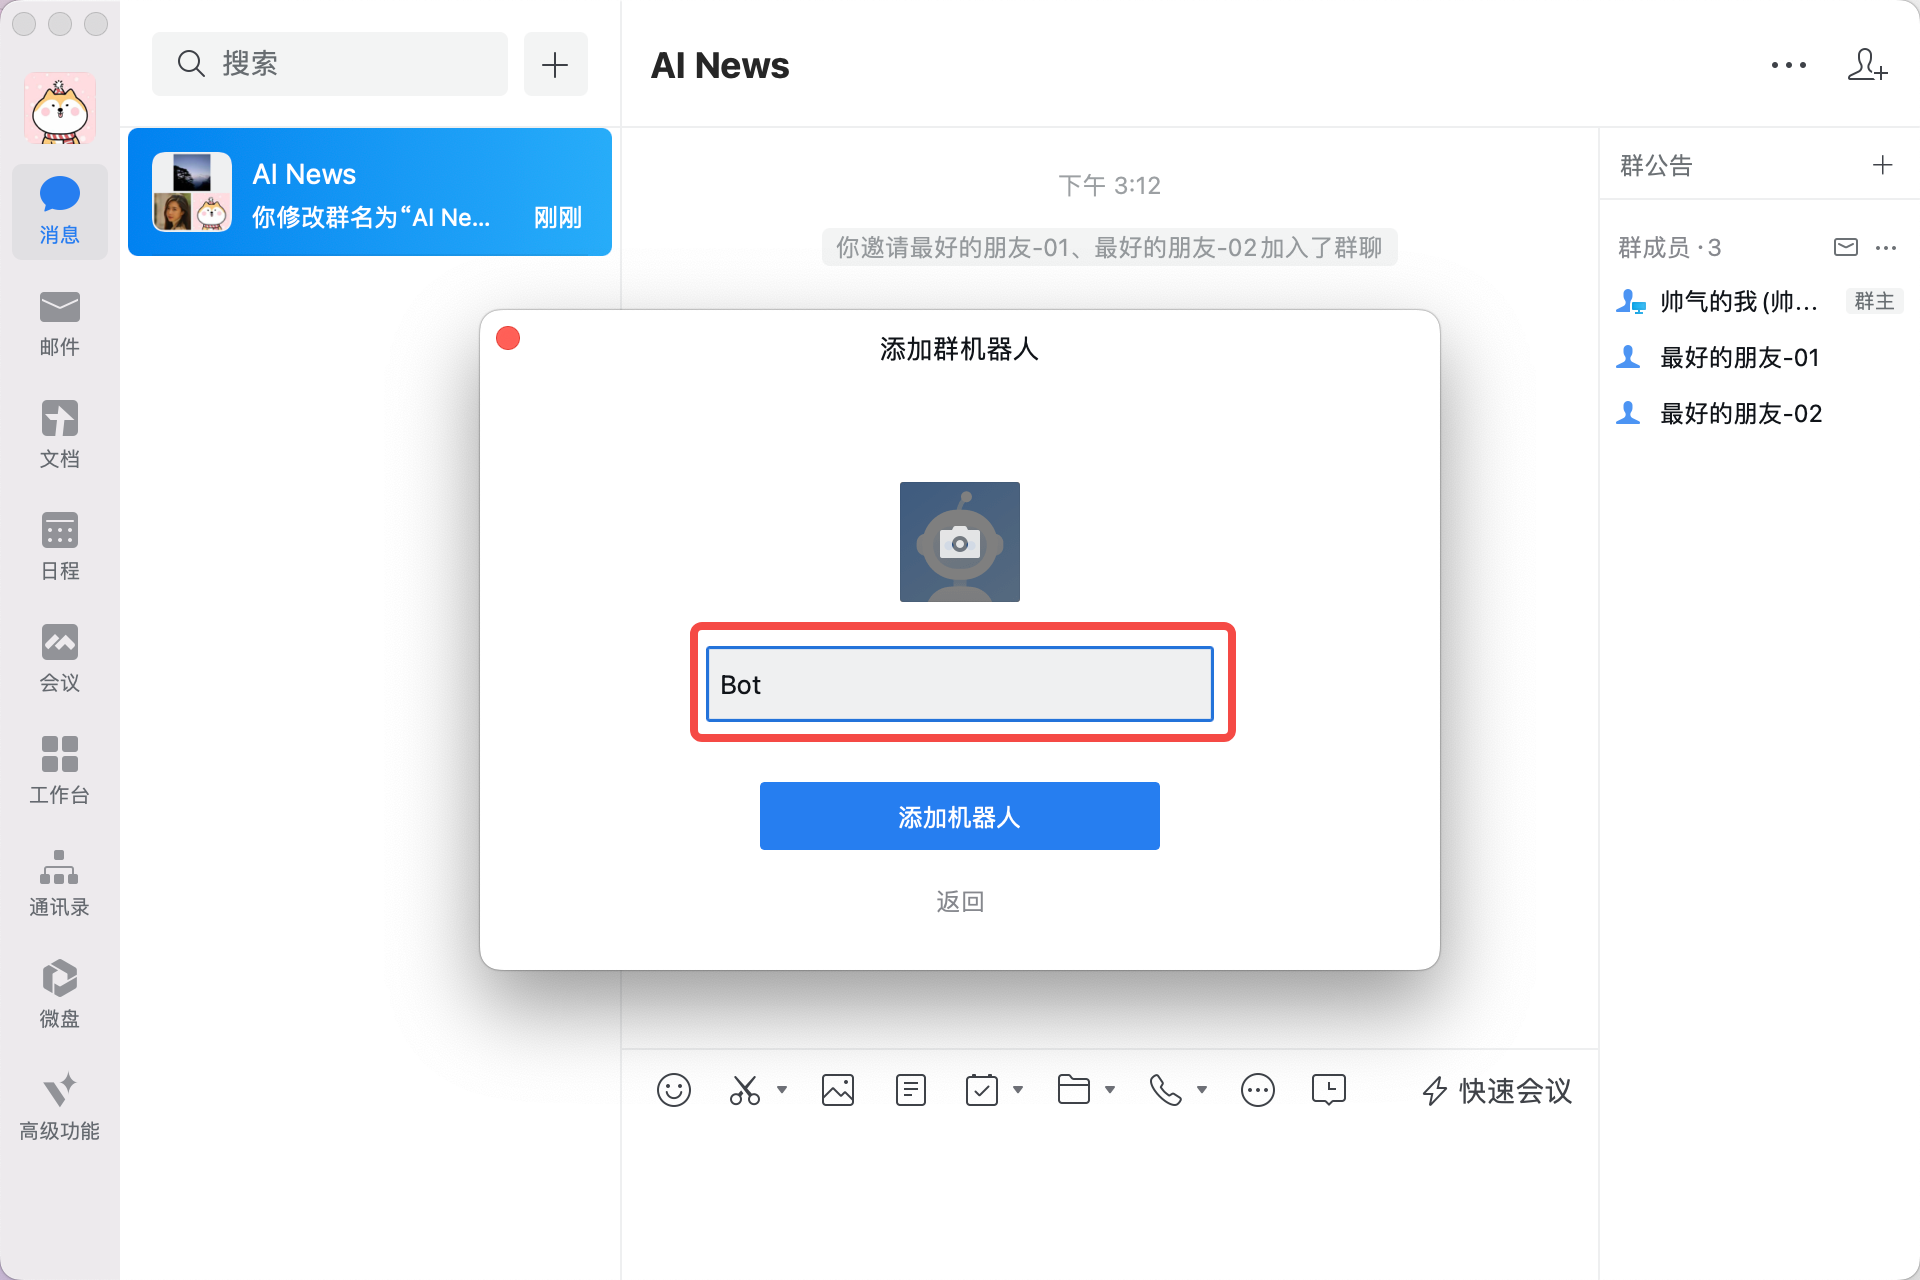 |
Step 3: Your bot is now set up. Click "Copy Address" buttons to copy the Webhook URL and paste it into ValueSpot.
| Step 3.1 | Step 3.2 |
|---|---|
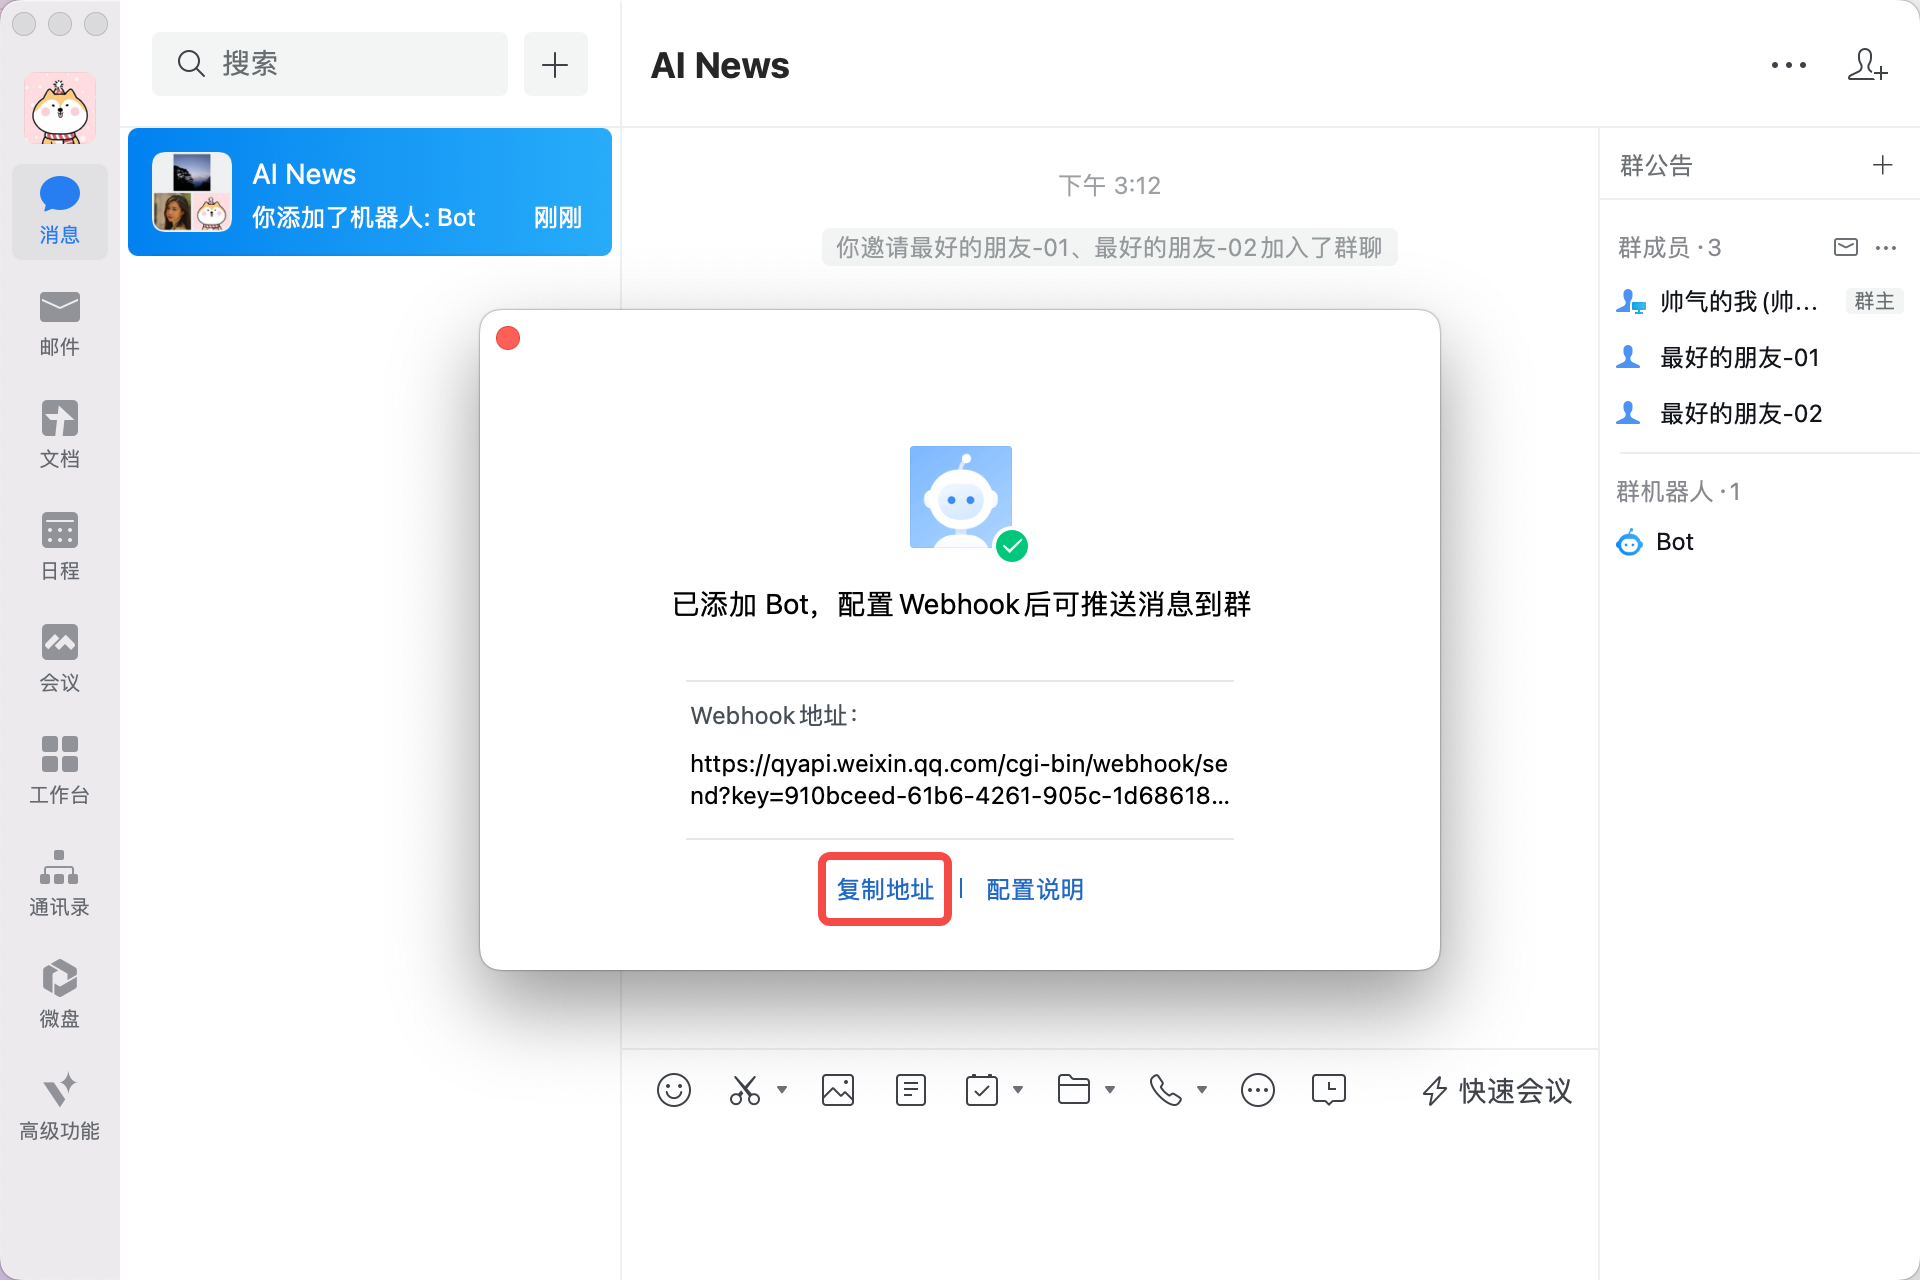 |  |
Lark (飞书)
Step 1: Open the Lark main interface and create a group chat. You can also invite friends to join the group for discussions.
| Step 1.1 | Step 1.2 |
|---|---|
 | 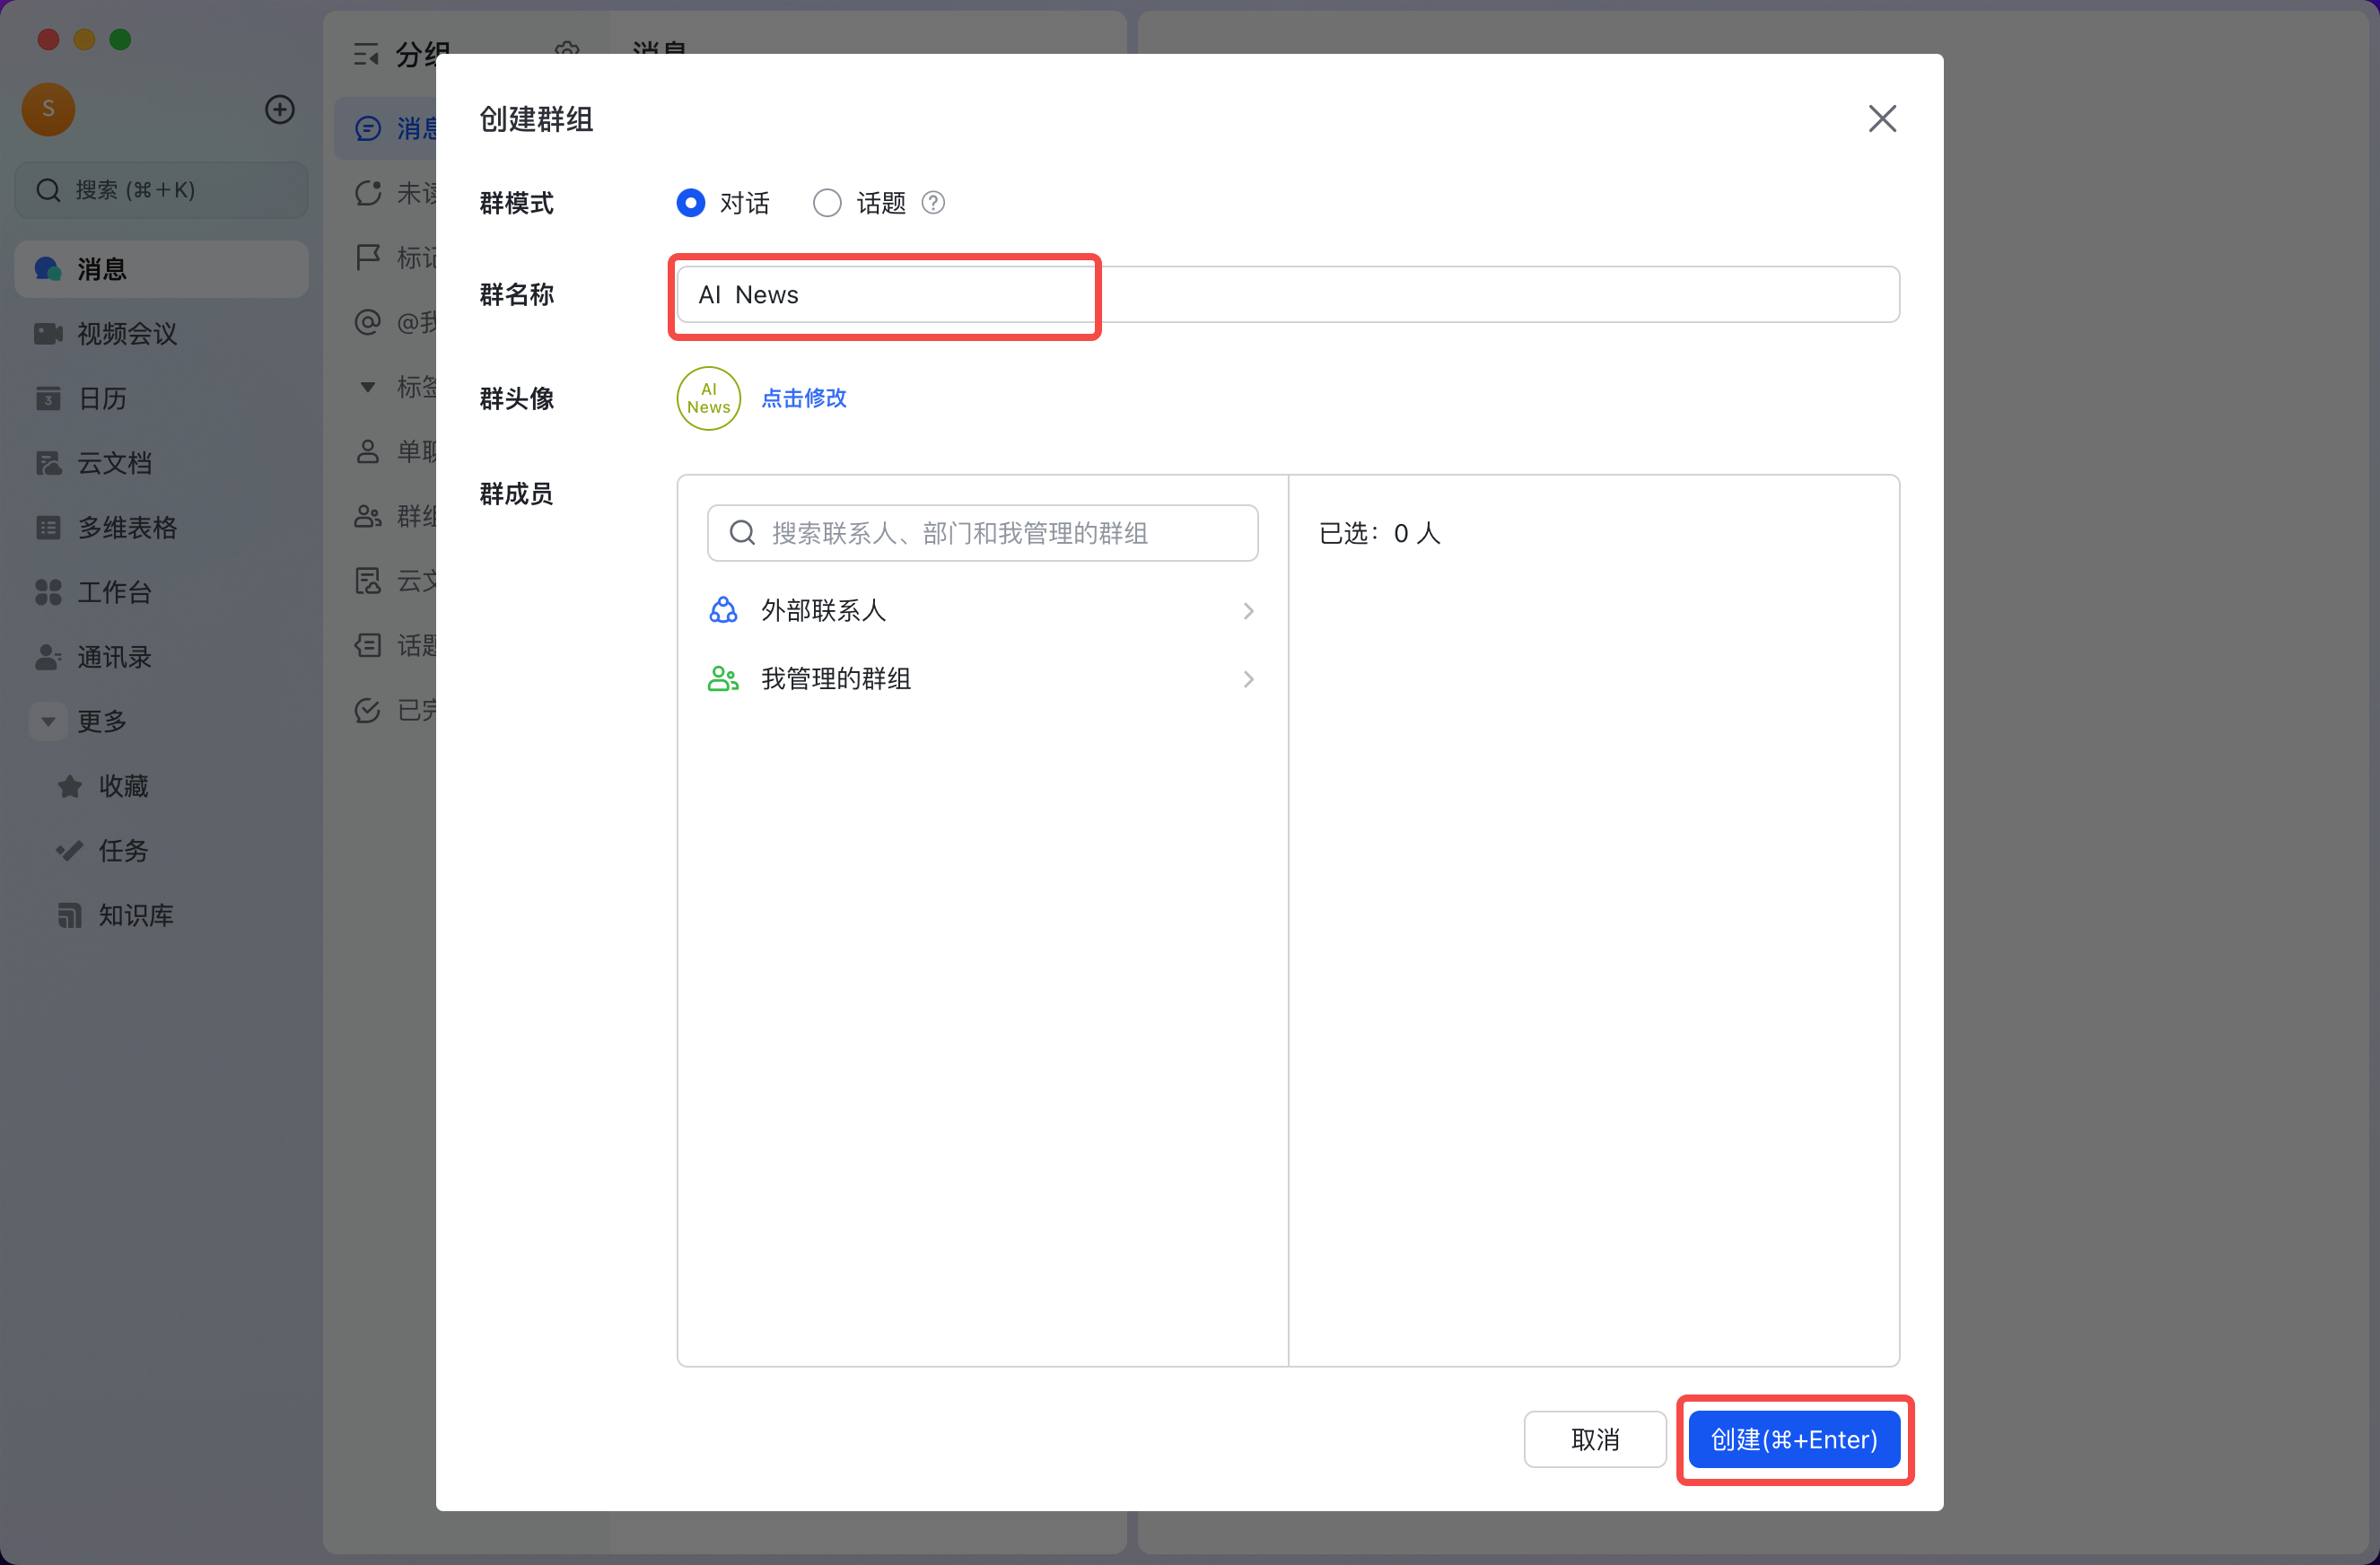 |
Step 2: Go to the group settings to add a bot to this group.
| Step 2.1 | Step 2.2 | Step 2.3 | Step 2.4 |
|---|---|---|---|
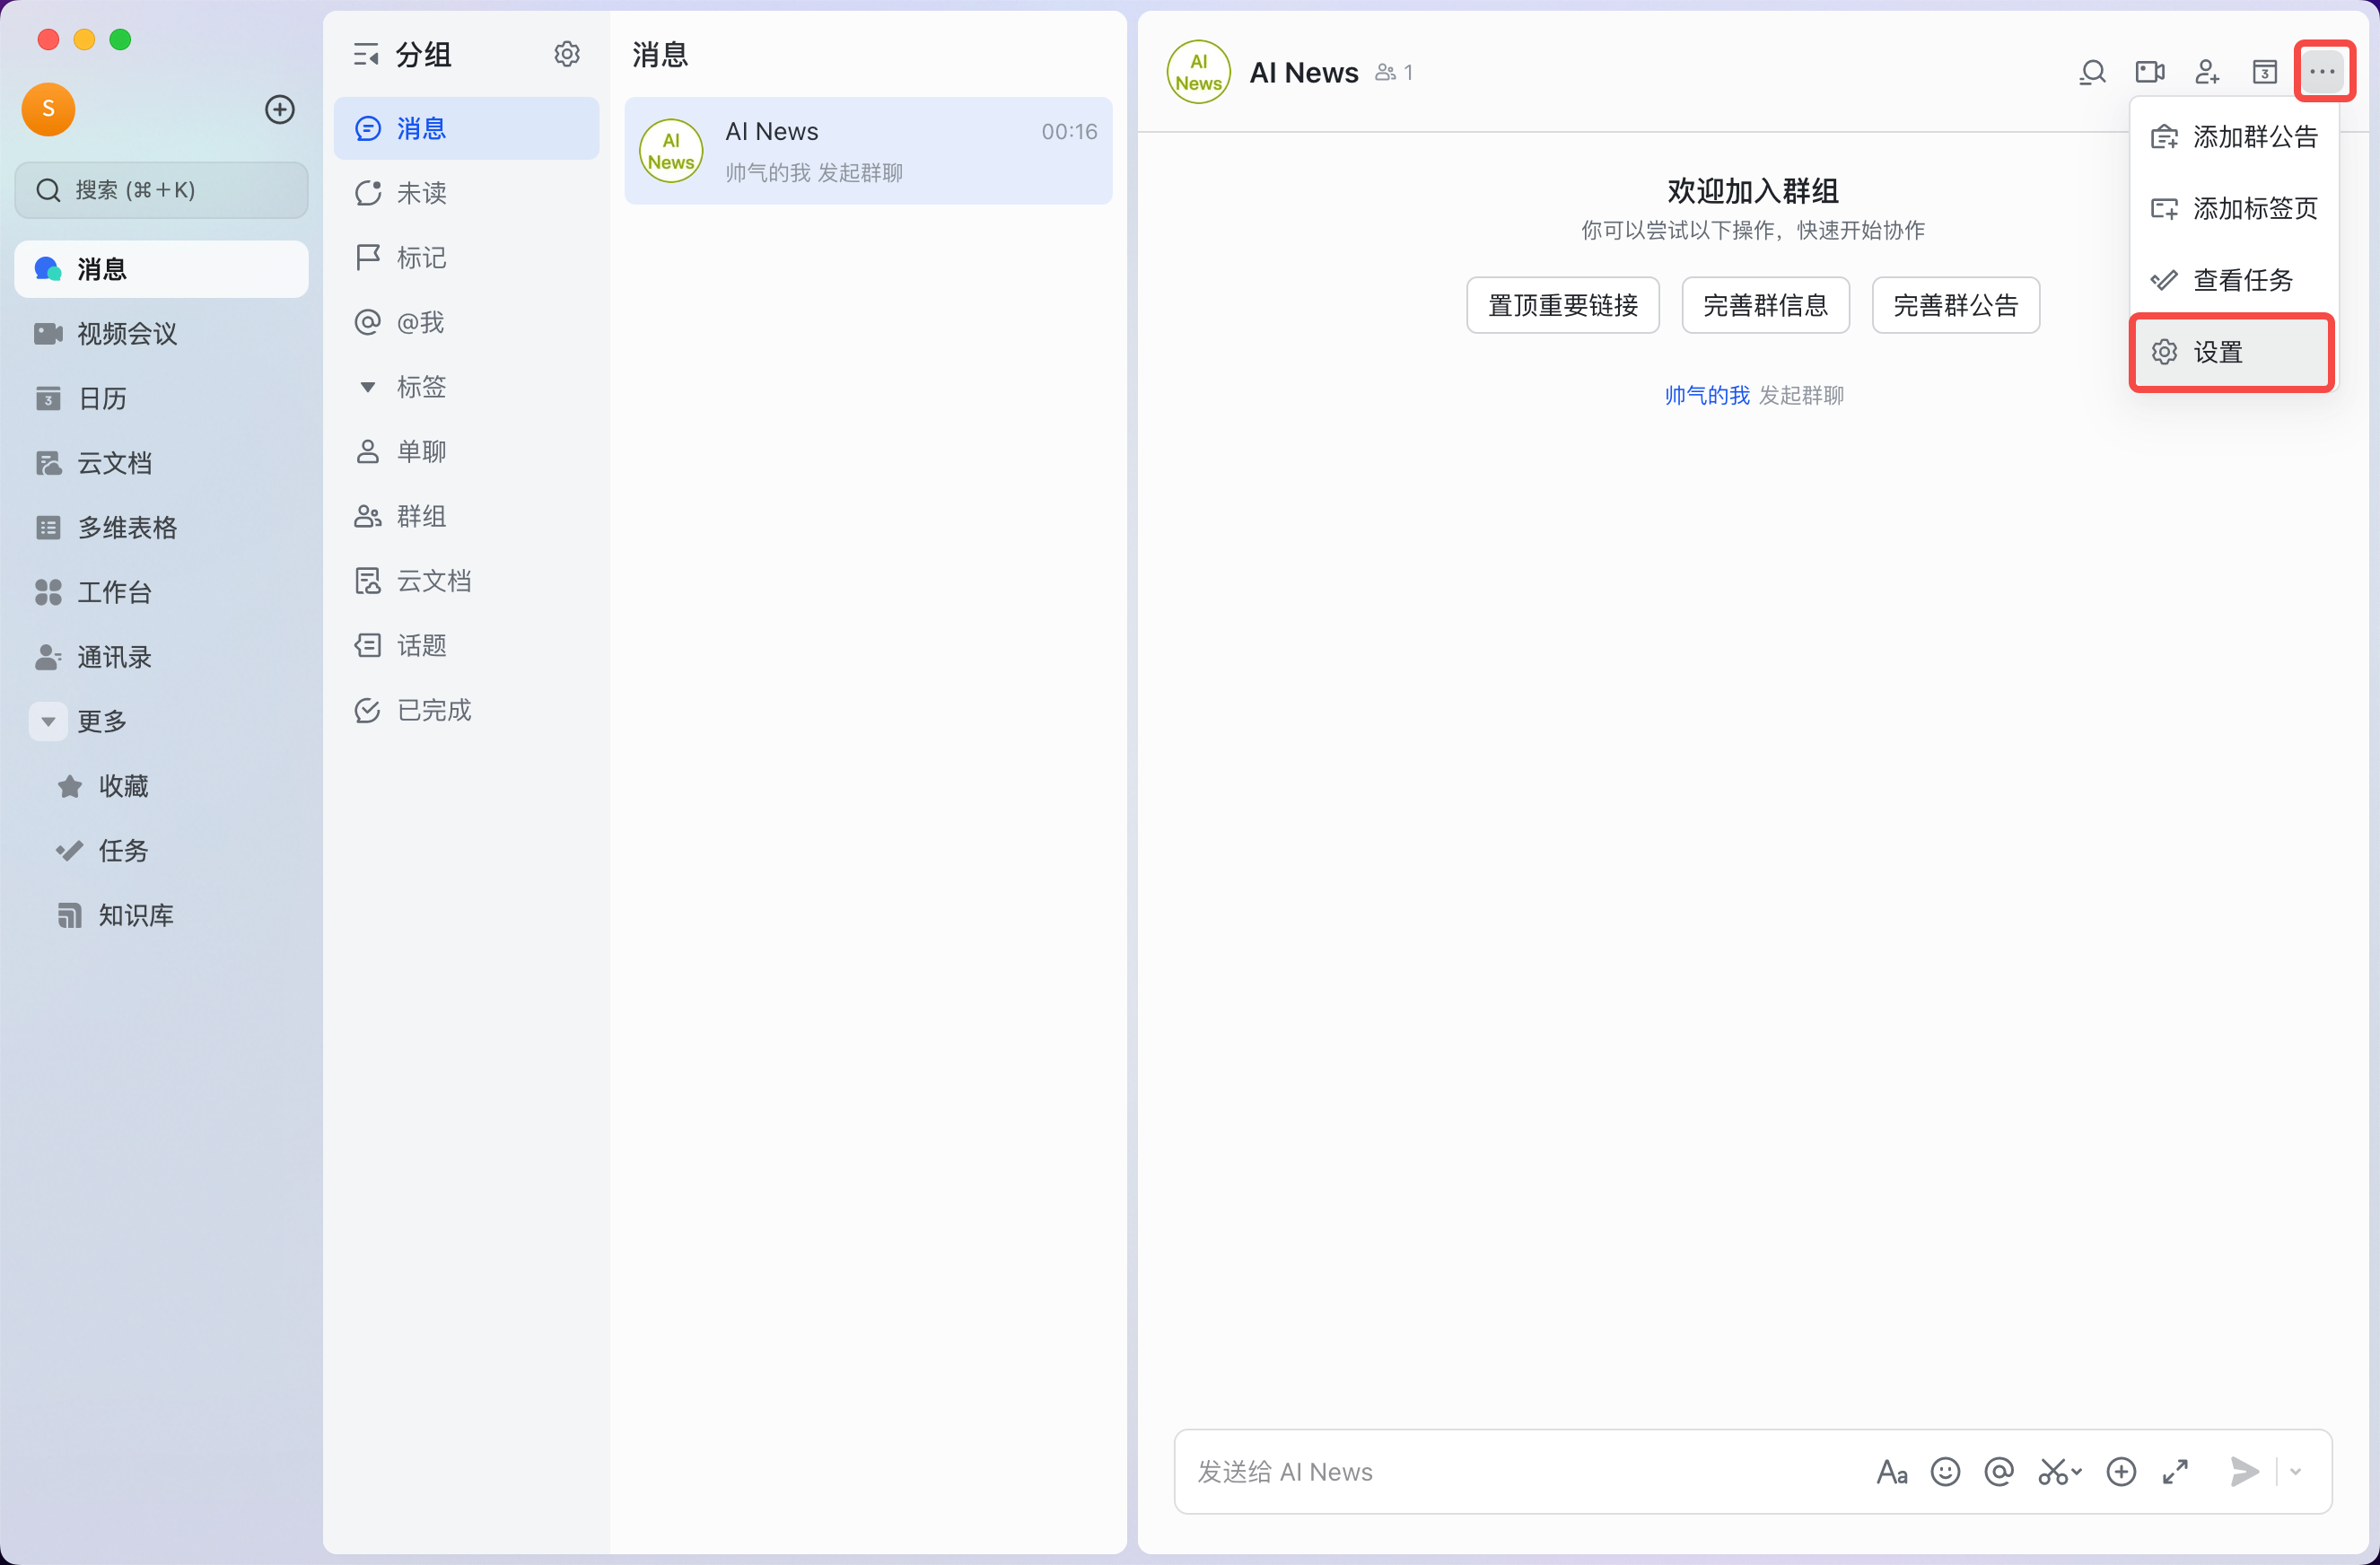 | 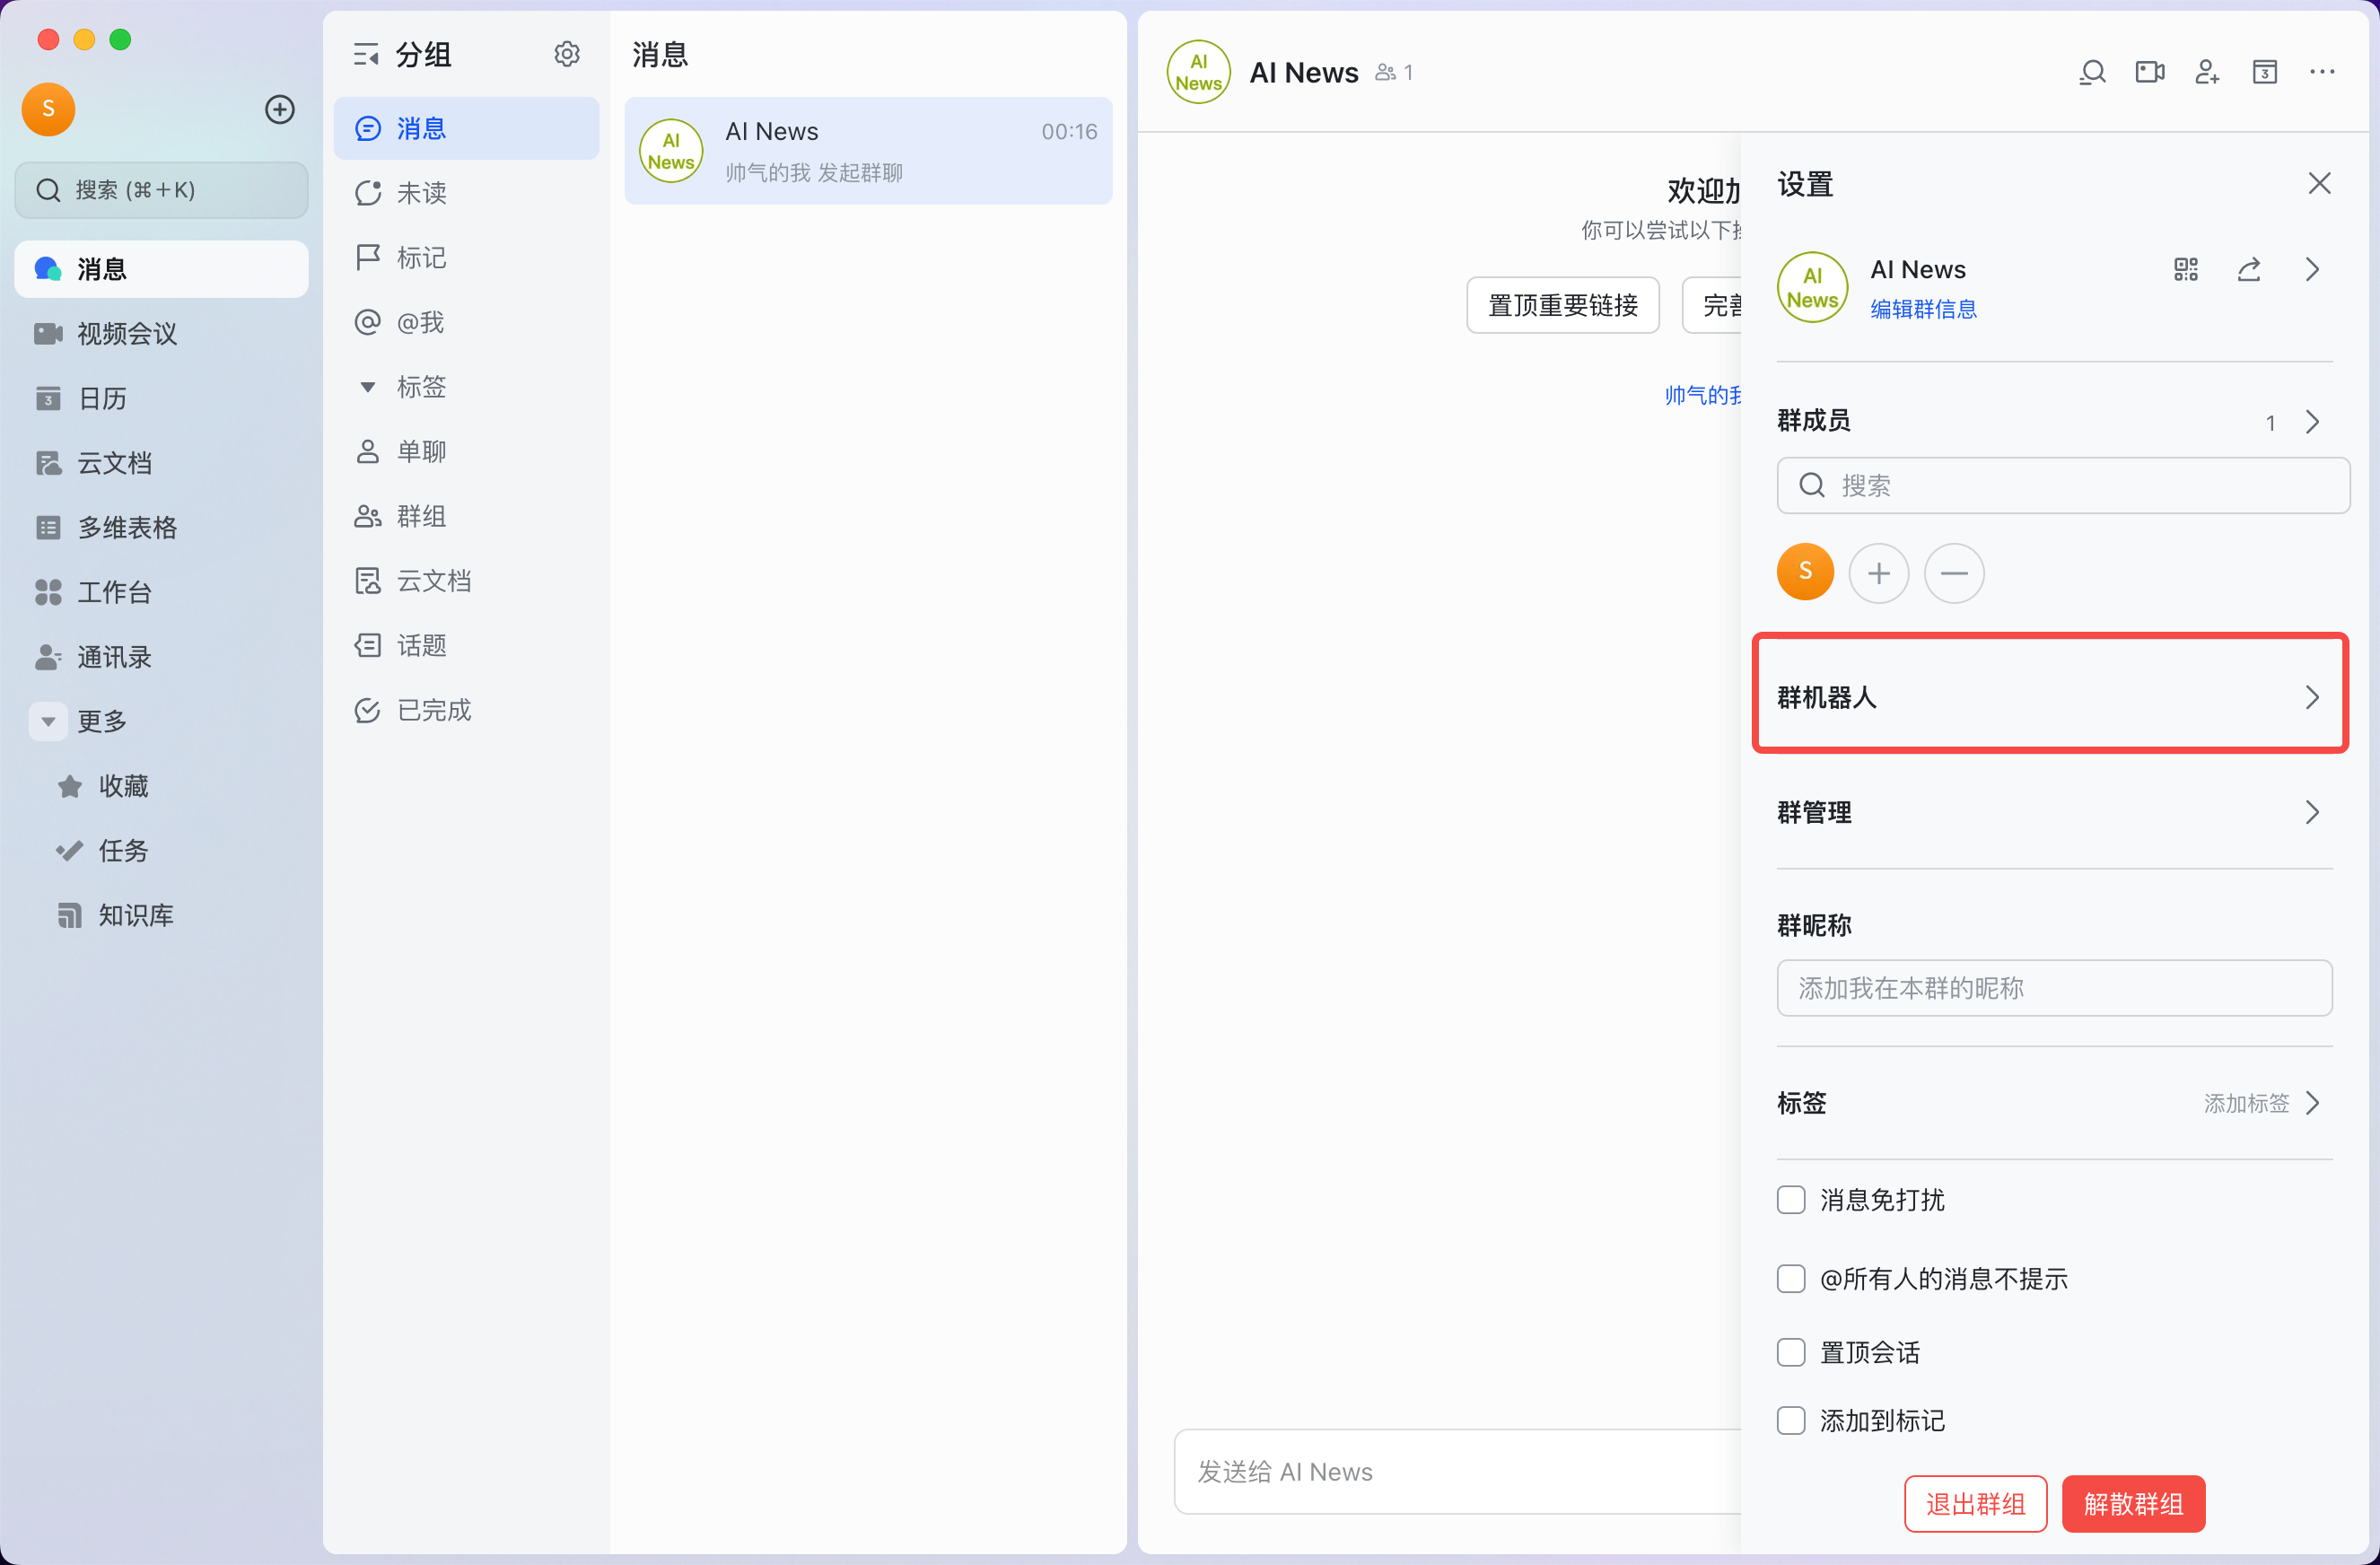 | 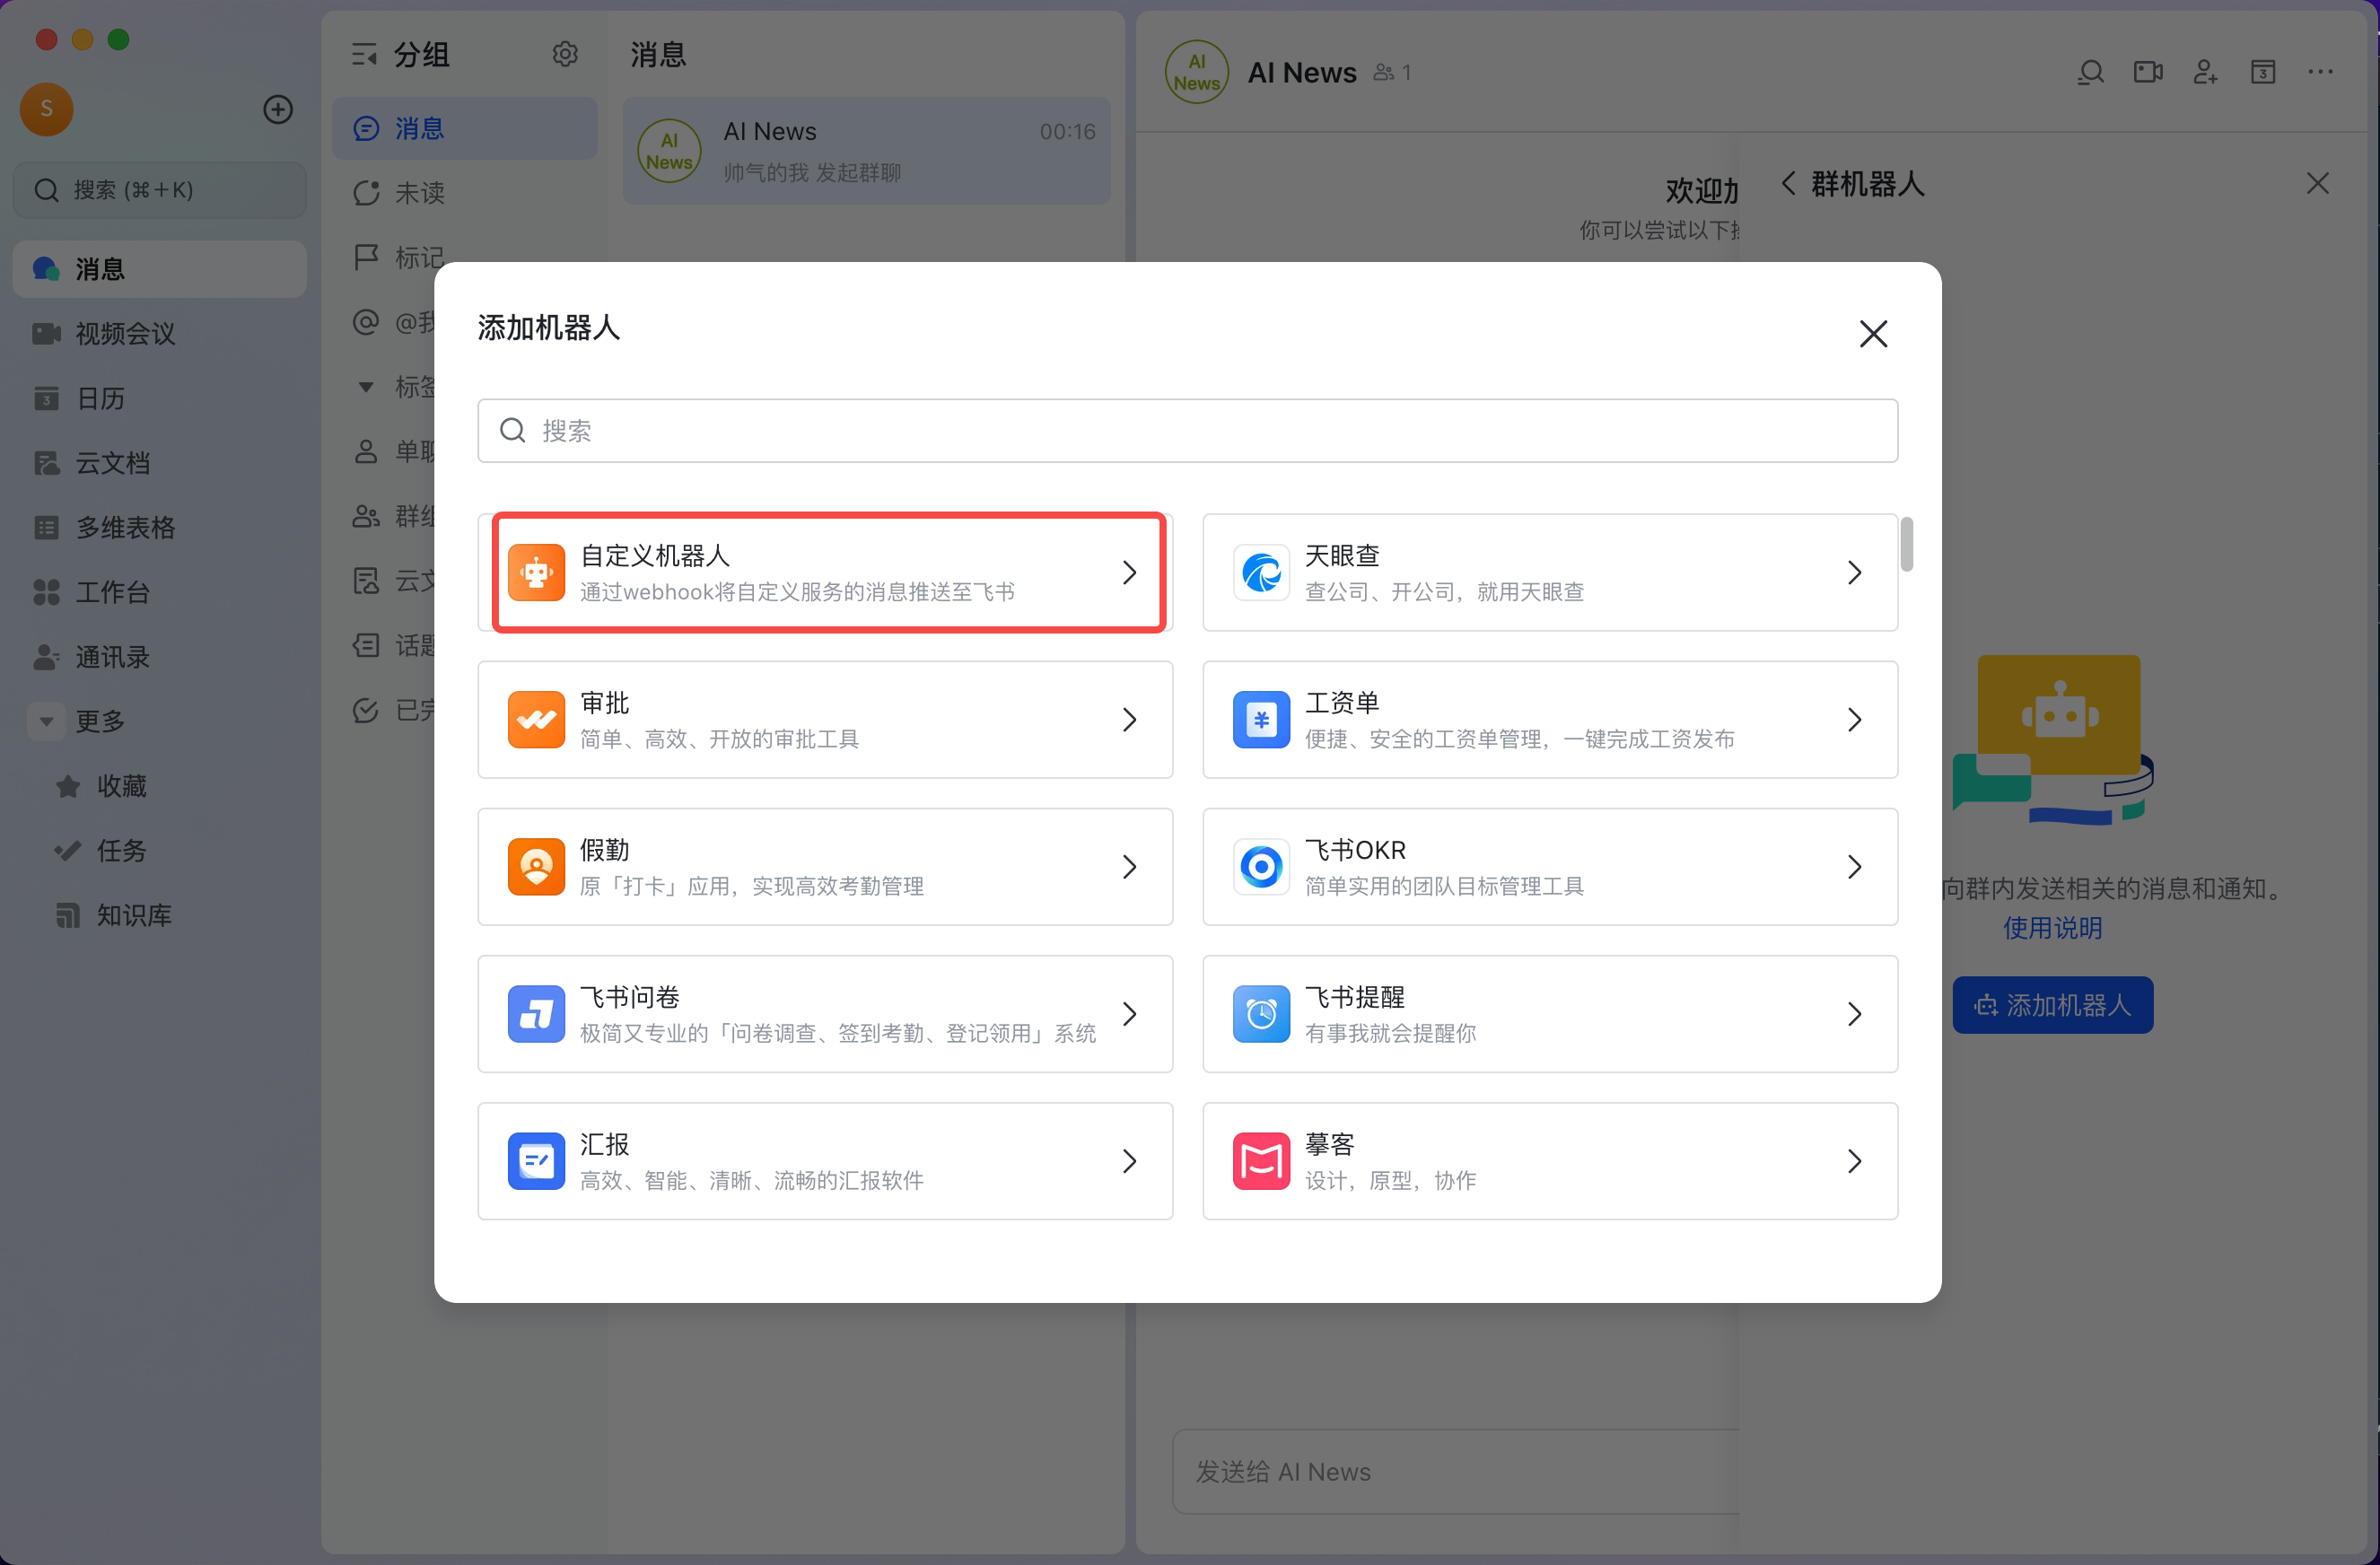 | 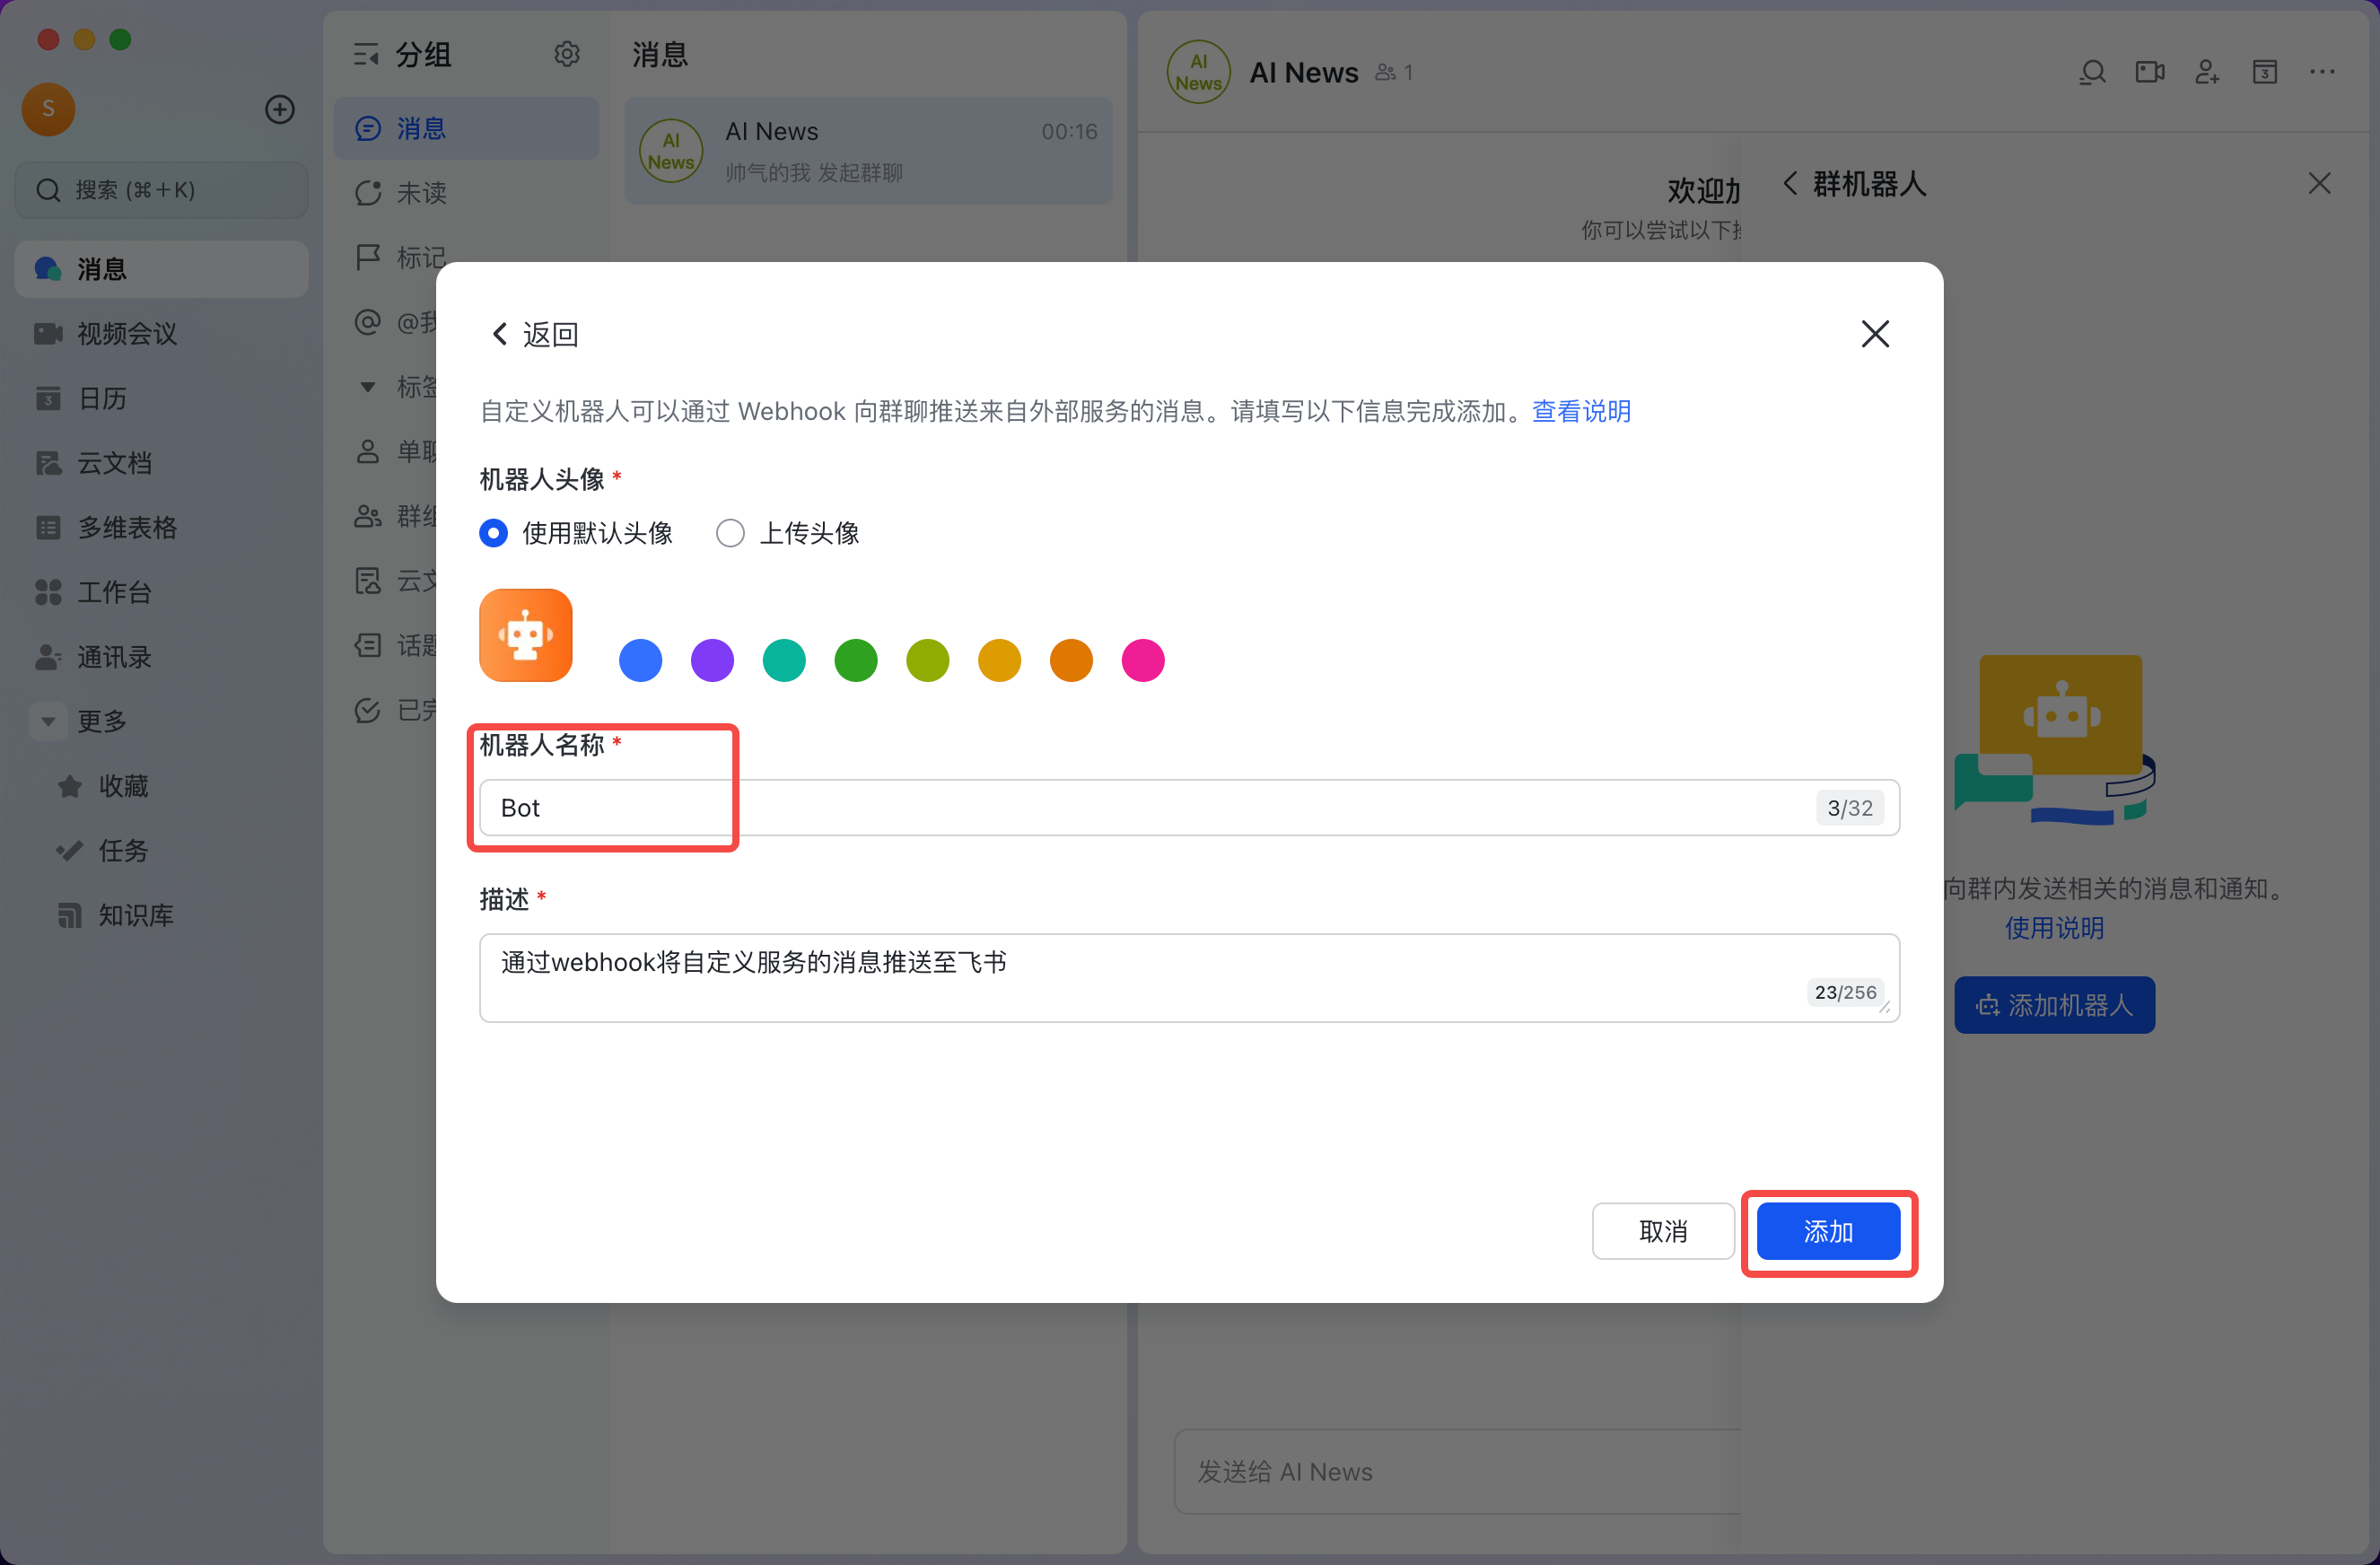 |
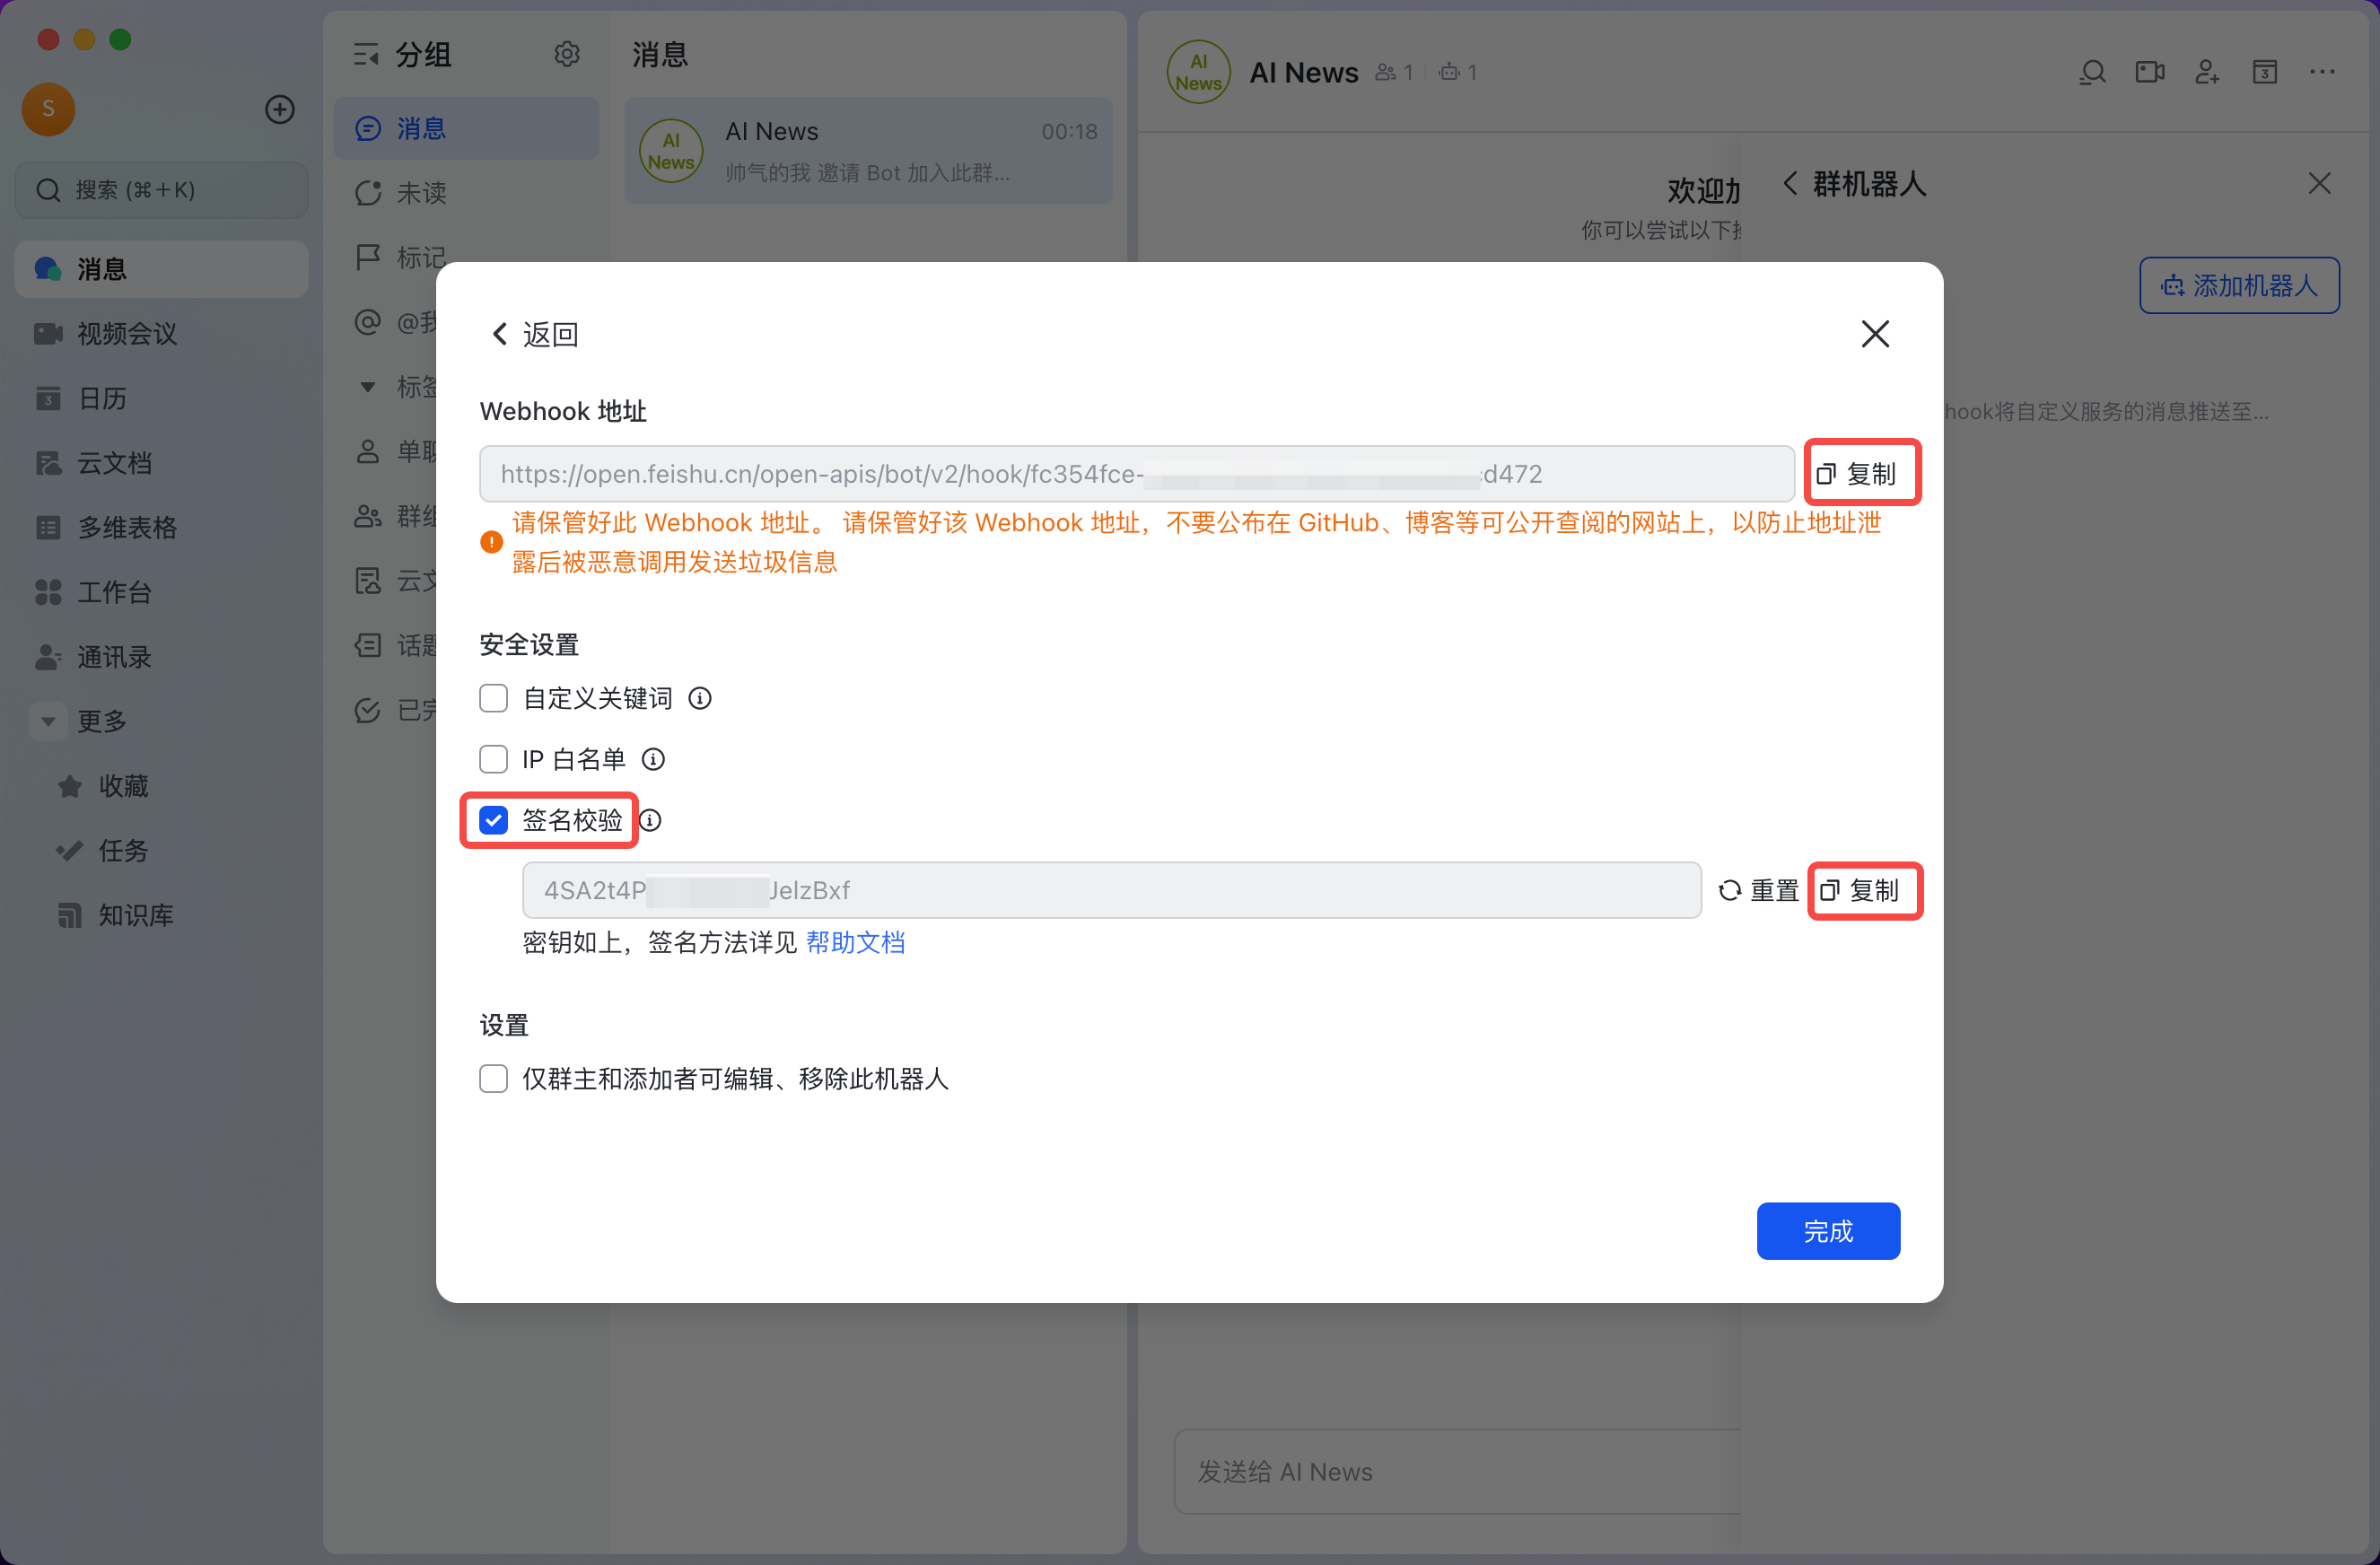
Step 3: Your bot is now set up; feel free to assign it a name. Click "Copy" buttons to copy the Webhook URL and secret token and paste them into ValueSpot.
| Step 3.1 | Step 3.2 |
|---|---|
 |  |